Search results for: '10ft Extension Cable for Concentric LD Linear Actuators'
- Mounting Bracket for Concentric LD Linear ActuatorsSKU: POLOLU-2314 Brand: PololuThis machined aluminum bracket allows the Concentric LD series linear actuators to be mounted to a structure. Complete mounting hardware is included. Two brackets are required for mounting each actuator.
- Glideforce GF23-120510-1-65 High-Speed LD Linear Actuator: 12kgf, 10" Stroke (9.8" Usable), 3.3"/s, 12VSKU: POLOLU-4958 Brand: PololuThis 12 V high-speed light-duty (LD) linear actuator with a 5:1 gear reduction can lift loads up to 12 kgf [27 lbs or 120 N] and can withstand static...
- Glideforce GF23-120506-1-65 High-Speed LD Linear Actuator: 12kgf, 6" Stroke (5.9" Usable), 3.3"/s, 12VSKU: POLOLU-4954 Brand: PololuThis 12 V high-speed light-duty (LD) linear actuator with a 5:1 gear reduction can lift loads up to 12 kgf [27 lbs or 120 N] and can withstand static...
- Glideforce GF23-120502-1-65 High-Speed LD Linear Actuator: 12kgf, 2" Stroke (1.97" Usable), 3.3"/s, 12VSKU: POLOLU-4950 Brand: PololuThis 12 V high-speed light-duty (LD) linear actuator with a 5:1 gear reduction can lift loads up to 12 kgf [27 lbs or 120 N] and can withstand static...
- Glideforce GF23-120512-1-65 High-Speed LD Linear Actuator: 12kgf, 12" Stroke (11.8" Usable), 3.3"/s, 12VSKU: POLOLU-4960 Brand: PololuThis 12 V high-speed light-duty (LD) linear actuator with a 5:1 gear reduction can lift loads up to 12 kgf [27 lbs or 120 N] and can withstand static...
- Glideforce GF23-120508-1-65 High-Speed LD Linear Actuator: 12kgf, 8" Stroke (7.8" Usable), 3.3"/s, 12VSKU: POLOLU-4956 Brand: PololuThis 12 V high-speed light-duty (LD) linear actuator with a 5:1 gear reduction can lift loads up to 12 kgf [27 lbs or 120 N] and can withstand static...$409.95 AUD, inc GSTAs low as $389.45 AUD, inc GST
Out of Stock
Sign up to get notified when it's available to order.
- Glideforce GF23-120504-1-65 High-Speed LD Linear Actuator: 12kgf, 4" Stroke (3.9" Usable), 3.3"/s, 12VSKU: POLOLU-4952 Brand: PololuThis 12 V high-speed light-duty (LD) linear actuator with a 5:1 gear reduction can lift loads up to 12 kgf [27 lbs or 120 N] and can withstand static...
- Glideforce GF23-120512-3-65 High-Speed LD Linear Actuator with Feedback: 12kgf, 12" Stroke (11.8" Usable), 3.3"/s, 12VSKU: POLOLU-4961 Brand: PololuThis 12 V high-speed light-duty (LD) linear actuator with a 5:1 gear reduction can lift loads up to 12 kgf [27 lbs or 120 N] and can withstand static...
- Glideforce GF23-120510-3-65 High-Speed LD Linear Actuator with Feedback: 12kgf, 10" Stroke (9.8" Usable), 3.3"/s, 12VSKU: POLOLU-4959 Brand: PololuThis 12 V high-speed light-duty (LD) linear actuator with a 5:1 gear reduction can lift loads up to 12 kgf [27 lbs or 120 N] and can withstand static...
- Glideforce GF23-120506-3-65 High-Speed LD Linear Actuator with Feedback: 12kgf, 6" Stroke (5.9" Usable), 3.3"/s, 12VSKU: POLOLU-4955 Brand: PololuThis 12 V high-speed light-duty (LD) linear actuator with a 5:1 gear reduction can lift loads up to 12 kgf [27 lbs or 120 N] and can withstand static...
- Glideforce GF23-120502-3-65 High-Speed LD Linear Actuator with Feedback: 12kgf, 2" Stroke (1.97" Usable), 3.3"/s, 12VSKU: POLOLU-4951 Brand: PololuThis 12 V high-speed light-duty (LD) linear actuator with a 5:1 gear reduction can lift loads up to 12 kgf [27 lbs or 120 N] and can withstand static...
- Glideforce GF23-120504-3-65 High-Speed LD Linear Actuator with Feedback: 12kgf, 4" Stroke (3.9" Usable), 3.3"/s, 12VSKU: POLOLU-4953 Brand: PololuThis 12 V high-speed light-duty (LD) linear actuator with a 5:1 gear reduction can lift loads up to 12 kgf [27 lbs or 120 N] and can withstand static ...
- Glideforce GF23-120508-3-65 High-Speed LD Linear Actuator with Feedback: 12kgf, 8" Stroke (7.8" Usable), 3.3"/s, 12VSKU: POLOLU-4957 Brand: PololuThis 12 V high-speed light-duty (LD) linear actuator with a 5:1 gear reduction can lift loads up to 12 kgf [27 lbs or 120 N] and can withstand static ...
- Mounting Bracket for Glideforce Industrial-Duty Linear Actuators - AluminumSKU: POLOLU-3636 Brand: PololuThis bracket was designed specifically for the Glideforce Industrial-Duty (ID) linear actuators. It is machined out of a single piece of aluminum and has...
- Mounting Bracket for Glideforce Medium-Duty Linear Actuators - SteelSKU: POLOLU-3623 Brand: PololuThis bracket was designed specifically for the Glideforce Medium-Duty (MD) linear actuators. It is made from stamped, zinc-plated steel and has been...
- Mounting Bracket for Glideforce Medium-Duty Linear Actuators - AluminumSKU: POLOLU-3622 Brand: PololuThis bracket was designed specifically for the Glideforce Medium-Duty (MD) linear actuators. It is machined out of a single piece of aluminum and has been...
- Mounting Bracket for Glideforce Industrial-Duty Linear Actuators - SteelSKU: POLOLU-3637 Brand: PololuThis bracket was designed specifically for the Glideforce Industrial-Duty (ID) linear actuators. It is made from stamped, black powder coated steel and...
- Mounting Clevis for Glideforce Industrial-Duty Linear Actuators - AluminumSKU: POLOLU-3638 Brand: PololuThis adapter was designed specifically for the Glideforce Industrial-Duty (ID) linear actuators and can be used to turn either end into a clevis-style...
- Mounting Bracket Pair for Glideforce Light-Duty Linear Actuators - SteelSKU: POLOLU-2328 Brand: PololuThis bracket was designed specifically for the Glideforce Light-Duty (LD) linear actuators. It is made from stamped, zinc-plated steel and has been tested...
- Concentric LACT6-12V-20 Linear Actuator: 6" Stroke, 12V, 0.5"/sSKU: POLOLU-2306 Brand: PololuThis 12 V linear actuator can be used in a variety of heavy-duty applications. The motor has 20:1 reduction gearbox that gives the actuator a dynamic load rating of 110 lbs (50 kg) and a maximum speed of 0.5 in/s (1.3 cm/s), and it is rated to withstand up to 500 lbs when not moving. Limit switches at each end make the actuator easy to control over its full range of motion, and the worm drive ensures that the shaft will hold its position even when unpowered. This version has a 6-inch stroke and no potentiometer.
- Concentric LACT8P-12V-20 Linear Actuator with Feedback: 8" Stroke, 12V, 0.5"/sSKU: POLOLU-2309 Brand: PololuThis 12 V linear actuator can be used in a variety of heavy-duty applications. The motor has 20:1 reduction gearbox that gives the actuator a dynamic load rating of 110 lbs (50 kg) and a maximum speed of 0.5 in/s (1.3 cm/s), and it is rated to withstand up to 500 lbs when not moving. Limit switches at each end make the actuator easy to control over its full range of motion, and the worm drive ensures that the shaft will hold its position even when unpowered. This version has an 8-inch stroke and a built-in potentiometer for position feedback.
- Concentric LACT4P-12V-5 Linear Actuator with Feedback: 4" Stroke, 12V, 1.7"/sSKU: POLOLU-2319 Brand: PololuThis 12 V linear actuator can be used in a variety of heavy-duty applications. The motor has 5:1 reduction gearbox that gives the actuator a dynamic load rating of 34 lbs (15 kg) and a maximum speed of 1.7 in/s (4.3 cm/s), and it is rated to withstand up to 450 lbs when not moving. Limit switches at each end make the actuator easy to control over its full range of motion, and the worm drive ensures that the shaft will hold its position even when unpowered. This version has a 4-inch stroke and a built-in potentiometer for position feedback.
- Concentric LACT6P-12V-20 Linear Actuator with Feedback: 6" Stroke, 12V, 0.5"/sSKU: POLOLU-2307 Brand: PololuThis 12 V linear actuator can be used in a variety of heavy-duty applications. The motor has 20:1 reduction gearbox that gives the actuator a dynamic load rating of 110 lbs (50 kg) and a maximum speed of 0.5 in/s (1.3 cm/s), and it is rated to withstand up to 500 lbs when not moving. Limit switches at each end make the actuator easy to control over its full range of motion, and the worm drive ensures that the shaft will hold its position even when unpowered. This version has a 6-inch stroke and a built-in potentiometer for position feedback.
- Concentric LACT2P-12V-20 Linear Actuator with Feedback: 2" Stroke, 12V, 0.5"/sSKU: POLOLU-2303 Brand: PololuThis 12 V linear actuator can be used in a variety of heavy-duty applications. The motor has 20:1 reduction gearbox that gives the actuator a dynamic load rating of 110 lbs (50 kg) and a maximum speed of 0.5 in/s (1.3 cm/s), and it is rated to withstand up to 500 lbs when not moving. Limit switches at each end make the actuator easy to control over its full range of motion, and the worm drive ensures that the shaft will hold its position even when unpowered. This version has a 2-inch stroke and a built-in potentiometer for position feedback.
- 1m OBD-II Extension CableSKU: CE08602 Brand: Core ElectronicsOBD-II male to female extension cable, Can be used to re-locate the OBD-II port for easier accessibility$28.10 AUD, inc GSTAs low as $26.70 AUD, inc GST
Out of Stock
Sign up to get notified when it's available to order.


Servos, Steppers or Solenoids? | Choosing an Actuator to Move Your Project
In this guide, we go over some common ways of adding motion to your project with actuators such as stepper motors, servos and linear actuators, to help you choose which one is most appropriate for your situation. The start of this guide c...

All About Electrical Switches
On and Off. It’s the basis for all electronics, from the most sophisticated computer network to a simple circuit. Electronics is all about using one thing, to control another, input and output, on and off. Even the transistors inside ...

Using Relays with Particle
So, you want to control things with your Particle Photon and/or Electron do you? Well, a relay is a perfect way to do that. Whilst there are many ways to control an electrical signal from digital logic such as transistors and optoisolators,...

How to Use DC Regulators/Converters
So, you might have the best project in the world, an amazing idea and design, but no matter how clever your circuitry or how advanced your prototype is, unless you can power your project correctly, it all counts for nothing. Often you will ...

Real Time Scanning and Storing QR Codes With Raspberry Pi and OpenCV
[Update – Until there is correct compatibility of OPEN-CV with the new Raspberry Pi ‘Bullseye’ OS I highly recommend at this stage flashing and using the previous Raspberry Pi ‘Buster’ OS ...

Exciting Features - Ultimaker Cura
Ultimaker Cura is an excellent slicing software to get the best out of your 3D printers and make the greatest models it possibly can, but it can do so much more! Cura is a brilliant means to inspire and expand your own creativity particular...

Controlling Standard Servos with Raspberry Pi
This guide will teach you how to control any small and big servos with a Raspberry Pi 4 Model B (worth noting any Raspberry Pi Board with GPIO pins can be able to be used in this scenario. Servos are an immensely useful way to turn ele...

How to use a NFC Reader with Raspberry Pi
Near Field Communication (NFC) is used all and everywhere. As it stands there are over two billion NFC-enabled devices (many of them smartphones) in use today. This basically means over 20% of the world’s population has access t...

Plant_io Sensors Guide | Connect Sensors and Log Data
In the Plant_io Basic Setup Guide we assembled the Plant_io platform to automatically irrigate plants, and sprouted some seeds. As the project runs, a log file is updated with data captured at each interval. This simple log allows us ...

4G and GPS HAT For Raspberry Pi - Waveshare SIM7600X
Love your Raspberry Pi but wish it had even more connectivity akin to your mobile phone. Then the Waveshare 4G HAT is the solution for you! HAT simply means Hardware attached On Top. With this installed on your Raspberry Pi Single Board Co...

Choosing a Benchtop Power Supply
If you're looking for a benchtop power supply, but you're unsure of what you should be looking for in a decent supply for your workspace, we have got you covered with this guide. We will look at the specifications to look out for in a power...

Potentiometers and the Arduino Uno
Variable resistors come in all shapes and sizes, and they all do the same basic job. They allow you precisely control voltage/current flow within a circuit. The most common type of variable resistor we see in DIY electronics is the Potentio...

Our Lulzbot Taz 6 Review
Lulzbot is constantly building upon their printer's design, incorporating the best modifications and add-ons from the community into their newer models. In May 2016, their newest addition to the TAZ line of printers, the TAZ 6 wa...

Micro:bit Temperature and Humidity Sensing
The Micro:bit has the ability to measure temperature by sensing the temperature of the silicon die inside the main CPU. This works because the Micro:bit runs cold, and the temperature of the CPU is usually a good approximation of ...

Ohm's Law - Practical Examples for Makers
This tutorial is a guide to the Ohm's Law / Power cheat sheet. You may have arrived here because you received a cheat sheet with your Core Electronics order. If not, no worries! You can still follow along with the examples - we've pro...

uGateway: How to Update the WiFi Settings
uGateway is setup, with the exception of your WiFi password. It's perhaps best we don't know what that is! If you know your way around Pi Zero and Raspbian (with desktop edition) then you can edit WiFI details as normal. He...

Arduino Projects with Robotics Using the Sparkfun RedBoard
Welcome to the final Project Set of the Sparkfun Inventors Kit! This Project Set focuses on Robotics with the final Circuit being an Autonomously Driving Vehicle! New components introduced in this tutorial are: DC Motor/Gearbox Mo...

IoT with LoRaWAN, Pycom, The Things Network & Node-RED
Note: With the rollout of TTNv3, the "Setup" section of this guide no longer works - but we're keeping it here for posterity. Let us know on our forums if you need help getting started with the new method. In our two previous Pycom article...

Safe Shut Down Button With Argon ONE Case For Raspberry Pi
All Argon ONE Cases for the Raspberry Pi 4 Model B have formidable feature sets, with my personal favourite feature being a safe On and Off button. Once the Pi has been installed to the case you can obtain full On and Off functionality...

How to Build Your Ultimate RetroPie Gaming Console
Amid all the new controllers that 8Bitdo have brought out and the mountain of Raspberry Pi cases and accessories that are available, we’ve bundled everything together to create the ultimate RetroPie gaming console. If you’ve bee...

Plant_io Basic Setup Guide | Automatically Water a Seedling Based on Soil Moisture
What We'll AchieveThis guide will help you set up a Plant_io controller to automatically irrigate a plant of your choice. This example focuses on germinating seeds, but this is only one option. Along the way we'll: Assemble a hardware pl...

5 Things You Can Do With The Raspberry Pi 500+
The Pi 500+ is here, and we see a lot of people wondering what the Pi hundred series is, what its uses are, and what role it can fill. That’s why today we are looking at 5 things you can do with a Raspberry Pi 500+. This guide will ...

Controlling a Solenoid with an Arduino
In this tutorial, we will look at the basics of Solenoids and how they work. Then we will design a small circuit that can drive a Solenoid from the input/output pins on your Arduino board. We covered a whole bunch of rotational motion co...

Chibitronics at Home - STEM Starter Kit
Now that we have dipped our toes into the Chibitronics environment, let's take a look at a more in-depth kit and see what kind of projects it offers. The Chibitronics STEM starter kit comes with: 1 Circuit Stic...

Raspberry Pi Pico W | Create a Simple HTTP Server
In this guide we'll create a simple HTTP server using a Raspberry Pi Pico W. This server will be accessible from within a local WiFi network and can be used to read sensors and control hardware - in our case we'll drive an LED and read the...

Controlling Servo Motors with Arduino
Servo motors are extremely useful in so many different applications; it’d be good to learn how to control them! Solenoid and DC motor control have been shown already; for the most part, they are both pretty straightforward (only powe...

Infrared Sensing, Hardware Interrupts, and the Arduino
Infrared (IR) is a great way of using non-visible light to control electronics, and there are a bunch of modules that we can use with our Arduino. However, what do we mean when we are talking about infrared and electronics? Well, IR remotes...

USB Keyboard-Mouse with Teensy
Hey all! By now you should have heard about all the wonderful Teensy Boards produced by Paul Stoffregen and the PJRC team but, in case you haven't, they're a collection of high-speed, ARM-based microcontrollers that...

How to Make a Safe Shutdown Button for Raspberry Pi
Pulling the power to your Raspberry Pi can cause image corruptions & other issues that can damage your Pi! In this article, we will create a small push button that will work as a ‘Safe-Shutdown’ option. We’ll connect i...

Teensy 3.5 & 3.6 Review
When Teensy was first released, it was a revelation to the maker community. It brought together the power of ARM processors and the simplicity that is the Arduino IDE. Building upon that platform, Paul Stoffregen, the man behind PJRC contin...
")
Three Golden Rules for Choosing a Power Supply (No Maths!)
Often the last consideration in a maker project, the DC power supply is the heartbeat of many electrical projects and the correct selection requires some consideration. Power supplies go by a lot of different names, you can call them Wall ...

How to Use Speakers and Amplifiers with Your Project
A popular question that we get all the time is ‘How do I choose a speaker or amplifier to go with my project?’. It’s a good question, and if you’re not familiar with the terminology, it can seem a bit daunting to kno...

Pycom FiPy Getting Started
Say you want to build a sun-tracking solar panel. You could add a tiny computer, like an Arduino, to control it. That might be all you need. But what if you need to connect to it to control it from somewhere else? Connecting it into your ho...

Encoding and Decoding Payloads on The Things Network
Note: With the rollout of TTNv3, the "Setup" section of this guide no longer works - but we're keeping it here for posterity. Let us know on our forums if you need help getting started with the new method. Sending data to the cloud is grea...

Controlling a Solenoid with Raspberry Pi and a Relay
Here is how to control a 12 Volt Solenoid with a Raspberry Pi using a 5 Volt Relay. Solenoids are an immensely useful way to turn electrical energy into a linear motion. Solenoids come in a variety of different specifications with 5 Volt an...

Video Looper with Raspberry Pi 4 Model B
[Update: The OMXPlayer system, needed for the video looper, has been dropped with the recent 'Bullseye' Raspberry Pi OS. Updates are coming out fast and all the teething troubles from this new OS will be ironed out. For now, download and f...
Meshtastic for Makers Workshop
Welcome to the Meshtastic for Makers Workshop, a short course that teaches you everything you need to know about Meshtastic so you can go out and start wirelessly sending information in your projects with the Meshtastic network. This works...

Custom Object Detection Models Without Training | YOLOE & Raspberry Pi
In this guide, we will be exploring YOLOE, a computer vision model that allows you to create custom object detection models through prompts - no training processes required! We are going to be learning how this vision model works and how t...

Natural Disaster Sensor Project for Micro:bit
The Micro:bit is a feature-packed development board that’s perfect for the classroom or the beginner programmer. Each Micro:bit has a built-in radio that can transmit and receive signals sent from other Micro:bits. The radio has a ran...

Getting Started with YOLO Object and Animal Recognition on the Raspberry Pi
Have you ever wanted to dive into computer vision? How about on a low-power and portable piece of hardware like a Raspberry Pi? Well, in this guide we will be setting up some with the YOLO vision model family, OpenCV and the COCO object l...

Circuit Playground Express Workshop for Educators and Beginners
Welcome to the Circuit Playground Express Workshop! This workshop is geared toward educators and coding beginners, who want to get started programming with this easy to use platform. We will go over everything you need to know to get you st...

GlowBit Stick 1x8 - Python and MicroPython Guide
Introduction This guide will cover the basic functionality of the GlowBit Python library when driving a GlowBit Stick 1x8 module. To follow along, it's best to have: A GlowBit Stick 1x8 A Raspberry Pi Pico or...

MicroPython for Micro:bit Workshop
Welcome to the MicroPython for micro:bit workshop! This workshop is aimed at makers who want to start programming with MicroPython, we will be using the micro:bit as it is very easy to use so we can cover the important concepts that will ap...

Makera Carvera Overview | The Most Approachable Industrial Desktop CNC Mill?
The Makera Carvera touts itself as a beginner-friendly CNC milling machine capable of carving through wood, plastic, brass, and aluminium, all while keeping a compact desktop footprint that still offers a highly capable 360 by 240 millimet...

How to use Stepper Motors and DC Motors with a Raspberry Pi - Adafruit DC & Stepper Motor HAT
Note: This guide does not work with the Raspberry Pi 5. The Pi 5 handles its GPIO pins differently so the libraries used in this guide no longer work. A Pi 4 or older will still work just fine with this guide. This guide will demo...

PiicoDev Connection Guide
In this article we'll show you how to connect your PiicoDev® modules to your favourite development platforms. Connection Guides Other Connection Methods Pinouts Connecting Many Modules PiicoDev Smart Modules Custom I2C Addres...

How to Set Up the Bambu Lab A1 | Assembly, Calibration, and First Print
In this guide, we are going to be assembling and setting up your Bambu Lab A1 so you can get printing quickly! A quick but important note: consult your included instruction manual alongside this guide. The packaging layout and shipping ma...

How to Use a LCD Screen/Display with Raspberry Pi
What fun would a computer be without a screen to see what you’re doing? Well if you own a Raspberry Pi and are curious about the different ways you can connect an external display or monitor up to it, then look no further. Today we&rs...

Getting started with your Onion Omega2/2+
In this tutorial we will learn how to set up the Onion Omega2/Omega2+ for the first time. You will require the following: Onion Omega2 or Omega2+ An Onion Omega2 Dock, such as: An Onion Omega2 dock, eg. Power Dock or Bre...

PiicoDev Ecosystem Compatibility
PiicoDev is the open-source and best-documented platform specifically designed with rapid prototyping and maker education in mind. As fellow community educators, we have infused PiicoDev with ideas to ensure that every home project, school...

Onion Omega - First Time Setup Using the Command Line
In this tutorial, we will learn how to set up the Onion Omega2/Omega2+ for the first time using the command line. While the Omega2/2+ has a graphical setup wizard and a web-based GUI called the "Console," we have found both to ...

PiicoDev Transceiver | Getting Started Guide
A radio transceiver is a device that can both transmit and receive radio signals, making it the perfect tool for communication on the go and remote projects! The PiicoDev Transceiver™ is a 915MHz radio that can send short messages up...

Raspberry Pi AI Camera Quick-Start Guide
In this guide, we will be getting the Raspberry Pi AI camera up and running as quickly as possible, as well as taking a look at how to get started with it in your own projects. The Raspberry Pi AI camera is a unique and interesting piece ...

Fix the Built-in Camera - Ultimaker
The built-in remote monitoring camera and the live feed it provides makes for a fantastic tool of the Ultimaker S5 and Ultimaker S3 3D printers. You can now keep tabs on your prints remotely, easing the pain of a long-distance relation...

Programming with USB-Serial Converters
Thanks to huge advancements in technology over the last decade, the maker community that we know and love has thrived. It’s now easier than ever before to get started with programming and tinkering due to the innovation from brands su...

Raspberry Pi High Quality Camera – First Pictures and Videos
[Note - Terminal Commands talked about here have been superseded with the new 'Bullseye' Raspberry Pi OS. Link here for new 'Bullseye' camera commands. If you want to use the commands found on this page download and flash the old 'Bu...
Remote 3D Printing with OctoPi
Remote control of your 3D printer is a particularly appealing concept, especially if you've been forced into printing via USB in the past. Using your new 3D printer should be as simple as plugging it in, uploading some G-Code and pressing '...

Bambu Lab H2C Set Up | From Box to Benchy
In this guide, we are going to be unboxing and setting up your Bambu Lab H2C so you can get printing quickly! A quick but important note: always consult your included instruction manual alongside this guide. The packaging layout and shipp...

DIY 2D and 3D Spatial Tracking with Ultra-Wideband | Arduino & Pico Guide
In this guide, we are going to learn how to use a series of Ultra-Wideband modules to track an object in both 2D and 3D space. By the end of this guide, you will be equipped with the skills and code to use up to nine modules in your maker ...

Pan-Tilt Hat with Raspberry Pi - Quick Start Guide
Pimironi Picade Pan-Tilt Hat lets you mount and control a pan-tilt module right on top of your Raspberry Pi palm-sized computer. Setting up a Pan and Tilt system has never been easier with absolutely no soldering required! Pe...

How To Make and Crimp Custom Connectors
The wires in our circuits are often forgotten when we are planning our next big project, but the right connectors will a make your project look more professional and a lot easier to work with! In this tutorial, we are going to have a quick ...

Choosing a Soldering Iron
Hello, and welcome to our tutorial where we’ll be looking at two different types of soldering irons and which one is going to be best for your workshop. We’ll be specifically looking at soldering irons, not how to solder, so for...

Flash MicroPython Onto An ESP32
The ESP32 family of microcontrollers are incredibly powerful (2 Cores on a Microcontroller!) and when combined with the awesome writability of MicroPython can be used for all kinds of projects. The ESP32 generally does not come with MicroP...
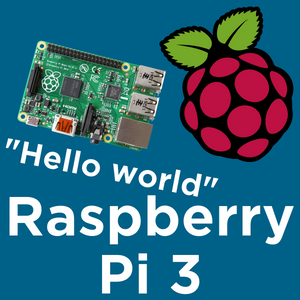
"Hello World" with Raspberry Pi 3
Today we’re going to take a look at how to get started and setup that fancy Raspberry Pi you’ve just bought. If you’re still not sure exactly how the Raspberry Pi works, or what it can do, check out ‘What is a Ra...

Program a Micro:Bit in your Web Browser
In this article, we'll program a Micro:bit v2 using a web browser. We'll connect a Micro:bit to our computer, open python.microbit.org and begin coding our first script. Contents What You'll Need Connect your Micro:bit Open the Progr...

Ultimaker 2+ 3D Printer and Ultimaker 2 Extended+ 3D Printer - Overview, Setup and First Print
This will be an overview, initial setup and first print guide for the Ultimaker 2 and Ultimaker 2 Extended . Quick links for the contents of this guide is seen below. Printer Overview Printer Characteristics ...

Getting Started with the Makera Carvera | Setup & First Cut
Have you just got your hands on a brand new Makera Carvera and want to get it making chips as soon as possible? Well, in this guide we will be taking a look at how to set up your Makera Carvera, as well as the Cyclone Dust Collector if yo...

Pycom GPy Getting Started
warning: Pycom has updated their libraries and the code listed below may not work. If you discover this and find a fix, please post it on our forum and we'll send you a $25 store credit along with a huge thank you. Go to Forum Thread. ...

Upgrade your Project for the Raspberry Pi 4
The New Version of the Raspberry Pi 4 has started going out to makers everywhere. If you are wanting to upgrade your old RPi3 project to take advantage of all the cool new features there are a few steps we are going to have to take first to...

How to Pair and Map 8Bitdo SF30 Pro Controller with RetroPie
8Bitdo have brought joy to many retro-gaming enthusiasts with their SF30 Pro Bluetooth controller. It’s a fantastic piece of gear, and one of our favourite controllers to use with a RetroPie setup. We’ve covered off on our thoug...

DFRobot 8.9 Inch 1920x1200 IPS Touch Display For Raspberry Pi - Set Up Guide
It is time for a high-quality, complete package, 1920x1200 (HD) display set up with a Raspberry Pi Single-Board Computer. In regards to touch screens with Raspberry Pi have looked at Tiny GPIO HAT LCD displays, medium-sized AMOLED maker di...
")
Zero To Maker Workshop | Fab Academy (Our Experience)
Welcome to 'Zero to Maker,' a workshop that will walk through and introduce a ton of tools and skills to help Makers of all skill levels! In this series, Jaryd and Liam will be completing projects as a part of the 2024 Fab Academy and...

PiicoDev Magnetometer- Getting Started Guide
This guide will help you get started with a PiicoDev® Magnetometer - get it working as a compass, and read the magnetic field strength of a nearby magnet. This guide is for the current revision of the PiicoDev Magnetometer, feat...

Our littleBits Rule Your Room Kit Review
"Yes, I would recommend this a friend." That's the verdict of 90% of people who pick up the Rule your Room Kit from littleBits. We love it so much, we're most definitely recommending it to you and your family. But you don't need to take ...

Say Cheese with Raspberry Pi Camera
Ever thought it would be cool if your Raspberry Pi could see the world like you do? You’re in luck, camera support is an integral part of the Raspberry Pi hardware, it comes with a built in CSI connector for connecting camera ...

How to set up YOLO Computer Vision on a Raspberry Pi | Conda & Ultralytics
In this guide, we will be learning how to install the Ultralytics YOLO Vision Package on a Raspberry Pi with Conda. This package is going to allow you to run nearly any YOLO model supported by Ultralytics, and we will also give you some de...
")
How to use a RTC With an Arduino UNO R3 to Create an Accurate Clock (LCD Screen and Nixie Tubes)
Today we're pulling out the breadboard, getting up and running with an RTC module then finishing up by making ourselves a clock that will keep the correct time even when we pull the plug. To achieve this we will be combining three main com...

Getting Started with the Grove Vision AI V2 | Power Efficient Object Detection
In this guide, we will be exploring the Grove Vision AI V2 – a microcontroller-based board capable of running YOLO and other computer vision models in real time, all while consuming a relatively tiny amount of power. We’re goin...

How to Build Internet-Connected Electronics Projects
What do we mean when we talk about the "Internet of Things"? Mostly we're talking about tiny computers that have access to the internet and do some useful work. Unlike the computers we're used to holding in our hands, they don't have a touc...

Getting Started with the xTool S1 | Unboxing to First Cut
In this guide, we will be unboxing and setting up the xTool S1, and walking through your very first cut using xTool Studio. We are going to cover the entire process, from getting the machine onto your bench and installing the laser head, t...

Makey Makey at Home
Have you heard of Makey Makey? If not, you’re about to have your mind blown! Makey Makey is an incredible way to bring imagination, creativity, and technology together. If you’re not sure what Makey Makey is, check out our Let's...

Getting Started With Relays | Examples with Raspberry Pi Pico
In this guide, we'll learn what a Relay is, why we might use one, how to choose a Relay, and finally how to use one with a Raspberry Pi Pico. To follow along you'll need: A 5V SPDT Relay - I'll be using a 5V Single Channel Relay M...

Getting Started with YOLO Pose Estimation Recognition on the Raspberry Pi
Have you ever wanted to dive into computer vision? How about on a low-power and portable piece of hardware like a Raspberry Pi? Well, in this guide we will be setting up some with OpenCV and the YOLO pose estimation model family on the Ra...

Updating 8Bitdo Controller Firmware
One of the great things about the 8Bitdo controllers is the fact that you can upgrade the firmware as new builds are released by 8Bitdo, allowing for future compatibility with various platforms. The process for updating the 8Bitdo controlle...

YOLO Object Detection on the Raspberry Pi AI Hat+ | How to Write Custom Python Code
In this guide, we will be exploring how to set up YOLO object detection with the Raspberry Pi AI HAT, and more importantly, learning how to apply this in your Python projects. We will be taking a look at how to install the required hardwar...

PiicoDev Distance Sensor VL53L1X - Raspberry Pi Pico Guide
Introduction This guide will help you read distance data in millimeters from your PiicoDev® Distance Sensor and a Raspberry Pi Pico To follow along, it's best to have: A Raspberry Pi Pico with pins soldered (pointing down) A Piico...

PiicoDev Ambient Light Sensor VEML6030 - Micro:bit Guide
Introduction This guide will help you read light intensity data from your PiicoDev Ambient Light Sensor and a Micro:bit. To follow along, it's best to have: A Micro:bit A PiicoDev Ambient Light Sensor VEML6030 A PiicoDev adapter for ...

Pycom WiPy Overview
The Internet of Things(IoT) and its devices have been utilised by ‘DIYers’ and ‘Makers’ to connect projects to the internet and take advantage of the worldwide network we have created. Some might say a sentence with ...
")
Raspberry Pi 4 vs Raspberry Pi 3 Plus (Model B)
The Raspberry Pi 4 Model B is finally here! This is a huge leap forward for single-board computing and what better way to explore it than power one up, run some tests and stress it out! Here are the test results for those peopl...

PiicoDev Magnetometer QMC6310 - Guide for Raspberry Pi Pico
This guide is for the previous revision of the PiicoDev Magnetometer QMC6310 - if you have the latest revision featuring the MMC5603 - head to the guide for updated links and instructions.Let's get started with the PiicoDev® Magnetome...

Face Recognition With Raspberry Pi and OpenCV
In this guide, we are going to be teaching you how to set up your Rasberry Pi to detect and recognise faces using OpenCV and the Facial-Recognition library, two fantastic open-source projects. In this set up all of the data and processing ...

PiicoDev Ambient Light Sensor VEML6030 - Raspberry Pi Pico Guide
Introduction This guide will help you read light intensity data from your PiicoDev® Ambient Light Sensor and a Raspberry Pi Pico To follow along, it's best to have: A Raspberry Pi Pico with pins soldered (pointing down) A PiicoDev...

PiicoDev Distance Sensor VL53L1X - Micro:bit Guide
Introduction This guide will help you read distance data in millimetres from your PiicoDev Distance Sensor and a Micro:bit. To follow along, it's best to have: A Micro:bit A PiicoDev Distance Sensor VL53L1X A PiicoDev adapter for Mic...

PiicoDev Pressure Sensor MS5637 - Raspberry Pi Pico Guide
Introduction This guide will help you read barometric pressure from your PiicoDev® Pressure Sensor and a Raspberry Pi Pico To follow along, it's best to have: A Raspberry Pi Pico with pins soldered (pointing down) A PiicoDev Press...

PiicoDev Pressure Sensor MS5637 - Micro:bit Guide
Introduction This guide will help you read barometric pressure from your PiicoDev® Pressure Sensor and a Micro:bit To follow along, it's best to have: A Micro:bit V2 A PiicoDev Pressure Sensor MS5637 A PiicoDev Adapter for M...

Getting Started with the Raspberry Pi 3A+
There is a new board in the Raspberry Pi family! In this Tutorial, we will walk you through the steps to set up your new Raspberry Pi 3 Model A+.To setup your Raspberry Pi 3A+ you will need: A Raspberry Pi 3A+ A Preloaded NOOBS SD Card...

Setting up your OctoPi Kit
So you have just received your OctoPi kit and you are looking to get it up and running. All you need to do is grab out all the parts you received and around 20 minutes of time. To connect your OctoPi to the network you need to decide what ...

Fritzing for Schematic and PCB Design
Fritzing is a completely free Circuit Design program available across all popular operating systems. The program was designed to support hobbyists, hackers, artists and makers (and all creative minds) in taking the step from concept to prot...

Getting Started with Particle Internet Button
Slowly but surely the electronics industry is moving away from discrete microcontrollers and towards boards that have sensors and extra functionality built in. This means that rather than buying a microcontroller and then needing to connect...

Power Supplies for your Project
Ever had the issue where you have dozens of old phone chargers and appliance plug packs piled up in a rats nest of AC-to-DC mayhem? We tend to breeze right past these square, black power supplies, not knowing what's happening under the hood...

Getting Started with Particle Photon
When you first look at the Photon, it’s staggering that such a small device could possess the incredible functionality that it does, but not only does it bring an impress spec sheet to the table, but the true power is unlocked in the ...

YOLO Pose Estimation on the Raspberry Pi AI Hat+ | Writing Custom Python Code
In this guide, we will be setting up and using YOLO pose estimation with the Raspberry Pi AI HAT, as well as exploring how to use it alongside your own Python code so you can use pose estimation in your projects. We will be taking a look a...

How to Build a RetroPie Console
Perhaps you’ve read our Gaming Kit for RetroPie tutorial on how to setup a RetroPie console and wondered what’s required to actually build one, or heard about it and not been sure what you need. Well, today is your lucky day bec...

Raspberry Pi 3 Model B+ Performance vs Raspberry Pi 3 Model B
The Raspberry Pi 3 Model B+ (I’ll be calling it the Pi 3+ for short) is an update to the existing Raspberry Pi 3 Model B and was released on Wednesday 14th March 2018. It has some very interesting changes: The Broadcom BCM2837 has ...

Using Teensy with Arduino IDE
If you’ve come looking for how to get your Teensy board up and running using the Arduino IDE, then you’ve come to the right place. Whilst you can use the standard Teensy loader application to flash compiled code directly to yo...

What is a JST Connector?
JST is a standard of electrical connection used widely across a spectrum of electrical applications. It's defined as a Japanese Solderless Terminal and is manufactured by a company of the same name. The JST range includes a variety of fami...

Tips for Installing your Lulzbot TAZ 6 Enclosure
With winter currently in full swing, there's a particularly annoying 3D printing problem that is rearing its ugly head, Warping. For those who don't know, warping is what happens when parts of a printed model shrink due to cold drafts acros...

PiicoDev Motion Sensor MPU-6050 - Raspberry Pi Pico Guide
Introduction This guide will help you read motion data from your PiicoDev® Motion Sensor and a Raspberry Pi Pico To follow along, it's best to have: A Raspberry Pi Pico with pins soldered (pointing down) A PiicoDev Motion Sensor M...

PiicoDev Motion Sensor MPU-6050 - Micro:bit Guide
Introduction This guide will help you read motion data from your PiicoDev® Motion Sensor and a Micro:bit. To follow along, it's best to have: A Micro:bit v2 A PiicoDev Motion Sensor MPU-6050 A PiicoDev adapter for Micro:bit ...

USB MIDI With Teensy
If you’re a musician or have had anything to do with the entertainment industry, you may have heard of the term MIDI before. MIDI stands for Musical Instrument Digital Interface and was created in the mid-80’s as a way to standa...

Makerverse Essentials Kit Guide | Build Circuits and Code with MicroPython
IntroductionWelcome to the guide for the Makerverse Essentials Kit. This kit provides the fundamental hardware required to construct many of the kits in the Makerverse Kits range along with providing hardware which will continue to be usef...

Identify Electrical Connectors
There are a ton of electrical wire connectors, too many to elaborate on in a single guide, however there are a couple of connectors that as a maker you will come across. Often when starting your way into the electronics world all you need ...

Raspberry Pi 4 Model B - Board Revisions
After the release of the Raspberry Pi 4 Model B 1 GB and 2GB and 4GB generations there was a design revision. Now if you have any other Raspberry Pi board in your hand the impact of this design revision will not affect you. If you happen to...

PiicoDev Buzzer Module - Guide for Raspberry Pi Pico
Introduction Let's play tones and melodies on a PiicoDev® Buzzer Module with a Raspberry Pi Pico. This guide will cover connecting the hardware, running an example to make sure everything works, and playing simple melodies. To follow ...

PiicoDev Buzzer Module - Guide for Micro:bit
Introduction Let's play tones and melodies on a PiicoDev® Buzzer Module with a Micro:bit. This guide will cover connecting the hardware, running an example to make sure everything works and playing simple melodies. Of course, the Micr...

How to get started with Circuit Playground
Have you heard about the Circuit Playground? It's the new all-in-one electronics platform from Adafruit. It was created to bring all the fun features of electronics and physical computing to makers, but It's dead-simple to use, solde...

MOVE Mini Assembly Guide
The :MOVE MINI allows you to turn your micro:bit into a simple robot! In this guide, we will give you some tips and tricks for assembling the :MOVE mini. This is a DIY assembly item and takes 30-60 minutes to fully assemble. There is a grea...

PiicoDev Precision Temperature Sensor TMP117 - Micro:bit Guide
Introduction This guide will help you read temperature data from your PiicoDev Precision Temperature Sensor and a Micro:bit. To follow along, it's best to have: A Micro:bit A PiicoDev Precision Temperature Sensor TMP117 A PiicoDev a...

3D Printed Case For Raspberry Pi Pico and PiicoDev Boards
Let me introduce a new 3D printable case for the Raspberry Pi Pico and the PiicoDev ecosystem. There are variants of the case, one which allows you to wall-mount the system and another variation that makes it possible to charge the dev...

PiicoDev Precision Temperature Sensor TMP117 - Raspberry Pi Pico Guide
Introduction This guide will help you read temperature data from your PiicoDev® Precision Temperature Sensor and a Raspberry Pi Pico To follow along, it's best to have: A Raspberry Pi Pico with pins sol...

PiicoDev Atmospheric Sensor BME280 - Micro:bit Guide
Introduction This guide will help you read weather data (Temperature, Air Pressure and Humidity) from your PiicoDev Atmospheric Sensor and a Micro:bit. To follow along, it's best to have: A Micro:bit v2 (v1 does not...

Getting Started with Particle Electron
In another tutorial we looked at the Photon board from Particle, and whilst Wi-Fi is awesome for many applications, it restricts you to a localised connection. Particle have once again come to rescue and provided us with a cellular solution...

8Bitdo Zero Controller Review
It’s always a fun day when you get hands-on with a device as cool as the 8Bitdo Zero Bluetooth gamepad. 8Bitdo are known are for their re-creations of classic gaming controllers such as the SFC30 and NES30 which bring the magic of NES...

Which Raspberry Pi Case is Best For You?
What’s even better than the world’s most popular microcomputer sitting on your desk? When it’s sitting there in a case which protects it, makes it easier to use, and gives your desk some style. If you buy a Raspberry Pi i...

How to set up a PiHole on a Raspberry Pi - Block All Ads and More!
Time to create a Little Red Advertisement Devouring Monster. This will be a self-hosted, network-wide, ad-blocking system running on a Raspberry Pi Single Board Computer. It will also stop access to malware sites and phishing websites. Fur...

How to Add an SSD To Your Raspberry Pi 5 with the M.2 HAT
SSDs on the Raspberry Pi are not new. For many years now people have been enjoying NVME speeds on Raspberry Pis through the use of NVMe-to-USB adapters. But long gone are the days of annoying adapters flopping around and occupying a precio...

Internet of Things with Pycom and Adafruit IO - From Zero to Hero
Introduction We’re going from zero to hero. Starting from nothing we’ll get a WiPy communicating with Adafruit IO, an IoT service out on the Internet. We’ll be able to send data from the device to the cloud and control th...

How to use an ESP8266 in the Arduino IDE
In August of 2014 Shanghai-based chip manufacturer, Espressif, released a ultra-cheap Serial to Wi-Fi chip called the ESP-01. At the heart of the ESP01 was an ESP8266 chip broken out into the 8 pins needed to program it via a microcontrolle...

PiicoDev Atmospheric Sensor BME280 - Raspberry Pi Pico Guide
Introduction This guide will help you read atmospheric data from your PiicoDev® Atmospheric Sensor and a Raspberry Pi Pico To follow along, it's best to have: A Raspberry Pi Pico with pins soldered (pointing do...

PiicoDev RGB LED Module - Microbit Guide
Let's get started with the PiicoDev® 3x RGB LED Module. In this guide, we'll connect the LED Module to our Raspberry Pi Pico and get it working with some example code to display colourful patterns. To follow along, it's best to ...

Your First Print with a Lulzbot 3D Printer
Once you receive and unbox your Lulzbot machine you might be so eager to print things, you skip a few steps in the setup process and all of a sudden you are having all sorts of difficulties that you can’t understand. It happens, what ...

What is a Kano Computer?
How many young people are able to assemble a computer, from scratch? Sure, adults can do it. There are even IT professionals and avid PC enthusiasts that take it to the next level; customizing everything down to the color of the Power LED a...

Cura 2 LulzBot Edition: Installing or Upgrading
In November of 2017, our friends over at LulzBot released a major software update to their Slicing software, Cura. In this tutorial, we will look at what Cura is and does, the process of installing Cura 2 onto a PC already running Cura 21.x...

PiicoDev RGB LED Module - Raspberry Pi Pico Guide
Let's get started with the PiicoDev® 3x RGB LED Module. In this guide, we'll connect the LED Module to our Raspberry Pi Pico and get it working with some example code to display colourful patterns. To follow along, it's best to ...

Our Raspberry Pi Compute Module 3 Review
A new day is upon us, and it is glorious. After all, it’s not often that a new Raspberry Pi board is released. As you’re probably aware, the current iteration of the popular Raspberry Pi microcomputer is the Raspberry Pi 3. It h...

3D Printable Charging Docks For 8BitDo Controllers
No gamer cave is complete without a retro gaming console and 8Bitdo Controllers are the best retro-gaming controllers you can buy. These controllers are simply that good. But there is nothing worse than rushing downstairs eager to play...

Getting Started with Raspberry Pi Pico
This guide is a little outdated: Follow our updated guide for a much simpler way to get started! Contents Part 1 - Interacting Coding with the REPL Part 2 - Moving Beyond the REPL (with rshell) Part 1 - Interactive Coding with the...

PiicoDev Magnetometer QMC6310 - Guide for MicroBit
This guide is for the previous revision of the PiicoDev Magnetometer QMC6310 - if you have the latest revision featuring the MMC5603 - head to the guide for updated links and instructions.Let's get started with the PiicoDev® Magnetomet...

Getting Started with Saleae: Tips and Tricks
Well hello there, if you’ve been looking at the amazing line-up of Saleae gear and wondered how to get started with it all, then you’ve come to the right place. Today we’re going to take a look at getting your Saleae setup...

PiicoDev Capacitive Touch Sensor CAP1203 - Micro:bit Guide
Let's get started with the PiicoDev® Capacitive Touch Sensor. In this guide, we'll connect the PiicoDev Capacitive Touch Sensor to our Micro:bit V2 and get it working with some example code to detect touch events. We'll also remix the c...

GlowBit Orb Snowflake & Bauble Kit - Pico Getting Started Guide
In this guide, we will be looking at how to set up the Glowbit Orb Snowflake and Bauble Kits. We will be looking at how to get going with the default code they ship with, breaking down how the code works, and learning how to modify it to m...

Sphero SPRK+ Review
If you’re in the education sector or keep up to date with the latest STEM learning tools, then you’ve most likely heard of Sphero. It’s one of the most popular educational products which fuses robotics with imagination and...

Introducing CircuitPython: Adafruit Circuit Playground Express
CircuitPython is a variant of MicroPython that is designed with ease of use and simplicity in mind, and it works great with the Adafruit Circuit Playground Express. CircuitPython is based on the very popular Python programming language, the...

Pycom Pysense & Pytrack: How to Update Firmware
UPDATE: This documentation now also applies to Pyscan and Expansion Board 3.0 Pysense and Pytrack boards have a “firmware update mode”. Unlike the Pycom microcontrollers you don’t add a jumper to the board to acces...

PiicoDev Colour Sensor VEML6040 - Raspberry Pi Pico Guide
Introduction Let's read colour data from a PiicoDev® Colour Sensor with a Raspberry Pi Pico, and create a colour sorting machine. This guide will cover connecting the hardware, downloading some example code and remixing it. ...

PiicoDev Colour Sensor VEML6040 - Micro:bit Guide
Introduction Let's read colour data from a PiicoDev® Colour Sensor with a Micro:bit V2, and create a colour sorting machine. This guide will cover connecting the hardware, downloading some example code and remixing it. To f...
")
How to Flash/Write Raspbian OS onto Raspberry Pi Compute Module 4 (CM4)
While the Raspberry Pi Compute Module 4s (CM4s) share a lot with the regular Pi 4 Model B, getting started with the flashing process can be quite different depending on which model you pick! This article aims to demystify that, so without f...

PiicoDev RFID Module - Guide for micro:bit
Radio Frequency IDentification (RFID) uses electromagnetic fields to identify and communicate with tags. Each RFID module emits radio waves that energise the passive tag, which then responds with its own identifying number or data, as reque...

GlowBit Matrix 8x8 - Python and MicroPython Guide
Introduction This guide will cover the basic functionality of the GlowBit Python library when driving a GlowBit Matrix 8x8 module. To follow along, it's best to have: A GlowBit Matrix 8x8 A Raspberry Pi Pico ...

Our Review of the MOARstruder by Lulzbot
Toolheads for your 3D printer come in all shapes and sizes. The different models available from Lulzbot are all designed with a specific purpose in mind, usually to add a filament type to your 3D printing repertoire. Dual extruders enable y...

Pycom Pysense Getting Started Guide
The Pysense expansion board from Pycom has many sensors. In Pycom Pytrack Getting Started, I showed how with some Processing code we can see the real-time position of the board in 3D. That project works with the Pysense too. How about we sh...

Pycom GPy & FiPy Cellular LTE Firmware Update
There are three levels of firmware upgrades that are required on Pycom gear. First, performing an upgrade on the firmware of any of the Pycom microcontrollers is a simple affair. Download the Pycom Firmware Update application as linked in t...

Building a LoRaWAN Nano Gateway to The Things Network
Note: With the rollout of TTNv3, the "Setup" section of this guide no longer works - but we're keeping it here for posterity. Let us know on our forums if you need help getting started with the new method. warning: this is a "nano" gateway...

PiicoDev Capacitive Touch Sensor CAP1203 - Raspberry Pi Pico Guide
Let's get started with the PiicoDev ® Capacitive Touch Sensor. In this guide, we'll connect the PiicoDev Capacitive Touch Sensor to our Raspberry Pi Pico and get it working with some example code to detect touch events. We'll also rem...

All About LEDs
Hello and welcome to our tutorial where we a look at all things LED. Now first of all, what is an LED? LED stands for Light Emitting Diode and is an electronic component used to convert electrical energy to light energy. This process is cal...

Raspberry Pi 500+ Overview and Teardown
The Raspberry Pi 500+ is hot off the press, an all-in-one computer keyboard which is the latest version of Raspberry Pi's hundred series, and the premium version of the Pi 500. This overview will get into the nitty-gritty of what mak...

Micro:bit Light and UV Sensing
Every Micro:bit has the ability to measure visible light, but what about UV light? Imagine that you are growing a plant on the window sill in a well-lit room. Does your plant have enough light? Plants need UV light to photosynthesize e...

Setting Up Hyperbian – Ambient Lighting with your Screen
Break your television and monitors free from the confines of their edges with Hyperbian! This is an open-source ambient light software that will improve the way you enjoy your favourite media. Hyperion for the Raspberry Pi ∴ Hy...

Cameras Compared for Raspberry Pi
There are so many types of cameras modules and lenses that are plug-and-play for Raspberry Pi Single Board Computers and that number is steadily increasing. From day to night, you can keep track, photograph, and record your surrou...

Tiny Screens for Raspberry Pi - Waveshare 3.5 Inch LCD
There is a whole range of Sub-4 Inch Displays that attach directly to the GPIO pins of Raspberry Pi Palm-Sized Computers. Many of them are touch devices and increase the usability of your Raspberry Pi whilst making almost no size sacrifices...

PiicoDev Magnetometer QMC6310 - Guide for Raspberry Pi
This guide is for the previous revision of the PiicoDev Magnetometer QMC6310 - if you have the latest revision featuring the MMC5603 - head to the guide for updated links and instructions.Let's get started with the PiicoDev® Magnetomet...

How to make a Raspberry Pi NAS - A NAS-Berry that Runs Open Media Vault
Welcome to the best article on setting up an OpenMediaVault-based NAS on a Raspberry Pi Single Board Computer! This guide is the fastest and best way to go about it. Raspberry Pi single-board computers are purpose-built to run 24/7, with a...

How to add mmWave Radar to a Pico | Detect and Track Humans
In this guide, we will be learning how to use the RD-03D radar sensor with a Raspberry Pi Pico so you can detect and track humans in your next project. We will be looking at how it operates and what you will get out of it, how to con...

Micro:bit Soil Moisture Sensor
The Micro:bit is great for small portable projects like a soil moisture sensor. In this tutorial, we will walk through how to program a Micro:bit to make a reliable and consistent soil moisture sensor that will give consistent readings. The...

Arduino Boards, Compared
We're going to compare each of the Arduino Boards available to Maker's and Electronics Enthusiats. We'll discuss the features of each board, provide an informative pinout diagram with tonnes of detail, and toward the end of the article, pro...

How to Set Up a Raspberry Pi Kiosk - Launch a Fullscreen Webpage on Boot!
In this guide, we will be transforming your Raspberry Pi into a bespoke device to interface humans with the web. This guide will walk you through setting up a Pi as a dedicated kiosk device, meaning it will seamlessly and automatically lau...

PiicoDev OLED Module SSD1306 - Micro:bit Guide
Let's get started with the PiicoDev® OLED Module SSD1306. In this guide, we'll connect the PiicoDev OLED to our Raspberry Pi Pico and get it working with some example code to display text, shapes, and animations. To f...

Setting Up Your xTool P3 | From Unboxing to First Cut
In this guide, we will be setting up the xTool P3, a powerful CO2 laser cutter that tries to bring industrial level features to a desktop format and price tag, and we are going to walk through the entire assembly process, from putting toge...

Face Recognition With Raspberry Pi and OpenCV
[Update – This guide is a little outdated and we have a released a newer version of it. Until there is correct compatibility of OPEN-CV with the new Raspberry Pi ‘Bullseye’ OS I highly recommend at this stage flash...

Object and Animal Recognition With Raspberry Pi and OpenCV
[Update – We have released a new and updated version of this guide that works on newer Raspberry Pis, runs faster, and uses a more powerful model.We are leaving this old guide up for legacy reasons and if you do choose to follow this...

Pose Estimation and Face Landmark Tracking with Raspberry Pi and OpenCV
[Update – Until there is correct compatibility of OPEN-CV with the new Raspberry Pi ‘Bullseye’ OS I highly recommend at this stage flashing and using the previous Raspberry Pi ‘Buster’ OS onto yo...

How to add GPS to Your Arduino | Add Real-Time Location to Your Project!
In this guide, we will be learning how to use a GPS module with an Arduino and C++. We will be looking at; how GPS works, how to wire up and code an Arduino to use the GPS module, and as a final step we will be putting it all together in a...

Getting Started with Moondream on the Pi 5 | Human-Like Computer Vision
In this guide, we will be exploring Moondream, a computer vision model that analyses images and applies human reasoning to them, allowing you to ask questions about the image in natural human language. We are going to be learning what Moon...

Lightning Sensor with a Raspberry Pi Single Board Computer - 40 KM RADIUS RANGE!
What if I told you that you could have the power to detect a lightning strike from 40km away? You'd probably think I've gone mad watching too many Marvel movies. But it is true! All thanks to the DFRobot Gravity: Lightning Sensor. Accessib...

GlowBit™ rainbow Quickstart Guide for micro:bit
Let's do some creative projects to get familiar with the GlowBit™ rainbow and micro:bit. The animation runs for 10 seconds, and can be started by pressing either of the micro:bit's buttons In this guide we will: Wi...

Detect Speed with a Raspberry Pi, Camera and OpenCV
[Update – Until there is correct compatibility of OPEN-CV with the new Raspberry Pi ‘Bullseye’ OS I highly recommend at this stage flashing and using the previous Raspberry Pi ‘Buster’ OS onto your Mi...

PiicoDev OLED Module SSD1306 - Raspberry Pi Pico Guide
Let's get started with the PiicoDev® OLED Module SSD1306. In this guide, we'll connect the PiicoDev OLED to our Raspberry Pi Pico and get it working with some example code to display text, shapes, and animations. To ...

Hand Recognition and Finger Identification with Raspberry Pi and OpenCV
[Update – Until there is correct compatibility of OPEN-CV with the new Raspberry Pi ‘Bullseye’ OS I highly recommend at this stage flashing and using the previous Raspberry Pi ‘Buster’ OS onto y...

PiicoDev RFID Module - Guide for Raspberry Pi Pico
Radio Frequency IDentification (RFID) uses electromagnetic fields to identify and communicate with tags. Each RFID module emits radio waves that energise the passive tag, which then responds with its own identifying number or data, as reque...

Getting Started With Ultra-Wideband & Measuring Distances| Arduino & Pico Guide
In this guide, we will be exploring ultra-wideband modules and how you can use them to add robust distance measurements to your next maker project. We'll be learning how these incredible little boards work, what you can expect from them, a...

Use a ESP32-CAM Module to Stream HD Video Over Local Network
Cameras in combination with artificial intelligence create arguably the most powerful sensor you can ever put on a microcontroller. So that’s exactly what we will do here with an ESP32-CAM Development Board that sports an inbuilt 2MB...

Fingerprint Scanner with Raspberry Pi Single Board Computer - Unlock with Biometrics!
Let's unlock Biometric Control on our Raspberry Pi Single Board Computers! Biometric Technology uses unique physical or behavioral attributes that are individual to each person and not (easily) replicable. Extraordinarily everyone on Earth...

WLED Phone App | Control Addressable LEDs with an ESP32 or ESP8266
Today will be all about controlling Fully Addressable LED Lights using any Espressif ESP32 Development Board and your mobile Phone all through WIFI! All possible by WLED. There are many ways to use your mobile phone to remotely...

Makerverse Audio Kit Guide | Play Music and Generate Tones
IntroductionWelcome to the guide for the Makerverse Audio Kit. This kit will allow you to build a music player, a musical keyboard, and a sound effect soundboard! To follow along you will need: The Makerverse Audio Kit The Makerverse ...

Using mmWave Radar to Detect and Track Humans | Raspberry Pi Guide
In this guide, we will be learning how to add the RD-03D radar sensor to your Raspberry Pi single-board computer so you can detect and track humans in real time. We will be looking at how the sensor works and what you can expect from it, h...

PiicoDev Servo Driver PCA9685 | Getting Started Guide
This guide will help you get started with a PiicoDev® Servo Driver module. We'll take a tour of the module and walk through some examples to drive common servos. Servo motors are integrated motors that contain their own power circuitr...

Detect and Track Humans with mmWave Radar on an Arduino
In this guide, we are going to be learning how to use the Rd-03D radar sensor to detect and track humans in your next Arduino project. We will be looking at how it works and what you can expect from it, how to wire up and code your Arduino...

Getting Started With EMG Muscle Sensors | Measure Muscle Flexing!
In this guide, we’re going to be exploring muscle sensors, also known as Electromyography (EMG) sensors, and learning how to use them to measure muscle movement in maker projects. These clever little modules can pick up the tiny volt...

Getting Started with Servos | Examples with Raspberry Pi Pico
In this guide, we'll learn what a Servo is, when we might use one, how to choose a Servo, and finally how to use one with a Raspberry Pi Pico. To follow along you'll need: A Positional Servo, such as the Feetech FS90 Micro Servo A Con...
Raspberry Pi Pico Workshop for Beginners
Welcome to the Raspberry Pi Pico Workshop, where you will learn everything you need to know to hit the ground running and start making your own projects with the Raspberry Pi Pico and MicroPython. This workshop is designed for complete beg...

Articulated Mule
Converting a Mule into an articulated 4 wheel vehicle. A 'Mule' is/was a hand trolley with a motorised elevatable platform. What for? Just for fun, want to be able to control it using the R2D2 droid inventor app via LittleBits boards, why ...

PowerPlay SSR Control
Introduction
The aim of PowerPlay is to provide an Arduino platform for managing downstream Solid State Relays (SSR) simply and safely. PowerPlay consists of a custom Arduino Shield, ...
IoT House
These days we can do just about anything on our phone, we can control so many aspects of our lives using the technology in our pocket, but the most mundane aspects of our lives; opening the garage door, blindly reaching for the light switch...

Raspberry Pi OSMC - Custom Media Center
I wanted to upgrade my media center (RPi B+ with Xbian) to something a bit nicer, more stable and more accessible than just the RPi in a basic plastic case.
I built an enclosure out of wood with aluminum front and rear panels.
I built an enclosure out of wood with aluminum front and rear panels.
")
Raspberry Pi Cyberdeck (SDR Edition)
I’ve always wanted a compact, rugged, and portable computer that can withstand any environment thrown at it. I’m a huge fan of Raspberry Pi computers and stumbled across Jay Doscher’s awesome designs for fitting Raspberry Pis in Pelican ca...

Possumpi
My partner wanted to assist with additional space for possums to live in as trees are being lost in the neighbourhood causing possums to move into unwanted areas. She asked me if there was any way to see if the possums were using the box we...

DIY Weather Station with Raspberry Pi
I wanted to build a weather station. After some googling I found a great ‘how to’ guide using a raspberry pi.
I was also interested in learning Python, so I decided to dive right in...
I wanted to build a weather station. After some googling I found a great ‘how to’ guide using a raspberry pi.
I was also interested in learning Python, so I decided to dive right in...

ATX Benchtop Power Supply
Despite having two high-quality variable (but analog) benchtop power supplies, I decided you can never have too many. I also specifically wanted a fixed, multi-output supply for standard project voltages such as 3.3V, 5V, 9V, 12V, ...
Despite having two high-quality variable (but analog) benchtop power supplies, I decided you can never have too many. I also specifically wanted a fixed, multi-output supply for standard project voltages such as 3.3V, 5V, 9V, 12V, ...

RetroPie in a Cartridge
For $50 and some dedication a retro gaming console can be yours and with HDMI you can play it with any modern TV or monitor. Instead of using bulky and space taking cartridges and discs it's all on the console. For this build, we're going ...


Micro:bit based GlowBit Car
I made this car because at school there was a Lego We-Do tug-of-war competition but the cars only drove backward and I wanted to make a car that can turn and drive forwards. If you make this car don't throw away the chassis box because I ...

UNITRAC
The UNITRAC (UNIversal TRACtion system) is a simple 3D printable conversion for the Black Gladiator-Tracked chassis, It’s designed to transform the large wheelbase platform into a self-contained propulsion system that has all the torq...

Autozem
Introduction So now everything is available in this day and age, and all those childhood dreams can now come true as parts, technology and software has come a long way. I had recently taken up the hobby, RC planes. Eventually I learnt ho...

RGB Light-Up Remote-Control Car
SummaryI made this car and the previous one because at school there was a Lego We-Do tug-of-war competition a few years ago, but the cars only drove backwards and I wanted to make a car that can turn and drive forwards. The new version can...

WLED Hourglass Theatre Prop - DMX Over Wi-Fi!
I’ve been working in theatres for about 5 years. I’m a lighting technician for a few different venues and production companies, but I specialize in the engineering solutions behind our shows; I’m a Mechatronics Engineering student at UoN, ...

Bill of Materials

FlipperMate: Hands-Free Pinball
FlipperMate began as a deeply personal exploration into accessibility, creativity, and play. The project traces back to my friendship with Jason Becker, a legendary guitarist who developed ALS (Lou Gehrig’s disease) at age 20. Jason has be...

Keypad entry to caravan using Arduino
I used to sleep in a caravan on my grandparent's property and as amenities were inside the house I had to go in and out of it quite regularly. I got sick of fumbling around with keys to go in and out of my caravan, so this project uses an A...

IoT Soundscape
I had been captivated by the sound levels of trains I could hear passing by Metford throughout the day/night. I wondered if a sound level sensor reporting data back over LoRa would help me understand when a train was noisy. I also like the ...
")
Desktop Infinity Mirror (Lasercut!)
A smaller version of our amazing Infinity-Mirror Table - the Desktop Infinity Mirror compresses all the colourful goodness into a picture frame-sized display. The entire design is made from laser-cut acrylic that we cut in-house. Check out ...

safePower
I like working with the Pi Zero W and Pi 4 as they are very compact, very powerful and very cheap for the capability they offer. I want to use them on small projects, stand-alone, and can't always guarantee power. As we know most Pi's don't...

The Snooze Logger - A Wearable Sleep Position Monitor
Everyone needs a good night’s sleep!One of the factors affecting sleep quality is sleep position. For instance, sleep apnoea and snoring are much more likely in the supine (lying on your back) position than lying prone or on your side. Of ...

LuMa 1 - The Neo Disco Ball
It is real and here it is! Including everything you need to make one a Luma 1 for yourself! So allow me to introduce you properly to the Luminator Mark 1. I'm talking all the ins and outs of this inside-out neo disco ball so you can ...

Robot Arm Upgrade Project
This project has been a long and tricky one for me, I purchased my robot arm kit from Jaycar many years ago with the intention of controlling it from the start. I used to work with industrial robots, so when I saw this robot kit for sale I...

GraviTrack Enhancements - Lights and Sound
Introduction Searching for solar panels and related items on the Core Electronics website; I came across the Solarbotics GraviTrack Marble Machine Kit. I thought the kit would be a good educational tool for the grandkids. The kit was a hit...

HUGE LED Pixel Panel
I’ve always been fascinated by LED screens and seeing beautiful colours mix and merge to create vibrant displays. I also love games, so what better way to combine the two than a giant LED pixel matrix which can play games, display aud...

Concrete Lamp
The concrete body of the lamp (which, to my eye look a bit like a leek) is made is two halves. The 1st and 2nd halves are cast in 2 steps using the same mould twice. I had a few failed attempts at making the mould entirely from sta...
The concrete body of the lamp (which, to my eye look a bit like a leek) is made is two halves. The 1st and 2nd halves are cast in 2 steps using the same mould twice. I had a few failed attempts at making the mould entirely from sta...

Playing Synthesizers with a Teensy Controlled Game on a LaunchPad
I am an amateur musician, coder, and electronics maker. When I found out that the Novation Launchpad (mine is a mini MK3) can be programmed, I was excited about creating unique music. The idea is to use the Launchpad to play a game and use ...

grinder_timer
Making a dumb coffee grinder slightly less dumb. This is a programmable timer tethered to a Rancilio Rocky coffee grinder. The Rocky is a "dumb" grinder and electrically very simple. Basically it's an ac motor with an on/off switch and a m...

Solar Charging Station
The aim of this project was to use the sun to charge some batteries with 1W and 2W Seeed solar panels. The DFRobot Solar LiPo Charger and a Sunflower Solar Power Manager were purchased. Initially, this was unsuccessful because I did no...

Environment Monitor - V2
This project started due to the smoke haze that enveloped our area during the 2019 and 2020 bushfires. I wanted something to check the air quality of my home and maybe find areas where it needed better sealing. In addition, the BMP280 senso...

Raspberry Pi Microscope
The Raspberry Pi Microscope was put together to help with soldering PCBs that have small surface mount components. Its main function is to verify the quality of solder joints and ensure there aren’t any short circuits. With the addition of...
")
IoT Chicken Shed (Arduino, Wifi)
If you have chickens and find you're not always available to close the gate at night or check the water levels each day, then why not use an ESP8266 to automate your chicken door and receive alerts door status and low water level, as well a...

FM Radio with Arduino, LCD and Si4703
A couple of years ago, I found a modern jukebox (with iPod connectivity, AM/FM radio, CD player and LEDs) dumped in my street. The body was in decent condition but all of the electronics were ruined apart from the LEDs. I decided to take it...

RPi Cluster - SETI@Home
I was interested in creating a RPi Cluster to learn about how they work. After getting the clusterhat and Pi Zero Ws I set about creating the images for 5 sd cards. This seemed a waste so I scrapped that idea and setup the image for one sd ...

DIY Pi Buggy
The motivation behind this project came from a robotics and engineering club that I've been going to. I've been saving my money and building up an understanding of raspberry pi and electronics. The reason I chose this project was to get use...

ESP32 IR-Triggered Camera with Home Assistant Integration
I love the ESP line-up. I started by messing around with the ESP8266 and I completely fell in love with it. The 8266 is all I ever wanted from a microcontroller: WIFI connectivity, a dec...
I love the ESP line-up. I started by messing around with the ESP8266 and I completely fell in love with it. The 8266 is all I ever wanted from a microcontroller: WIFI connectivity, a dec...

Modify Dell multimedia keyboard from USB bus power
This project is to modify a Dell multimedia keyboard into a Raspberry Pi Zero dedicated keyboard with external powered USB hub. You can find this article in my blog http://sizeofinfinity.blogspot.com.au/2017/06/modify-dell-multimedia-keyboa...

Electronica Botanica
This piece combines recycled electronics extracted from decommissioned computers and new electronic components. I had an idea I wanted to incorporate a lighting element into a contemporary sculpture so it was just a matter of coming up with...

Portable Arcade Emulator
Introduction
I am a Mechanical Engineer, and after 30 years in industry I now teach Engineering at High School. I create various projects in my spare time and bring them to school to inspir...
Fruit and Veggie Gaming Controller
In preparation for some Maker Faire's we were heading to last year, I wanted to combine the awesomeness of the Makey Makey platform, with the fun that is RetroPie. For those who don't know the Makey Makey, it's a fantastic platform that all...

A Back to the Future Clock
This project started life as an alarm clock for my son made to look like the time circuit from the Back to the Future movies. The display can show the time in various formats, including the one from the movies of course. It's configurable v...

ThingSpeak temperature & pressure logger
This project logs temperature and pressure observations to a ThingSpeak channel using an ESP8266 WiFi module.
For this project, I designed my circuit and ordered a PCB using easyEDA. The project gets power from a USB port and uses a...
For this project, I designed my circuit and ordered a PCB using easyEDA. The project gets power from a USB port and uses a...


MakeCode STEM Arcade Machine
This project came about for a number of reasons. Firstly, we wanted a real showpiece for the school's Resource Centre. It's a real talking point and when people find out that it was made almost enti...
This project came about for a number of reasons. Firstly, we wanted a real showpiece for the school's Resource Centre. It's a real talking point and when people find out that it was made almost enti...

mintyPi
This is an awesome project that takes about 6 hours to complete. Hours upon hours of endless fun thereafter! Ideally, some prior soldering experience is advantageous but if you take your time and practice before you start it's beginner fri...

Super cheap Xbox 360 wireless adapter
This project is to build a super cheap wireless adapter based on Raspberry Pi Zero and ENC28J60 ethernet module for Xbox 360I have two Xbox 360 consoles and today I want to connect them together but I only have one OEM wireless adapter. It ...

Aircraft Lighting Model
The aim of this project was to create a working model of the aircraft exterior lighting systems. Initially, this started as a simple project for Uni, but I wasn’t having that. I wanted to learn something. So of course, I went over the...

Mailbox Delivery Notification System
Introduction
During the Covid lockdown, I needed something to do. The Postman or woman does not deliver mail every day as most bills come online. So I built this to notify me when the Pos...
The Amazon Alexa-Enabled Smart Pool System
This project is to allow remote control of my pool and associated lights with a dedicated display inthe house, a phone application and Amazon Alexa. Any and/or all of these input devices may be usedto control the pool. The pool temperature ...

IoT Plant Monitor
So, my wife wanted to have some small plants in the house. I didn’t, so we compromised, and got some plants. The only thing is that neither of us remembers to water them, so I wanted to build a sensor array to monitor the moisture con...

Wefted Waveforms
This project aims to fuse neopixel strips with papier mache and origami into a free-standing electro-sculpture.
The freestanding structure is formed from wire mesh and papier mache. It is then painted and wired ...
This project aims to fuse neopixel strips with papier mache and origami into a free-standing electro-sculpture.
The freestanding structure is formed from wire mesh and papier mache. It is then painted and wired ...

Retro Gaming Station
Hey, My son is turning 1 and I wanted to setup a retro gaming station for him to learn to game through the ages. I went with RetroPie as it is well documented and supports a range of emulators - and it's easy to setup.My RetroPie Gaming Ki...

PiicoDev Ecosystem In Fritzing
This project began with a desire to make circuit building readily approachable for students new to electronics by bridging the gap between schematic diagrams and working circuits. The PiicoDev ecosystem provides a very accessible introduct...

Garage Door Sensor
This project uses a US100 ultrasonic distance sensor to detect instances of a garage tilt door being left open and sends an alert via the IFTTT mobile app. Additionally, the device logs temperature and pressure to a Thingspeak channel using...

Lightbox
The idea was to leverage the light transmitting properties of clear acrylic sheeting and pass LED light through it; interfering the transmission using laser cut edges which would cause the light to highlight the lines thereby creat...
The idea was to leverage the light transmitting properties of clear acrylic sheeting and pass LED light through it; interfering the transmission using laser cut edges which would cause the light to highlight the lines thereby creat...

Simple e-ink dashboard
The aim of my project was to make a small display to show information such as the clock, weather, calendar, etc. I liked the idea of making a magic mirror, but wanted to try something more unique, less expensive, and easier to assemble (no ...

The Euclidean
I'm an amateur musician but a pretty serious classical & jazz pianist, and this project arose out of my interest in exploring the difference between writing music for synthesisers and music for piano. I work as a...
I'm an amateur musician but a pretty serious classical & jazz pianist, and this project arose out of my interest in exploring the difference between writing music for synthesisers and music for piano. I work as a...

Ping Pong Launcher
I like to take on projects that give me an opportunity to learn new things. For this project, my two goals were to learn more about face detection algorithms and PID controllers but of course, there were so many more skills learned along th...

Makey Makey Pencil Piano
After seeing how much fun people had using the Makey Makey as a gaming controller for our RetroPie setup, I decided that more fun, simple projects that can be made using household materials were in order. So today I present to you the piano...

3D-Printed GPS Speedometer
Introduction
I wanted a GPS speedometer that is portable, robust, and looks okay. I had been messing around with 3D printing and exploring GPS modules for a few years and wanted...

Raspberry Pi Desk Clock with Data Display
This project uses a Raspberry Pi and TFT display panel to provide a desk clock that also monitors our Home Solar and Battery system, and the weather, in one neat unit.
We recently installed a Solar Panel system and a Tesla Powerwall...
We recently installed a Solar Panel system and a Tesla Powerwall...

12V Portable Battery Box
This project creates a functional 12-volt portable battery case for camping or other outdoor activities.The battery box provides a 12V cigarette lighter socket for running lights with an on/off switch for ease of use. There is also an Ander...

3D Printed Pico Weather Display
I frequently check the weather on my phone, often finding it hasn’t changed. As there are already many screens around the house and even in our pockets or on our wrists that can display the weather forecast, I decided to create a display t...
")
Time lapsing in OctoPrint (Properly!)
Now that we have decked out our Lulzbot Taz 6 3D Printer with a really nice looking acrylic enclosure, I'm just about ready to turn on some serious 3D printing work. But before I dive into that endless pool of fun, it's a good time to take ...

IoT Pet Feeder
The objective of this project was to create an Internet of Things (IoT) device that could give pet access to a food bowl when a text message command was sent from a remote location. I had never done an IoT project before, so I wanted to ke...

Smart Home Makeover with HomeAssistant
IntroductionI wanted to bring ageing, and failing, Home Automation infrastructure into the modern age whilst retaining hardware investments already made. Our house had Universal Power Bus (UPB) dimmers and switches installed at build time...

LoRaWAN Tank Level Sensor Node
My brother-in-law has a dairy farm in Victoria and many hours per week are wasted traversing the farm to check water tank levels, opening/closing valves, and other small tasks that could easily be remotely monitored and controlled. It was ...

BuzzBox
Do you ever wanna pump up some tunes but you don't know how to play a MIDI file? Fear not, the PiicoDev Buzzer modules let you stack up multiple tones into a song. Find your MIDI, export it through a script, upload it and get grovin'! ...

The Great Doorbell Hack
Do you want a quick, easy, cheap RF remote control for your Raspberry Pi projects? Well, look no further than the front door! As you've probably got a half-duplex RF setup you've never considered using in a project before. Try thi...
Do you want a quick, easy, cheap RF remote control for your Raspberry Pi projects? Well, look no further than the front door! As you've probably got a half-duplex RF setup you've never considered using in a project before. Try thi...

Raspberry Pi IoT Doorbell
This Raspberry Pi, IoT Doorbell is basically a simple smart Door Bell, which takes a photo of whoever rings it, and emails it to the specified email address, and keeps all the photos in a folder. (along with going Ding-Dong). Any Problems,...

Tweeting Pi-Zero-W GIF Camera
I made a Raspberry Pi camera that captures GIF files and optionally tweets them over WiFi! It's built around a Raspberry Pi Zero W and a Pi Camera module. The camera connects to a pre-programmed WiFi network to tweet the gifs, but...

Arduino E-Paper Clock
This project started with a desire to have a modern digital clock that would use the natural light of the room for illumination. This means the screen is always the right brightness, looking like paper rather than a traditional screen. By ...

433mHz Radio connected pool thermometer
I was wanting to know what the water temperature was without having to physically go and check and I was curious about how warm the water would get during a sunny day and how much heat was lost overnight. I am interested in the idea of home...

Stream Airplay to Your Pi Zero
The Raspberry Pi Zero W is a tiny, yet powerful little device. Coupled with a Pimoroni Speaker pHat, it can be easily turned into a portable Airplay speaker which allows you to stream your music anywhere you want.Parts you'll need: Raspb...

House Power and Solar Monitor
I’ve had a Current Cost Power Monitor for a number of years which worked well until we put solar on the roof. The Current Cost can’t determine which direction the power is flowing and so power generation and con...
I’ve had a Current Cost Power Monitor for a number of years which worked well until we put solar on the roof. The Current Cost can’t determine which direction the power is flowing and so power generation and con...

Hogwarts Lights
Although there are commercially available lighting kits for Lego models, we found those that are available for this Hogwarts Castle can seem a little garish and don’t do the best job at concealing the wires. We felt that with t...

Pico Baro V2
Introduction:
The inspiration for this project stems back to my childhood when I was curious to find out how the mechanical barometer worked.
Introduction:
The inspiration for this project stems back to my childhood when I was curious to find out how the mechanical barometer worked.

Vehicle GPS Logger and Speedometer
Purpose
To display time and speed to a driver while logging timestamped raw latitude, longitude and speed as returned by the GPS satellite network. This allows a driver to double-check th...
Borg Cube for Scouts STEM Camp
Introduction
What does one make for a Startrek-themed STEM camp for Scouts? Especially when given the Search and Rescue (SAR) activity base to run. Why this base you ask? Usually I run a radio d...Introduction
What does one make for a Startrek-themed STEM camp for Scouts? Especially when given the Search and Rescue (SAR) activity base to run. Why this base you ask? Usually I run a radio d...
Days2Bin: Pico Powered Bin Reminder
Our recycle bin is collected fortnightly, but I can never remember which week, and the printed calendar changes every year! So I made a Raspberry Pi Pico W and GlowBit Matrix powered model wheelie bin which shows when the bins are due at a...

10" Home Lab Testing Rack
⚠️ This project features mains power For a lot of project development and testing, I’m always using a combination of testing and verifying power via USB, 12VDC, MIDI inputs and outputs, and other general IO. Havin...

Infinity-Mirror Table
An infinity mirror creates a striking optical illusion - a tunnel of light that seems to tear through space. I built this infinity-mirror table using some addressable LEDs, a Particle Photon and easily obtainable timber supplies. Check out...

GlowBit Desktop Audio-Visualiser
Introduction
I’ve had this little 8x8 Glowbit matrix for a few weeks now, and for whatever reason, the first thing I thought after running the example programs was “This needs to be synchro...
YouTube Desktop Notifier
Do you get nightmares of losing your YouTube Subscribers? If you do, you are not the only one. Luckily I have made this "YouTube Desktop Notifier" to keep me up-to-date with my channels Subscriber and View Counts. This very simple DIY ...

Raspberry Pi Video Looper Display Installation | Overshare Video Festival
Introduction
A suspended ceiling display of forty repurposed screens and displays, each screening crowd-sourced content captured on mobile devices, installed in the entry to Testing Grounds...
Kid’s Music Box
I want to make a portable music box that my 2 year old kid can operate intuitively on her own. So, Spotify or any other on-demand music platform with tablets and Bluetooth speakers are out of the question. Remember the good old days of putt...

Smart Watering System
Introduction This began as an idea after building a very basic single-channel unit. Commercial smart watering systems use a Wifi connection to the internet and get weather reports to determine the level of watering required. These systems...

WhyzaGC - Feather ESP32 addon to the MightyOhm Gieger Counter
This project is about adding a wireless Adafruit Feather HUZZAH ESP8266 or ESP32 v2 with Adafruit Featherwing 128x64 OLED to interface with the self-assembled MightyOhm Geiger Kit.
Introduction
I am always on ...Introduction
I am always on ...
Arduino Tide Gauge
I used an Arduino and a US-100 ultrasonic sensor to make an extremely low-cost tide gauge. This project measures the tide by sensing the distance to water using a US-100 ultrasonic sensor. The device has a 3D printed base&nb...

LoRa P2P Wireless Gate Alarm
Introduction
My front gate is a long way from the house at around 300m. I don’t want people wandering around my property without knowing about it. This project uses two Raspberry Pi P...
Math Scroller
I was looking for something educational to 3D-Print for my child in Thingiverse and came across the concept of the Math Spinner. I found the models lacked a method of checking the answer so I wanted to automate it. The core design is inspir...
Parts List

Analogue Quad Oscillator Drone Synth
I have a peer-reviewed study on my desk and it confidently tells me that all the capacitors on planet Earth want to be synthesisers when they grow up. To make the world a better place, let's realise the dream of four fortunate elec...

Remote-Controlled Mars Rover
As an avid space-lover, I have always admired the amazing engineering that goes into the various robotic missions we have sent out into the great unknown. Of these adventurous autonomous argonauts, the ground-based explorers such as Sojour...


Makers love reviews as much as you do, please follow this link to review the products you have purchased.