The :MOVE MINI allows you to turn your micro:bit into a simple robot! In this guide, we will give you some tips and tricks for assembling the :MOVE mini. This is a DIY assembly item and takes 30-60 minutes to fully assemble. There is a great assembly manual that comes with the device, this information will supplement that manual.
Tools Needed
To assemble the :MOVE mini we need a small Philips head screwdriver, and optionally some tape.
Parts Required
The :MOVE mini requires a micro:bit, a computer, and a micro USB cable to get started. Some micro USB cables are too thick to plug into the micro:bit without loosening the screws on the Servo:lite board. This can be pretty inconvenient. These micro USB cables have been tested and definitely fit.
Assembling the MOVE mini
The :MOVE mini comes with a great assembly guide in the box, this guide will not cover everything but instead will help show the steps in photos to help make things clearer. We will also share any helpful tips along the way. To start out, it's important to know that you have all the parts. Here is a photo of all the parts arranged in the direction they will go in when assembled. We found it a bit confusing working out which way was forward on the first few panels.
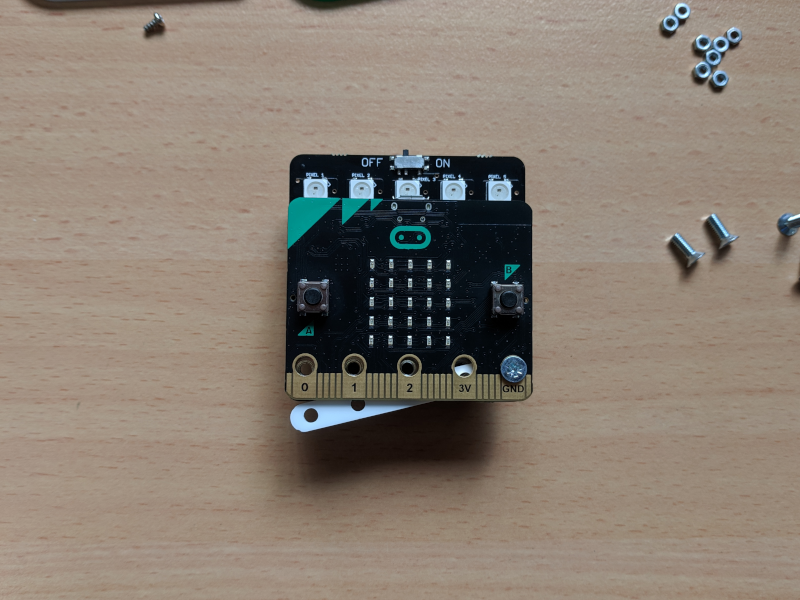
Connect a micro:bit to the Servo:lite board
We found it easiest to install the micro:bit and spacer by starting all the screws first then tightening them down.
Calibrate the Servos
Before installing the servos it is critical to ensure that they are trimmed before proceeding. You will need to take the entire bot apart to trim them later on. To do this we will attach the round servo horns onto the wheels using the large screws. The screw will stick through a bit, that's normal. The servos will snap into place on the bottom plate, this may take a fair bit of force.
Connect the servos to the Servo:LITE board. The orange wires should face down. If your servo doesn't respond to any commands, flip this connector over! It won't damage anything to connect it backwards (but it also won't work).
Next press the wheels into place but do not secure them with a screw. With everything assembled like this, check the trim of the servos by setting them to 90 in Makecode. If they move at all in this position adjust the trim screw on the bottom of the servo until the servo no longer turns.
Install the Servos
After calibration of the servos is complete, disconnect the servo:LITE board and connect the joining plate on top of the servos. Notice that the rectangular cutout is facing the front of the bot, with the overhang from the attaching plate on the servos facing toward the back.
Attach The Side Panels
While assembling the :MOVE mini we often felt the need for three hands. Here are some helpful tips to be able to easily pull this off with only two!
When installing the side panels, put the back screw and nut in place before installing the panel.
Then just put the side panel in place, and tilt it into position! Alternatively, you can put a bit of tape on one side of the panel so the nut doesn't fall through while installing. Then just remove the tape afterwards!
Fitting The Panels
For everything to seat perfectly when the :MOVE mini is fully assembled, loosely install all the screws, then make sure all the panels are in this orientation before tightening the screws.
The side wall panel fits best if twisted a bit in its holes. Notice where the spaces are in the below photo. Tighten the screws when the panel is in this orientation.
To keep the sidewall bolts straight, position the nut on the back bolt on the outside of the sidewall panel we just tightened.
Install the decorative side panels at the upper edge of their slot for better bolt engagement.
Final Steps
To finish the installation put the servo:LITE board into the front of the bot, and connect the servo cables. Finally, install the wheels with the smallest screw from the bag.
Programming
To program the :MOVE mini we recommend using the servo:LITE expansion for MakeCode. For most bots, this works great, but sometimes one servo turns a bit faster than the other, what do you do then? Under the "Pins" menu you can control Servos directly. If you have a :MOVE mini that always wants to drive in a circle, you can control the speed of each servo directly using the servo blocks, and calibrate this out of the servos!
Check out our video for more information on assembly! For more project that use the micro:bit, check out our micro:bit Tutorials!


