Near Field Communication (NFC) is used all and everywhere. As it stands there are over two billion NFC-enabled devices (many of them smartphones) in use today. This basically means over 20% of the world’s population has access to NFC technology. NFC technology has become a particularly popular choice for the retail industry, being used in countless contactless payments via mobile wallets.
This guide will look at setting up an NFC System with a Raspberry Pi using the Waveshare PN542 NFC HAT. This also comes with a Type 2 Tag (NTAG215) Keychain Fob making it a complete package to get up and running. The HAT connects directly to the top of the Raspberry Pi GPIO and is a great way to read an NFC chip. The GPIO (General Purpose Input and Output) pins extend through the HAT as well, allowing you to still access and use them. The other sweet thing about this HAT is the fact that it can (with a little rearrangement of the top jumper plugs and DIP switches) work with any Arduino Board or any STM32 Board which is really swell.
Today we will just focus on the Raspberry PI compatibility. See below for the contents of this guide.
- NFC and RFID Overview
- What You Need
- Initial Hardware Set-Up
- Raspberry Pi Settings and Downloads
- Script to Read UID (Unique Identifier)
- Where To Now (GPIO Control Via UID)
- Downloads
The really valuable thing to remember about this HAT is it will work with UART, SPI, and I2C communication. Check these linked guides to know more about these technologies but the big take-away is that this HAT will work communicate to your Raspberry PI in many different ways. Each of these communication types will impact the available GPIO pins slightly so do take the time to read the specification sheet (available in downloads). We will use the UART connectivity method today as this is by default the technology used and will work with all Raspberry PI single board computer models.
The code for this will be clearly explained so you can jump right in and edit it to your heart's content. I have a particularly soft spot for this technology, going so far as melting my credit cards to get my dirt mitts onto the NFC chip. However, you do not need to go to these extremes as we have all kinds of NFC and RFID technology; key fobs, pills, cards, buttons, micro NFCs, and even ones for your nails. Also, there we have numerous different types of NFC modules. For example, there is one where the reading/writing part is free from the rest of the HAT. This means your designs won't be limited by the constraints of the hardware.
As always if you have any questions, queries, or things to add please let us know your thoughts!
NFC and RFID Technology Overview
RFID stands for Radio-Frequency Identification. RFID technology enables the communication between a tag and a powered reader. Both NFC and RFID are contactless communication technologies (global wireless). What it boils down to is NFC technology is a variation of high-frequency passive RFID that uses an extremely close-range magnetic field for two-way communication. The range is usually no more than a few centimeters. Both NFC and high-frequency RFID technology operate in the same 13.56 MHz frequency. Furthermore, NFC is based on the same protocol as RFID, but due to the hardware, the use cases are entirely different.
NFC makes for excellent close-range data transmission and exchange medium, but it is not viable for asset location management. NFC is capable of both one-way and two-way communication, meaning it can act as both a reader and a tag. This allows NFC to be used for more complex interactions such as peer-to-peer (P2P) data sharing as well as card emulation. That is why very common uses of this technology are between a smartphone and a payment reader in the checkout line, or two smartphones exchanging data such as opening a URL or providing Social Platform details.
Whereas RFID is best suited for asset tracking and location in logistic functions. RFID tags can be read quickly in batches, making the technology a good fit for tasks such as inventory management. In contrast, only a single NFC tag can be scanned at one time.
As a note, passive transponders or tags are available in three different RFID frequency ranges: Low-frequency (LF), high-frequency (HF), and ultra-high frequency (UHF). The reading range of LF and HF systems is usually only a few centimeters. UHF tags, however, are often readable over distances of more than one metre. Furthermore, there are two different styles of RFID tags possible. Either they are active, meaning they have their own power source or they are passive. Passive tags (which include NFC system) have no own power source and have to be supplied with energy via an electromagnetic field produced by the reader.
What You Need
Below is a list of the components you will need to get this system up and running real fast.
- Raspberry Pi 4 Model B (any earlier version of the Raspberry Pi will work too)
- Waveshare NFC HAT (PN532)
- Micro SD Card that has been flashed with Raspberry Pi OS
- Power Supply
- Monitor
- HDMI Cord
- Mouse and Keyboard
Initial Hardware Set-Up
The fastest way to get up and running with this NFC HAT with the Raspberry Pi is to adjust all the connections of the top of the HAT, carefully install it onto the GPIO pins and set up Raspberry Pi as a desktop computer. This guide will use UART (default) connection, in the download section, you will find the technical spreadsheet that goes through the process to set up SPI or I2C connection (Please note that recently there have been some issues with SPI interfacing to the board for various Pi).
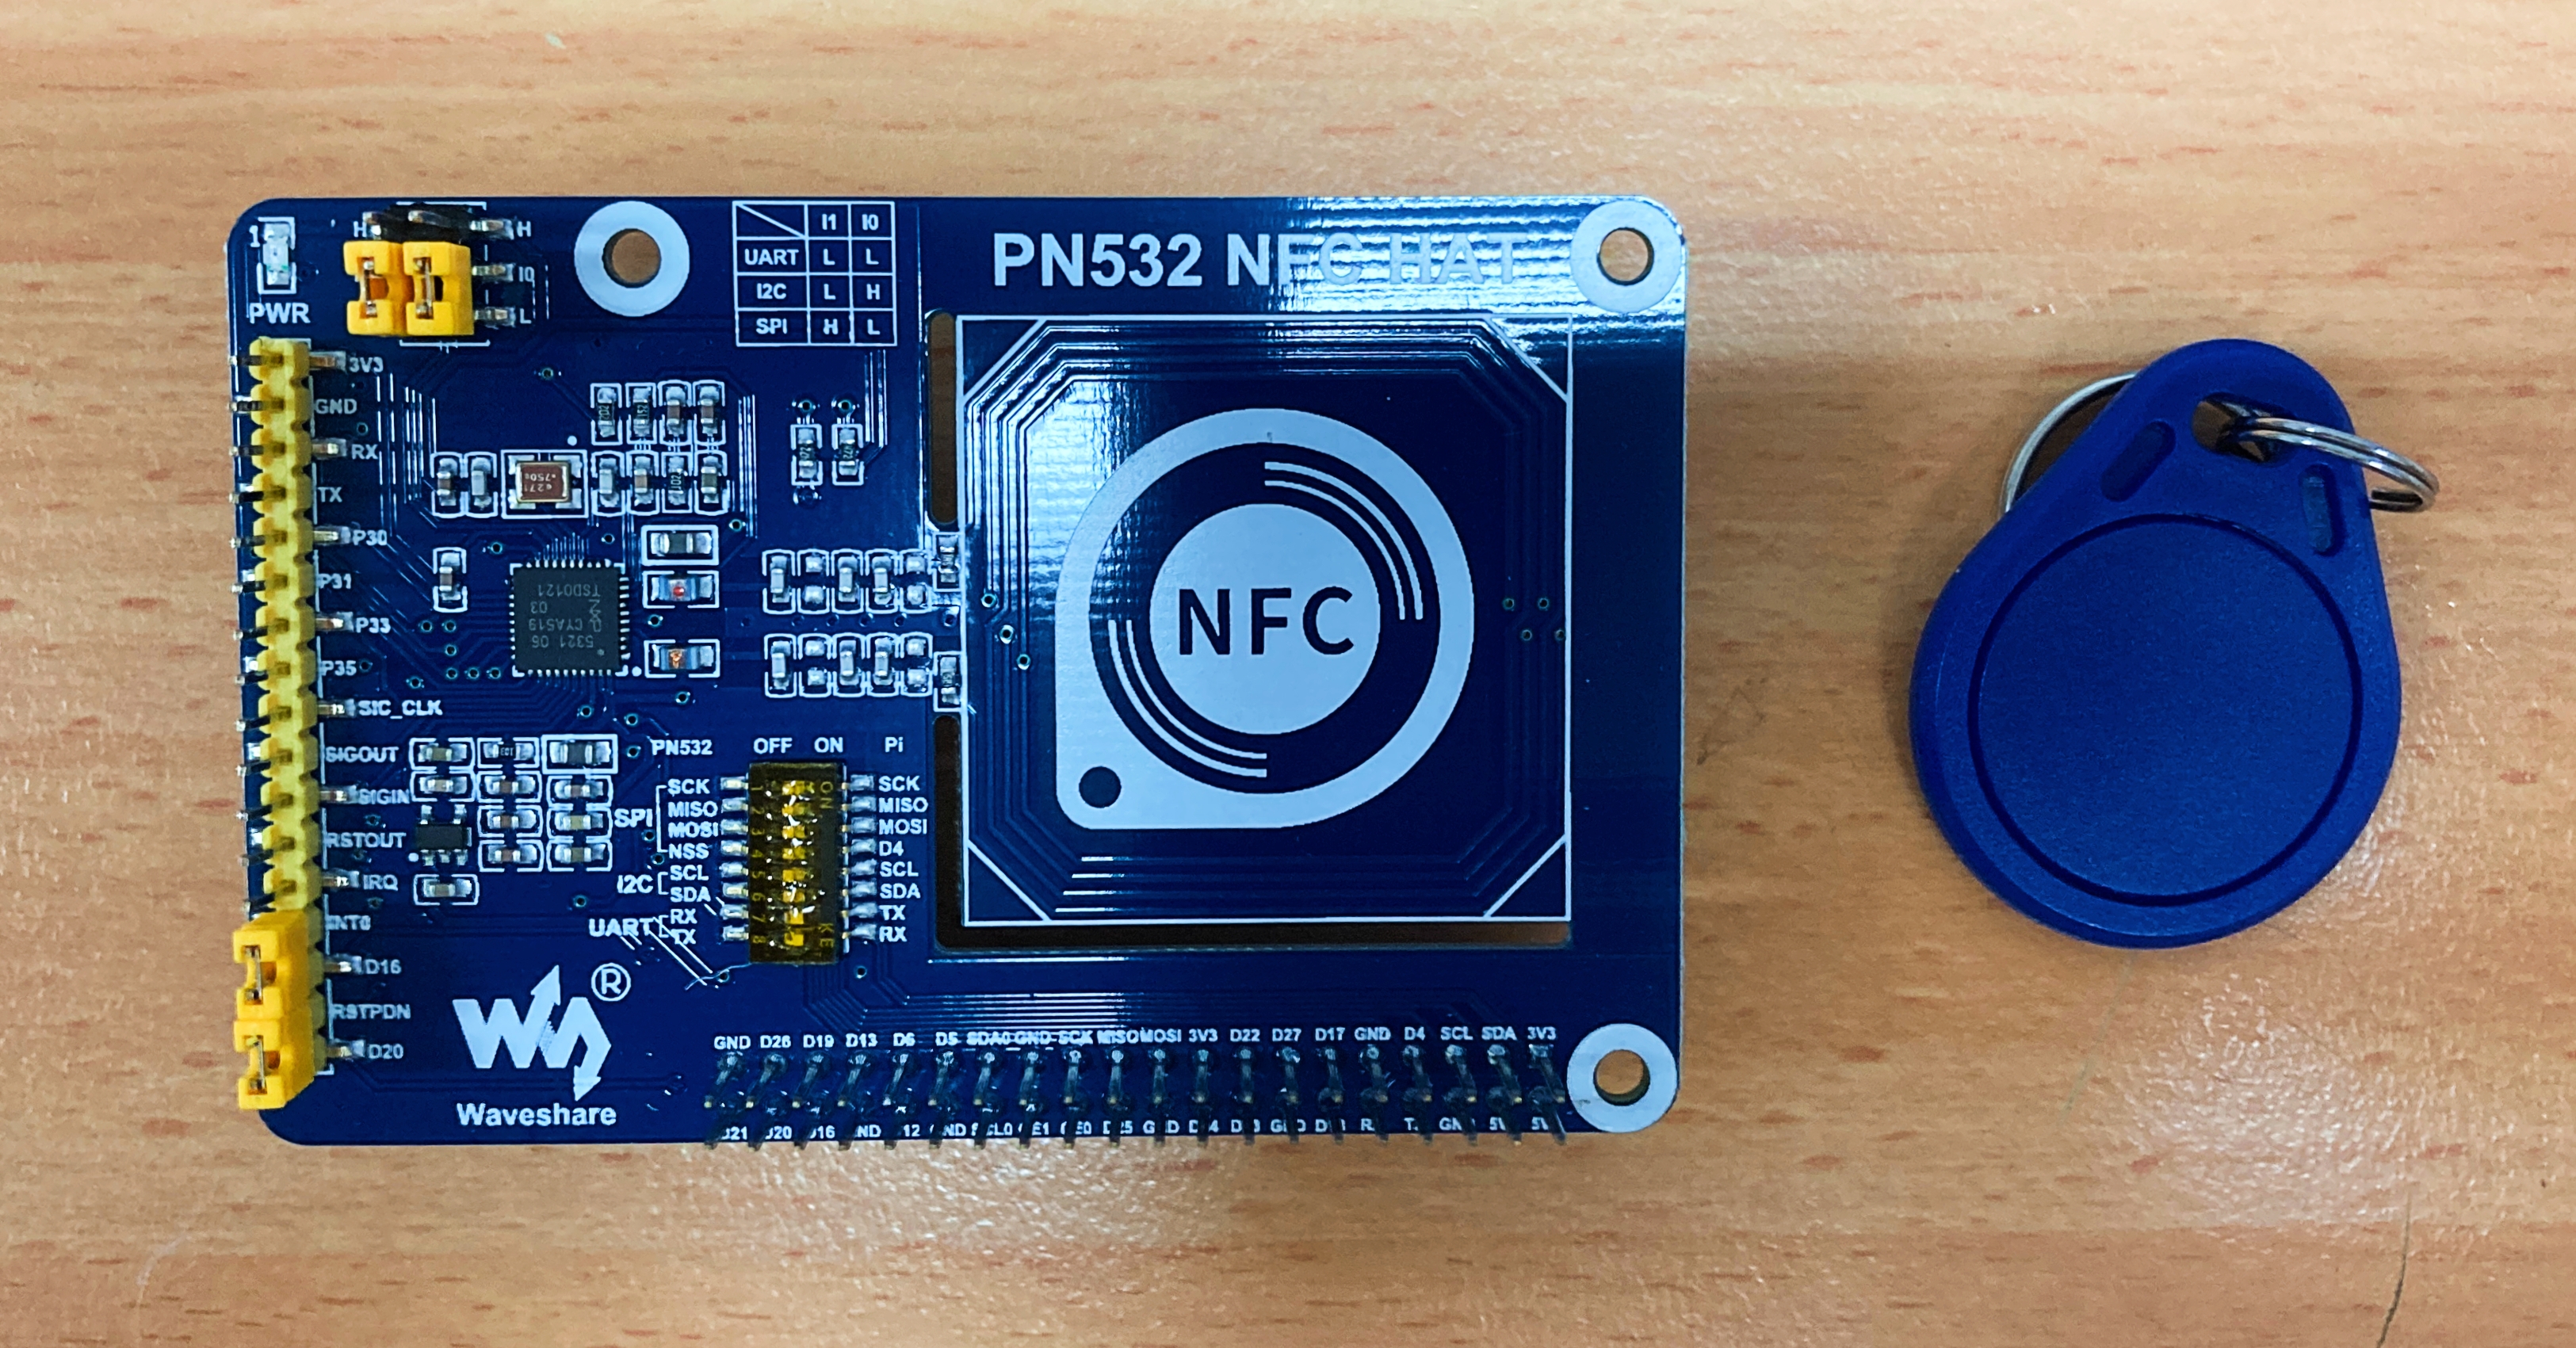
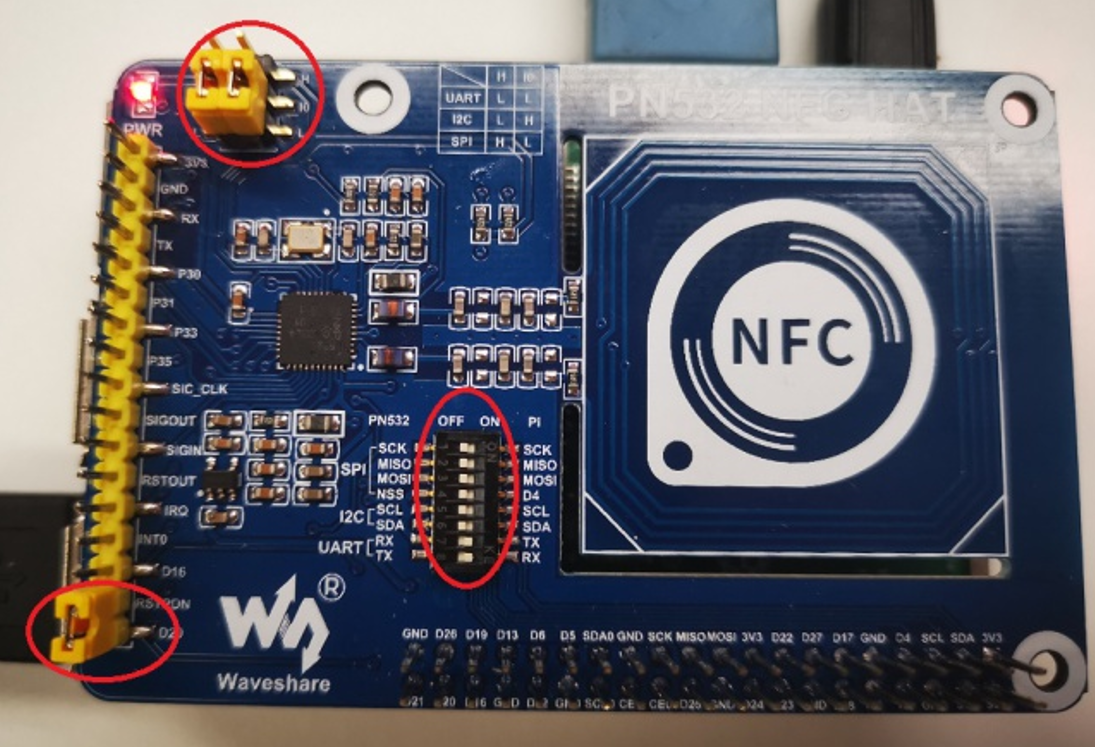
Start by adjusting the jumpers (supplied with the product) and DIP switches as you can see in the image below. Connect the L0 to L and L1 to L by jumpers are to be connected together. The RSTPDN to D20 is to be connected by a jumper. Set the DIP switch with only RX and TX switched to ON. Find yourself a some tweezers to do the DIP adjustments.
With that set up install the Waveshare NFC HAT to the Raspberry Pi. Connect the HAT directly to the GPIO pins of the Raspberry Pi. Make sure to line all the GPIO Pins up and press the two boards together. You can see this happening in the image below.

Flash a micro-SD card with a fresh version of Raspberry Pi OS. Link on how to flash micro-SD with Raspberry Pi OS found here. With the Micro-SD Card flashed you can then install it into your Raspberry Pi. Then connect the Raspberry Pi to a Monitor and other peripheries (mouse and keyboard). With all that complete power up your Raspberry Pi through the USB-C connector. Check this guide here if you need help doing this.
Also, do yourself a favour and remove the metal keychain rings (or any metal) from the Fob. With the exposed GPIO pins there is a chance to accidentally short them with the metal ring and brick the Raspberry Pi in a very ungraceful way.
Raspberry Pi Settings and Downloads
With the Raspberry Pi desktop, connect to the internet. Then download the PN532 Package and Example codes available at the bottom of this page. This package (along with code written in C and for other Developer boards) is also available at the Waveshare Wiki for this device. Note here, the Waveshare Wiki files are zipped up using 7Zip format. If you use the file from Waveshare you will need to open the terminal. Then type and enter the following | sudo apt-get install p7zip-full |.
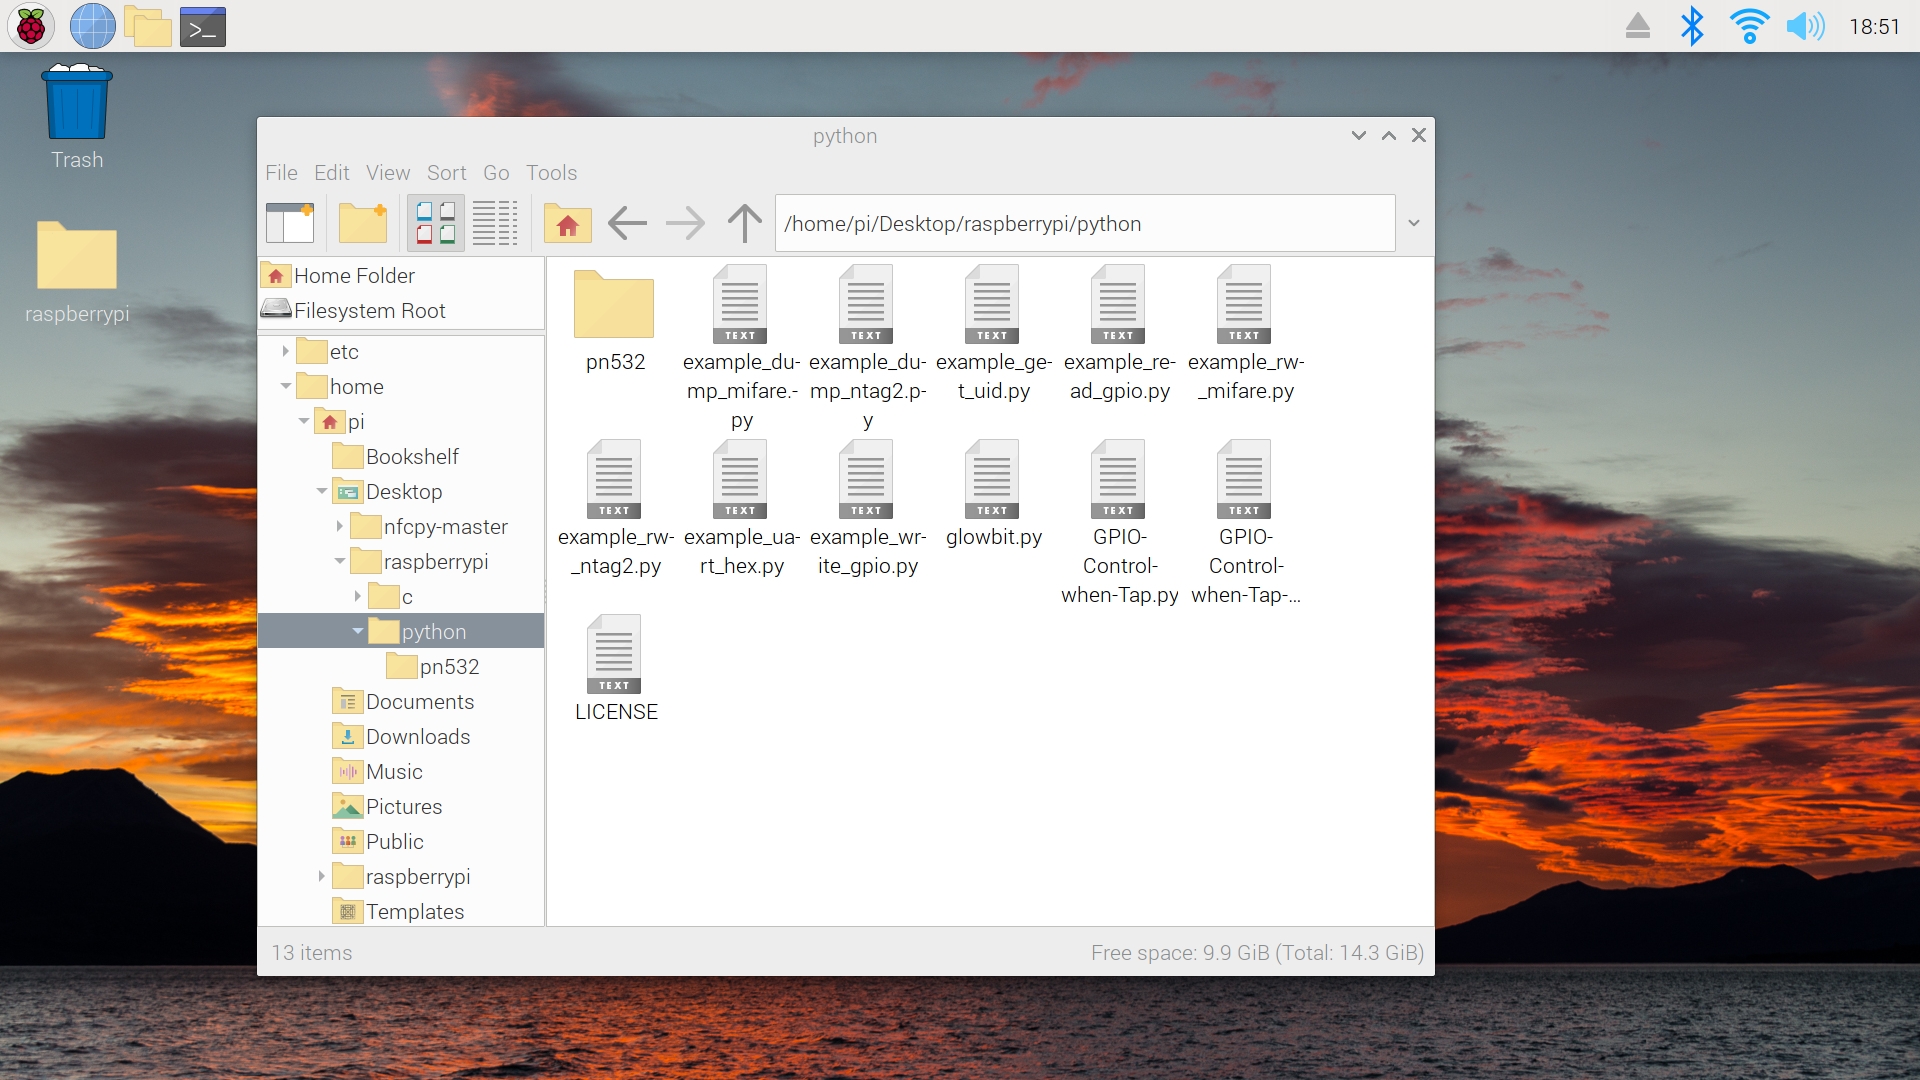
With that complete, you will be able to unzip the downloaded files. This step will not need to be done if sourcing the files from this article as you will be able to unzip them as normal. To unzip, right-click the downloaded file and then select | Extract Here |. I extracted the files to my Desktop to demonstrate easier but you can do so wherever. See this in the image below.
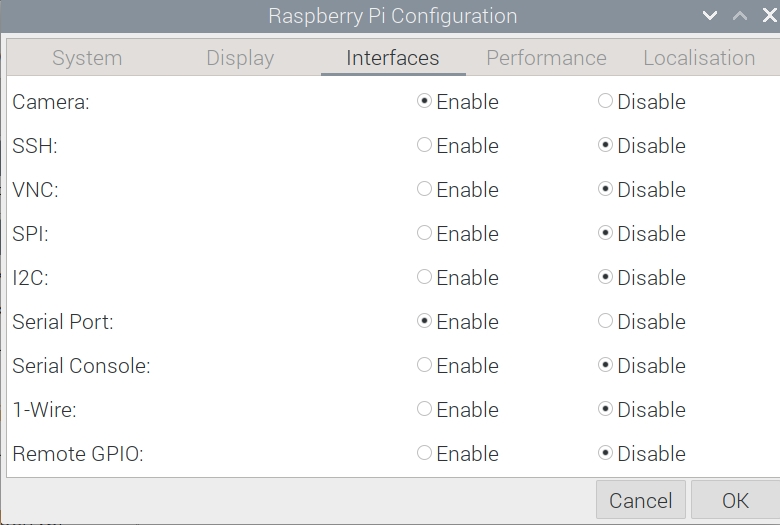
Now to adjust the UART connectivity settings on the Raspberry Pi so that it will be able to communicate correctly with the Waveshare PN532 NFC HAT. To do this go into the Raspberry Pi Configuration Menu. To do this click on the Raspberry Pi symbol on the top left of the screen, hover over Preferences and then select it. Then clock the Interfaces heading. In this section enable the Serial Port (see image below). After rebooting your Raspberry Pi communication through UART is a go!
Script to Read UID (Unique Identifier)
Inside the unzipped file there will be a number of scripts. Lets start with | example_get_uid.py |. This script when run will allow the NFC HAT to listen/search for nearby NFC Chips. When one is identified it will then display the Unique Identifier (UID). The NFC chip UID is a manufacturer-supplied unique identifier for the NFC chip used to uniquely identify each NFC tag. This UID is usually read-only.
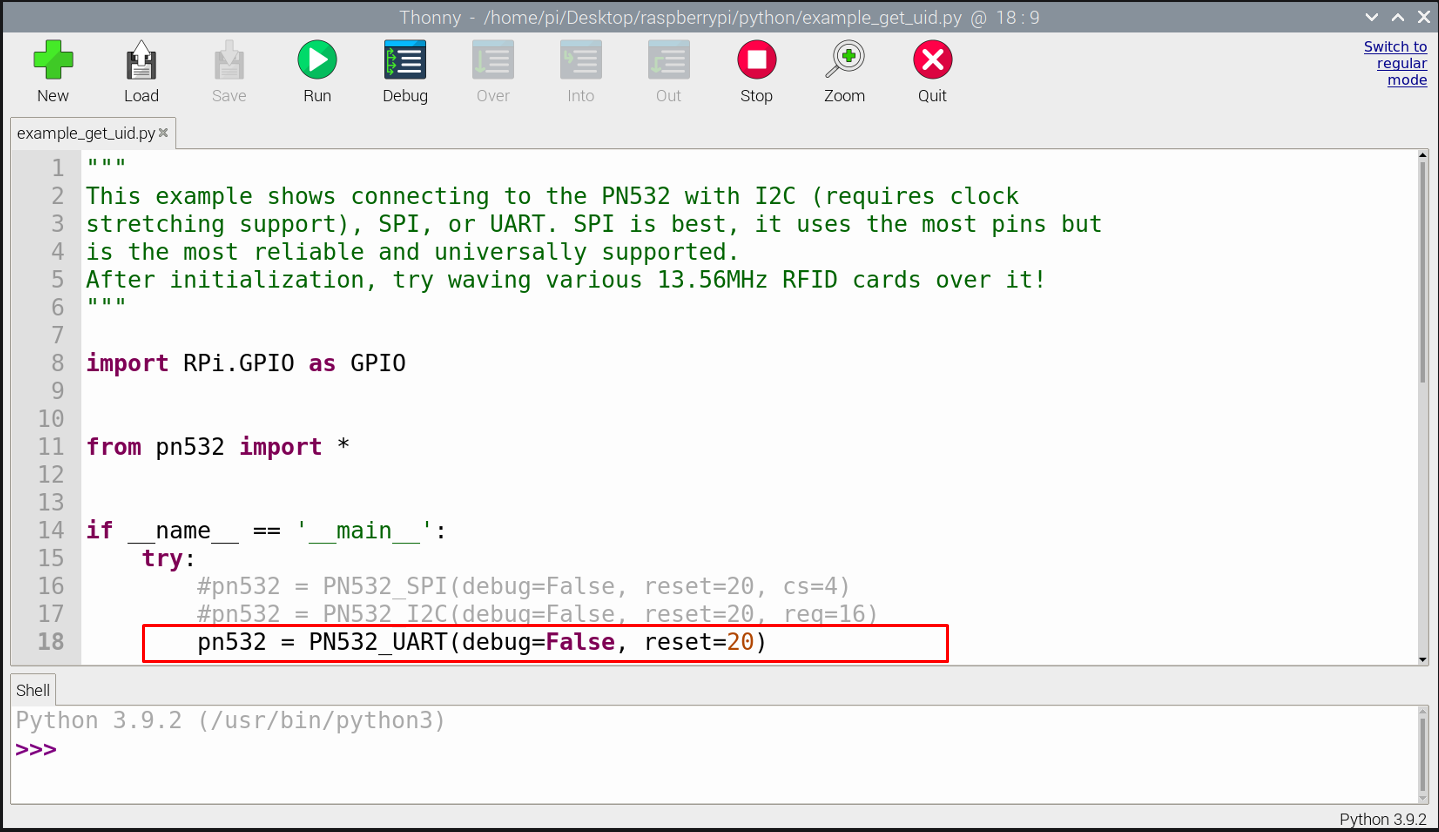
First before doing this open the script by right-clicking the file and opening it with Thonny IDE. Thonny IDE is just a Python interpreter software. Make sure the line highlighted in RED is uncommented and the two above are, just like the image below. Depending on which one of these three is uncommented will decide whether the system will run through UART (what we want), SPI, or I2C. Comment or uncomment lines by adding the symbol | # |. Lines with this symbol in front of them will not be activated when the code is run.
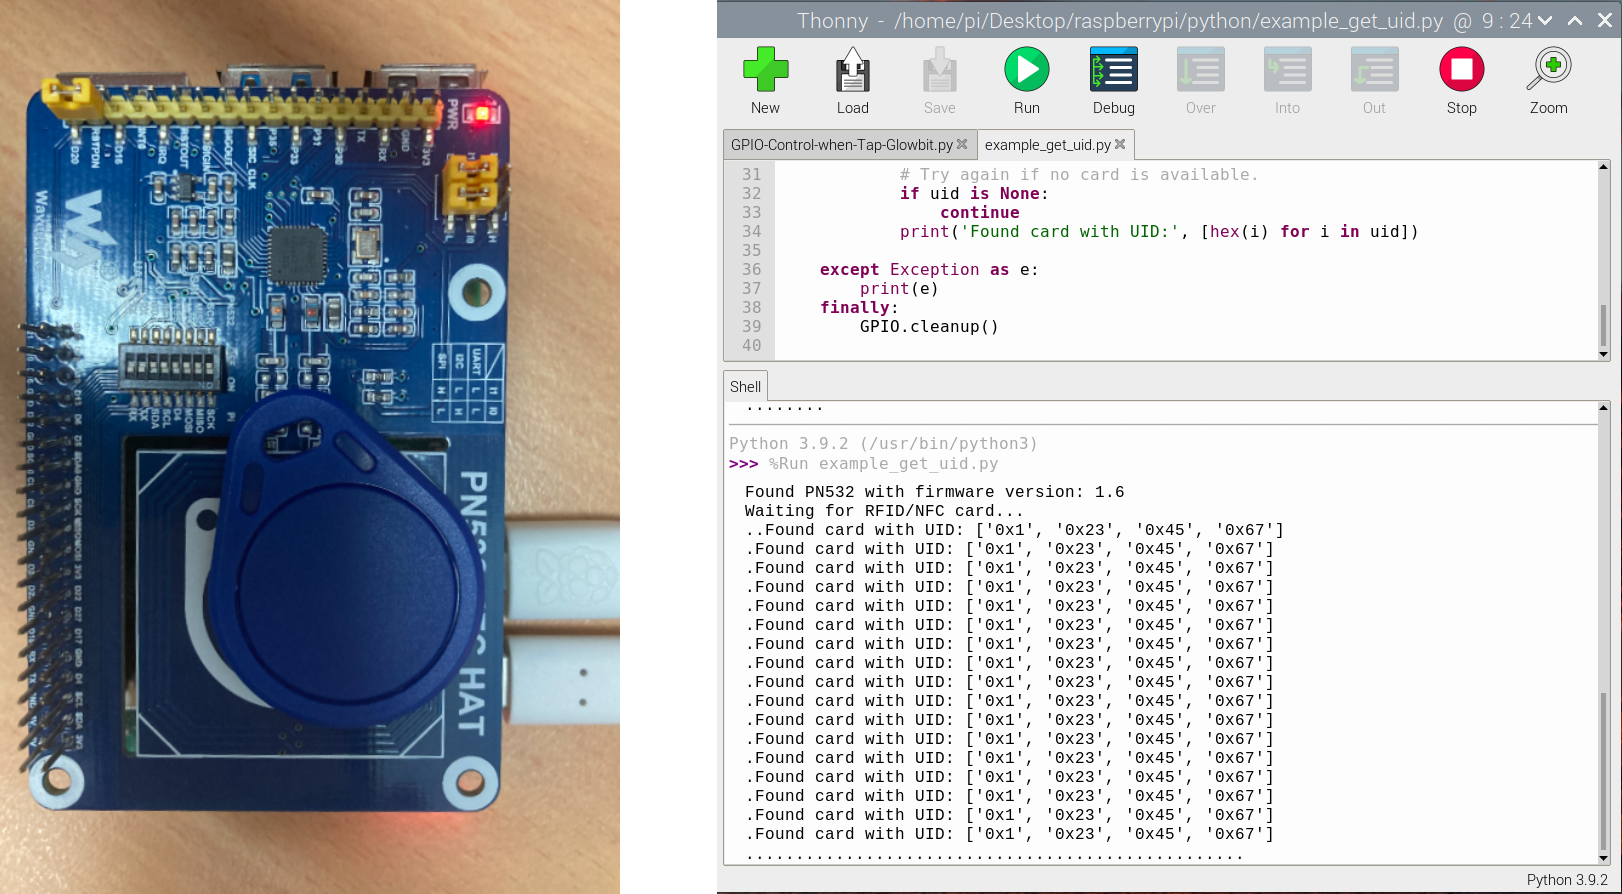
With that complete, you can now save and run this script. The NFC HAT will then start searching for NFC Chips nearby. Whenever one is found its details will be displayed to the Shell. The UID will be given in Hexadecimal format as this is how NFC Chips store information. See this occurring in the image below.
There are a number of other scripts here that you can explore such as scripts that will allow you to dump all the data out of nearby NFC Tags or write new information to compatible NFC tags.
Where To Now (GPIO Control with UID)
GPIO (General Purpose Input and Output) is the interface that allows your Raspberry Pi to connect to the outside world. This can be any manner of control and you are only limited by your imagination. In the downloaded folder, you will also find the scripts | GPIO-Control-when-Tap.py | and | GPIO-Control-when-Tap-Glowbit | already there. These scripts are great scaffolds to control the GPIO pins of your Raspberry Pi via NFC Chips.
For example for the first script, if the correct NFC Chip comes close to the NFC reader of the HAT when this script is run the Raspberry Pi identifies that QR code it will light up a red LED Diode by sending power through the GPIO Pin 4. This we will do here but understand that this LED is just a placeholder for anything! GPIO pins are the doorway to controlling almost an endless amount of sensors, motors, actuators, hardware.
Having wired up a Red LED Diode (with resistors in series so as not to burn out the LED) and have attached it to a Ground Pins and the GPIO Pin 4 on the Raspberry Pi. Then whenever you run the code bring that before NFC tag nearby it will light right up! If you bring a different tag no light will turn on. See this happening in the image below. A great guide to clarify at a grassroots level the code and why certain connections are made can be found in Chapter 2 of the Raspberry Pi Workshop.

And to demonstrate that this code can be quickly adjusted to accommodate other NFC tags and other outputs here is the second script being used to run a Glowbit Matrix. When the right NFC tag is read it will display a unique output. See this happening below. Learn how to set up Glowbit Matrix here.
Downloads
Below is all the code you need to get up and running with these examples above. They have been fully commented so you can easily understand and alter them to do exactly what you want for your purposes.


