I want to make a portable music box that my 2 year old kid can operate intuitively on her own. So, Spotify or any other on-demand music platform with tablets and Bluetooth speakers are out of the question. Remember the good old days of putting a cassette tape into a boombox and you can press the play button? This is a modern version of that.
Press the on button, put a little figurine onto the box and it will start playing your favourite music!
I am not a coder. At the most, I can only describe myself as tech savvy, so I started the journey by googling for a semi-coded product that I could use on the spare Raspberry Pi lying around. I started with Mopidy but my buttons were temperamental with the Mopidy GPIO extension. Giving an unreliable product to a 2 year old was asking for trouble, so back to my friend, Google.
I then came across this beautiful build but the main problem was I did not want to pay for Spotify Premium, so I went back to Google again.
And bam! I found exactly what I was after - a simple, flexible build with an active, supportive community (no soldering was a bonus). Here comes Phoniebox!
Materials Required:
- Raspberry Pi Zero W - $25 (To keep costs down, I used a Pi Zero because I already had one lying around. It’s functional albeit a little slow on start up. A Pi 3B+ will boost performance especially if you use the Spotify version. A Pi 4 is probably an overkill.)
- OnOff Shim - $14.50 (Not essential and requires soldering but I would recommend this to preserve the powerbank juice. Without the OnOff Shim, the RFID reader will continue to deplete the powerbank even when the Pi is turned off.)
- Speakers - $10 (Cheap K-Mart speakers that are USB powered and easy to take apart. For a better audio experience, pick up a HifiBerry with some decent speakers. My 2 year old couldn’t care less.)
- USB sound card adapter - $10
- USB RFID card reader and chips - $10 (I started off with a RC522 because who knows how long AliExpress would take to deliver during a pandemic. Probably due to my shoddy soldering skills, the RC522 was temperamental.)
- Powerbank (ADATA PT100) - $18 (I bought a Mi Powerbank 3 on special but it did not work well with the OnOff Shim as you need to physically turn on the powerbank before the OnOff Shim could be turned on. The ADATA one works perfectly.)
- USB port - $11 (Needed for the Pi Zero for powering the speakers and RFID card reader. Not required if you are using a Pi 3B+.)
- A box to hold it all together - $6 (I used a wooden wine box or build your own)
- Arcade buttons and wires - $20 (Big buttons that my 2 year old can click easily. I decided against LED buttons to minimise wiring and power consumption.)
- USB OTG micro B male to A female cable - $4 (to connect the Pi to the USB port)
- USB micro to A cable (to connect the Pi / OnOff Shim to the powerbank)
Step 1 - Software Installation
- Install Raspbian - follow the official guide and set up wifi plus SSH.
- Update to latest Raspbian
sudo apt-get update
sudo apt-get upgrade
cd; rm buster-install-*; wget https://raw.githubusercontent.com/MiczFlor/RPi-Jukebox-RFID/master/scripts/installscripts/buster-install-default.sh; chmod +x buster-install-default.sh; ./buster-install-default.sh
- The one liner script will run you through an interactive installation:
- Continue interactive installation? Y (of course)
- Do you want to configure your wifi? N (I chose no as I configured it when I installed Raspbian)
- Use Headphone as iFace? N (My Pi’s iFace name was “Speaker”, the other common iFace name is “Master”.)
- Do you want to enable Spotify? N (I chose no because this would only work with a Spotify Premium account and I did not have one.)
- Do you want to configure MPD? Y (I chose yes because I was running the classic version. If you enabled Spotify, choose no.)
- Do you want to use the default location? Y (I chose yes because that was where I wanted to store my music files.)
- Do you want to activate the GPIO-Control-Service? Y (I wanted to use physical buttons, so yes, I needed GPIO to work.)
- Do you want to start the installation? Y (please)
- The installer also guides you on installing the RFID reader. It might be coincidental but every time I chose Yes, it corrupted my SD card after reboot and required a fresh install. So I chose no. You can install the RFID reader manually later.
Step 2 - Hardware
Time to plug everything up and turn it on.
Here was the first prototype.
Step 3 - Get the Audio Working
-
Once the Pi is switched on, you should be able to reach the web app using http://[your Pi’s IP address]/index.php.
-
Transfer a few audio files to /home/pi/RPi-Jukebox-RFID/shared/audiofolders or use the web app to upload the audio files
-
Use the web app to check that the audio is working
You can also add web radio streams and podcast. See the official manual for instructions.
Getting the audio to work was actually a pain. Here are a few things to try if plug and play did not work for you:
- check if the usb sound card is recognised
cat /proc/asound/modules
- change sound config to usb audio card
sudo nano /usr/share/alsa/alsa.conf
- Change “defaults.ctl.card 0” to “defaults.ctl.card 1”
- Change “defaults.pcm.card 0” to “defaults.pcm.card 1”
- to turn off the very annoying bootup audio
sudo mv /usr/share/piwiz/srprompt.wav /usr/share/piwiz/srprompt.wav.bak
- check iFace name
amixer scontrols
aplay -l
alsamixer
- F6: select sound card
- Choose the USB sound card
The iFace name that should be used in this case is “Speaker”.
- update iFace name to all relevant files
sudo nano /etc/mpd.conf
sudo nano /home/pi/RPi-Jukebox-RFID/settings/global.conf
sudo nano /home/pi/RPi-Jukebox-RFID/settings/Audio_iFace_Name
If all fails, read the official FAQ on audio not working.
Step 4 - Get the RFID Reader Working
-
Once you plug in the RFID reader, you should hear a beep. And every time you swipe a card, you should also hear a beep. If the LED on the reader is on and you can hear the beep, your USB RFID reader should be working.
-
Register the RFID reader to the music box:
cd /home/pi/RPi-Jukebox-RFID/scripts/
python3 RegisterDevice.py
-
This would come up with a list, type in the number that represents the RFID reader. 0 in the case below.
-
Reboot the pi.
-
Go to the webapp using http://[your Pi’s IP address]/index.php > Card ID to configure the RFID cards / chips. Each card can be tagged to a subfolder under /home/pi/RPi-Jukebox-RFID/shared/audiofolders.
If all fails, read the official guide on Special RFID readers.
RFID reader extra
-
To conserve space, I took the USB RFID reader apart - flipped the casing over, removed the little black stickers at each corner and that should reveal 4 screws, removed those and voila.
-
The RFID reader chip was screwed to the music box and the wire was hot glued to it.
-
I personally found the beeping sound very loud and annoying. I could tell that the card was being read when the led turned green, so there wasn’t a need for the beep. I have seen people putting wax on the beeper or taping it down but I took a flathead screwdriver and gently broke the beeper off the soldering and removed it. The pink circle is where the beeper was.
Step 5 - Get the Buttons Working
You can use physical buttons to control the music box (volume +/-, play/pause, next track, previous track). You can use a rotary encoder like a KY040 or I had some spare arcade buttons left from another project (a Retropie bartop arcade), so I used those.
Most non-led microswitches have either 2 or 3 terminals:
-
NC - Normally Closed - ignore
-
NO - Normally Open - connect jumper wire to Pi Zero GPIO pin
-
COM - Common - daisy chain all the buttons and connect it to one of the Pi Zero Ground pins
Here is a link to Raspberry Pi pinout to avoid any confusion:
-
Connect the buttons to the Pi. Here is my example.
|
Button |
GPIO pins |
|
Play / pause |
13 |
|
Next track |
19 |
|
Volume down |
6 |
|
Volume up |
5 |
|
Power (if you are not using the OnOff Shim) |
3 |
|
Ground |
Any ground pins |
-
Configure GPIO settings
sudo nano /home/pi/RPi-Jukebox-RFID/settings/gpio_settings.ini
-
Update to your GPIO configurations / button connections. Here is mine:
[DEFAULT]
enabled: True

#[VolumeControl]
#enabled: False
#Type: TwoButtonControl ;or RotaryEncoder
#PinUp: 5
#PinDown: 6
#pull_up: True
#hold_time: 0.3
#hold_repeat: True
#timeBase: 0.1 ;only for RotaryEncoder
#functionCallDown: functionCallVolD
#functionCallUp: functionCallVolU
#functionCallTwoButtons: functionCallVol0 ;only for TwoButtonControl

#[PrevNextControl]
#enabled: False
#Type: TwoButtonControl
#Pin1: 22
#Pin2: 23
#functionCall1: functionCallPlayerPrev
#functionCall2: functionCallPlayerNext
#functionCallTwoButtons: None
#pull_up: True
#hold_time: 0.3
#hold_repeat: False

[PlayPause]
enabled: True
Type: Button
Pin: 13
pull_up: True
hold_time: 0.3
functionCall: functionCallPlayerPause

[Shutdown]
enabled: True
Type:  Button
Pin: 3
pull_up: True
hold_time: 2
functionCall: functionCallShutdown

#[Volume0]
#enabled: False
#Type:  Button
#Pin: 17
#pull_up: True
#hold_time: 0.3
#functionCall: functionCallVol0

[VolumeUp]
enabled: True
Type:  Button
Pin: 5
pull_up: True
hold_time: 0.3
hold_repeat: True
functionCall: functionCallVolU

[VolumeDown]
enabled: True
Type:  Button
Pin: 6
pull_up: True
hold_time: 0.3
hold_repeat: True
functionCall: functionCallVolD

[NextSong]
enabled: True
Type:  Button
Pin: 19
pull_up: True
hold_time: 0.3
functionCall: functionCallPlayerNext

#[PrevSong]
#enabled: False
#Type:  Button
#Pin: 20
#pull_up: True
#hold_time: 0.3
#functionCall: functionCallPlayerPrev

#[Halt]
#enabled: False
#Type:  Button
#Pin: 21
#pull_up: True
#hold_time: 0.3

#functionCall: functionCallPlayerPauseForce
-
Restart the GPIO service
sudo systemctl restart phoniebox-gpio-control
Step 6 - Install OnOff Shim (Optional)
Phoniebox comes with its own shutdown script and you can use the GPIO buttons to shut down the Pi gracefully. Although the Pi is shutdown, if it is still connected to the powerbank, it is still drawing a small amount of energy together with its connected components (i.e. the speaker and RFID reader). With an OnOff Shim, this problem goes away and the powerbank’s battery life significantly improves.
-
Make sure you solder the pins the right way! And then connect it to the Pi. I made the mistake of soldering it the wrong way the first time (flipped top to bottom) and had to painfully unsolder it.
-
Connect the on/off arcade button to the OnOff Shim.
-
Unplug the powerbank from the Pi and plug it into the OnOff Shim.
-
To install the OnOff Shim:
curl https://get.pimoroni.com/onoffshim | bash
-
Reboot the Pi.
Step 7 - Decorating the Box and Chips
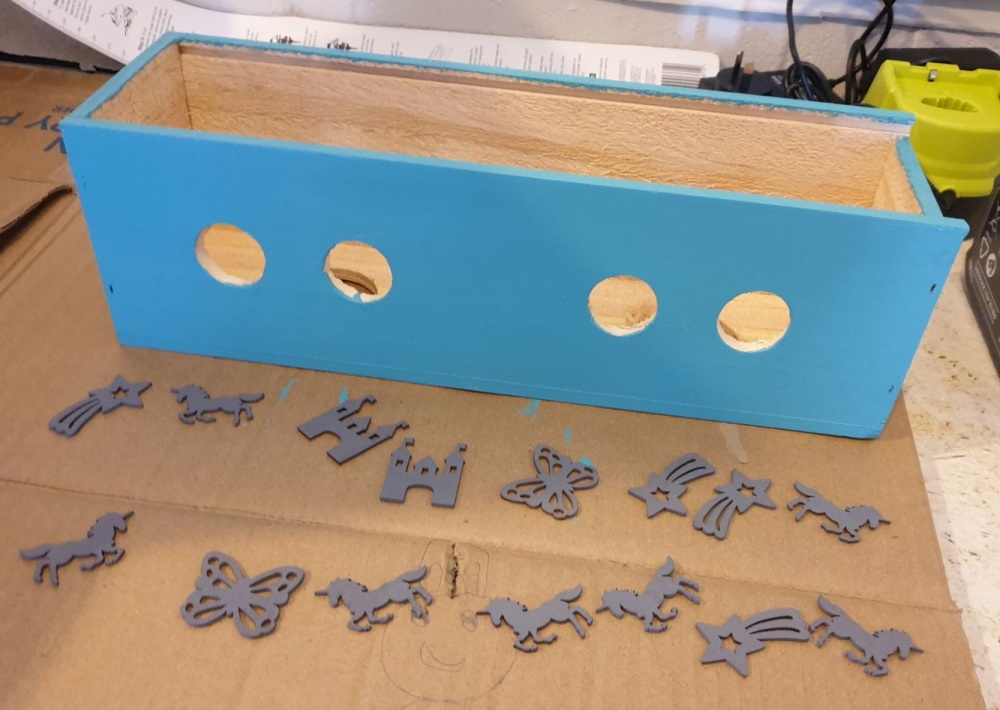
I picked a wine box as a starting point because I wanted to have easy access from the back to all the wiring and for charging. With a hole saw drill kit, I got the holes for the buttons and speakers sorted. I then got the kids to help with the painting.
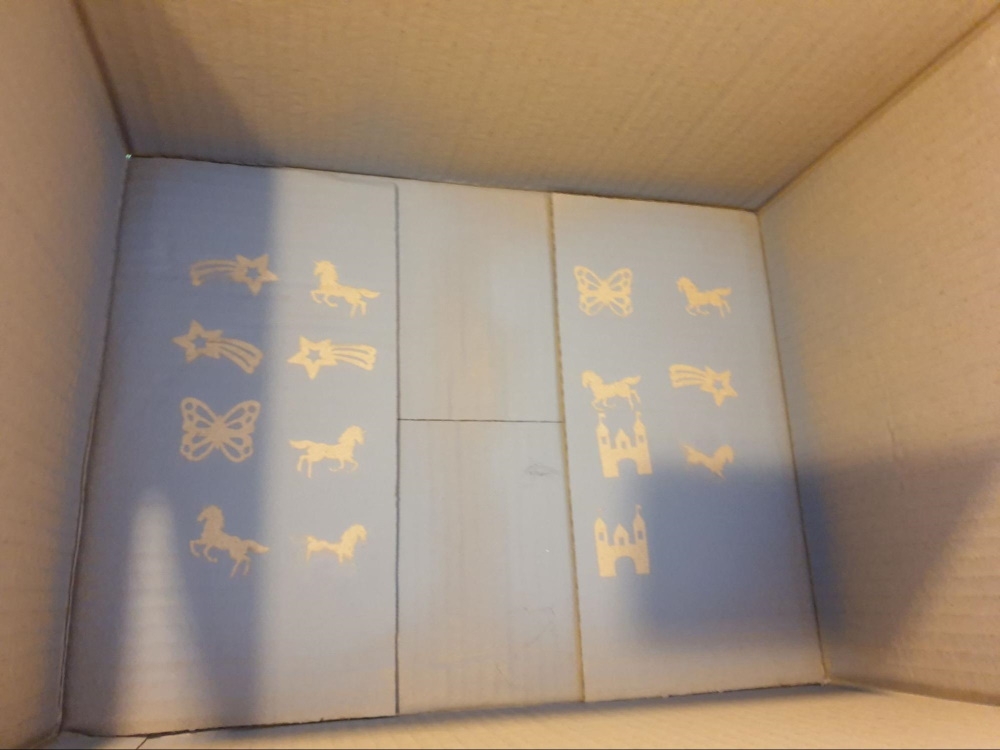
Got some precut decorations from Kmart and used my customised spray paint booth (aka a deep cardboard box).
Pull the speakers apart with the help of a mini hacksaw and screw them into the box.
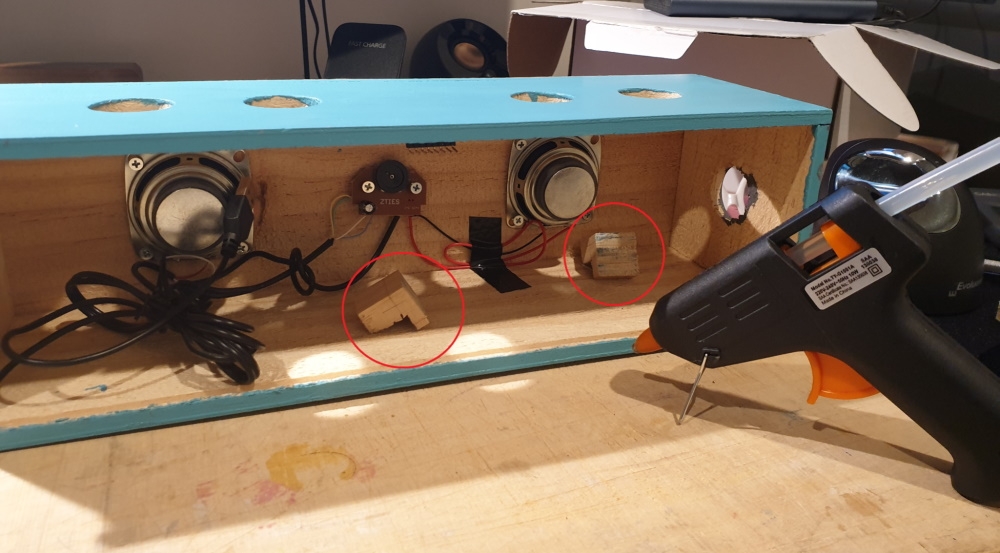
With the mini hacksaw, I cut some pine trim to hold the powerbank. I tried to hot glue the wood pieces. Failed! Super glue? Failed. Wood glue? I ran out so I ended up using some really strong double sided tape.
I also saw some small wooden pieces to hold the Pi Zero. Screwed and double taped.
Superglue all the decorations onto the box. This is our special Space Invaders on/off button.
My 2 year old can’t read yet, so laminated cards are not particularly helpful. The kids did a scavenger hunt in their toy boxes and “donated” some figurines that were superglued to the RFID chips.
I found some plexiglass in the garage, so I decided to cut that up (a really good craft knife, some patience and a good snap) and used that as the back covering, so that the kids can see all the cool electronics in action.
Step 8 - Speed Up
If the startup time is too much to bear, there are a few things that you can do to speed up the music box.
#check start up speed
systemd-analyze blame

# Disables loading Bluetooth
dtoverlay=disable-bt

# Boot Delay Time
boot_delay=0

# avoid_warnings=2 disables the warning overlays, but additionally allows turbo mode even when low-voltage is present; avoid_warnings=1 disables the warning overlays [use at your own risk]
avoid_warnings=2

# the rainbow splash screen will not be shown on boot
disable_splash=1

# Initial Turbo in seconds; max. 60 seconds
initial_turbo=20

#deactivate Exim4
sudo update-rc.d exim4 remove

#adjust dhcp client service
sudo nano /etc/dhcpcd.conf
noarp
ipv4only

#Disable samba
sudo systemctl status smbd
sudo systemctl disable smbd
Final Thoughts
This was a fun little project that requires little coding but can be highly customisable and functional. It is also a great introductory project for slightly older kids. I will definitely do this again, maybe an adult version this time with a nicer box and better audio.
Although I have labelled this as a kid's music box, I think a more refined version may be suited for elderlies who struggle with smartphones, Spotify and Netflix.


