I used to sleep in a caravan on my grandparent's property and as amenities were inside the house I had to go in and out of it quite regularly. I got sick of fumbling around with keys to go in and out of my caravan, so this project uses an Arduino Micro, 3x4 keypad, LCD and an electric door strike to unlock the caravan door.
The below video demonstrates the project in action and describes the various features of the system.
Items used in the build:
- Arduino Micro
- 3x4 keypad
- Electric door strike
- 12v Power supply
- Push button – held down while turning the system on to change the pin
- 1x PNP transistor
- 2x16 LCD
- Typical consumables like wiring, solder, heat shrink etc.
Wiring Diagram
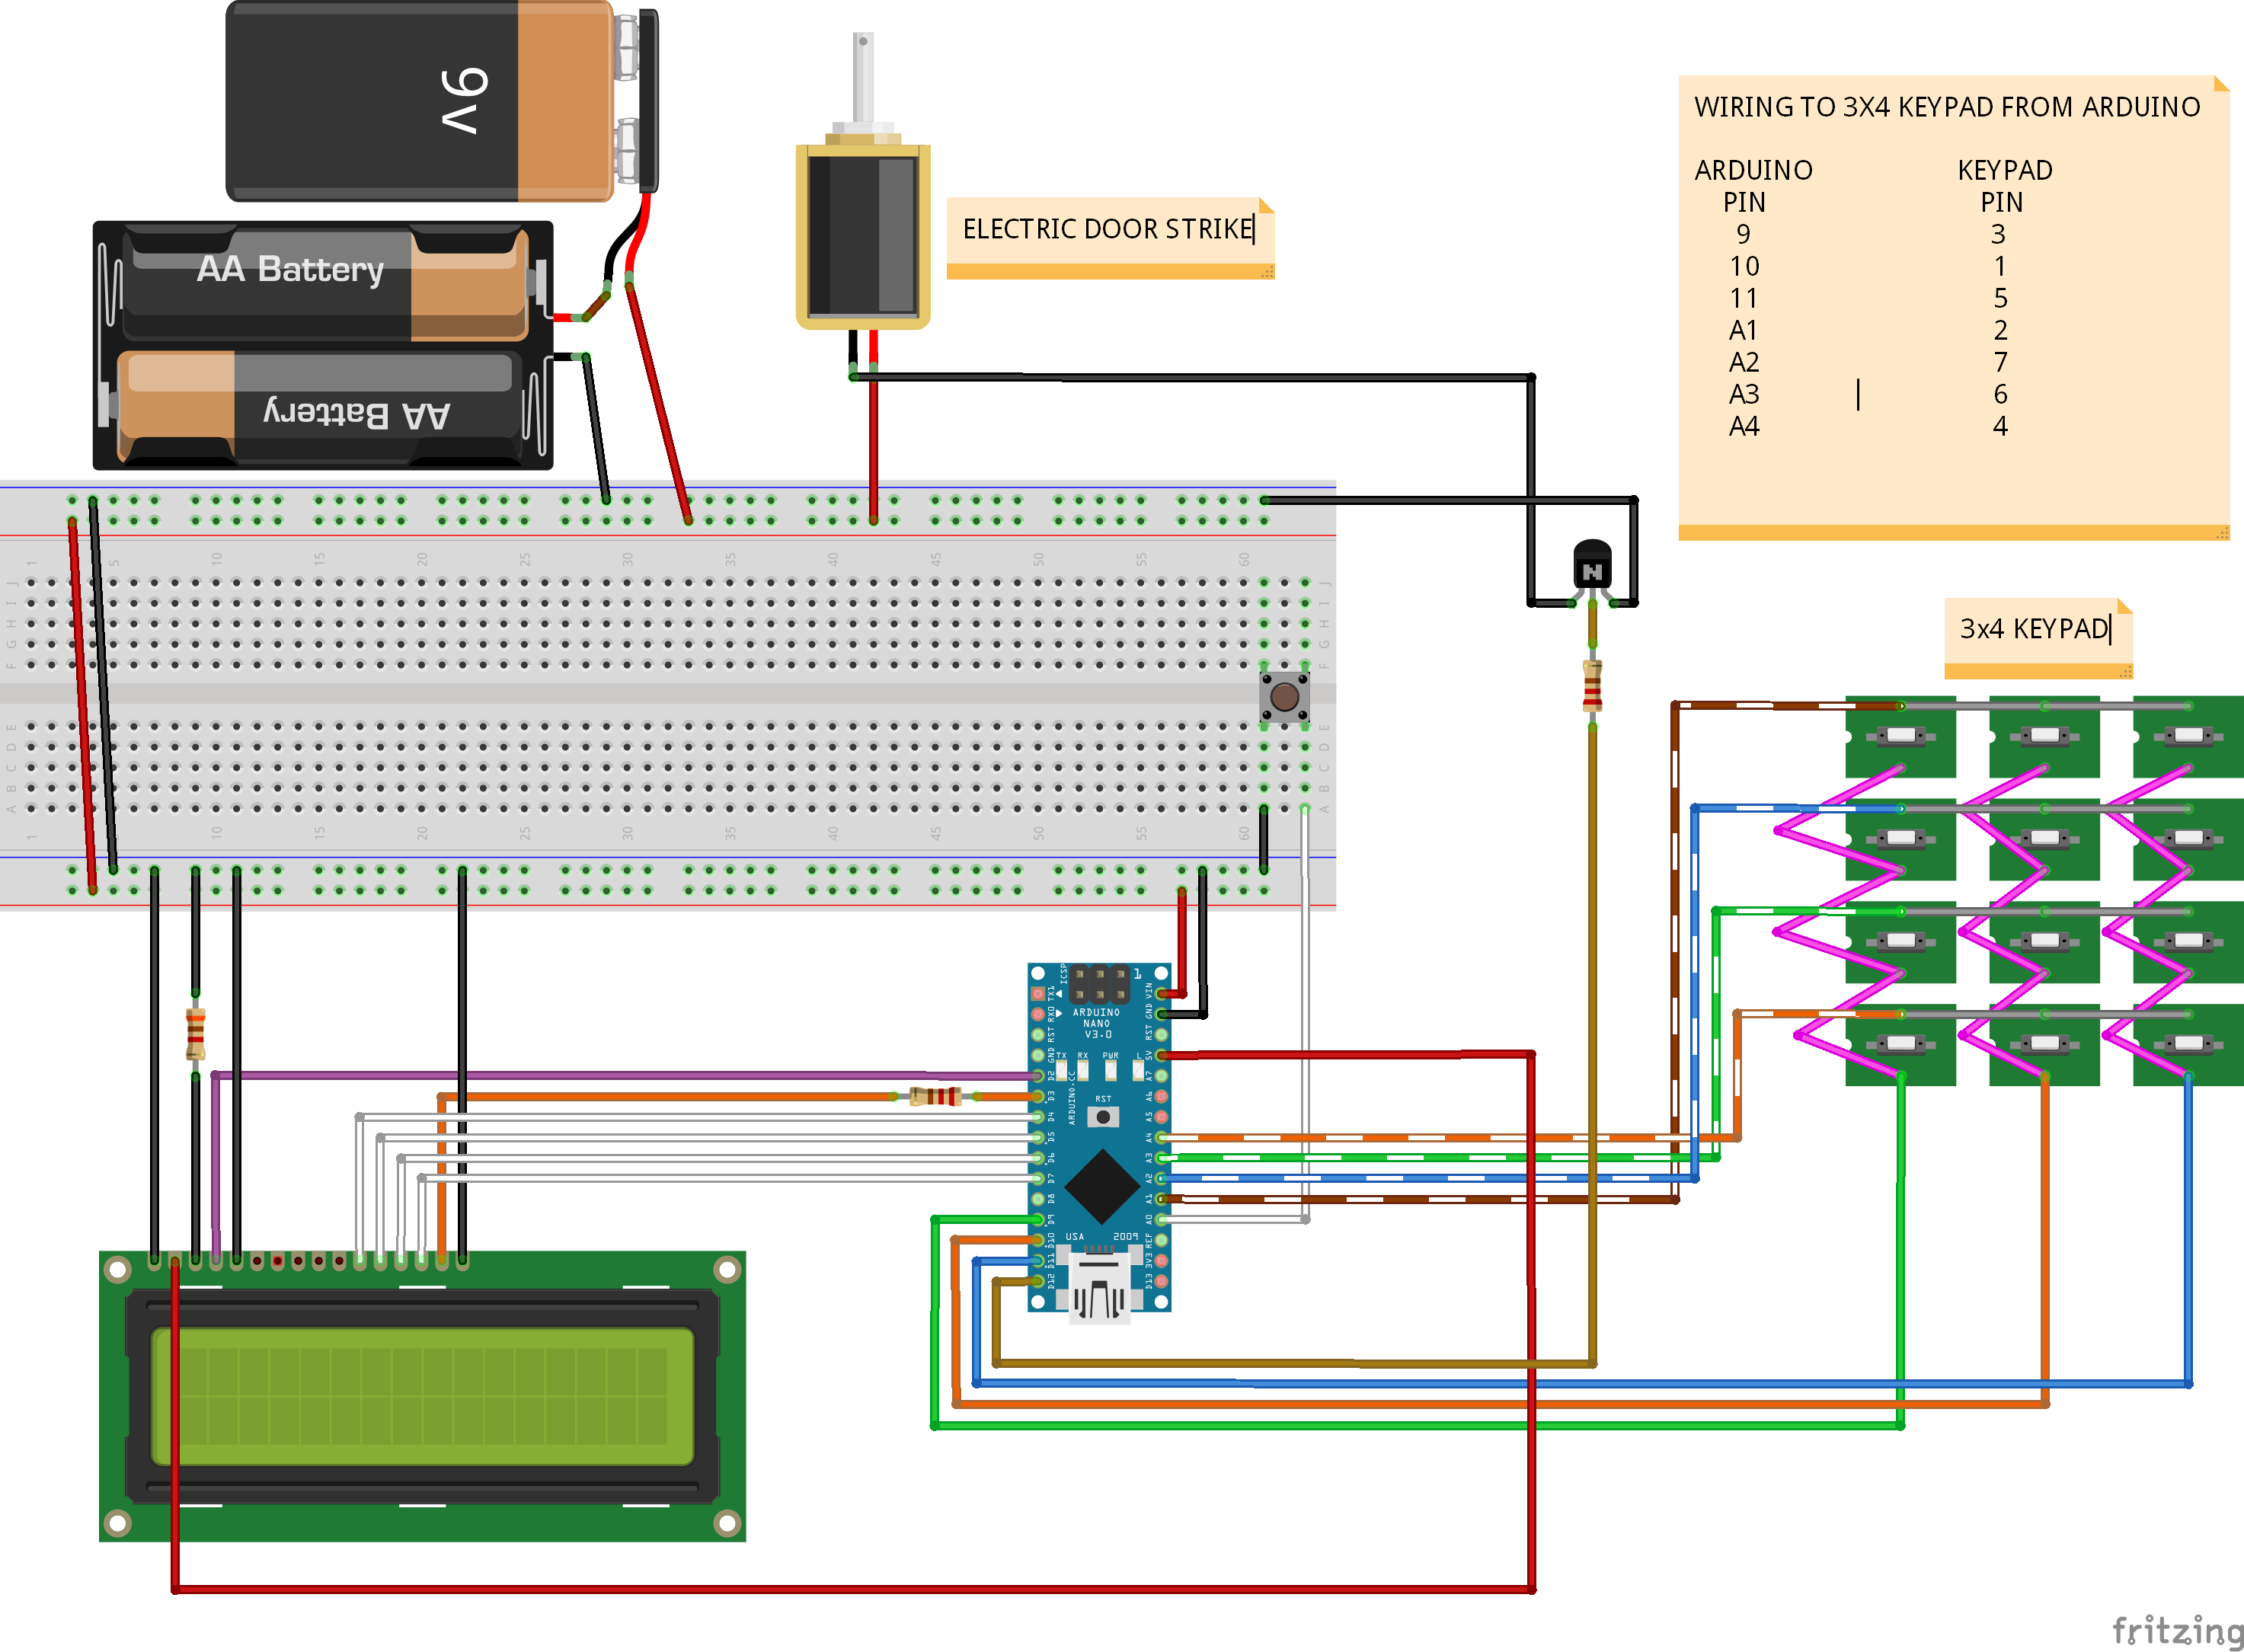
In the above diagram, I have used batteries in lieu of a power supply because I couldn’t find a 12v DC power supply! The 3x4 keypad is shown as a group of momentary push buttons – which is essentially what the keypad is but fitted into a neat circuit board.
When the correct pin code is entered into the keypad, the Arduino sends a signal to the transistor which completes the circuit to the electric door strike lock solenoid, unlocking the caravan door.
I find the best method for any electronics project is to write out the concept, create a test circuit, then create a working model. I followed this process for this project too. I find using a breadboard, Arduino mega and a bench power supply an easy way to test code and see the behaviour before going to the effort of installing the required hardware. For example, I used an LED before I used the transistor and door strike, simplifying the circuit before a real test.
The hardest part of the project was fitting the hardware. I had to make a custom panel to mount the keypad to the caravan exterior and mounting the electric door strike took some effort as I had to cut out the old door strike to fit the electric one.
I used a normally closed electric door strike as power to the caravan is easily cut by pulling the extension cord out. If you do choose to use one of these on your project, ensure that the door can be opened from the inside without power.
The 4 digit pin is stored using the Arduino’s EEPROM memory, so the system will eventually fail as the EEPROM memory has a specified life of 100,00 write/erase cycles. This is not a pressing issue as it will take 100,000 pin changes before it fails.
The code is available in the attachments below - there are two .ino files as I kept the LCD writing functions in a seperate tab to the main code.
Thanks for reading!
