Have you just got your hands on a brand new Makera Carvera and want to get it making chips as soon as possible?
Well, in this guide we will be taking a look at how to set up your Makera Carvera, as well as the Cyclone Dust Collector if you have it. We will be running through everything from getting the machine onto your workbench and getting the tool changer loaded, all the way to running your very first 3D relief carving job.
Before we dive into all of this though, please ensure you still read and follow the official Makera instruction manual included with the machine. It contains some incredibly important catches and troubleshooting steps. If your machine doesn't do exactly what it should, the manual is where you will find the specific fix. Think of this guide as a handy primer to complement the written instructions.
Let's get right into it!
Unboxing and Assembly
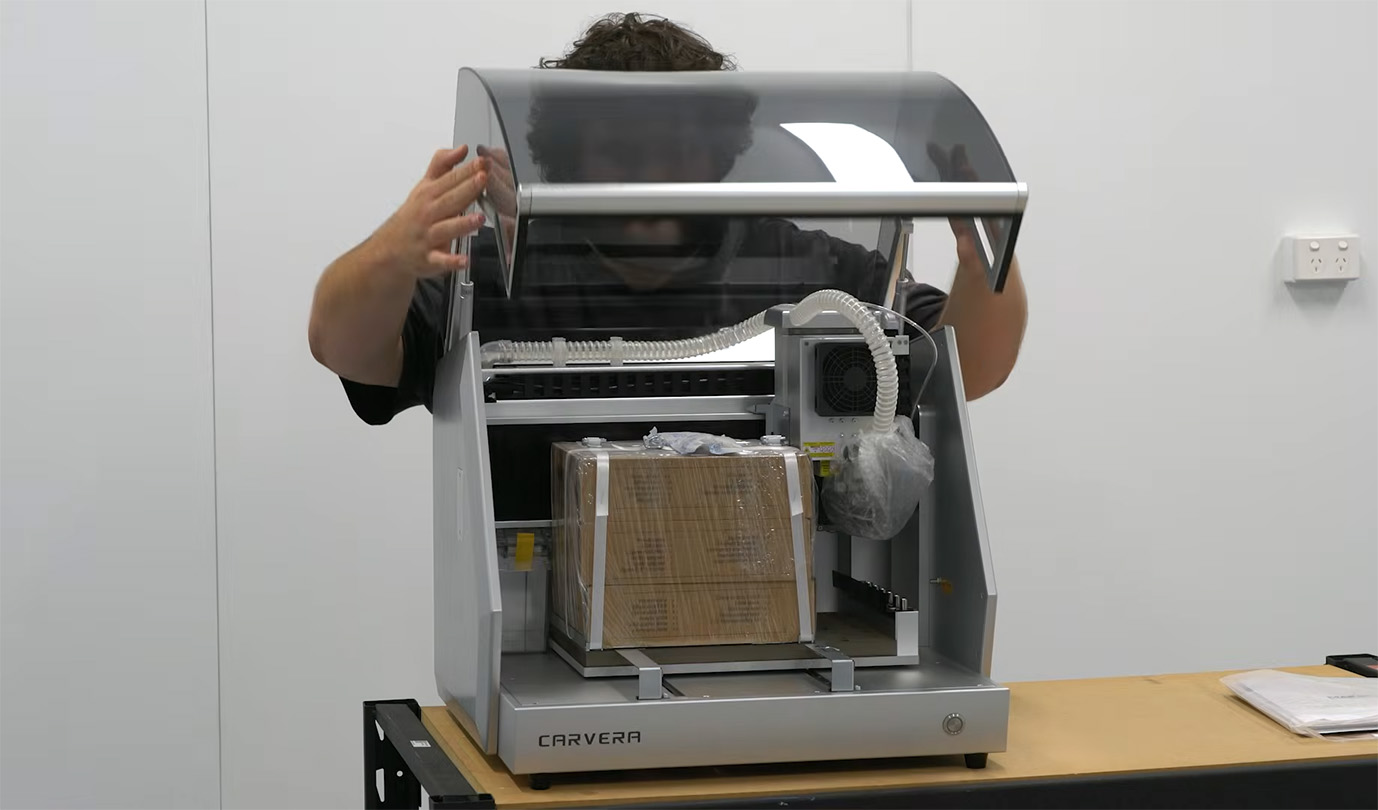
Starting off, it's worth noting that this machine is quite heavy. The box it arrives in weighs about 65 kilograms, and the machine itself is about 50 kilograms when fully unpacked. Getting the Carvera out of its packaging and onto a sturdy workbench is absolutely a two-person job—and remember to lift with your knees, not your back!
Once it's safely on the bench, the machine itself is fairly ready to go out of the box. There are just a few small things we need to do to get it prepped for cutting.
First of all, open the doors and remove the bundle of parts boxes from the inside of your machine. You should find a tool box containing all your bits and clamps, the accessory box with all the cables and extras you will need, and the materials box containing some stock to use in the example cutting guide.
Because it's a precision machine, it ships with transit brackets to stop the heavy axes from moving around during transit. You will need to remove the 7 screws from the mounts holding the bed in place, the 3 screws holding the spindle carriage in place, as well as the tape on the dust collector. It is highly recommended to keep these brackets and their screws safely stored away in case you ever need to move your machine to another workshop down the track.
Under one of those bed mounts, you will find an Allen key and some extra bolts. You will need to screw two of these into the panels on the front of the machine, and two into the head of the machine. These go into the exact same holes that were just used to mount the transit brackets.
![]()
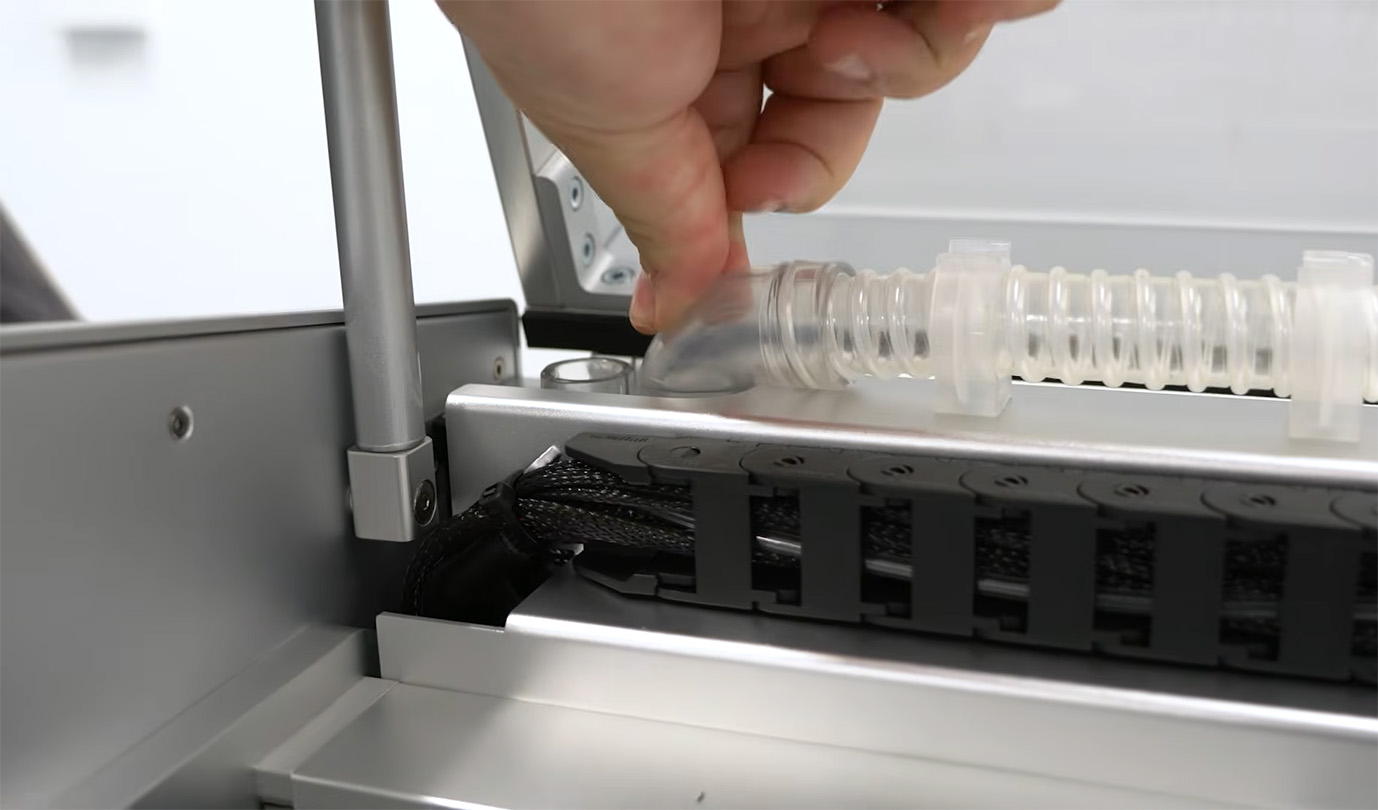
Finally, the machine will come with its dust shoe locked in the raised position. To release it, simply pull out the black knob out, then rotate it about 30 degrees. This will allow the shoe to move freely up and down. Have a bit of a play with locking the shoe up and unlocking it, as you will likely be doing it quite often when setting up jobs. For now, leave it in the down position, but ensure it is not locked in place as you want it to be able to freely move.

If you follow the dust shoe’s corrugated tube upwards, you will find that it can be connected to one of two inlets. The inlet on the left utilises the Carvera’s inbuilt dust collector vacuum system, while the inlet on the right connects the shoe directly to the standard-sized 22mm (or 7/8-inch) hose connector on the back of the machine.
Now, the inbuilt dust collector on the Carvera is capable and probably good enough for most of your everyday jobs. However, we will be setting up the external Cyclone Dust Collector alongside it. Because we are running this machine in a nice, clean workshop, the Cyclone will catch that extra bit of fine dust and keep the room much cleaner in the long run. If you don't have the Cyclone, using the built-in collector is just fine, or connect your own on the rear port.
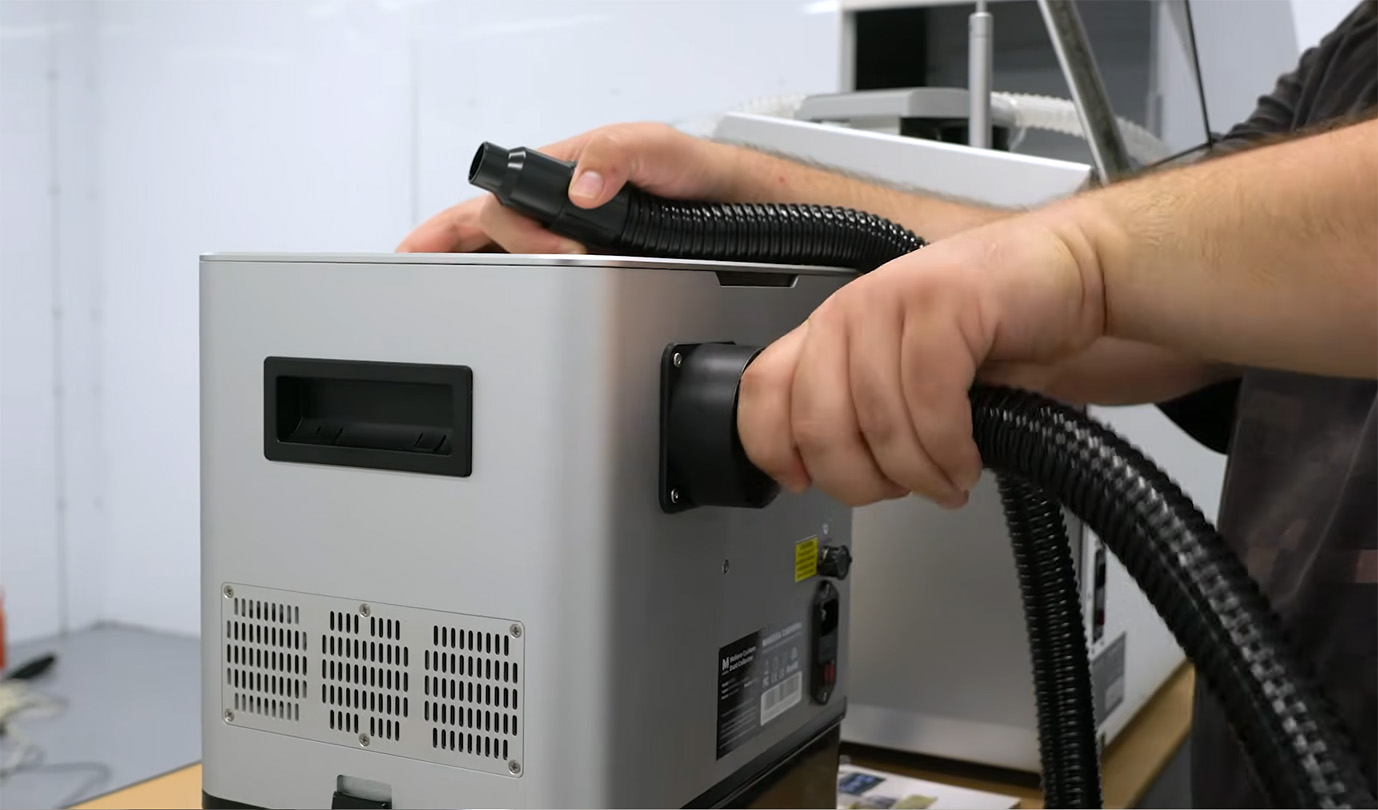
If you open up the base of the Cyclone, you will find all your necessary parts tucked away inside. To get it connected, you just need to lock the hose onto the back of the Cyclone and press the other end securely into the Carvera’s air outlet.
While digging through those parts, you will also find a control cable for your Cyclone. Now, don't stress if you can't find a place to plug this in—unfortunately, the standard Carvera doesn't actually have a connector for it! This automatic control port is a feature found only on the newer Z1 and Carvera Air models. All this cable does is allow the machine to turn the Cyclone on and off automatically, so leaving it unplugged just means we will be turning our dust extractor on and off manually without any issues.
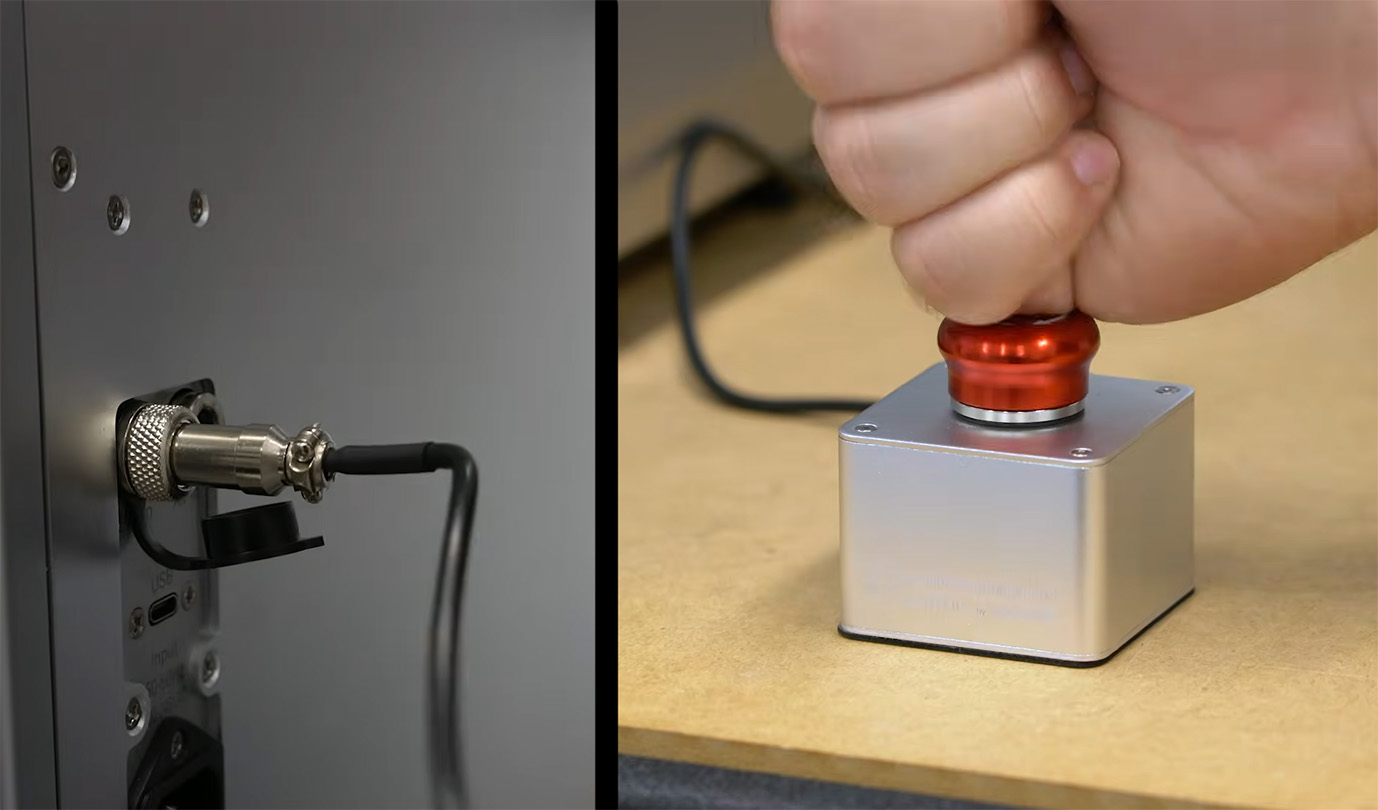
On the back of your Carvera, you will however find a dedicated connector for your Emergency Stop (E-stop) button. This is incredibly important from a safety perspective, so plug it in and place or mount the button in a spot that is easy to reach in a hurry in case things go wrong.
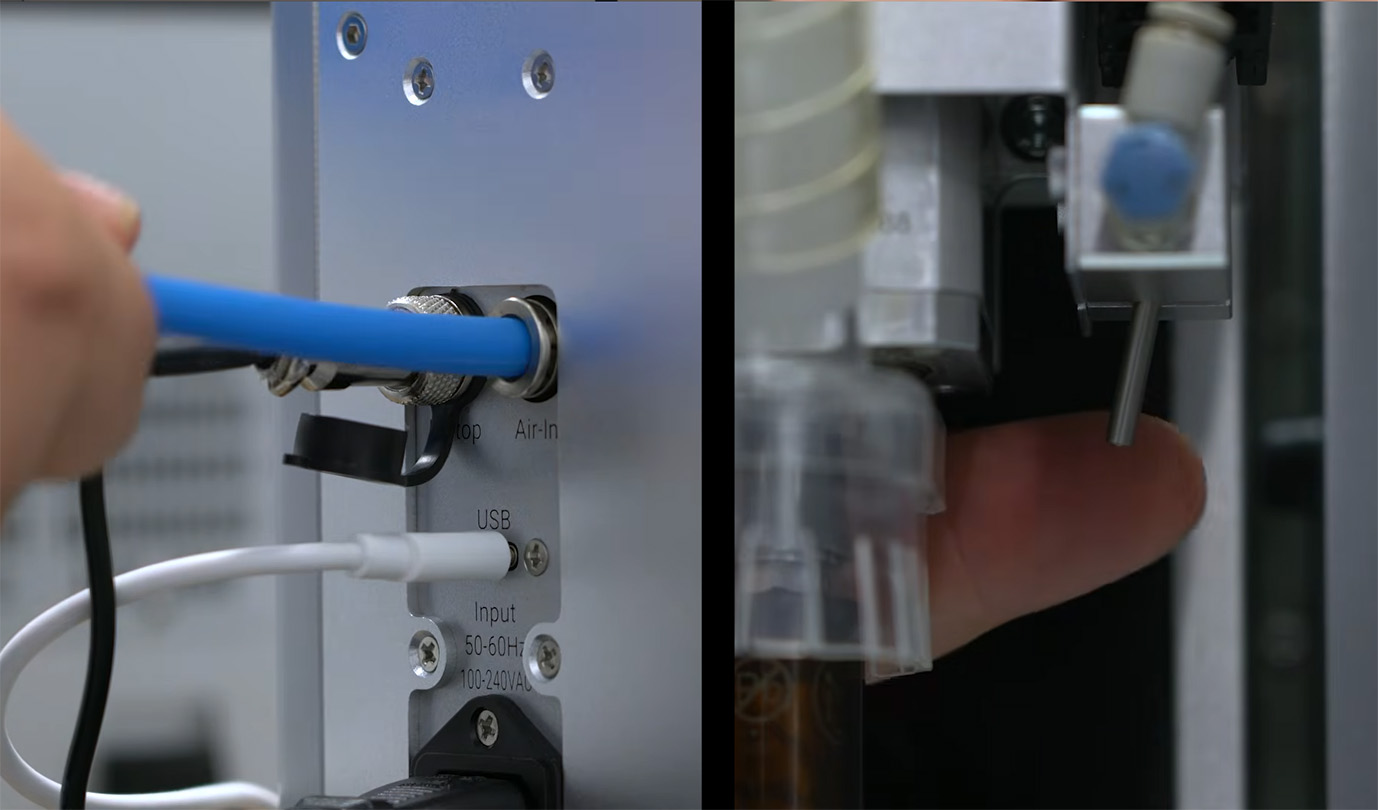
Also on the back of the machine, you will spot an 8mm air inlet for the Carvera’s air assist feature. Now, you will need an external source of compressed air to utilise this feature, but you can absolutely get away without using it, which is exactly what we are doing for this guide. Essentially, the air assist is your go-to when the standard vacuum and dust shoe won't quite cut it. For example, if you are using the 4th axis rotary module, the dust shoe simply isn't going to fit or be effective, so a blast of air is needed to clear away the chips. It can also be super handy when milling metals to clear out the cutting path, or when using the inbuilt laser to get a much cleaner, scorch-free engraving. It isn't essential to get running on day one, but if you plan on doing any of those specific jobs, it might be a worthwhile feature to have. A quick search online is always a good idea to determine if your specific material or job needs air assist.
If you do decide to hook up the air assist, simply pull out the little blue knob on the spindle carriage and rotate it to open the air valve, then go ahead and angle the articulated nozzle so it blows directly onto the tip of your cutting bit. Crucially, if you are using the air assist, you will also need to raise and lock the dust shoe up out of the way. You can't use the dust shoe and the air assist at the same time. It's always one or the other.
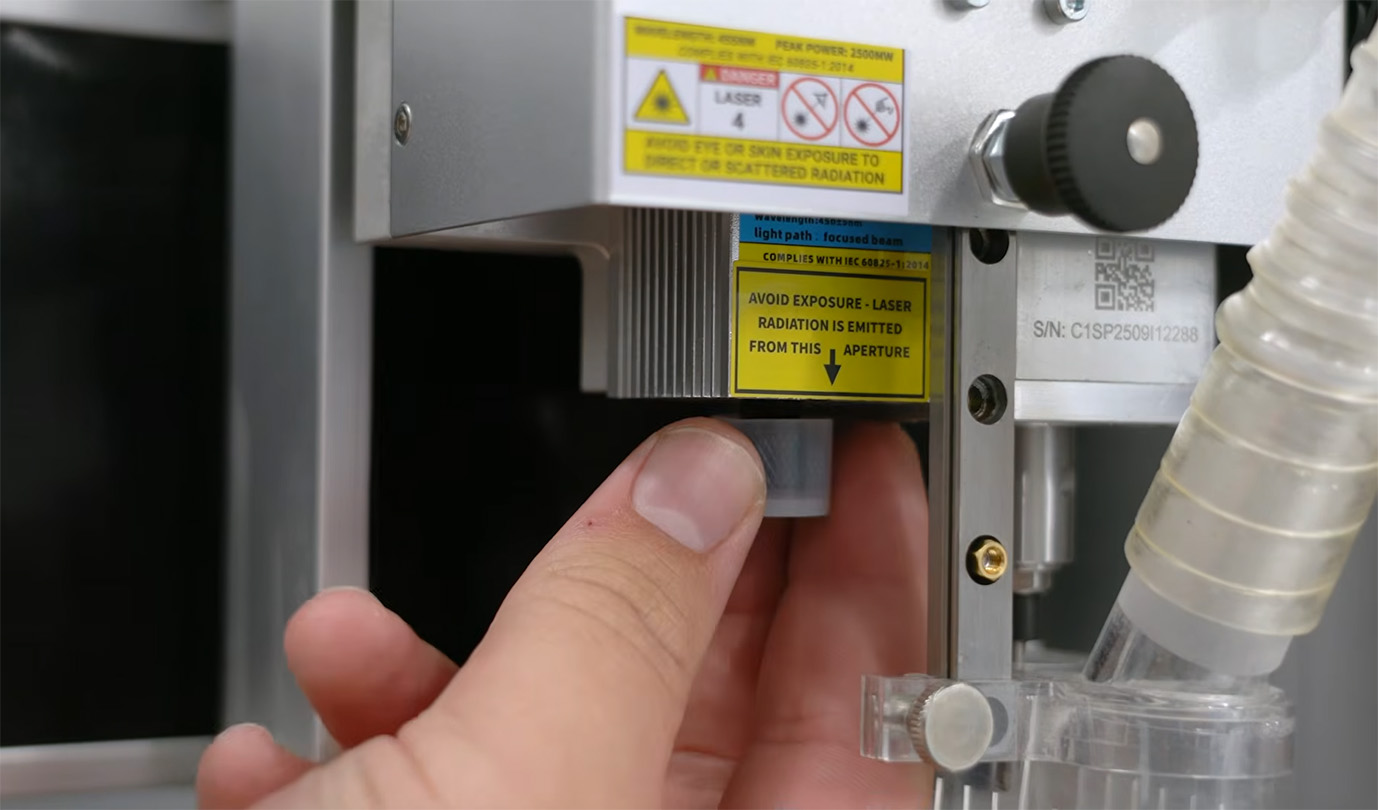
Just a quick note while we are looking closely at the spindle carriage: on the bottom side, you will find a protective cover over the laser module lens. Obviously, you will need to remove this cap when you are actively using the laser for engraving, but if you are just CNC routing or milling, leave it firmly in place to protect the delicate lens from flying dust and debris. Make sure you don't accidentally pull it off during this initial setup!
Loading the Auto Tool Changer
Alrighty, one more step before we fire it up: placing the tools in the tool changer. Now, there is a dark little joke of a warning sign you might see around CNC machines that reads something like, “This machine does not know the difference between metal and flesh, nor does it care.” So, whenever you are sticking your hands inside the machine to change bits or clear dust, ensure that the E-stop is pressed in, and maybe even switch the machine off entirely just to be incredibly safe.
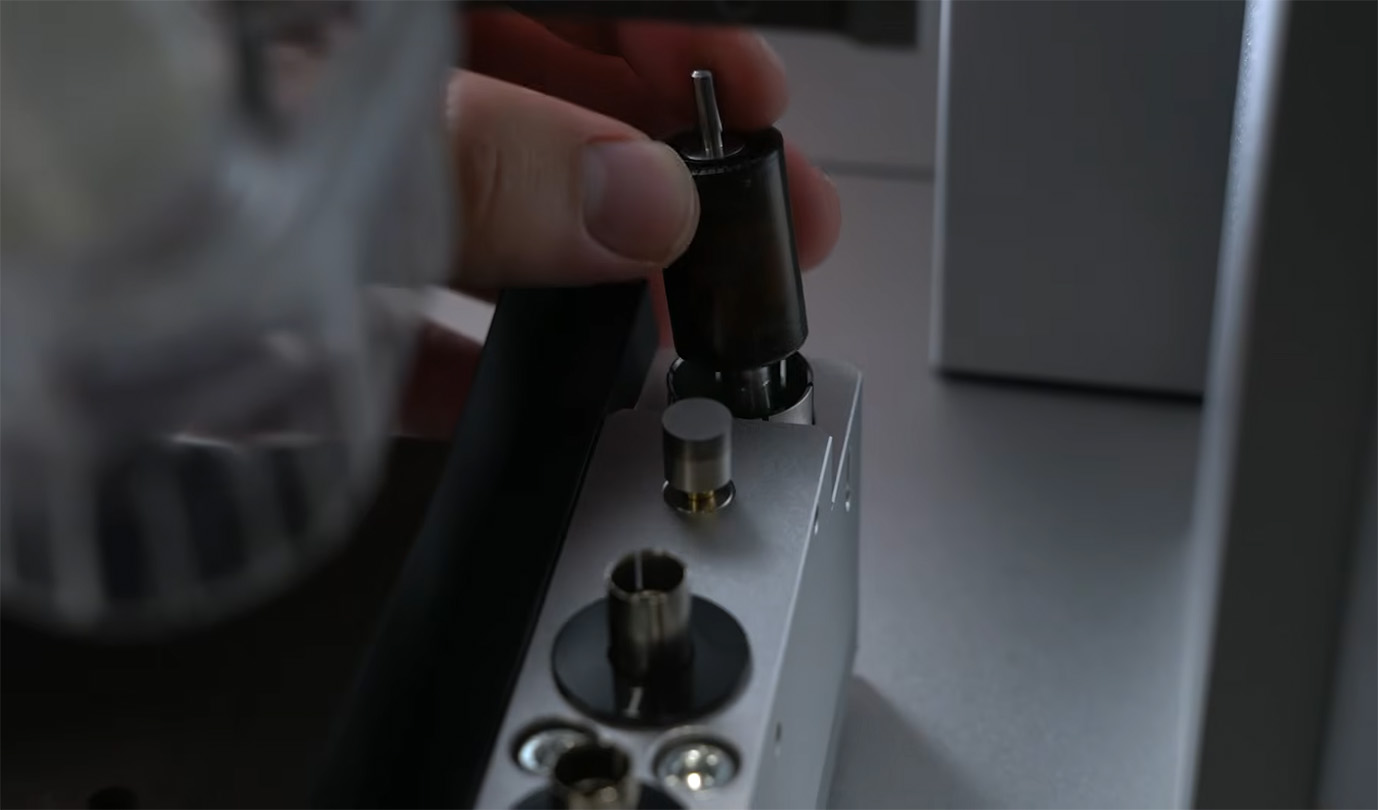
First up, pop in the wireless probe which can be found in your accessories box. This just needs to be firmly pressed into the rear slot, and it will automatically charge whenever the machine is turned on.
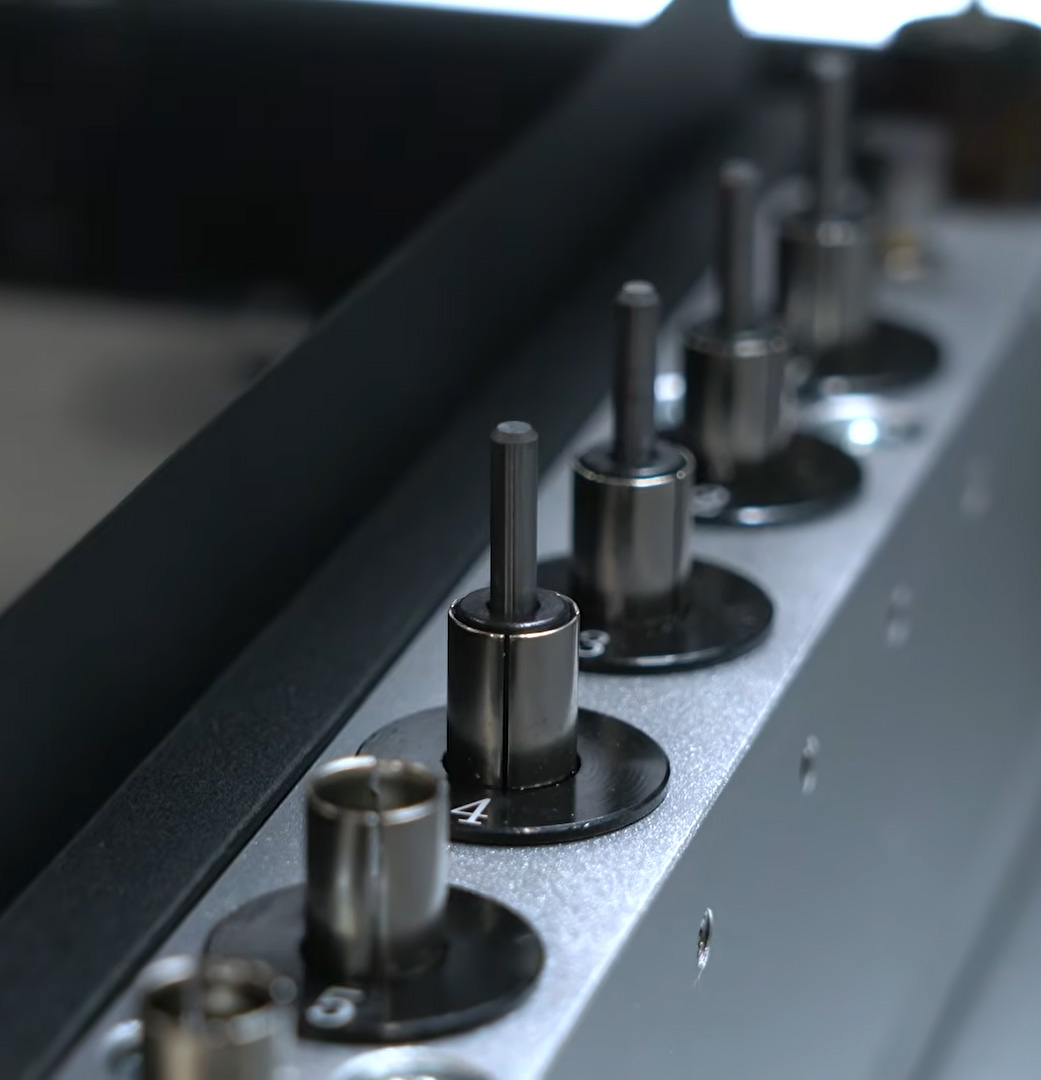
In your toolbox, you will find a series of bits to load into the tool changer slots. There is a recommended order for these, and loading them like this will order them correctly to follow the example tutorials:
- Tool Slot 1: 3.175*25mm single-flute bit (Yellow lid). This will be your main cutting bit for everyday things like plastics and woods. Single-flute means that it has one cutting tip (sometimes you can get 2 or more), and the numbers mean it is 3.175mm wide and 25mm long.
- Tool Slot 2: 30°*0.2mm single-flute engraving bit (Orange lid). This bit has a tiny 0.2mm tip that is used for highly detailed engraving work. The 30° refers to the angle that the V-shape of this tip comes in at. This is the finest engraving tip in your toolbox, but you will also find some extra bits with a wider tip (0.3mm or 0.5mm) for less-accurate, but faster engraving jobs.
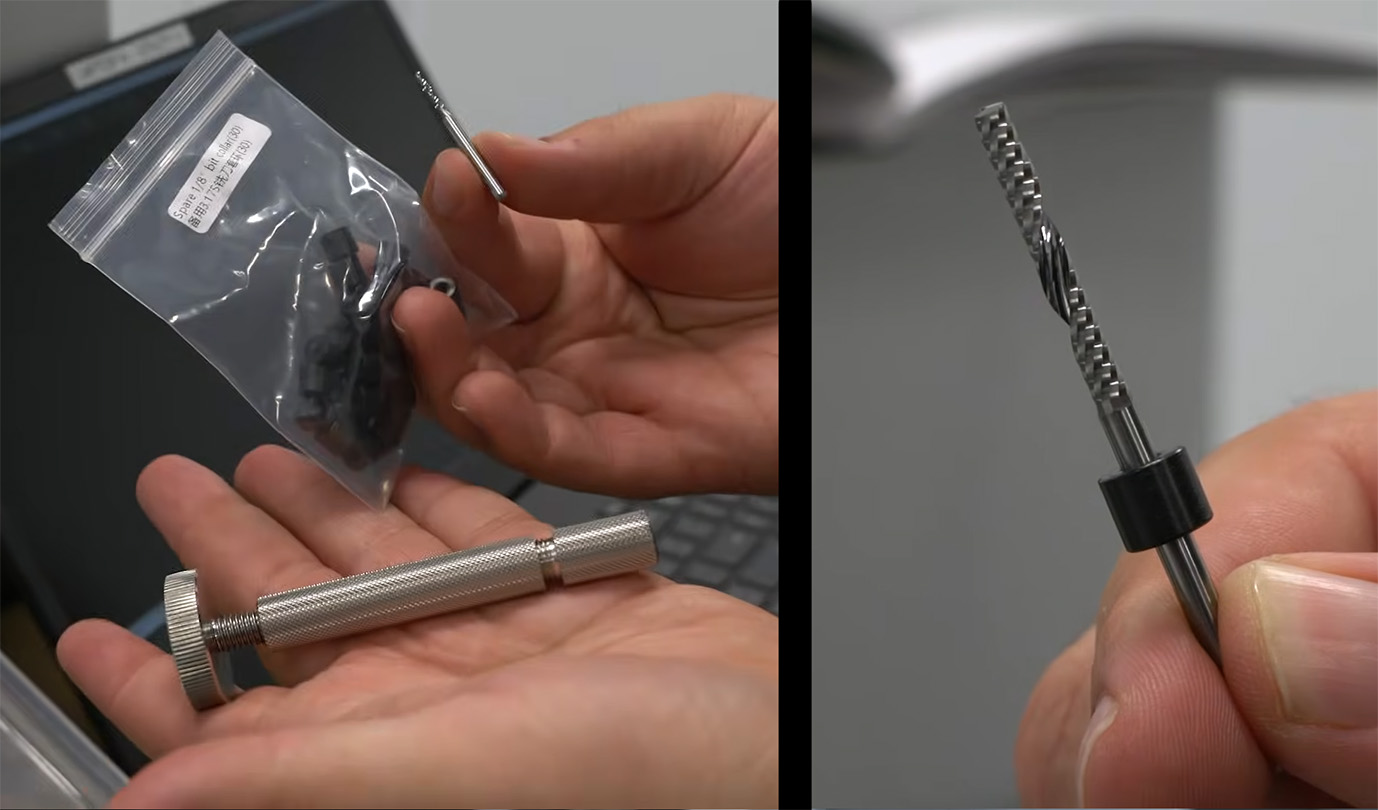
- Tool Slot 3: 0.8mm*5.5mm corn cob bit (Yellow lid). This is your go-to bit for milling composite materials like fibreglass, carbon fibre, and PCBs. The 0.8mm represents the cutting diameter (how thick of a line it will cut), and the 5.5mm represents the cutting length - the actual depth you can cut with this bit.
- Tool Slot 4: 3.175*12mm single-flute bit (Green lid). This is similar to the first bit, but it's shorter and designed specifically to mill metals. The shorter length helps prevent the bit from snapping, and gives a cleaner cut as it is less likely to "wobble" around while it's cutting.
- Tool Slot 5: UV solder mask removal tool (Optional). Pop this one in here if you bought the PCB manufacturing kit. If you do not have it, do not worry.
- Tool Slot 6: 1/8th-inch test rod (Keep Empty). The machine comes with this test rod living in the spindle already. If you don’t use the machine for a while, you need something clamped in the spindle to help keep the clamping mechanism happy, and this is designed to be the tool that stays there.
Now, you don’t always need to have the tools in this exact configuration, you can change it up to whatever you need for your own jobs. If you have other custom bits in mind, there is an included tool to attach the proprietary bit collars to them, making your own bits perfectly compatible with the automatic tool swap system.
And with that, we can finally plug in and turn on our Carvera and Cyclone! One little thing to note: it is highly recommended to fully charge the wireless probe before running your first job. It has a little yellow light on it indicating that it is charging, and this will turn off in about 30 minutes when it is full and ready to go.
In the meantime, we can start setting up the Carvera Controller software. Now, we did set up the mobile device stand earlier, but we will actually be installing the software on a laptop and plugging the machine in via the included USB-C cable, as we find it to be a bit more reliable for longer jobs. Please do not use a random USB-C cable from your drawer for this—it needs to be a high-speed data cable like the one included in the box. So, go ahead and install Carvera Controller, and that’s it! Your machine is done, dusted, and ready to get cutting.
Running a Demo Job
Makera does include some fantastic example cutting tutorials if you want to follow along and learn the workflow. To wrap up this guide, we are actually going to go ahead and complete the 3-axis relief example.
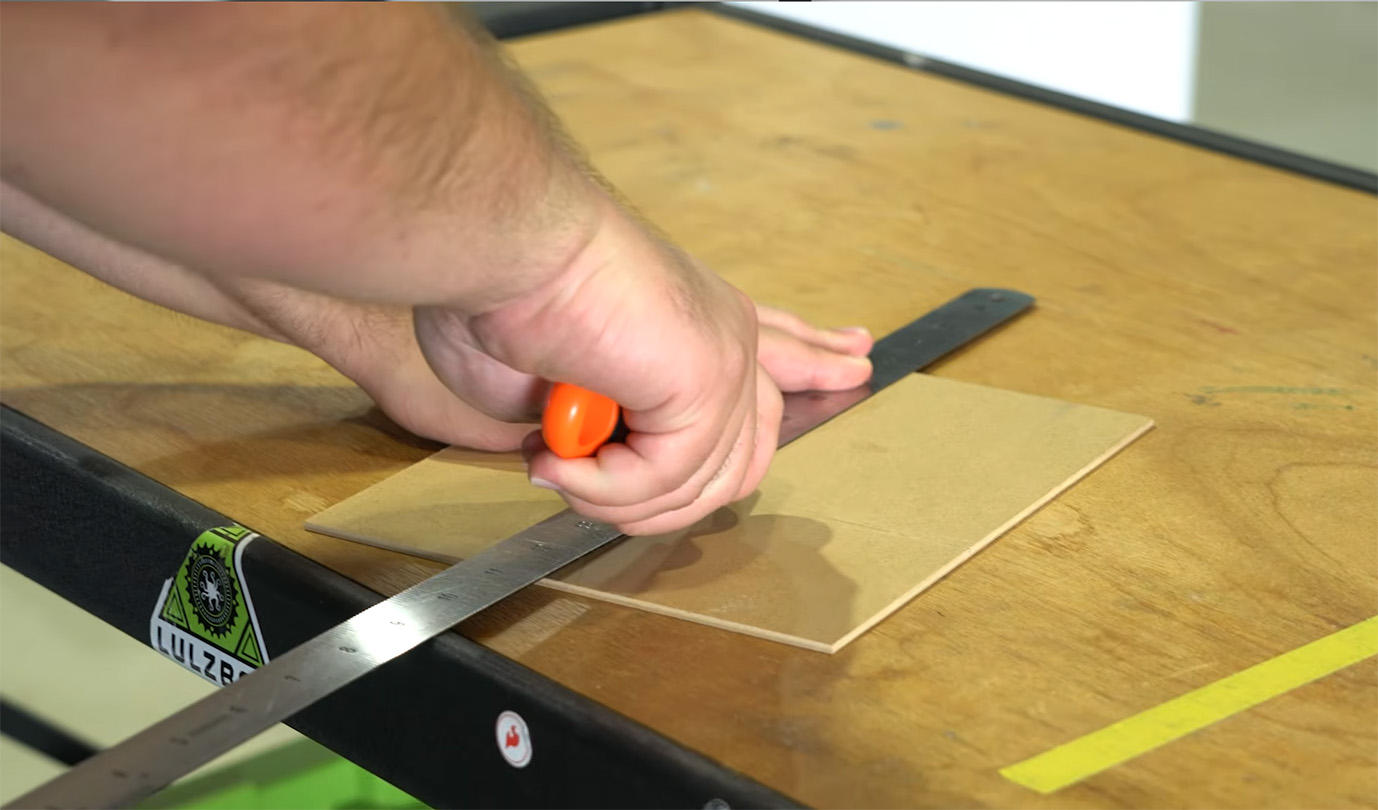
To prep for this, you will need to go into your materials box and grab a sheet of the white epoxy tooling board. You will then also need to cut down a sheet of 2mm MDF wasteboard to 100mm by 150mm (also included in the materials box). This wasteboard will be placed directly under the tooling board to protect our beautiful aluminium bed from being accidentally damaged by the milling bit.
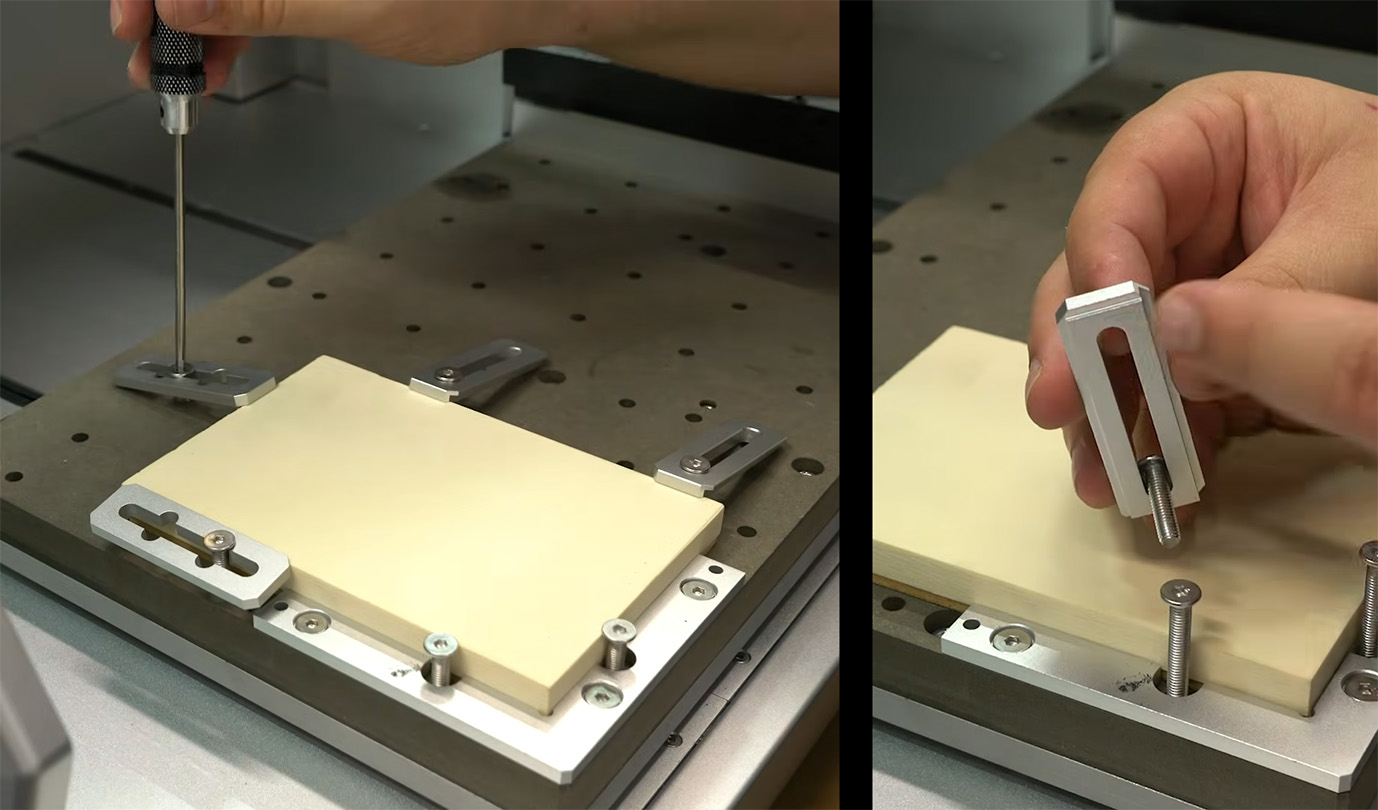
Now that we have our MDF wasteboard and epoxy tooling board ready, grab the low-profile L-bracket from the tool kit. With the shorter bolts, mount this bracket to the bottom left corner of the bed. Then, place your stock (the wasteboard with the tooling board on top) nice and flush against this bracket. Using the longer bolts, start clamping it all down with the four provided clamps.
Take a close look at the edge of each clamp as there is a little lip that needs to sit directly on the edge of your stock to hold it down securely. Ensure you firmly tighten all of this in place. Be careful not to comically overtighten it to the point of breaking things, but it needs to be tight enough to hold everything perfectly still. The spinning mill bit will be putting a lot of lateral force on the material and will actively try to rip the stock away from the bed.
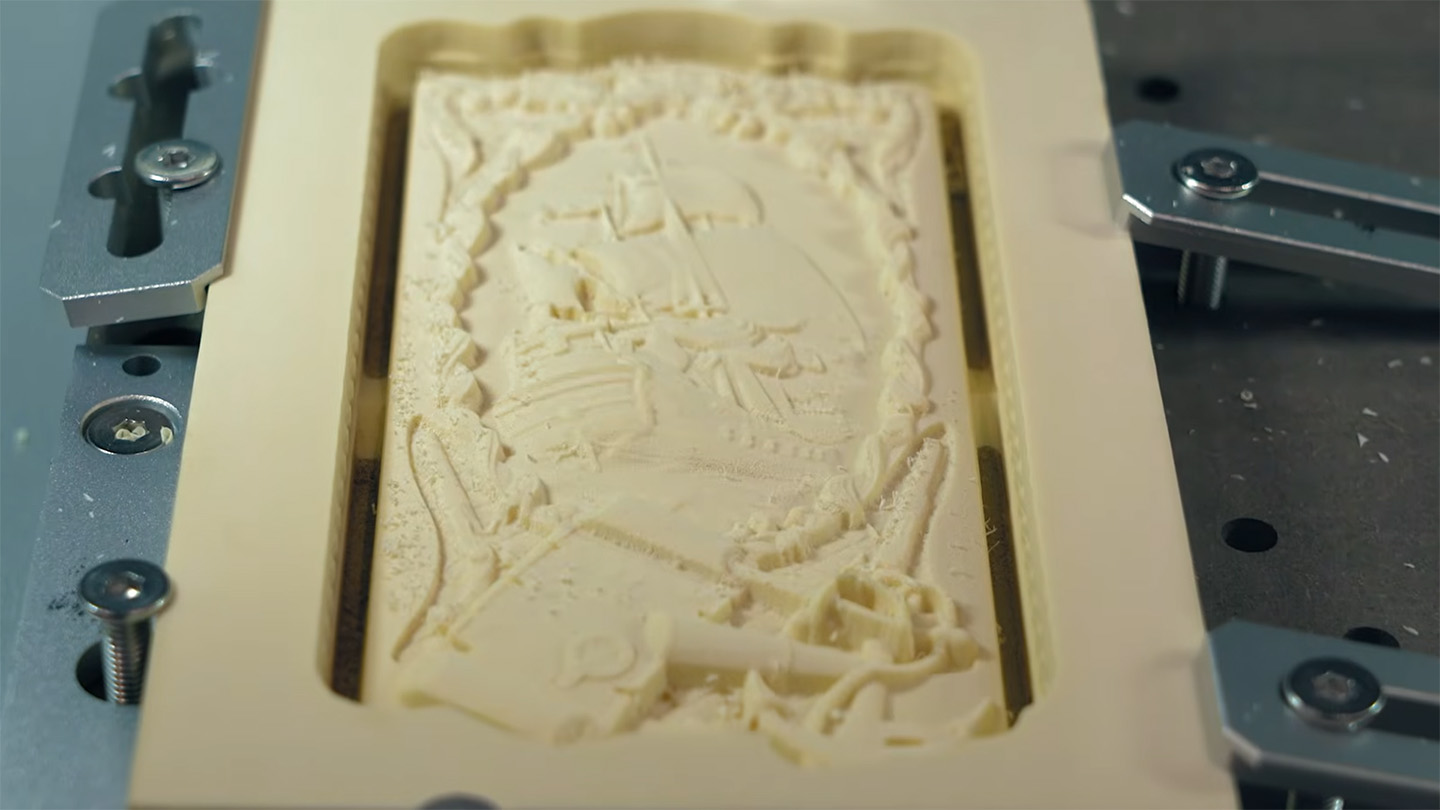
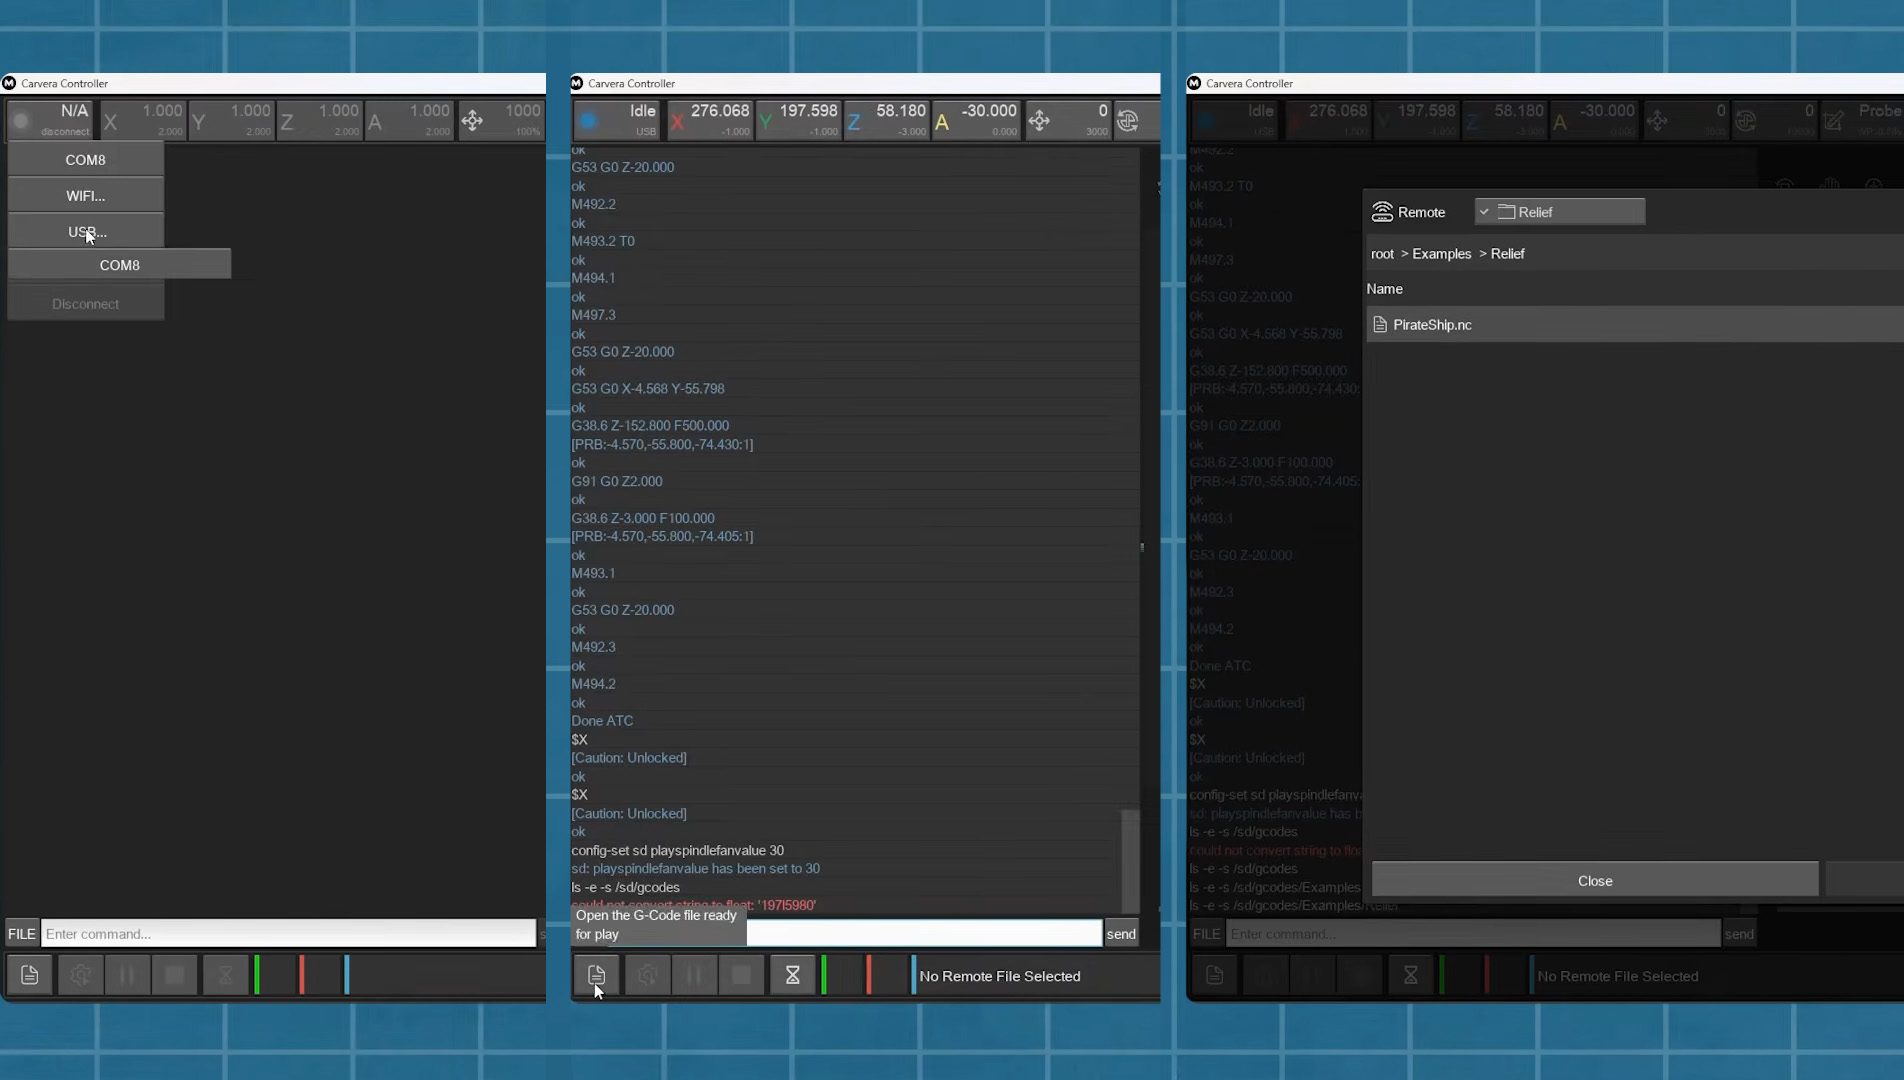
Now, go ahead and open up the Carvera Controller software on your connected device. In the top left corner, connect to your machine via USB and select the COM Port it is using. In the bottom left, we are going to open a G-code file. Navigate under the Examples folder, then to Relief, and you will find the Pirate Ship file.
Usually, to get to this point, you need to use CAM (Computer-Aided Manufacturing) software like MakeraCAM or Makera Studio to generate the G-code, which is the programming language that actually tells the machine how to move and cut your part. Thankfully though, Makera has already done all the hard work for this demo, and we can just open the pre-made file.
In the bottom left corner, hit the button to start running the G-code (the button next to the one that opens a G-code file), and a little settings window will pop up. We will then go ahead and set the Work Origin by pressing the "Config" button underneath it. This is where we tell the machine exactly where to start cutting from. Set it to Anchor 1, and offset it by 3mm in both the X and Y directions.
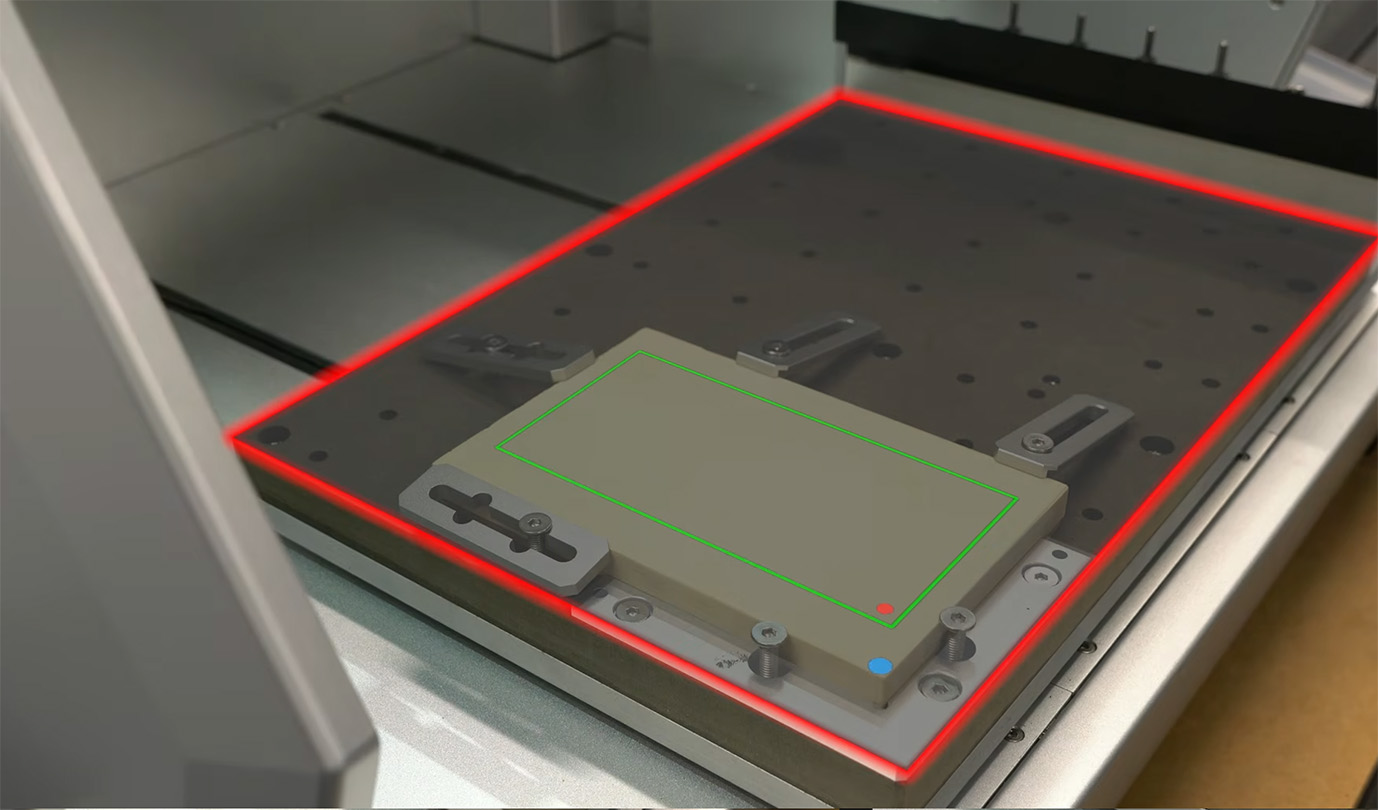
To break that down: Anchor 1 is the inside corner of that L-bracket we installed. By adding the 3mm offset, we are telling the machine to move 3mm inwards from that corner before it starts working. Usually, you would want to move in a bit more for safety—maybe something closer to 10mm or 15mm—but as you can see by the green bounding box on your screen, our cutting area is well clear of our clamps, so we aren’t going to accidentally cut into our hardware.
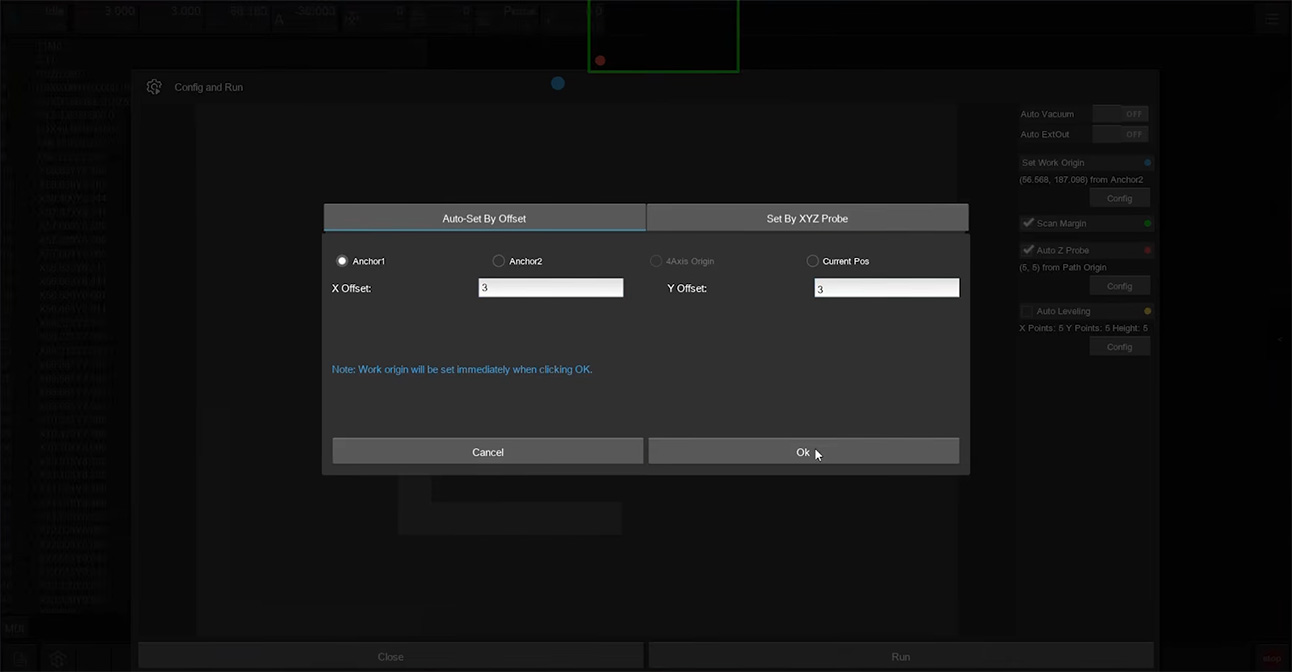
Next, under the Z Probe Config, we are going to offset that by 5mm in each direction from the path origin. This tells our machine to physically move 5mm inwards from the corner of that green box before it drops the wireless probe down to measure the exact height of our material. The image on the right shows what the lines on your screen represent on the machine itself.
And with that set, we can close the lid and hit run! If you are using an external vacuum system like the Cyclone, turn it on now as well. We found that setting the Cyclone to about 60 percent power is a great number for a dusty job like this.
The machine will automatically grab the first tool bit to do what is called a "roughing run." This is where it rapidly cuts down the bulk of the material to get the general shape. Once that is done, it will automatically swap to the second bit (the fine engraving one) and run through a very slow, highly detailed finishing run. This whole process will take a little over 2 hours, so grab a book, catch up on some videos, or do some tidying—just remember that you should never leave a CNC machine unattended while it is cutting.
When it is finally done, you will have your piece mostly cut out of your stock. The machine will purposefully leave these little "tabs" behind. These tabs hold the part in place attached to the main stock so it doesn’t break loose, get caught by the spinning bit, and get violently thrown around the enclosure. You will just need to manually cut these tabs off with a blade or flush cutters and give the edges a quick sand down. There should be a little pen saw included in your materials box.
And with that, you have just successfully cut your very first piece on your Makera Carvera! And damn, is it pretty intricate. This was a long job because it was so detailed, but it is incredibly nice to have a highly complex piece right off the bat to flex what this machine can actually do.
And that is your first part cut! If you need a hand with anything from this guide, or you have any general Makera Carvera questions, feel free to head on over to our Maker Forums, or drop a comment on the forum at the bottom of this page. We are all makers over there and are always happy to help out.