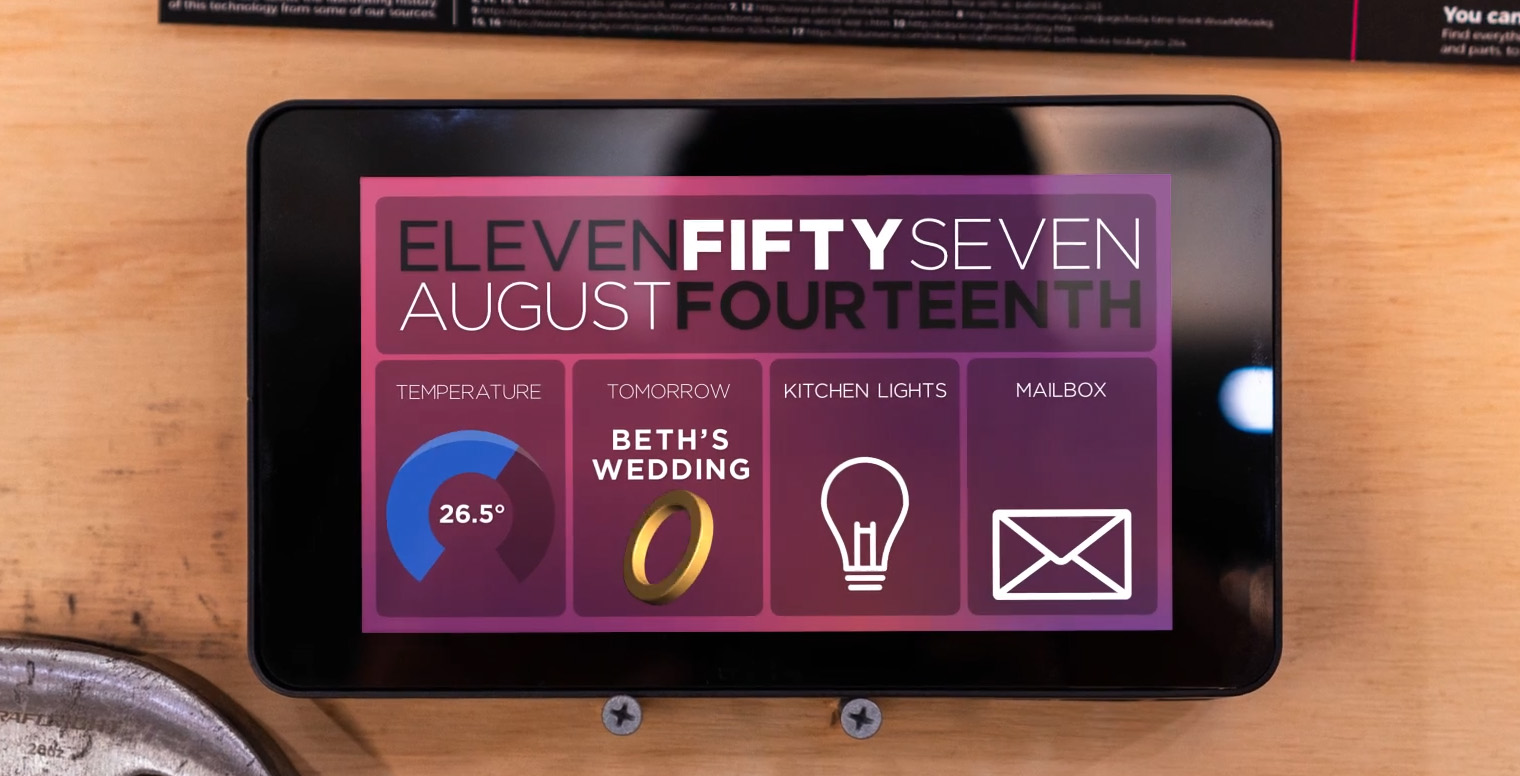
In this guide, we will be transforming your Raspberry Pi into a bespoke device to interface humans with the web. This guide will walk you through setting up a Pi as a dedicated kiosk device, meaning it will seamlessly and automatically launch a fullscreen webpage every time you boot up it - no mouse, no keyboard, and no inputs required. Whether you want it to open your Home Assistant dashboard, Callender, or even pull live weather data from the internet, this device will turn any display into an information-rich powerhouse for your business, home, or maker project.
In this guide, we will first be taking a look at how to get your Pi to launch into Kiosk mode (with both Wayland and X11), and then we will be learning how to automate mouse movement and simulate keystrokes to interact with webpages, in case you need to refresh your page, or cycle between different pages. We will also be looking at how to set up this fantastic little case for the Pi 5 and touch screen - but this guide will work for nearly any display.
What You Will Need
For setting up your Pi in kiosk mode you will need a:
- Raspberry Pi - Nearly any Pi will work with this, but for this guide, we will specifically use a Pi 5. You don't need a massive amount of RAM either, 2 GB should be plenty enough.
- Mouse and Keyboard
- Micro SD Card - At least 16 GB in size.
- Power Supply
- Micro-HDMI to HDMI Cord
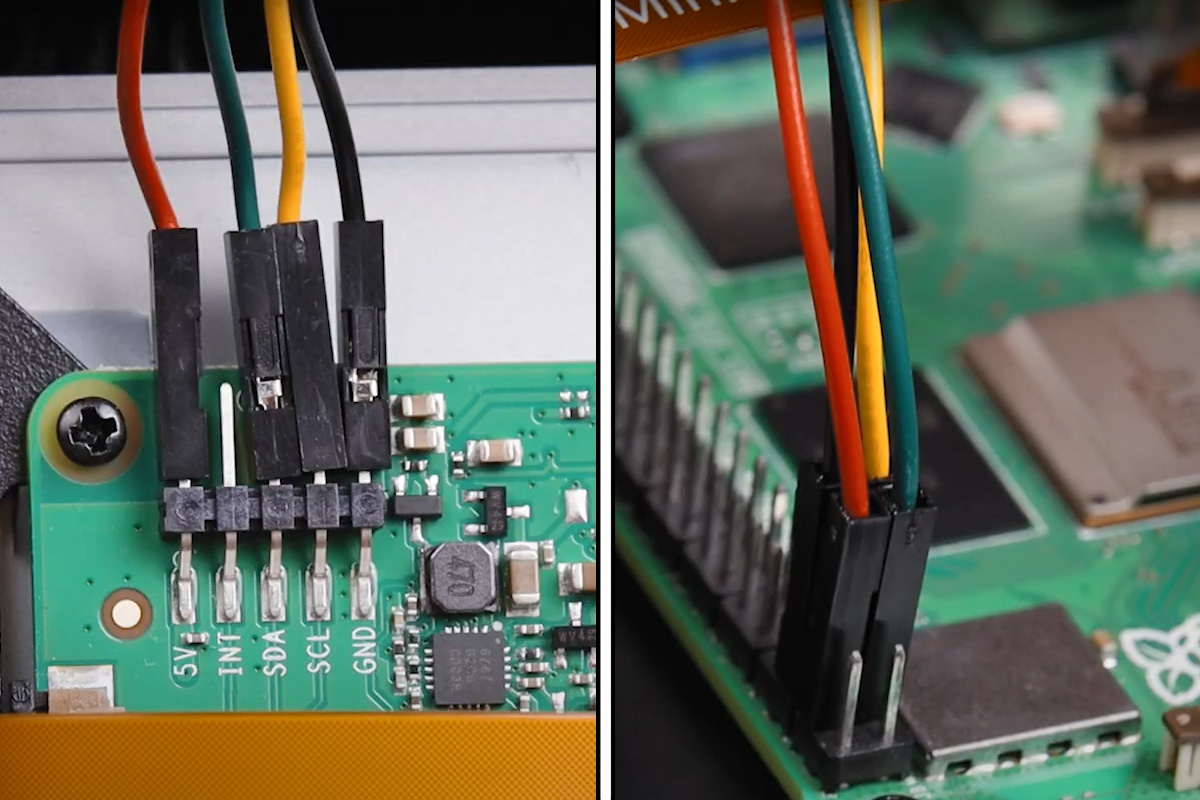
- Display - Again nearly any display will work (even a computer monitor), but we will be using the official touch screen. NOTE: If you are using a Pi 5 with a screen that connects via DSI (the onboard connector), the Pi 5 comes with a different connector and you may need an adapter cable. If you have the KKSB case, it already comes with one.
To make the KKSB Kiosk you will need:
- A Raspberry Pi 5
- The KKSB Case
- The Pi Official Touch Screen
- A Power Supply
Assembling the KKSB Case
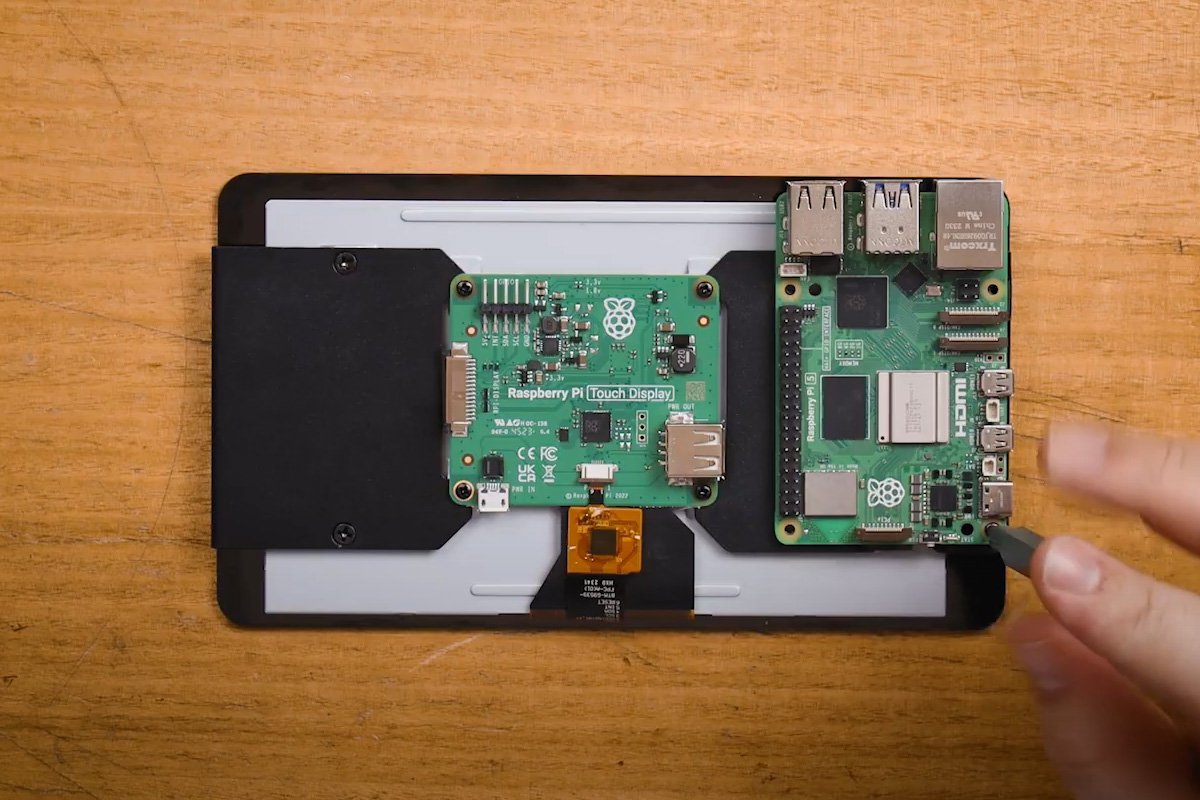
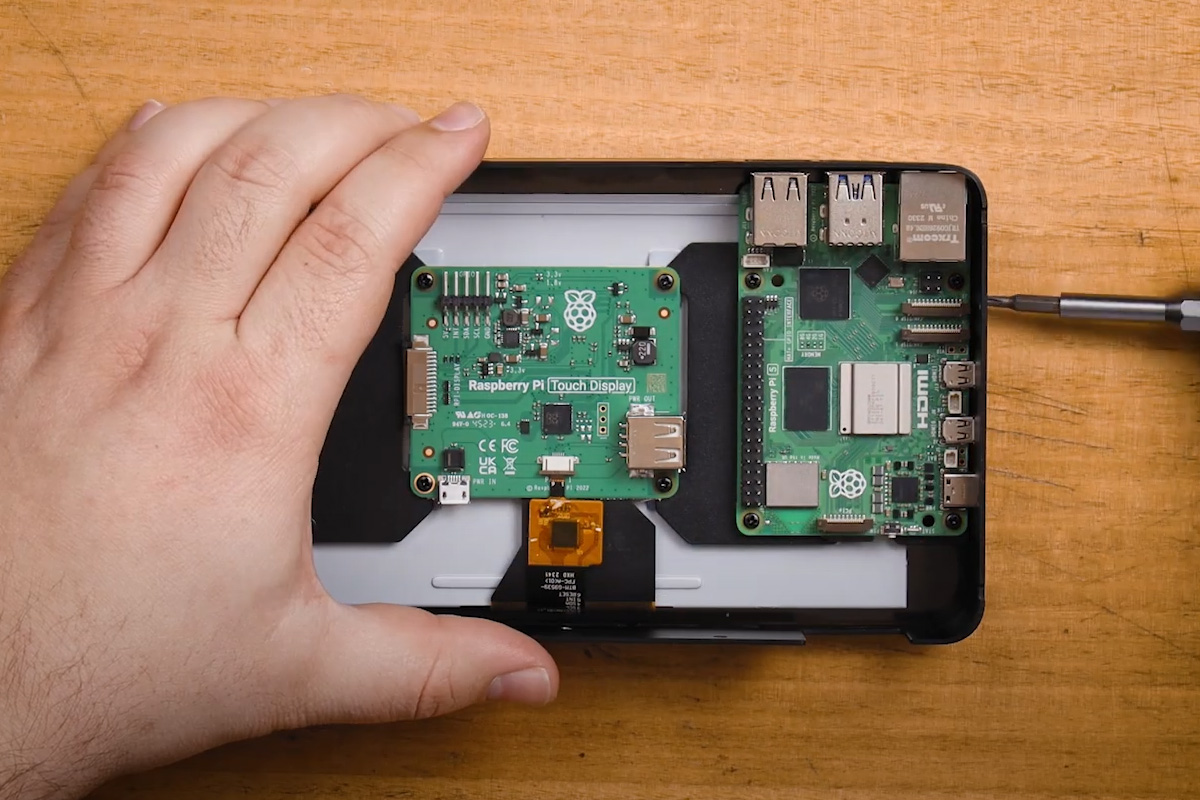
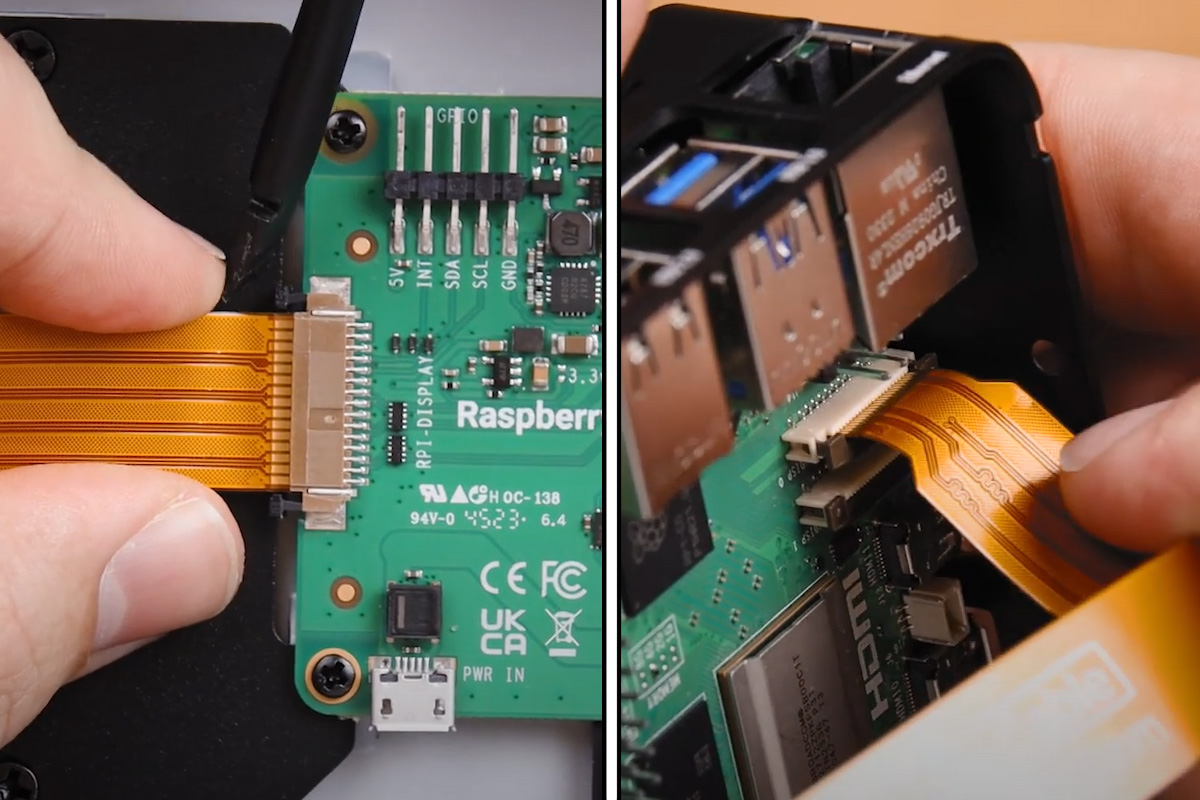
If you are following along and building the KKSB case, in the tabs below are some assembly instructions for it. If you aren't ensure your Pi is plugged into a display, keyboard and mouse, and has power.
Launching Kiosk Mode on Boot
A technical note before we begin: The new Bookworm OS has migrated over to using Wayland window manager by default and the instructions in this section will be for that. If you wish to use an X11-based approach, we have an alternative method at the bottom of the page, but be aware that X11 does not support Pi Connect, Raspberry Pi's easy-to-use remote connection client. If you don't know what any of this means, don't worry and use the Wayland method we will do in this section.
If you are interested we also have a guide on setting up Pi Connect!
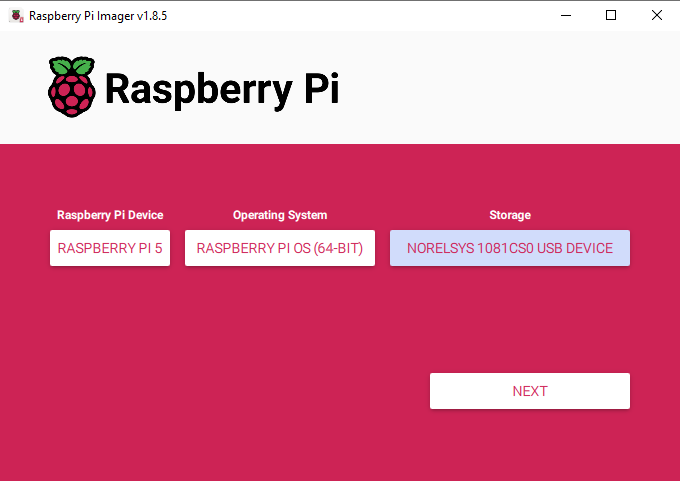
First things first, we will need to install Pi OS onto the micro SD card. Using the Raspberry Imager, select Raspberry PI 5 as the Device (or whichever Pi you are using), Raspberry Pi OS (64-bit) as the Operating system, and your microSD card as the storage device.
NOTE: INSTALLING PI OS ONTO THE MICROSD CARD WILL WIPE ALL DATA ON IT.
This process may take a few minutes to download the OS and install it. Once the process has finished, insert it into the Pi and boot it up. Set up your Pi as instructed and just ensure that you remember your username. Do not uninstall Chromium (there is a check box to uninstall the web browser that isn't your default - don't tick it), and ensure you Pi is connected to the internet.
As with any project, let's start by updating the Pi. In a terminal window enter in:
sudo apt update
To update our package list, followed by:
sudo apt full-upgrade
To update all of our installed packages.
Now we will head to the configuration window with:
sudo raspi-config
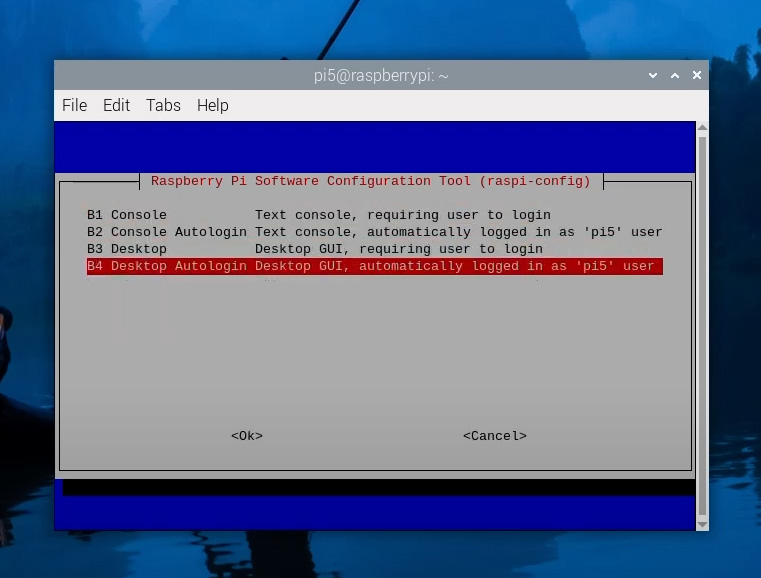
Which opens up the configuration settings menu. Under System Options > Boot / Auto Login, select B4 Desktop Autologin. This will ensure that when we turn on the Pi, it will automatically boot into the desktop environment without the need to log in.
To launch into kiosk mode, we will need to create a shell script to open Chromium in kiosk mode and then set up the Pi to open that script on boot. Let's start with the shell script part of that.
A shell script is a series of lines we can write to make the Pi execute commands. We can create a new shell script by first opening a command terminal and typing in:
nano run_kiosk.sh
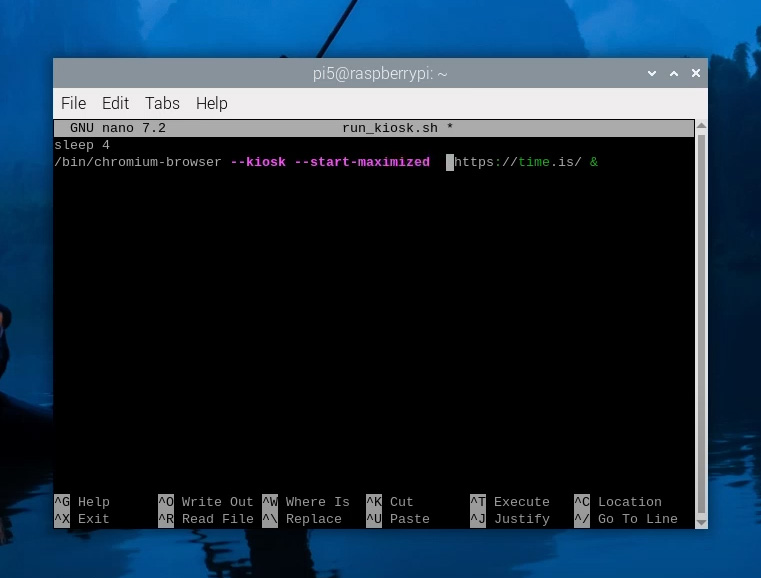
This will open the nano editor in the terminal and allow us to start putting code into the shell script that we are naming "run_kiosk". In this script, we will then write:
sleep 4
/bin/chromium-browser --kiosk --ozone-platform=wayland --start-maximized https://time.is/ &
This will tell the Pi to wait for 4 seconds, then it will open up Chromium in kiosk mode, and what website to open to. For this example we are just using the world clock, but here is where you would put your desired address. We sleep the Pi for 4 seconds because it delays it for 4 seconds, preventing other UI and windows from being loaded on top of Chromium.
The "--kiosk" is a start-up option to launch Chromium in full-screen kiosk mode, but there are a few other launch options we can also add.
We can suppress error messages with:
--noerrdialogs
Disable notifcation infobars with:
--disable-infobars
Make the scroll bar only appear when we scroll with:
--enable-features=OverlayScrollbar
And run Chromium in an incognito window with (just be aware this may log you out of any services like adafruit.io):
--incognito
If you can't decide what options to choose, we are using no error or notification windows with the scroll bar suppressed and our final script looks like this:
sleep 4
/bin/chromium-browser --kiosk --ozone-platform=wayland --start-maximized --noerrdialogs --disable-infobars --enable-features=OverlayScrollbar https://time.is/ &
Once you are happy with your script, to save it we need to hit ctrl + x, and then hit y and enter to confirm. We now have our script saved, but we need to make it executable so we can run it. To do so, in the terminal enter:
sudo chmod +x run_kiosk.sh
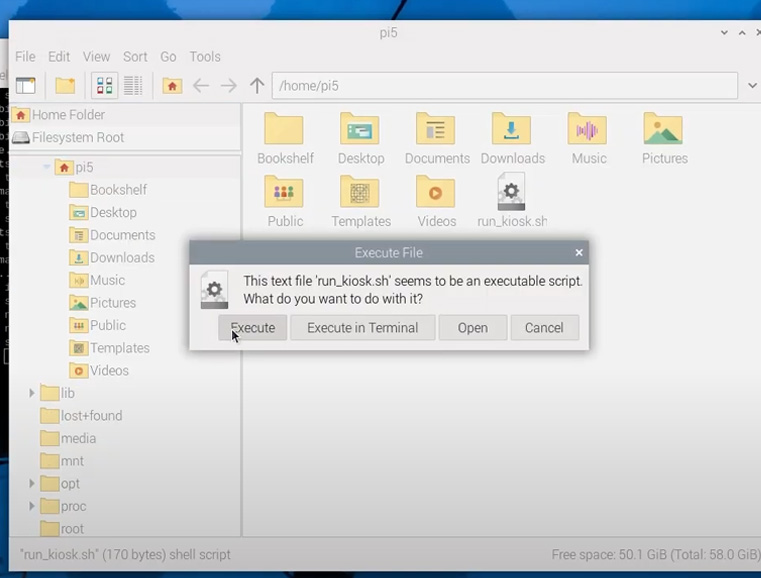
We can now confirm that the script is working - you should be able to open File Explorer and in your home folder, you should see the file you created. Ensure that Chromium is closed, and then run that script (if prompted hit execute) and after a few seconds, your Pi should open Chromium in kiosk mode. This is a great time to ensure that the Pi is properly opening to the site you want and that it is being properly displayed.
You can exit chromium by hitting alt + f4.
Now that we have our script, we just need to open it when the Pi boots up and tweak some other settings. We will be editing the Wayfire initialisation file to achieve this, and although we could add this as a process in the crontab file, editing the Wayfire file also allows us to configure other startup processes. To do so, open the Wayland initialisation file in a terminal window with:
sudo nano .config/wayfire.ini
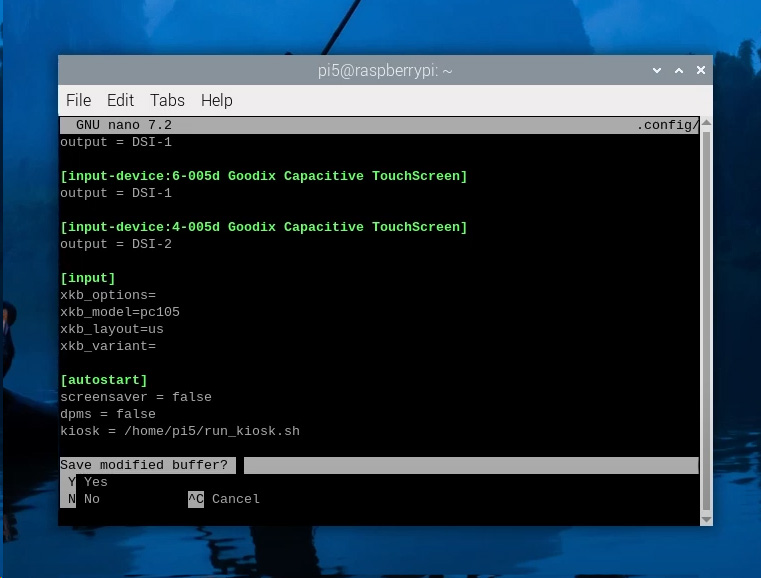
Now find the [autostart] section, if your file does not contain this section, you can create it. First, we will disable the screen saver and display power management settings so that our screen always stays on:
screensaver = false
dpms = false
Then we will add the command to start the kiosk script:
kiosk = /home/username/run_kiosk.sh
Note: This last line will change depending on what Pi username you chose as your login. Ours is called "pi5" and is what is in the image on the right. The order of these lines matter so ensure that they match the image as well. Save it with ctrl + x, hit y, and enter.
Now you should be able to restart your Pi (typing reboot into the terminal is a handy way), and it will run our kiosk script and boot into Chromium in kiosk mode!
Hiding the Cursor in Wayland
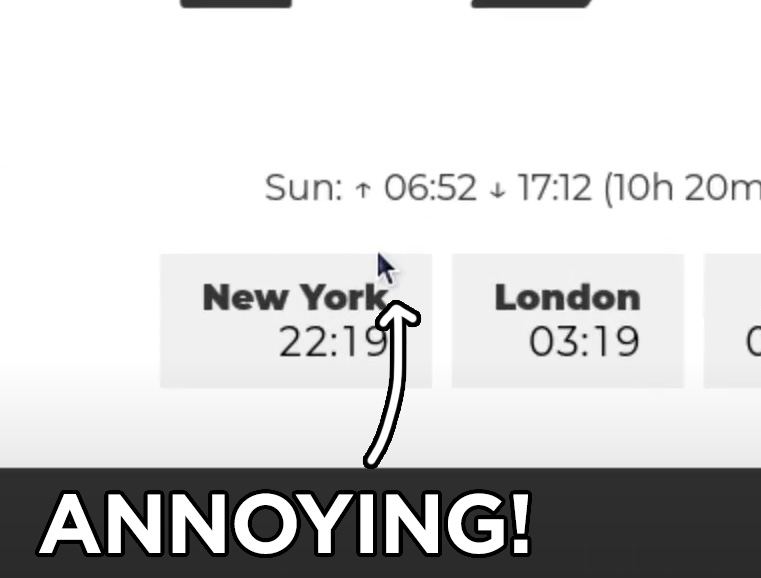
Right now we have an issue that when our Pi boots, the mouse cursor will sit right in the centre of the screen. While there are plenty of ways to hide the cursor using X11, there are far fewer with Wayland (at the time of writing this guide the change to Wayland as the default with Pi OS is recent).
With Wayland, there are very finicky and complicated ways to hide the cursor after a few seconds of not moving it, but the easiest and most robust is to simply move it to the bottom right of the screen where it can't be seen - which is what we will be doing.
To start, install ydotool which is a program that allows us to simulate mouse movement. Install it by entering into a terminal:
sudo apt install ydotool
Then create a new script with:
nano hide_cursor.sh
And in there paste:
sleep 8
sudo ydotool mousemove --delay 1000 10000 10000
This will delay for 8 seconds and then simulate a mouse movement to the bottom right of 10,000 pixels in the x and y direction, which should be plenty enough to move it to the edge of the screen. Note: the --delay 1000 is to allow enough time for this input to be registered, ydotool and Wayland have a complicated relationship.
Now make it an executable with:
sudo chmod +x hide_cursor.sh
And in the same location as your kiosk script, you should be able to find and launch it to test that the mouse moves as intended.
Now open the Wayland config file with:
sudo nano .config/wayfire.ini
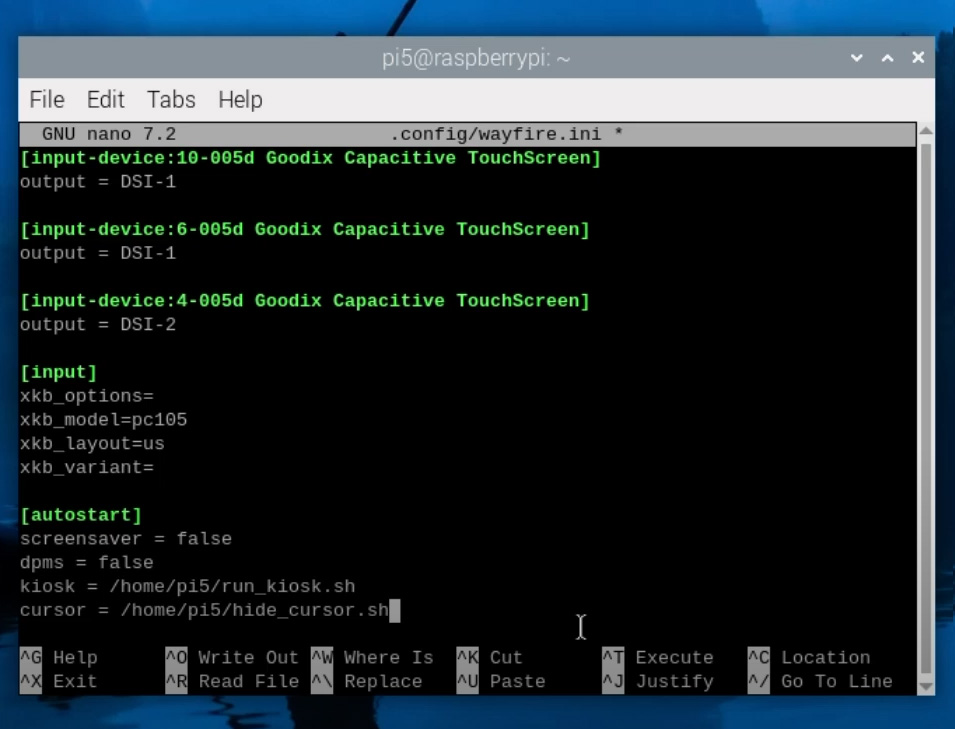
And under the autostart section, tell it to run this script:
cursor = /home/username/hide_cursor.sh
Note: You will need to change the path here again with the username of your Pi.
Now when we boot up the Pi, that pesky cursor should now be off the screen!
Refreshing the Page and Adding Functionality
We now have the secret formula - create a shell script to do something, then launch it automatically, and this is quite a powerful formula. We will be applying it one more time by learning how to simulate keystrokes.
While ydotool can be used to simulate keystrokes, at the time of writing, it had some issues here and there with certain keys. So instead we will be using wtype which can do the same job.
Start by installing wtype with:
sudo apt install wtype
And create a new script with:
nano run_keystroke.sh
Below are a few examples of what we can do with keystrokes:
In Chromium hitting ctrl+F5 will refresh the page and its more powerful than just pressing F5 because it will refresh without cache - meaning it will grab a completely fresh new page. This is extremely hand for webpages that might not refresh automatically. The time example we have been doing is fine without this refresh, but sites like this weather map don't automatically update and need to be refreshed. In the script paste:
sleep 10
while true; do
wtype -M ctrl -P F5
sleep 20
done
The first delay is to give Chromium and everything else enough time to open everything, then we enter into an infinite loop where we use Wtype to press ctrl+F5 and then wait for 15 seconds. You can change this 15 seconds to whatever length of time you want between refreshes. Once you are done, save it and exit with ctrl+x, y and enter.
In Chromium hitting ctrl+tab will switch to the next tab if we have one open. In the script paste:
sleep 10
while true; do
wtype -M ctrl -P Tab
sleep 15
done
The first delay is to give Chromium and everything else enough time to open everything, then we enter into an infinite loop where we use Wtype to press ctrl+tab and then wait for 15 seconds. You can change this 15 seconds to whatever length of time you want between tabs being switched. Once you are done, save it and exit with ctrl+x, y and enter.
We will also need to edit the "run_kiosk" script to open another tab. This can be done by opening it through the file explorer and choosing to open it instead of execute, or the nano editor by entering into a terminal:
nano run_kiosk.sh
To open another window, simply add another URL to the end. For example, if I wanted to open time.is and Google, I would have:
/bin/chromium-browser --kiosk (insert all of our setup options here) https://time.is/ https://www.google.com/ &
We can also merge the 2 other examples and get chromium to switch and then refresh the tab every 15 seconds with:
sleep 10
while true; do
wtype -M ctrl -P Tab
wtype -M ctrl -P F5
sleep 15
done
Then make it executable with:
sudo chmod +x run_keystroke.sh
And open the Wayfire config:
sudo nano .config/wayfire.ini
And add it as a start-up script.
keystroke = /home/username/run_keystroke.sh
And now your script should run! With this, you can simulate any other keystrokes you need such as pressing F in youtube to enter fullscreen. Here is some handy documentation on writing your own commands with wtype.
Where to From Here?
We now know how to get kiosk mode to launch on boot, and how to write a shell script to do something and launch it on boot. Pair this with the ability to automatically simulate mouse movement with ydotool and keystrokes with wtype, you can set up a kiosk to navigate through any web pages you want with enough work.
If you are looking to take this project to the next level, check out our guide on Raspberry Pi Connect - a service that allows you to remotely access your Pi from another computer over the internet from anywhere in the world. If your kiosk is set up in a hard-to-reach place, Pi Connect is a great worthwhile setup in case you ever need to service or change your kiosk.
Another powerful application is to host your own webpage for home automation-related activities. We have a guide on setting up a Pico microcontroller to do just that, paired with this guide, you should be able to control hardware connected to it through a computer. How cool is that!
Regardless of your application for this kiosk, we hope you made something cool and had fun in the process!
Alternative: Kiosk Mode with X11
This section is for users who are looking for an X11-based implementation of this. We recommend using the Wayland-based method we looked at before as it is more future-proofed, but if you have other dependencies that need X11, here is how to do it.
As with any project, let's start by updating the Pi. In a terminal window enter in:
sudo apt update
To update our package list, followed by:
sudo apt full-upgrade
To update all of our installed packages.
While we are here, we will install Unclutter which is a fantastic little tool that we will be using the hide the mouse cursor:
sudo apt-get install unclutter
Now we will head to the configuration window with:
sudo raspi-config
Which opens up the configuration settings menu. Under System Options > Boot / Auto Login, select B4 Desktop Autologin. This will ensure that when we turn on the Pi, it will automatically boot into the desktop environment without the need to log in.
We will also need to ensure that the Pi is using X11 for its window manager. Under Advanced Options > Wayland we will select X11. You can now exit out of the settings menu.
To launch into kiosk mode, we will need to create a shell script to open Chromium in kiosk mode and then set up the Pi to open that script on boot. Let's start with the shell script part of that.
A shell script is a series of lines we can write to make the Pi execute commands. We can create a new shell script by first opening a command terminal and typing in:
nano run_kiosk.sh
This will open the nano editor in the terminal and allow us to start putting code into the shell script that we are naming "run_kiosk". In this script, we will then write:
sleep 4
/bin/chromium-browser --kiosk --start-maximized https://time.is/Sydney &
This will tell the Pi to wait for 4 seconds, then it will open up Chromium in kiosk mode, and we also tell it what website we wish to open to. For this example we are just using the world clock, but here is where you would put your desired address. We sleep the Pi for 4 seconds because it prevents other UI and windows from being loaded on top of Chromium.
The "--kiosk" is a start-up option to launch Chromium in full-screen kiosk mode, but there are a few other launch options we can also add.
We can suppress error messages with:
--noerrdialogs
Disable notifcation infobars with:
--disable-infobars
Make the scroll bar only appear when we scroll with:
--enable-features=OverlayScrollbar
And run Chromium in an incognito window with (just be aware this may log you out of any services like adafruit.io):
--incognito
If you can't decide what options to choose, we are using no error or notification windows with the scroll bar suppressed and our final script looks like this:
/bin/sleep 4
/bin/chromium-browser --kiosk --noerrdialogs --disable-infobars --enable-features=OverlayScrollbar https://time.is/Sydney &
Once you are happy with your script, to save it we need to hit ctrl + x, and then hit y and enter to confirm. We now have our script saved, but we need to make it executable so we can run it. To do so, in the terminal enter:
sudo chmod +x run_kiosk.sh
We can now confirm that the script is working correctly by first restarting the Pi. Then you should be able to open File Explorer and in your home folder, you should see the file you created. Ensure that Chromium is closed, and then run that script (if prompted hit execute) and after a few seconds, your Pi should open Chromium in kiosk mode. This is a great time to ensure that the Pi is properly opening to the site you want and that it is being properly displayed.
You can exit chromium by hitting alt + f4.
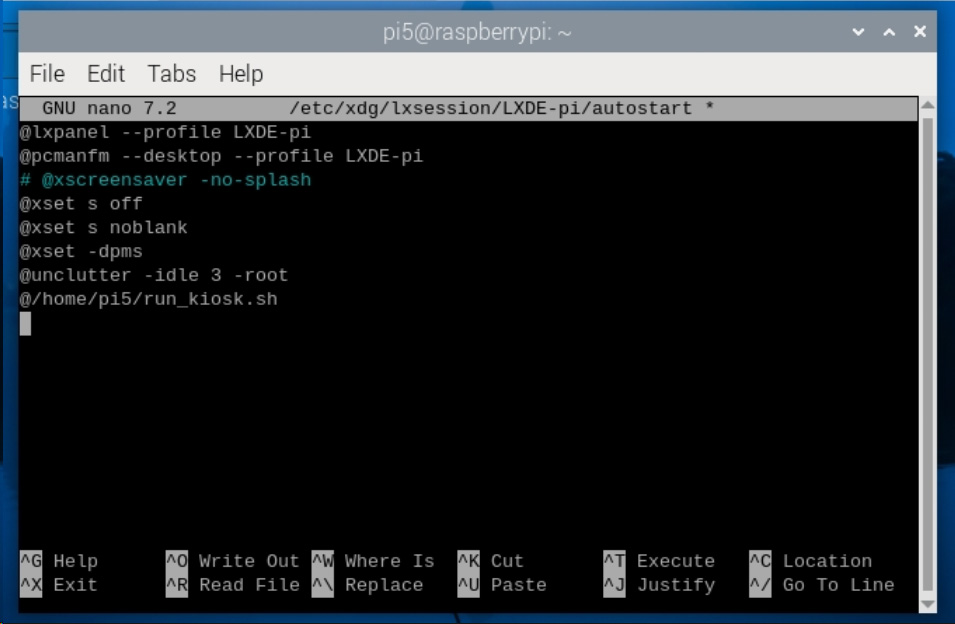
Now that we have our script, we just need to open it when the Pi boots up and tweak some other settings. To do so we will open the autostart file in a terminal window with:
sudo nano /etc/xdg/lxsession/LXDE-pi/autostart
We start by disabling the screen saver or any screen blanking so that our display is always on and displaying our webpage. To do so, start by commenting out the line, it should look like this:
# @xscreensaver -no-splash
Then we will add the following lines to seal the deal:
@xset s off
@xset s noblank
@xset -dpms
Then we will start unclutter to hide the mouse after 3 seconds of not moving:
@unclutter -idle 3 -root
And finally, tell the Pi to run the kiosk script we made:
@/home/username/run_kiosk.sh
Note: This last line will change depending on what Pi username you chose as your login. Ours is called pi5 and is what is in the image on the right. The order of these lines matter so ensure that they match the image as well. Save it with ctrl + x, hit y, and enter.
Now you should be able to restart your Pi (typing reboot into the terminal is a handy way), and it will run our kiosk script and boot into Chromium.
If you are having trouble with this and it isn't booting, double-check the code we have written, it's very easy to mistype something.
We now have our kiosk opening on boot and this might be enough for you, but we are now going to look at adding some more scripts to add some more functionality. Refreshing the page is a very common need in a kiosk, our example of using the time.is site doesn't require it, but if you were loading something like a page with the latest rain radar, you might need to periodically refresh it. To do so, we will be installing xdotool which can be used to simulate keyboard strokes, and we will be writing some scripts using it to refresh the page and switch between multiple pages.
Let's start by installing xdotool with:
sudo apt-get install xdotool
Then we will create a new shell script with:
nano run_keystroke_sim.sh
In this file, we will input:
sleep 7
while true; do
sleep 10
xdotool key ctrl+F5
done
And save it with ctrl + x, y, and then enter.
We then need to make it an executable file with:
sudo chmod +x run_keystroke_sim.sh
Then open the autostart file again:
sudo nano /etc/xdg/lxsession/LXDE-pi/autostart
Add the following line to the end of the file:
@/home/username/run_keystroke_sim.sh
Note: Like last time you will need to replace the username with the username of your Pi.
Now you should be able to restart your Pi, and your Chromium page will now refresh every 10 seconds! You can change the "sleep 10" to however many seconds you want between page refreshes. Do not alter the first "sleep 7" as this ensures that this script is queued up to start after the "run_kiosk" script (which sleeps for 4 seconds before running).
And with this we know can open kiosk mode, and simulate keystrokes!

