FlipperMate began as a deeply personal exploration into accessibility, creativity, and play. The project traces back to my friendship with Jason Becker, a legendary guitarist who developed ALS (Lou Gehrig’s disease) at age 20. Jason has been communicating solely through eye movements for over three decades. You can see his incredible story in this 3-minute trailer
This friendship led me to develop a web-based version of Vocal Eyes, his eye-movement communication board for people with severe physical disabilities. That experience fundamentally reshaped how I thought about interaction, agency, and also what technology can enable.
Inspired further by Dr. Jordan Nguyen’s Becoming Superhuman series and Fletcher Heisler’s Cheeky Keys project, I began experimenting with computer vision. I learned Google’s MediaPipe framework to track hand, eye, and facial movements, eventually building a virtual eye-controlled pinball machine that proved fast, reflex-driven games could be played without hands.
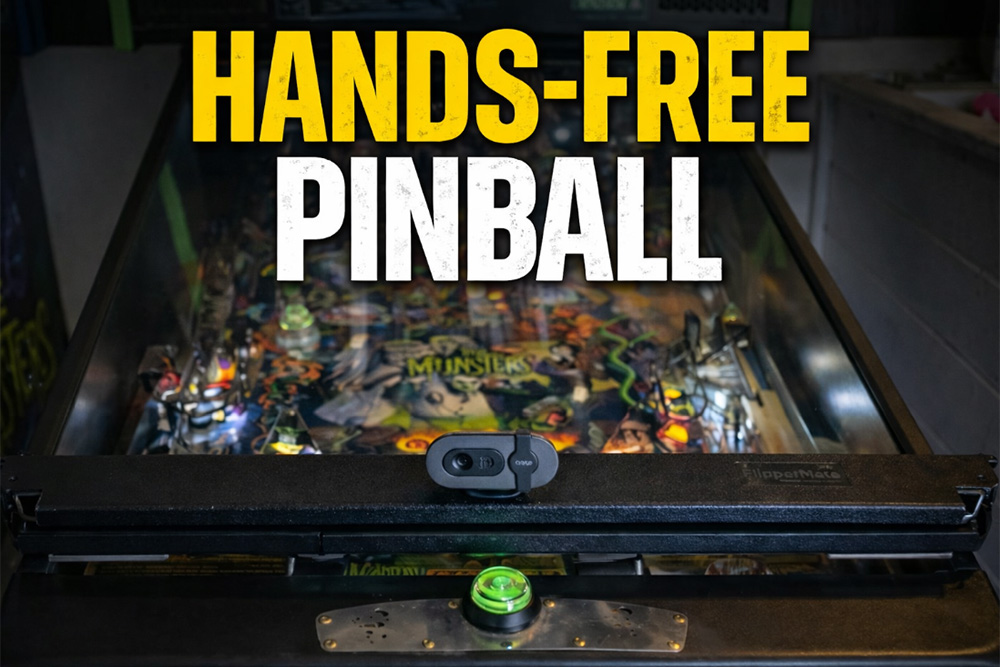
FlipperMate is the physical evolution of that idea. It is a device that mounts on top of a real pinball machine and uses eye tracking to trigger the flippers in real time. By bridging software, computer vision, and hardware actuation, FlipperMate connects digital accessibility tools to a tactile, social arcade experience. The goal is simple but powerful: to make pinball playable for people who otherwise couldn’t play at all.
The Challenge: From Virtual to Physical
I had already achieved success using MediaPipe to map eye movements to keyboard inputs — closing my left or right eye could trigger specific keys. The next challenge was connecting this to the physical world: how do you actually press a pinball button mechanically?
Iteration 1: Understanding Solenoids
My first step was figuring out how solenoids work. I ordered a large push-pull solenoid and knew I needed linear force rather than rotational motion (ruling out stepper motors from previous projects). The solenoid specifications indicated 12V with red and black wires. I grabbed an 8×AA battery holder (8 × 1.5V = 12V) and ran the simplest possible test: connecting black to black, then briefly touching the red wires together.
Instant understanding: voltage energises the copper coil, creating an electromagnet that fires the plunger. Break the circuit, and the magnetism stops. This particular solenoid didn’t retract on its own, so I added a spring-return mechanism manually. After learning that solenoids can burn out if powered continuously, I added a momentary button to the circuit.
Iteration 2: Mounting and Force Testing
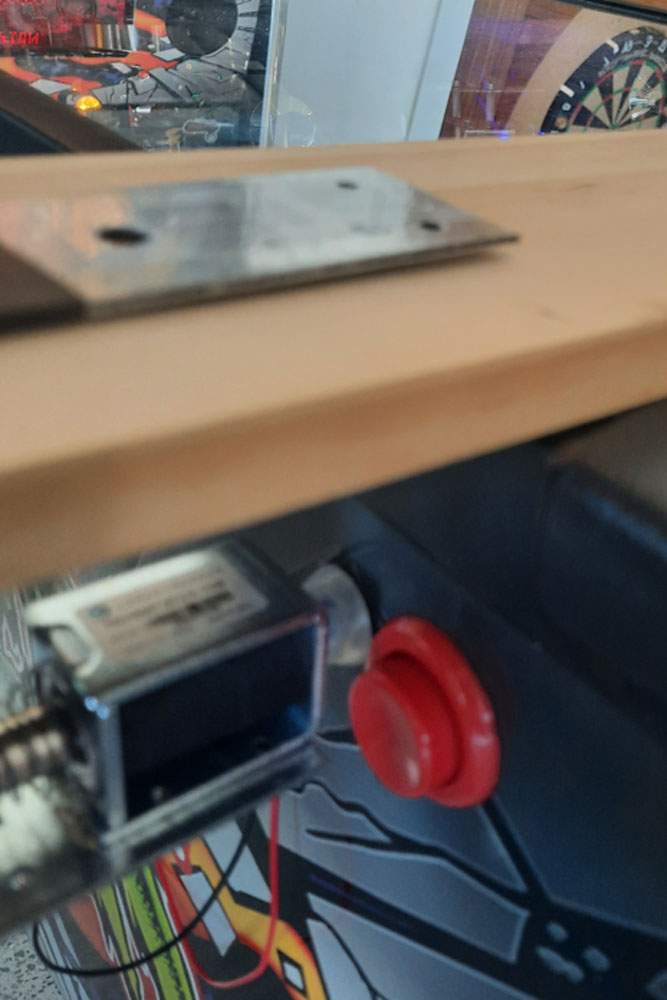
Next challenge: mounting this on a real pinball machine without scratching or damaging a $15,000–$25,000 piece of equipment. I built a crude prototype, positioned it on a pinball machine, and tested the force needed to hold down the flipper button. The solenoid had sufficient force, but my single-bracket design failed.
The button's resistance pushed the entire device away from the machine. I tried small clamps with rubber stoppers—too unstable. Then it occurred to me: if I had two solenoids (one per flipper), I could join them with a rigid brace. One side would support the other.
My first brace? Decking wood. Yes, actual decking timber and a chunky bracket. Functional but crude—and I missed the buttons' positioning on the first attempt.
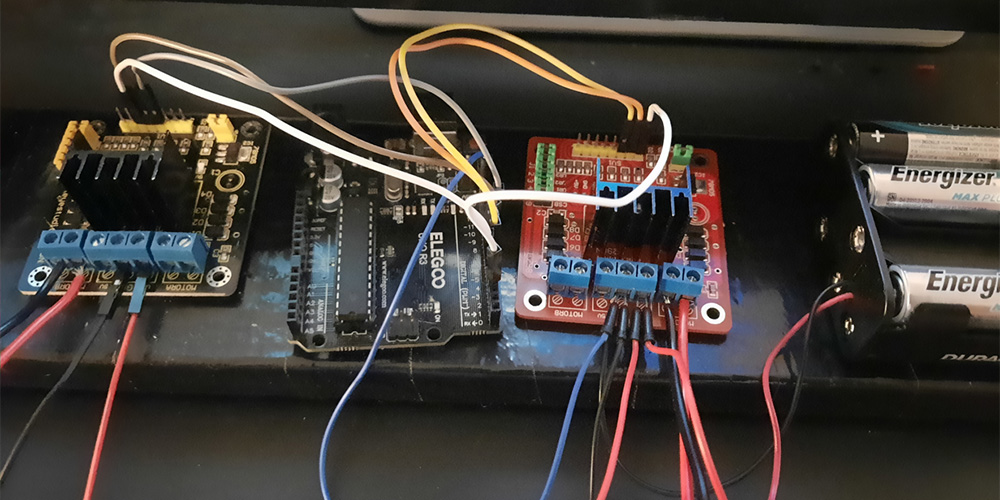
Iteration 3: Power Distribution
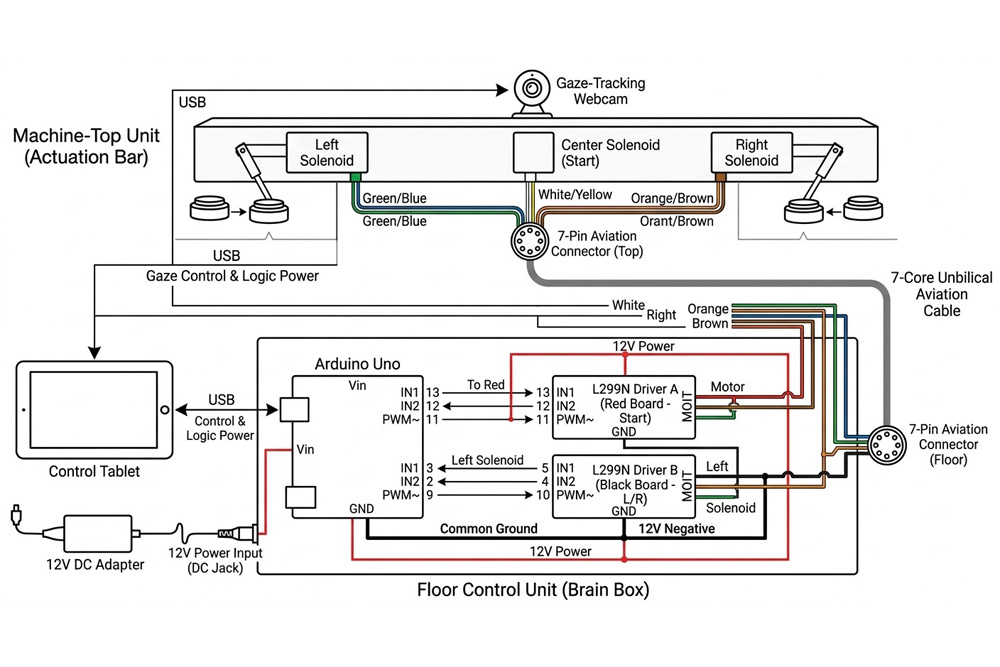
With two solenoids, I needed a shared power supply. I repurposed an L298N motor driver from another project:
Right solenoid → one output channel
Left solenoid → second output channel
12V battery pack → center power input
Eventually, I switched to two L298N drivers (one per solenoid) with daisy-chained power for better distribution, then connected to an ELEGOO Arduino for computer control.
Iteration 4: The Reality Check
My initial design had everything mounted on the wooden board—batteries, electronics, wires—thinking portability was key.
Problems discovered:
Solenoids drain batteries fast. When it stops working, you don't know if it's loose wires, a blown solenoid, or flat batteries. Solution: Replaced batteries with mains power (12V adapter).
Approaching a pinball machine owner with loose electronics and exposed wiring? Instant rejection.
But the pinball owner's feedback made me rethink the entire layout. My first attempt to "separate" the electronics involved 1-meter red and black cables hanging down the side of the machine to a box on the floor. Not exactly reassuring.
Next iteration: hid wires underneath the wood and used a single 7-core cable, with all electronics in a black box on the floor. Better, but still a hard sell.
Iteration 5: Professional Design
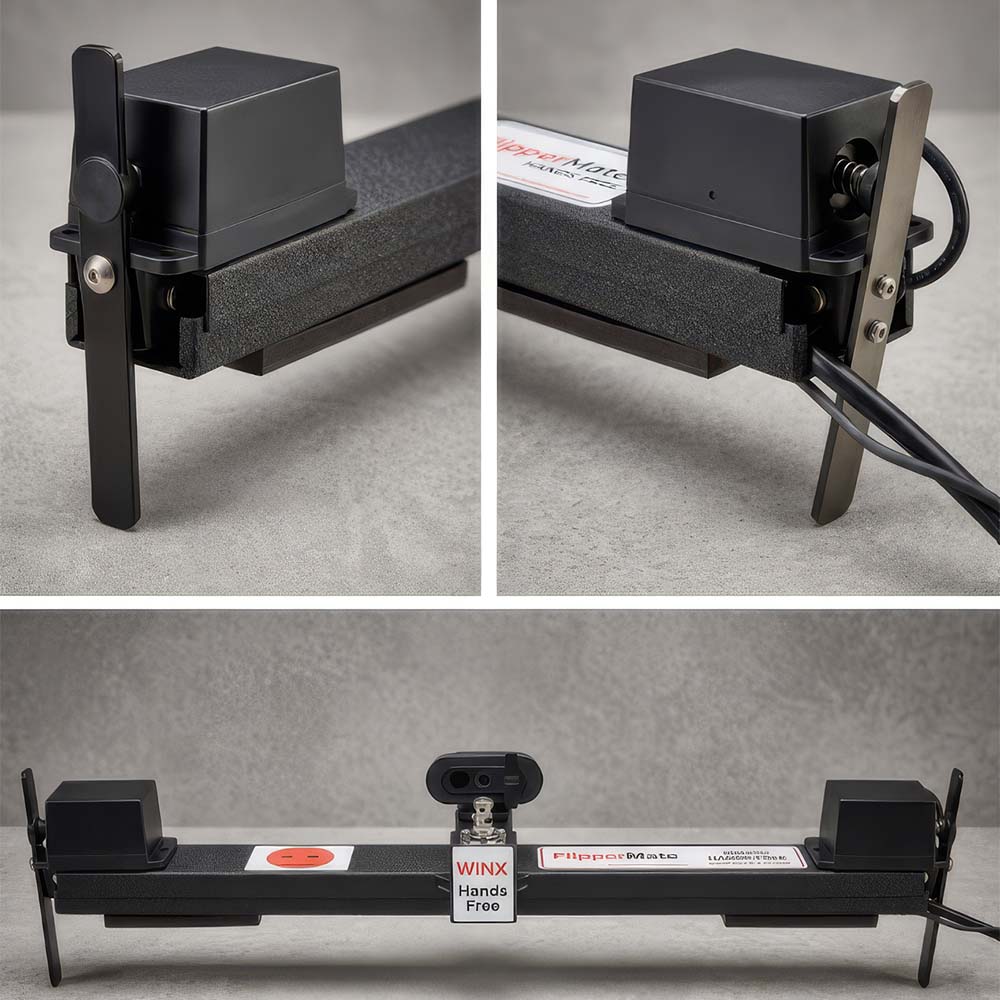
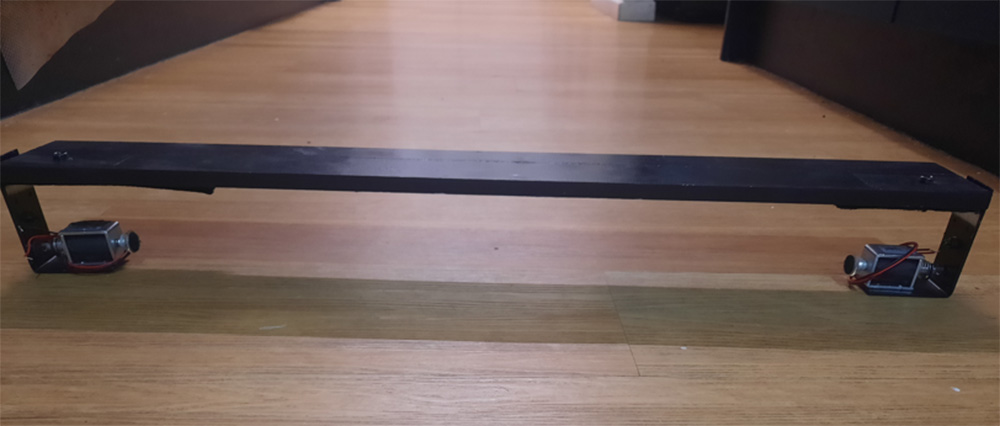
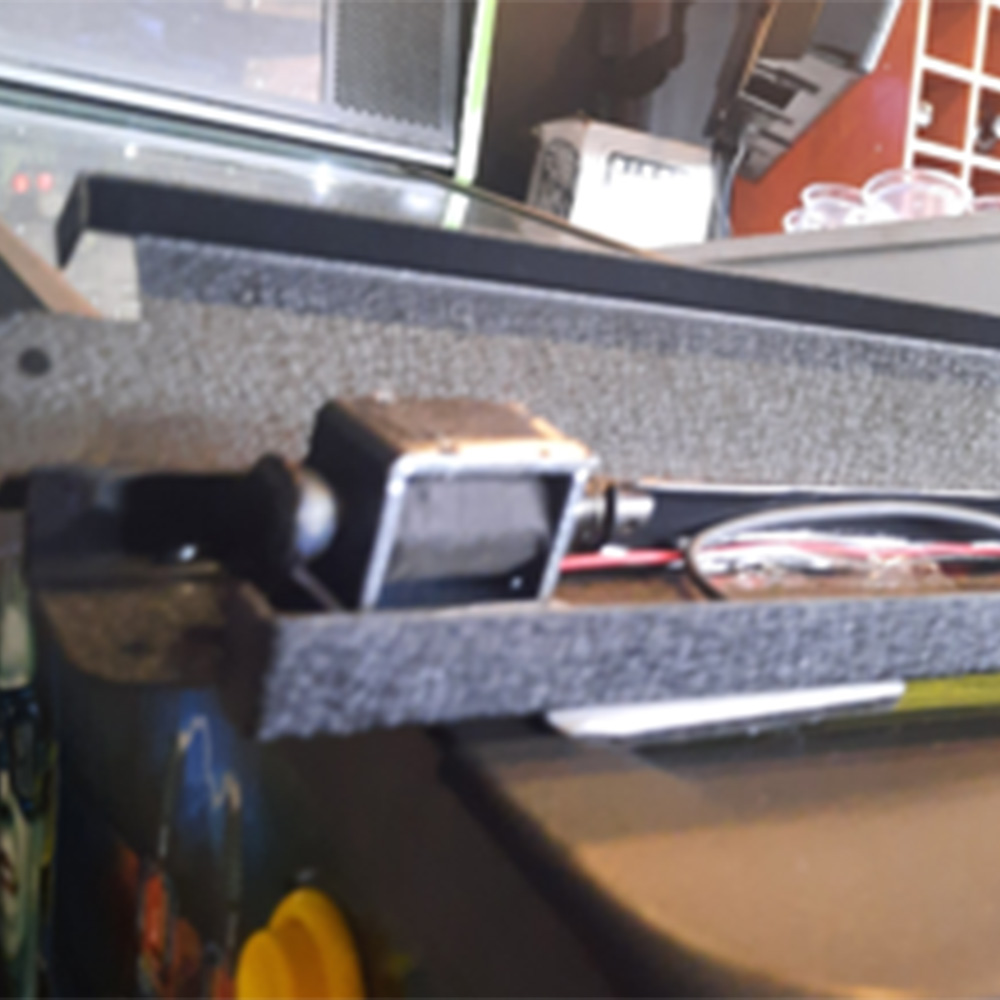
While preparing for a demonstration at the upcoming Coffs Harbour Pinball Festival on February 28th, the event organiser suggested relocating the solenoids to the top of the machine and using lever mechanisms. Machines are packed tightly at events, and this approach would reduce both footprint and visual clutter.
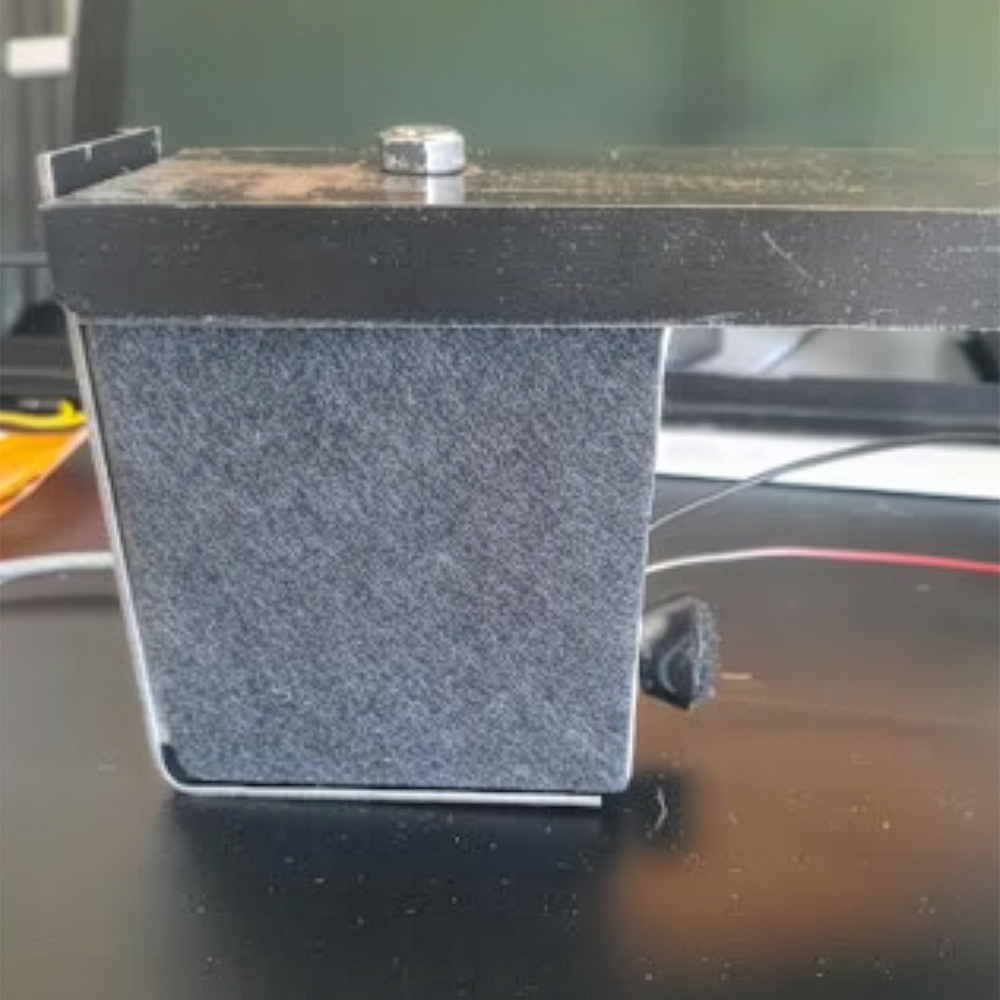
This reframed the entire design. Two aluminium U-channels sourced from Bunnings — each exactly 56 cm wide, matching standard pinball machines — were taped together to form a temporary enclosure capable of housing both solenoids and wiring.
I was recently introduced to Roger, an electrical engineer who services dental chairs. We’re now collaborating to refine FlipperMate into a robust, event-ready system with minimal failure points, allowing me to focus on refining the eye-tracking software.
Latest Addition: Independent Start Button
The final accessibility piece: enabling users to start a new game independently. We purchased a small push-pull solenoid that mounts on top of the machine. When the user opens their mouth wide, it triggers the start button.
Complete independence. No assistant needed.
Update!
I was due to test this at Hoey Moeys pinball festival on 28th February 2026. The guy who organised the event was the one who suggested we move from directly pushing the buttons to using levers to trigger buttons to give a more streamlined appearance.
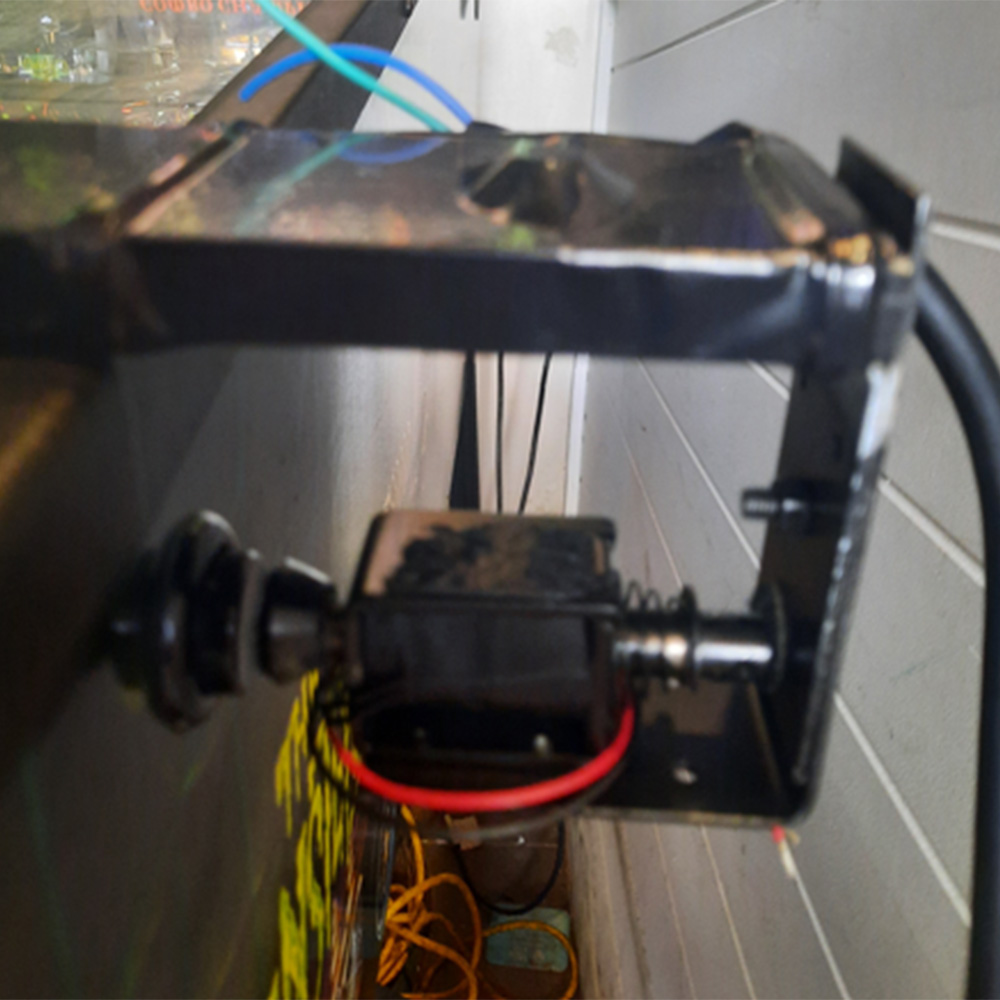
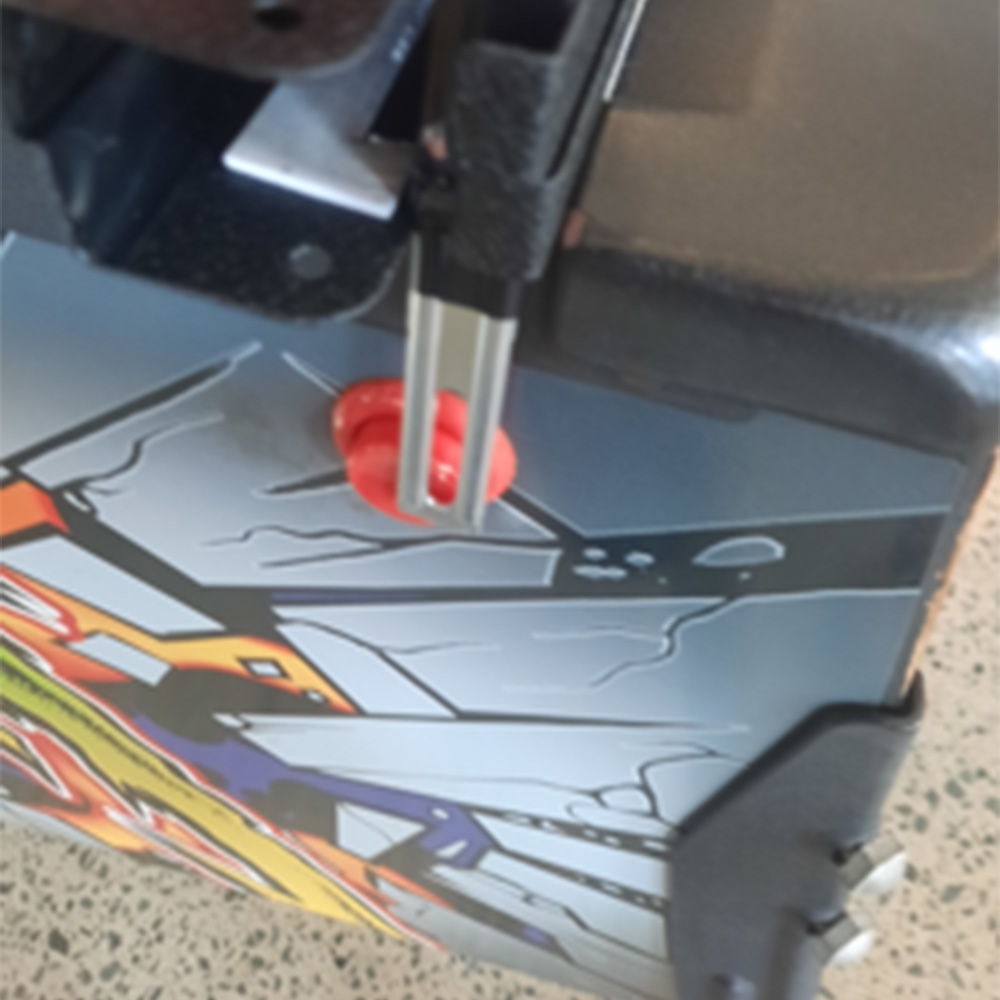
There were some difficulties with this. Initially, the solenoids were not providing enough throw to push the levers with enough force to overcome the button's resistance. So it was a choice of moving the solenoids higher up the lever to give true ‘one for one’ force, lower the fulcrum point - which was not possible due to constraints of the machine - or to try to use a more powerful solenoid, which complicated the current wiring.
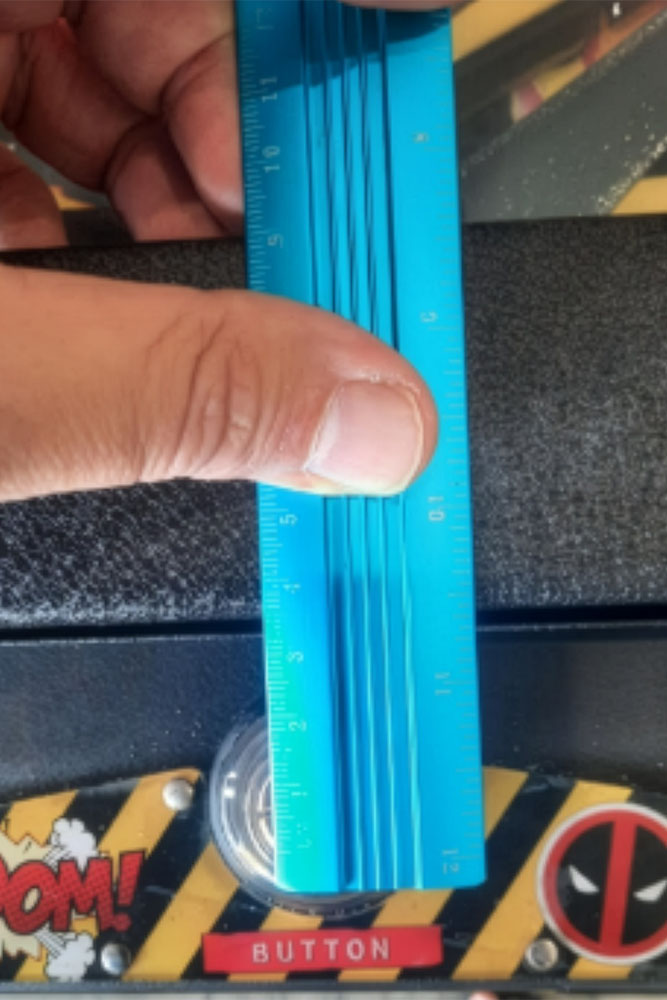
Neither of these options worked. What did work was to angle the levers so that they were pushing the buttons halfway - right on the cusp, and to place another spring on the solenoids so that the short burst was at the most powerful force point. The downside is that it has to be very precise on installation, and as we found out, if people touch the device, it is hard to reposition correctly.
Also, the small solenoid to press the start button was simply not powerful enough, so we did have to order another large push/pull solenoid to trigger the main button.
I borrowed a pinball machine and got smaller legs cut to size to accommodate a wheelchair. Here is a quick clip of the device working at the festival.
The Software: MediaPipe Concept Demo
Before introducing eye tracking, the earliest proof-of-concept focused on simplicity rather than novelty. I deliberately started with hand open/close gestures because they were faster to implement, easier to debug, and removed many variables from the equation.
That initial prototype was intentionally low-tech: a virtual pinball machine built using a large cardboard box, a portrait-mounted monitor, and a printed poster from Kmart as artwork. Hand gestures were mapped to flipper actions to answer a single question early on — does this style of interaction actually feel playable? The goal was validation, not polish.
Once that interaction was proven, the next step was moving from gestures to software control. Using a Python desktop prototype, hand gestures were mapped to virtual left and right arrow key presses, allowing the game to be controlled without touching a keyboard. This confirmed that the interaction could be abstracted cleanly: a detected gesture could reliably trigger a logical input, independent of how that gesture was produced.
The browser-based MediaPipe demo included with this project reflects that same philosophy. It demonstrates how a small number of tracked points can generate reliable control signals without exposing the full FlipperMate implementation. The production system adds eye and facial tracking, calibration routines, and safety considerations, and remains under active refinement.
By starting with the simplest possible input and progressively layering complexity, FlipperMate evolved from a cardboard prototype into a system capable of controlling a real pinball machine — while keeping the core interaction model intentionally simple and robust.
TRY HAND TRACKING WITH A BROWSER
The accompanying hand-gesture demo represents a refined version of those earliest experiments. While it is not the exact code used in the original cardboard prototype, it implements the same core interaction model in a clearer and more robust form, making it easier to understand, extend, and experiment with. In that sense, it reflects how the project was validated at the very beginning. I guarantee that you will have a lot fewer headaches than I did!
Hardware & Wiring
Camera
- Brio 100 webcam
Computer
- Intel NUC (transitioning to tablet)
Microcontroller
- ELEGOO Arduino Uno
Connection
- USB serial (5V power input)
Solenoid Setup
- 2× large push-pull solenoids for left/right flippers
- 1× small push-pull solenoid for start button
- 2× L298N motor drivers
- 12V mains power adapter (2A version)
- Spring return mechanisms
Mounting
- 2× aluminium U-channels (56 cm width)
- Single 7-core aviation cable to the control box
- Custom lever mechanisms (in development with Roger)
Parts List
From Core Electronics
- 2× large push-pull solenoids
- 1× small push-pull solenoid — start button
Other Components
- ELEGOO Arduino Uno
- 2× L298N motor driver modules
- 12V power adapter
- Brio 100 webcam
- 7-core aviation cable
- 2× aluminium U-channels (56 cm, Bunnings)
- Assorted mounting hardware, springs, and brackets
Software
- Python 3.x
- OpenCV
- MediaPipe
- PySerial