Search results for: 'OpenBeam Starter Kit - Silver Aluminum'
- Anodized Aluminum Machined Knob - Silver - 20mm DiameterSKU: ADA5528 Brand: AdafruitThese compact and luxurious machined knobs look fantastic and have a nice feel, a perfect way to upgrade your rotary encoder or potentiometer. We...
- Silver Anodized Aluminum Bumper Feet - Pack of 2SKU: ADA5055 Brand: AdafruitKeep your electronics from going barefoot, and give them sleek cyberpunk metal feet! These aluminum bumpers are originally designed for keyboard enclosures that are made of anodized aluminum with a black rubber nubbin embedded inside for no-slip support. They're so cool looking we figure they could be your new favorite accessory.
- Four Key Silver Aluminum Keypad Shell Enclosure - MX Compatible SwitchesSKU: ADA5073 Brand: AdafruitFor all the DIY keebfans in the house here is a super sleek and sturdy 4-Key Aluminum Keypad Shell in Silver, the perfect base to...
- BOSON Science Starter Kit -SKU: TOY0084-LITE Brand: DFRobotBoson science Start kit is a set of digitalized scientific exploration tools for a young scientist to build their hands-on STEM lab. Boson science ...$66.89 AUD, inc GSTAs low as $65.89 AUD, inc GST
Out of Stock
Sign up to get notified when it's available to order.
- SparkFun FTDI Starter Kit - 5VSKU: KIT-18290 Brand: SparkfunThe SparkFun 5V FTDI Starter Kit gives you just what you need to get started with FTDI FT232RL USB to serial IC. The pinout of the included board matches the FTDI...
- SparkFun FTDI Starter Kit - 3.3VSKU: KIT-18289 Brand: SparkfunThe SparkFun 3.3V FTDI Starter Kit gives you just what you need to get started with FTDI FT232RL USB to serial IC. The pinout of the included board matches the FTDI...
- Arduino Starter Kit (Official)Unleash your creativity with the Official Arduino Starter Kit! This comprehensive kit has everything you need to learn electronics and build 15 innovative projects, including a spaceship interface, color mixing lamp, and more. Perfect for makers looking to dive into the world of Arduino!Special Price $157.15 AUD, inc GSTRegular Price $188.49 AUD, inc GSTDelivered by May 7th
- Raspberry Pi 3+ Starter KitThe Raspberry Pi 3+ Starter Kit is just that; a starter kit! We've brought together all the essentials needed to power up a Raspberry Pi 3+ with one of seven operating systems.$123.40 AUD, inc GSTDelivered by May 7th
- LattePanda Starter KitSKU: CE04829 Brand: DFRobotDoes the LattePanda shut down automatically when you run a software? Is it running hot and throttling? I like my LattePanda, but why things are not going well. I...$68.58 AUD, inc GSTAvailable with 10 to 16 day lead time
- SparkFun Arduino Pro Mini Starter Kit - 3.3V/8MHzSKU: KIT-15257 Brand: SparkfunWhat's blue, thin, and comes with everything you need to get started? The Pro Mini 3.3V Starter Kit!...$59.30 AUD, inc GSTAs low as $56.33 AUD, inc GST
Out of Stock
Sign up to get notified when it's available to order.
 PiicoDev Starter Kit for Micro:bitSKU: CE08260 Brand: PiicoDevGet started coding high-tech sensors and modules with the PiicoDev® Starter Kit - BYO Micro:bit v2$90.65 AUD, inc GSTDelivered by May 7th
- TIMI-130 Starter KitSKU: DEV-19256 Brand: SparkfunTIMI-130 is a 1.3” TFT IPS LCD display module that is driven directly by a PIXXI-28 graphics processor from 4D Labs...$111.26 AUD, inc GSTAs low as $109.59 AUD, inc GST
Out of Stock
Sign up to get notified when it's available to order.
- TIMI-Click Starter KitSKU: DEV-19254 Brand: SparkfunTIMI Click is a 0.96” TFT LCD display module that is driven directly by a PIXXI-28 graphics processor from 4D Labs...
- SparkFun mbed Starter KitSKU: KIT-19043The SparkFun mbed Starter Kit (mSK) is a great way to get into user-created projects created by ARM to assist with rapid prototyping on microcontrollers...$304.27 AUD, inc GSTAs low as $299.71 AUD, inc GST
Out of Stock
Sign up to get notified when it's available to order.
- Gravity Starter Kit for ArduinoSKU: KIT0111 Brand: DFRobotGravity Starter Kit for Arduino is an open-source, plug&play electronics toolkit that provides Arduino beginners and makers with the easiest experience of learning and playing with the Arduino platform.
- SparkFun RFID Starter KitSKU: KIT-13198 Brand: SparkfunDescription: This it the SparkFun RFID Starter Kit, an all-in-one kit that offer everything you need to get your next RFID project off the ground. This kit includes our USB RFID Reader, ID-12LA RFID module, and two 125kHz RFID cards. We’ve done away with the annoying clamshell and now offer this in the same type of box as the rest of our kits.
- Nanoleaf Shapes - Hexagons Starter Kit (5 Panels)SKU: CE09320 Brand: NanoleafThe Nanoleaf Shapes - Hexagons elevate the concept of smart lighting into a creative journey of design. A combination of smart technology and sleek...
- PiicoDev Starter Kit for Raspberry PiSKU: CE08258 Brand: PiicoDevGet started coding high-tech sensors and modules with the PiicoDev® Starter Kit - BYO Raspberry Pi.$84.95 AUD, inc GSTDelivered by May 7th
- SparkFun ESP8266 Thing Starter KitSKU: KIT-15258 Brand: SparkfunThe SparkFun ESP8266 Thing Starter Kit is a great place to start learning about the Internet of Things (IoT)! Inside this kit you will find a ESP8266 Thing, a Serial...
- Grove Creator Kit - γ / 40 modules Arduino Starter KitSKU: SS110020230 Brand: Seeed Studio
Grove Creator Kit contains 40 different Grove modules which is a very useful kit that can help you get started with Arduino quickly.
- SparkFun MicroMod mikroBUS Starter KitSKU: KIT-19935 Brand: SparkfunThe SparkFun MicroMod mikroBUS™ Starter Kit is designed to give you just what you need to start using the MicroMod and Click ecosystems side-by-side...
- SparkFun RP2040 mikroBUS Starter KitSKU: KIT-19936 Brand: SparkfunThe SparkFun RP2040 mikroBUS™ Starter Kit is designed to give you just what you need to start using the Click, Qwiic, and RPi side-by-side...
- Raspberry Pi 4 Starter Kit (4GB)SKU: CE08076 Brand: Raspberry PiGet started with Raspberry Pi, this kit has everything you will need to begin your Raspberry Pi journey.$171.30 AUD, inc GSTDelivered by May 7th
- Raspberry Pi 4 Starter Kit (2GB)SKU: CE08077 Brand: Raspberry PiGet started with Raspberry Pi, this kit has everything you will need to begin your Raspberry Pi journey.$151.20 AUD, inc GST
Out of Stock
Sign up to get notified when it's available to order.
- Raspberry Pi Zero WH Starter KitSKU: CE08226 Brand: Raspberry PiHere it is, the Pi Zero WH Starter Kit! It comes with everything you need to get right into using your new Raspberry Pi Zero WH!$93.58 AUD, inc GSTDelivered by May 7th


Getting started with your Raspberry Pi Zero W Starter Kit
Who should follow this tutorial? If this is your first experience with Raspberry Pi, and you're using a starter kit for a Raspberry Pi Zero W, then this tutorial is for you. We'll plug everything into where it needs to be, install an ...

Chibitronics at Home - STEM Starter Kit
Now that we have dipped our toes into the Chibitronics environment, let's take a look at a more in-depth kit and see what kind of projects it offers. The Chibitronics STEM starter kit comes with: 1 Circuit Stic...

Assemble a goBILDA Outlaw Chassis Kit - Plus Raspberry Pi and 8BitDo Control!
If you want a high-end robotics platform that is easy to expand with it does not get better than goBILDA! GoBILDA is a complete build system designed for makers, students, and educators. From curated kits, to many structural alum...

Choosing the Right Raspberry Pi Kit
Show of hands, who loves Raspberry Pi? We all do, and one of the most common questions we get asked is which Raspberry Pi kit is going to best suit my project, which one has the right components in it etc. So today we’re going to be l...

Our Overview of Makeblock's Ranger Robotics Kit
Now that we've taken a look at MakeBlock's beginner kit, the mBot (take a look at the previous article here), let's take our skills to the next level with the Ranger. The Ranger adds much more modularity and customisation to the kit. From e...

Our Overview of Makeblock's Ultimate Kit 2.0
The aptly named Ultimate Kit 2.0 is the final kit in the line-up of educational robots from Makeblock. With over 160 independent mechanical parts and modules, the Ultimate Kit 2.0 answers the call for almost limitless creative freedom. Matc...
Gaming Kit for RetroPie
Video gaming has evolved tremendously over the last decade, console games produce near real-life graphics, and playing with friends across the globe is easier than sending a text message. This is all well and good, but there are those of us...

How to Drive High Power LEDs – 3W Aluminum Backed Star LEDs
High power LEDs (Light Emitting Diodes) have different requirements that need to be met when compared to regular LEDs. Current regulation using only resistors is impractical so it is necessary to use a switched-mode voltage and current reg...

Infinity Mirror Kit V1 - Assembly and tutorials
The Infinity Mirror Kit is a desk-top display that creates a dazzling optical illusion - a tunnel of light that tears through space! Note: This tutorial is for the Infinity Kit V1. We updated have updated to the Infinity Kit V2 as of ...

Setting up your OctoPi Kit
So you have just received your OctoPi kit and you are looking to get it up and running. All you need to do is grab out all the parts you received and around 20 minutes of time. To connect your OctoPi to the network you need to decide what ...

Makerverse Essentials Kit Guide | Build Circuits and Code with MicroPython
IntroductionWelcome to the guide for the Makerverse Essentials Kit. This kit provides the fundamental hardware required to construct many of the kits in the Makerverse Kits range along with providing hardware which will continue to be usef...

Solarbotics Paris Flyer CarouSol Kit Speed Build
We had a lot of fun making this speed build video for the Paris Flyer CarouSol Kit by Solarbotics. If you aren't already familiar, Solarbotics makes a great line of DIY electronics kits made from laser cut materials. They range from quite s...

Infinity Mirror Kit Kickstarter Hall of Fame Backers
The Infinity Mirror Kit was made possible by all the people who backed our Kickstarter! Kits are where it's at. With our Desktop Infinity Mirror Kit you'll get to make something wonderful with your hands, all in the span ...

Infinity Mirror Kit V2 - Assembly and Tutorials
The Infinity Mirror Kit V2 is a desktop display that creates a dazzling optical illusion - a tunnel of light that tears through space! The Infinity Mirror Kit V2 entered production in October 2018, and now ships with an Adaf...

Circuit Scribe for Educators
Educators everywhere are lining up to have the most recent, high-tech teaching tools to introduce STEM learning in the classroom. With the rate that modern technology is advancing, educators can often feel overwhelmed with the sheer number ...

Our Guide for Arduino Beginner Kits
Kits are a pretty nifty idea for someone starting out in maker electronics. For this beginner-friendly article, we are just going to take a look at three of our great kits for the Arduino Uno. All three are all solder-free electronics ...

Our littleBits Rule Your Room Kit Review
"Yes, I would recommend this a friend." That's the verdict of 90% of people who pick up the Rule your Room Kit from littleBits. We love it so much, we're most definitely recommending it to you and your family. But you don't need to take ...
 Review")
Our littleBits Gizmos and Gadgets Kit (2nd Edition) Review
The new Gizmos and Gadgets revision 2.0 from littleBits is here and we've decided to review the kit for any budding inventors (or inventor's parents) out there. The v1.0 kit was impressive enough, we were interested to see what littleBits c...

Makerverse Audio Kit Guide | Play Music and Generate Tones
IntroductionWelcome to the guide for the Makerverse Audio Kit. This kit will allow you to build a music player, a musical keyboard, and a sound effect soundboard! To follow along you will need: The Makerverse Audio Kit The Makerverse ...

Makerverse Load Cell Kit Guide | Measure Weights and Forces
Introduction Welcome to the guide for the Makerverse Load Cell kit. With this hardware you will be able to make a set of scales capable of measuring weights up to 3kg with a precision as low as 0.1g! To follow along you will need: ...

Alcohol Inks to Colourise Resin Prints - Three Different Methods
One of the special properties of transparent resin prints created by DLP 3D printers like the Creality LD-002R and SLA printers like the Formlabs Form 3 is how vibrantly you can colourise them with Alcohol Inks. Simply by dabbing on just a ...
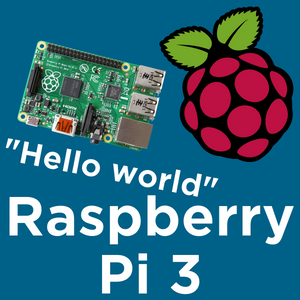
"Hello World" with Raspberry Pi 3
Today we’re going to take a look at how to get started and setup that fancy Raspberry Pi you’ve just bought. If you’re still not sure exactly how the Raspberry Pi works, or what it can do, check out ‘What is a Ra...

Makey Makey at Home
Have you heard of Makey Makey? If not, you’re about to have your mind blown! Makey Makey is an incredible way to bring imagination, creativity, and technology together. If you’re not sure what Makey Makey is, check out our Let's...

Analog Electronics Crash Course
Welcome to our beginners tutorial on analog electronics. Living in the digital age that we do, it’s easy to disregard the world of discrete analog components, however these concepts form the basis for everything from your mobile phon...

Getting Started with Particle Photon
When you first look at the Photon, it’s staggering that such a small device could possess the incredible functionality that it does, but not only does it bring an impress spec sheet to the table, but the true power is unlocked in the ...

Cooling Your Raspberry Pi
Part of the joy that is Raspberry Pi is getting stuck into it at a slightly lower level and finding out exactly what you can do with it if you take a look under the hood. One of the most popular experiments to do with your Raspberry Pi is o...

Make 3D Prints Look Like Chrome and Steel - Metallic Paints and Finishes For 3D Prints
Demonstrated here are two metallic finishes, that you can do to any 3D print, that will astound your friends and family when you tell them 'It was actually 3D printed and these are not metal at all'. These finishes are perfect to use for co...

Getting Started with Circuit Scribe
What a glorious time we live in, where, as technology continues to evolve, so too does the ability to learn more about it and get hands on with concepts that would otherwise be out of reach, especially for young minds. Today, we’re go...

LittleBits Community & the Workshop Set
LittleBits have launched a global network of organizations to share and spread the word of littleBits. It's all to put the power of electronics in the hands of everyone. The 'chapters' are simply locations such as maker spaces and libraries...

What is a Kano Computer?
How many young people are able to assemble a computer, from scratch? Sure, adults can do it. There are even IT professionals and avid PC enthusiasts that take it to the next level; customizing everything down to the color of the Power LED a...

Setting up Your Retroflag NESPi Case with a Heatsink and Cooling Fan
By now, you’ve probably seen the fancy new Raspberry Pi cases we’ve got available; the NESPi case by Retroflag. Designed and styled specifically for retro gaming systems such as RetroPie, it offers everything you need to turn yo...

Getting Started with Arduino Using the Sparkfun RedBoard
Welcome to the Sparkfun Inventors Kit (SIK) Ver 4.0 tutorial page. In this beginner’s tutorial, we will explore the basics of microcontroller programming and circuit electronics through a series of projects that are provided in the&nb...

PiicoDev RFID Module - Guide for micro:bit
Radio Frequency IDentification (RFID) uses electromagnetic fields to identify and communicate with tags. Each RFID module emits radio waves that energise the passive tag, which then responds with its own identifying number or data, as reque...

How to Choose a Bluetooth Module For Your Project
Alright, so we know that Bluetooth is awesome, and if you don’t, take a read of our Introduction to Bluetooth tutorial. But how exactly do we go about implementing Bluetooth communication in our projects? Well, fortunately for us, th...

PiicoDev RFID Module - Guide for Raspberry Pi Pico
Radio Frequency IDentification (RFID) uses electromagnetic fields to identify and communicate with tags. Each RFID module emits radio waves that energise the passive tag, which then responds with its own identifying number or data, as reque...

PiicoDev RFID Module - Guide for Raspberry Pi
Radio Frequency IDentification (RFID) uses electromagnetic fields to identify and communicate with tags. Each RFID module emits radio waves that energise the passive tag, which then responds with its own identifying number or data, as reque...

How to Build a RetroPie Console
Perhaps you’ve read our Gaming Kit for RetroPie tutorial on how to setup a RetroPie console and wondered what’s required to actually build one, or heard about it and not been sure what you need. Well, today is your lucky day bec...

Arduino Projects with Robotics Using the Sparkfun RedBoard
Welcome to the final Project Set of the Sparkfun Inventors Kit! This Project Set focuses on Robotics with the final Circuit being an Autonomously Driving Vehicle! New components introduced in this tutorial are: DC Motor/Gearbox Mo...
")
Arduino Projects with an LCD (Using Sparkfun RedBoard)
Arduino Projects with an LCD (Using Sparkfun RedBoard) Welcome to Project Set 4 in the Sparkfun Inventors Kit Guide! In this tutorial, we will look into using Liquid Crystal Displays (LCD's) to print data. This ability allows us to remotel...
")
Arduino Projects with Light (Using Sparkfun RedBoard)
Now that your RedBoard is set up on its baseplate and the Arduino IDE is installed on your computer, we can begin our first Arduino-based Project Set! The First Project Set explores light and the type of electrical component we will be usin...

DFRobot 8.9 Inch 1920x1200 IPS Touch Display For Raspberry Pi - Set Up Guide
It is time for a high-quality, complete package, 1920x1200 (HD) display set up with a Raspberry Pi Single-Board Computer. In regards to touch screens with Raspberry Pi have looked at Tiny GPIO HAT LCD displays, medium-sized AMOLED maker di...

Our Raspberry Pi Compute Module 3 Review
A new day is upon us, and it is glorious. After all, it’s not often that a new Raspberry Pi board is released. As you’re probably aware, the current iteration of the popular Raspberry Pi microcomputer is the Raspberry Pi 3. It h...

Unconstrained 3D Printing with LulzBot's Dual Extruder v3
Dual Extruding with FDM 3D Printers is typically reserved for the most expert-level makers. By adding the ability to print with 2 materials, you open yourself up to a spread of conditions that simply didn't exist with a single extruder setu...

Learning Arduino in Australia
Core Electronics is the official supplier for Arduino products Australia wide. We stock components from both Arduino.cc (Genuino) and Arduino.org (Arduino). Sourcing our products directly from Arduino ensures you are supporting the team beh...

What is Raspberry Pi?
Hi there! If you’re wondering what all the hype and interest surrounding Raspberry Pi is about, you’ve come to the right place. The original Raspberry Pi debuted in 2012, and is a credit card sized computer that has ports for U...

How to Build Your Ultimate RetroPie Gaming Console
Amid all the new controllers that 8Bitdo have brought out and the mountain of Raspberry Pi cases and accessories that are available, we’ve bundled everything together to create the ultimate RetroPie gaming console. If you’ve bee...

PiicoDev Pressure Sensor MS5637 - Micro:bit Guide
Introduction This guide will help you read barometric pressure from your PiicoDev® Pressure Sensor and a Micro:bit To follow along, it's best to have: A Micro:bit V2 A PiicoDev Pressure Sensor MS5637 A PiicoDev Adapter for M...

PiicoDev Pressure Sensor MS5637 - Raspberry Pi Pico Guide
Introduction This guide will help you read barometric pressure from your PiicoDev® Pressure Sensor and a Raspberry Pi Pico To follow along, it's best to have: A Raspberry Pi Pico with pins soldered (pointing down) A PiicoDev Press...

Control Large GoBILDA DC Motors With a Raspberry Pi - Pololu Motoron HAT
This guide will demonstrate exactly how to control any large DC Motors that we stock with a Raspberry Pi Single Board Computer, through code or through a Bluetooth Controller. To clarify (in my mind) a large DC Motors runs at 12+ Volt...
")
Arduino Projects with Motion (Using Sparkfun RedBoard)
Arduino Projects with Motion (Using Sparkfun RedBoard) Welcome to the Third Project Set from the Sparkfun Inventors Kit V4.0 Guide! In this tutorial, we will explore the operation of a Servo Motor and an UltraSonic Sensor in combination wi...

Character Displays with Particle
Crunching numbers is fine, but sometimes you really need to visualise what’s going on in the tiny brain of your Photon. There are numerous different ways to visualise data or text on a microcontroller from binary LEDs, to HDMI display...

Snap Circuits makes Electronics Fun and Educational
From breadboarding to soldering, the way we connect our components is critical to ending up with a working circuit. Before the new-age tech startups like littleBits and innoBits came along with their magnetic clip-together building blocks, ...

Third Hand Webcam Mount for the LulzBot Taz 6
When making a webcam mount for your 3D Printer, there are physical limitations for where you can have the camera sitting safely throughout the whole print. A while back, we remixed a really nicely designed bed mount for the Raspi Camera so ...

PiicoDev Pressure Sensor MS5637 - Raspberry Pi Guide
Introduction This guide will help you read barometric pressure data from your PiicoDev® Pressure Sensor with a Raspberry Pi single-board computer. To follow along, it's best to have: A Raspberry Pi (model 3, 4, Zero or Zero W)...

PiicoDev Buzzer Module - Guide for Micro:bit
Introduction Let's play tones and melodies on a PiicoDev® Buzzer Module with a Micro:bit. This guide will cover connecting the hardware, running an example to make sure everything works and playing simple melodies. Of course, the Micr...

Our Overview of Makeblock mBot
Looking for the best way to get into robotics? Checkout Makeblock's mBot. This all in one robot is the perfect introduction to basic robotics, with its simple yet robust design, mBot is built with education in mind. The mBot kits modul...

PiicoDev Buzzer Module - Guide for Raspberry Pi Pico
Introduction Let's play tones and melodies on a PiicoDev® Buzzer Module with a Raspberry Pi Pico. This guide will cover connecting the hardware, running an example to make sure everything works, and playing simple melodies. To follow ...

PiicoDev Buzzer Module - Raspberry Pi Guide
Introduction Let's play tones and melodies on a PiicoDev® Buzzer Module with a Raspberry Pi. This guide will cover connecting the hardware, running an example to make sure everything works, and playing simple melodies. To follow along...

Optimising RetroPie
Hello and welcome to another tutorial on the joys of RetroPie. Today we’re going to look at making RetroPie even better. If you’ve had the chance to play around with the RetroPie system, you’ll have noticed that whilst it ...

Ultimaker 3D Printer Build Platform Calibration
For Ultimaker 3D printers it is crucial to have a flat and level build platform which is parallel to the path of the nozzle. By having a correctly set up print space it will ensure the best possible results for all 3D printed components.&nb...

Tips for Installing your Lulzbot TAZ 6 Enclosure
With winter currently in full swing, there's a particularly annoying 3D printing problem that is rearing its ugly head, Warping. For those who don't know, warping is what happens when parts of a printed model shrink due to cold drafts acros...
")
Arduino Projects with Sound (Using Sparkfun RedBoard)
Project Set 2 – Sound Welcome to the second Project Set from the Sparkfun Inventors Kit V4.0 Guide! In our last Project Set, we explored the basics of the Arduino IDE, some electrical and electronic concepts and looked at vario...
Using NeoPixels with Particle
Life’s better in colour right? Then why are you still using boring old regular LEDs in your project, when you could be using addressable RGB LEDs. Now LEDS that have Red, Green, and Blue integrated in a single package are nothing new,...

Setting up 8Bitdo Controllers in RetroPie
Hey there, are you loving the vintage gaming experience that is RetroPie? Wait, you haven’t heard of RetroPie. No! You’d better go and check out our Gaming Kit for RetroPie tutorial ASAP. Oh good, you now know the awesomeness t...

Setting up and Using the Adafruit 16-Channel Servo HAT for Raspberry Pi
This guide will teach you how to control up to 992 5V Servos through the GPIO pins on your Raspberry Pi! But more practically, without stacking multiple HATS (Hardware Attached on Top), this guide will teach exactly how to control sixt...

Graphic OLED Displays with Particle
Note that the digital artifacts on the screenare from the camera used to capture and not the screen itself How many great artworks or photos have you seen that consist of just lines of characters; words and numbers? Very few. It’s ...

PiicoDev Capacitive Touch Sensor CAP1203 - Micro:bit Guide
Let's get started with the PiicoDev® Capacitive Touch Sensor. In this guide, we'll connect the PiicoDev Capacitive Touch Sensor to our Micro:bit V2 and get it working with some example code to detect touch events. We'll also remix the c...

PiicoDev Capacitive Touch Sensor CAP1203 - Raspberry Pi Guide
Let's get started with the PiicoDev® Capacitive Touch Sensor. In this guide, we'll connect the PiicoDev Capacitive Touch Sensor to our Raspberry Pi and get it working with some example code to detect touch events. We'll also remix the c...

PiicoDev Magnetometer QMC6310 - Guide for MicroBit
Let's get started with the PiicoDev® Magnetometer. In this guide, we'll connect the Magnetometer to our micro:bit, get it working as a compass, and read the magnetic field strength of a nearby magnet. To follow along, it's best to...

Raspberry Pi Video Kiosk with MP4Museum
This tutorial works great for Raspberry Pi 3 Model B, however if you need a Video Kiosk/Digital Sign for the newer Pi Models, we've written this guide on how to do it. One of the most requested projects for Raspberry Pi is how to set ...

Configuring 8Bitdo N64 Controller Mapping
RetroPie is a fantastic system, and once you map your input device, it will take those mappings and apply them to all of the emulators on RetroPie. If you’re new to RetroPie and want to find out a bit more, take a read of our Gaming ...

PiicoDev Colour Sensor VEML6040 - Raspberry Pi Pico Guide
Introduction Let's read colour data from a PiicoDev® Colour Sensor with a Raspberry Pi Pico, and create a colour sorting machine. This guide will cover connecting the hardware, downloading some example code and remixing it. ...

PiicoDev Colour Sensor VEML6040 - Micro:bit Guide
Introduction Let's read colour data from a PiicoDev® Colour Sensor with a Micro:bit V2, and create a colour sorting machine. This guide will cover connecting the hardware, downloading some example code and remixing it. To f...

Raspberry Pi Kodi Media Centre
Media centres are everywhere nowadays, from smart TV’s with built in media apps, to standalone lounge room boxes to watch all your favourite shows on. With the new features found on the Raspberry Pi 3, it makes sense for it to become...

What is the better tech, innoBits or littleBits?
We get a lot of interest from parents and educators surrounding littleBits and innobits. Especially the difference between the two products. Both are magnetically connected electronic building blocks. Both products empower people to invent ...

PiicoDev Colour Sensor VEML6040 - Raspberry Pi Guide
Introduction Let's read colour data from a PiicoDev® Colour Sensor with a Raspberry Pi and create a colour sorting machine. This guide will cover connecting the hardware, downloading some example code and remixing it. To follow along,...

PiicoDev Capacitive Touch Sensor CAP1203 - Raspberry Pi Pico Guide
Let's get started with the PiicoDev ® Capacitive Touch Sensor. In this guide, we'll connect the PiicoDev Capacitive Touch Sensor to our Raspberry Pi Pico and get it working with some example code to detect touch events. We'll also rem...

Makerverse Real Time Clock with Supercapacitor Backup - Raspberry Pi Pico Guide
Introduction This guide covers the basic use of the Makerverse Supercap Real Time clock on the Raspberry Pi Pico using our RV3028 MicroPython module. The MicroPython module implements some commonly used features of the RV3028 RTC but is no...

PiicoDev Ultrasonic Rangefinder | Getting Started Guide
Similar to how bats echo-locate and how submarines use sonar, the PiicoDev® Ultrasonic Rangefinder uses sound waves to measure the distance to an object. It sends out a high-pitched sound wave, which bounces off of the object and comes...

Getting Started with Particle Electron
In another tutorial we looked at the Photon board from Particle, and whilst Wi-Fi is awesome for many applications, it restricts you to a localised connection. Particle have once again come to rescue and provided us with a cellular solution...

Our recommendation on Breadboard Power Supplies
So, you’re looking for the right way to power your breadboard? You’ve found that your Arduino Uno just doesn’t quite have the juice to power up your circuit. It's likely that the microcontroller can output around 400mA whe...

Overview of Resin 3D Printing and Calibrating the Print Platform with the Creality LD-002H
Resin 3D printers are an immensely powerful tool in the hands of a maker and they have never been more accessible. This will be a rundown on this technology, contrasting it to filament 3D printing and an explanation of tools whilst tea...

PiicoDev Magnetometer QMC6310 - Guide for Raspberry Pi Pico
Let's get started with the PiicoDev® Magnetometer. In this guide, we'll connect the Magnetometer to our Raspberry Pi Pico, get it working as a compass, and read the magnetic field strength of a nearby magnet. Finally, we'll remix the c...

PiicoDev Magnetometer QMC6310 - Guide for Raspberry Pi
Let's get started with the PiicoDev® Magnetometer. In this guide we'll connect the Magnetometer to our Raspberry Pi, get it working as a compass, and read the magnetic field strength of a nearby magnet. Finally, we'll remix the code to ...

How to use Stepper Motors and DC Motors with a Raspberry Pi - Adafruit DC & Stepper Motor HAT
This guide will demonstrate exactly how to control Standard Stepper Motors and DC Motors with a Raspberry Pi Single-Board Computer. To do this as seamlessly as possible we will utilise a HAT. HAT stands for Hardware Attached on Top. HAT bo...

History of Arduino
So, after almost a week of researching, cross-referencing, double checking, and image hunting, I’m excited to show you guys my take on the history of Arduino, and the evolution of the Arduino hardware into what it is today. With so m...

An Introduction to Makeblock
Makeblock is a company with education at the forefront of its priorities. They introduce mechanical design, and software development to robotics in a way analogous to Lego, that is to say, they aim to educate the student by encouraging crea...

Let's take a look at Makey Makey!
Makey Makey is a compact circuit board which allows you to create circuits using anything you like and connect them up to a computer. You use alligator clips to connect things to the Makey Makey, and then your Makey Makey connectors to a co...

Raspberry Pi Compute Module Generations 2020
Raspberry Pi Compute Modules have developed in tandem with the many generations of Raspberry Pi single-board computers. These boards are in every right a microprocessor just like their bigger cousins however they are a very different form f...

Program a Micro:Bit in your Web Browser
In this article, we'll program a Micro:bit v2 using a web browser. We'll connect a Micro:bit to our computer, open python.microbit.org and begin coding our first script. Contents What You'll Need Connect your Micro:bit Open the Progr...

How To Choose The Right Resistor.
Resistors are the hardworking underdogs of the electrical circuit world. You have probably added a 4.7k or 330-ohm resistor into your circuit without thinking about why we use those values, let alone what the resistor is doing. We are going...

Micro:bit Temperature and Humidity Sensing
The Micro:bit has the ability to measure temperature by sensing the temperature of the silicon die inside the main CPU. This works because the Micro:bit runs cold, and the temperature of the CPU is usually a good approximation of ...

Boards of a Feather
Have you ever used an Arduino board, and wanted to hook it straight up to a JST connected LiPo battery but knew it wouldn’t work? Or maybe you wanted a microcontroller with built-in wireless capabilities? Well, Adafruit has developed...

What is the ESP32
The ESP8266 is the Serial to Wi-Fi SOC gaining steam back in August of 2014, no doubt you've heard of it; if not used one yourself. Since then, hundreds of IoT devices were built on this originally-undocumented device. With those projects a...

Capacitive Touch with Makey Makey
The Makey Makey introduces the concept of using everday objects like fruit, lead pencil drawings, play dough etc. to interact with your computer via USB. The Makey Makey acts like a HID device over USB, which means that it behaves just like...

Understanding ESP32 Naming Conventions
Espressif is a constantly ground-breaking company that produces lots of really cool development modules which includes the ESP32. ESP32 Boards, ESP32 Dev-Kits, and ESP32 Modules (the part that gets soldered to the Board/PCB) are all about ...
Remote 3D Printing with OctoPi
Remote control of your 3D printer is a particularly appealing concept, especially if you've been forced into printing via USB in the past. Using your new 3D printer should be as simple as plugging it in, uploading some G-Code and pressing '...

How to network XBee and the Arduino
Want to setup a wireless XBee network between some Arduinos and your PC? We're going to show you how. We will be using Series 1 XBee modules alongside some XBee Explorer USB modules from Sparkfun to set up our own Personal Area Network (PAN...

Improving Results with Transparent Filament
Fused filament fabrication and transparent prints! No, surely you mean SLA prints. And true you can get excellent transparent prints effectively using SLA however consumer-grade fused filament fabrication can be mistaken for glass when corr...

GlowBit™ rainbow Quickstart Guide for micro:bit
Let's do some creative projects to get familiar with the GlowBit™ rainbow and micro:bit. The animation runs for 10 seconds, and can be started by pressing either of the micro:bit's buttons In this guide we will: Wi...

Optimal Layer Exposure Time for Perfect Resin Prints
Layer Exposure Time is the crucial parameter that when dialed in will change average 3D resin printed components into awesome, crispy, final results that capture every single detail of the CAD model. As a general rule for Normal Layer ...
")
Zero To Maker Workshop | Fab Academy (Our Experience)
Welcome to 'Zero to Maker,' a workshop that will walk through and introduce a ton of tools and skills to help Makers of all skill levels! In this series, Jaryd and Liam will be completing projects as a part of the 2024 Fab Academy and...

Getting Started on The Things Network
Note: With the rollout of TTNv3, the "Setup" section of this guide no longer works - but we're keeping it here for posterity. Let us know on our forums if you need help getting started with the new method. Since you’ve got your new P...

Raspberry Pi Workshop for Beginners
Welcome to the Raspberry Pi Workshop for Beginners! Here you'll be able to follow along with our series of bite-sized videos that cover everything you'll need to know to get started with your Raspberry Pi, and start making awesome project...

Plant_io Basic Setup Guide | Automatically Water a Seedling Based on Soil Moisture
What We'll AchieveThis guide will help you set up a Plant_io controller to automatically irrigate a plant of your choice. This example focuses on germinating seeds, but this is only one option. Along the way we'll: Assemble a hardware pl...

How to use a PiRelay HAT for Raspberry Pi - Multiple Relay Control with Voice or GUI
This guide will teach you exactly how to use a Raspberry Pi Single Board Computer to independently control 4 relays. A Relay is an electrically operated switch. This is all possible thanks to the PiRelay V2 HAT from SB Components. These re...

Arduino Workshop for Beginners
Welcome to the Arduino Workshop, where you'll be able to follow our guided course which covers everything you'll need to know in order to create your own Arduino projects and become a leveled up maker. My name is Sam and along with being ...

PiicoDev Transceiver | Getting Started Guide
A radio transceiver is a device that can both transmit and receive radio signals, making it the perfect tool for communication on the go and remote projects! The PiicoDev Transceiver™ is a 915MHz radio that can send short messages up...

Meet 'Holman' the Ultimate Bluetooth Speaker
Who says you can't have it all? Good looks and a great sound! My name is 'Holman" and I'm a Bluetooth speaker in the form of mans best friend - a dog of course! Why is my name Holman? Well, that's the name of the manufacturer of the PVC pi...

Raspberry Pi OSMC - Custom Media Center
I wanted to upgrade my media center (RPi B+ with Xbian) to something a bit nicer, more stable and more accessible than just the RPi in a basic plastic case.
I built an enclosure out of wood with aluminum front and rear panels.
I built an enclosure out of wood with aluminum front and rear panels.

Raspberry Pi 3 B+ Media Center
How-to guides are very useful, but while “do this, then do that” is great to reproduce exactly what is in the guide, it’s less helpful if you want or need to modify the project. This is especially true with technology proj...

A Back to the Future Clock
This project started life as an alarm clock for my son made to look like the time circuit from the Back to the Future movies. The display can show the time in various formats, including the one from the movies of course. It's configurable v...

WhyzaGC - Feather ESP32 addon to the MightyOhm Gieger Counter
This project is about adding a wireless Adafruit Feather HUZZAH ESP8266 or ESP32 v2 with Adafruit Featherwing 128x64 OLED to interface with the self-assembled MightyOhm Geiger Kit.
Introduction
I am always on ...Introduction
I am always on ...
Fruit and Veggie Gaming Controller
In preparation for some Maker Faire's we were heading to last year, I wanted to combine the awesomeness of the Makey Makey platform, with the fun that is RetroPie. For those who don't know the Makey Makey, it's a fantastic platform that all...

Hot-Wire Bender for Acrylic
A simple, and affordable build that produces sharp, and consistent heat-bends. A nichrome wire heats a channel. Place the acrylic over the channel, wait for it to reach temperature, and pull the hingeing section to create a bend.
&l...
&l...

Roverling
Introduction
My first 3D printer was a CTC generation 2 clone of MakerBot ‘The Replicator Dual’, circa 2012. It died a little while back and has since been replaced ...

Cheap Deluxe Resin Curing Chamber
After purchasing an Anycubic Photon resin printer, I wanted an easy and reliable method for post-curing the prints. This allows the printed resin to achieve maximum material strength and eliminate tackiness in...
After purchasing an Anycubic Photon resin printer, I wanted an easy and reliable method for post-curing the prints. This allows the printed resin to achieve maximum material strength and eliminate tackiness in...

grinder_timer
Making a dumb coffee grinder slightly less dumb. This is a programmable timer tethered to a Rancilio Rocky coffee grinder. The Rocky is a "dumb" grinder and electrically very simple. Basically it's an ac motor with an on/off switch and a m...
")
Time lapsing in OctoPrint (Properly!)
Now that we have decked out our Lulzbot Taz 6 3D Printer with a really nice looking acrylic enclosure, I'm just about ready to turn on some serious 3D printing work. But before I dive into that endless pool of fun, it's a good time to take ...

Smart Mirror with Raspberry Pi
I had first seen smart mirrors online several years ago and have been meaning to create one ever since, my requirements were to be able to see the time, weather, calendar and news. The great thing about it is the unlimited possibility for c...

Micro:bit Random Selector
This project has been created to be used as an exemplar for Year 7 Technology students to demonstrate some of the features and potential of making with a micro:bit. This device is a teacher tool or game accompaniment device that random...

Coffee Grinder With Arduino
Using a few bits and pieces, this ordinary coffee grinder now has two presets to run the motor for a programmable length of time. The idea being that the grinder running for a set amount of time will deliver a certain amount of coffee each ...

Salvaged Street Light Conversion
Introduction
I salvaged some decommissioned street lights from the local transfer station. I suspect they adorned the main street of Woodend in the past and would now look good in our...
Makey Makey Skill Tester
This is the third project I've put up using the Makey Makey, and it's incredible fun, but it's also the simplest. Today I'm going to show you how to make a simple Skill Tester game complete with sound effects using a Makey Makey board and s...

Concrete Lamp
The concrete body of the lamp (which, to my eye look a bit like a leek) is made is two halves. The 1st and 2nd halves are cast in 2 steps using the same mould twice. I had a few failed attempts at making the mould entirely from sta...
The concrete body of the lamp (which, to my eye look a bit like a leek) is made is two halves. The 1st and 2nd halves are cast in 2 steps using the same mould twice. I had a few failed attempts at making the mould entirely from sta...

p0wer - Control mains outlets over wifi.
As part of a larger home automation project, I wanted the ability to control some mains power outlets remotely. To achieve this, I interfaced the transmitter from an inexpensive 433MHz mains remote control kit with a raspberry pi zero w (vi...

Creating our own Raspberry Pi 3 Case
We've got a whole bunch of Raspberry Pi 3 Cases here at Core Electronics. From the Official Enclosure that's perfect for most uses, right through to the gilded PiBow Coupe from Pimoroni. All of the cases we see have one or two impressive fe...

The One Wand to rule them all!
Wands are cool, right? That's what Trinity, Adele, and April were thinking of our recent littleBits Workshop, down at the Core Electronics Knowledge Factory. Their inspiration for this project came straight from the films, in particular, th...

Raspberry Pi Game Show
Introduction
I made this project because I had been given a Raspberry Pi 4 for Christmas and was hoping to make a fun project with it. I wanted to make something which wasn’t just copying a tutorial and was a...Introduction
I made this project because I had been given a Raspberry Pi 4 for Christmas and was hoping to make a fun project with it. I wanted to make something which wasn’t just copying a tutorial and was a...
Water Tank Level Sensor
Update: Community member Chris has had a go at remaking this project after the original project contributor Denver made the original code repository private. GitHub links below will not work but the original project has been kept here for...

Roverling Mk.ⅠⅠ
Introduction
A few months back I created a basic mobile platform using parts from an old 3D printer. It was fun but not very practical. I designed Roverling Mark II so I could experi...
Retro Gaming Station
Hey, My son is turning 1 and I wanted to setup a retro gaming station for him to learn to game through the ages. I went with RetroPie as it is well documented and supports a range of emulators - and it's easy to setup.My RetroPie Gaming Ki...

littleBits Death Eater Skull!
Remote Controls are magical enough to recreate this awesome Death Eater Skull. You can switch it on from across the room and make it glow an evil green! Jake and Nathan built this invention at a littleBits Workshop down at the Core Electron...

My ghostbusters proton pack
Hi all. Thought I'd share with you my modded Spirit Halloween proton pack. It's about 80% scale, which is plenty big enough for my 7-year-old son, and still looks decently sized on adults. As soon as I learned of this pack, 5-year-old me ju...

Makey Makey Pencil Piano
After seeing how much fun people had using the Makey Makey as a gaming controller for our RetroPie setup, I decided that more fun, simple projects that can be made using household materials were in order. So today I present to you the piano...

Raspberry Pi Desk Clock with Data Display
This project uses a Raspberry Pi and TFT display panel to provide a desk clock that also monitors our Home Solar and Battery system, and the weather, in one neat unit.
We recently installed a Solar Panel system and a Tesla Powerwall...
We recently installed a Solar Panel system and a Tesla Powerwall...
")
DIY Gameboy based on Raspberry Pi Zero W (PiGRRL)
We made a Pi Zero W retro-games console! The nostalgia is making me dizzy! If you'd like to build your own, we've put together a couple of wishlists to make things easier: For the Pi Zero W build, like in this project, check out the PiG...

DIY Weather Station with Raspberry Pi
I wanted to build a weather station. After some googling I found a great ‘how to’ guide using a raspberry pi.
I was also interested in learning Python, so I decided to dive right in...
I wanted to build a weather station. After some googling I found a great ‘how to’ guide using a raspberry pi.
I was also interested in learning Python, so I decided to dive right in...
Auto Tracking Camera System
The purpose of this project is to design a system that will automatically track stars or satellites. The first version, described here, is specifically to track stars and operate a Raspberry Pi HQ camera to take a series of long-exposure im...

Robot Arm Upgrade Project
This project has been a long and tricky one for me, I purchased my robot arm kit from Jaycar many years ago with the intention of controlling it from the start. I used to work with industrial robots, so when I saw this robot kit for sale I...

Articulated Mule
Converting a Mule into an articulated 4 wheel vehicle. A 'Mule' is/was a hand trolley with a motorised elevatable platform. What for? Just for fun, want to be able to control it using the R2D2 droid inventor app via LittleBits boards, why ...

The Great Doorbell Hack
Do you want a quick, easy, cheap RF remote control for your Raspberry Pi projects? Well, look no further than the front door! As you've probably got a half-duplex RF setup you've never considered using in a project before. Try this simple h...

GraviTrack Enhancements - Lights and Sound
Introduction Searching for solar panels and related items on the Core Electronics website; I came across the Solarbotics GraviTrack Marble Machine Kit. I thought the kit would be a good educational tool for the grandkids. The kit was a hit...

Borg Cube for Scouts STEM Camp
Introduction
What does one make for a Startrek-themed STEM camp for Scouts? Especially when given the Search and Rescue (SAR) activity base to run. Why this base you ask? Usually I run a radio d...Introduction
What does one make for a Startrek-themed STEM camp for Scouts? Especially when given the Search and Rescue (SAR) activity base to run. Why this base you ask? Usually I run a radio d...
UNITRAC
The UNITRAC (UNIversal TRACtion system) is a simple 3D printable conversion for the Black Gladiator-Tracked chassis, It’s designed to transform the large wheelbase platform into a self-contained propulsion system that has all the torq...
")
Desktop Infinity Mirror (Lasercut!)
A smaller version of our amazing Infinity-Mirror Table - the Desktop Infinity Mirror compresses all the colourful goodness into a picture frame-sized display. The entire design is made from laser-cut acrylic that we cut in-house. Check out ...

Hydra Bluetooth Speaker
Wow - this is one monstrous sounding and great looking speaker - even if I do say so myself! This is basically a 2.1 (stereo + subwoofer) system made with 3D plastic parts. Both the full range and subwoofer speakers are based on closed (se...

Kid’s Music Box
I want to make a portable music box that my 2 year old kid can operate intuitively on her own. So, Spotify or any other on-demand music platform with tablets and Bluetooth speakers are out of the question. Remember the good old days of putt...

Raspberry Pi Microscope
The Raspberry Pi Microscope was put together to help with soldering PCBs that have small surface mount components. Its main function is to verify the quality of solder joints and ensure there aren’t any short circuits. With the addition of...

IoT Soundscape
I had been captivated by the sound levels of trains I could hear passing by Metford throughout the day/night. I wondered if a sound level sensor reporting data back over LoRa would help me understand when a train was noisy. I also like the ...

IR Break-Beam Stopwatch
This project is a simple stopwatch with a little bit of a twist! It operates like a conventional stopwatch… you can start and stop it, you can record lap times and you can review the lap times once you hit stop. The twist is th...

Backyard Birdcam
Introduction
I had been thinking about how best to capture clear close-up photographs of some of the many birds we see around our property for quite a while and mulling over a variet...
Math Scroller
I was looking for something educational to 3D-Print for my child in Thingiverse and came across the concept of the Math Spinner. I found the models lacked a method of checking the answer so I wanted to automate it. The core design is inspir...

3D-Printed GPS Speedometer
Introduction
I wanted a GPS speedometer that is portable, robust, and looks okay. I had been messing around with 3D printing and exploring GPS modules for a few years and wanted...


Makers love reviews as much as you do, please follow this link to review the products you have purchased.