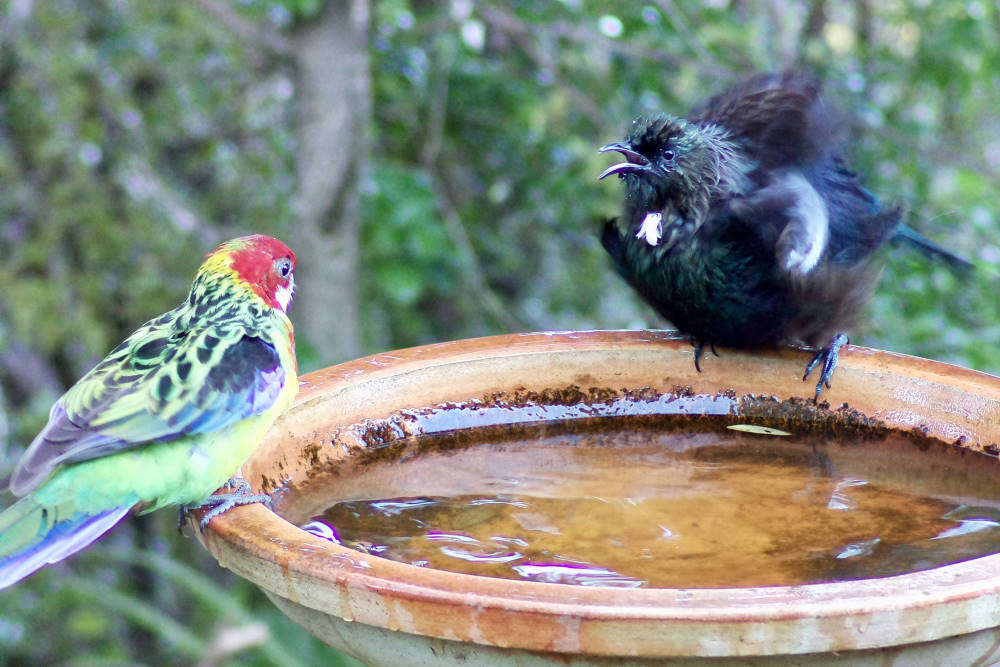
I had been thinking about how best to capture clear close-up photographs of some of the many birds we see around our property for quite a while and mulling over a variety of Raspberry Pi based ‘trail cam’ options. Birds regularly visit the two birdbaths and various native plants in our garden that flower or fruit at different times of the year. These locations are obvious targets to direct a camera at. I didn’t really want to use motion detection as a trigger because bushes, leaves and branches move around a lot in the breeze, and I expected rapidly changing light from clouds moving across the sky would also give rise to a high rate of false alarms. When I saw Tim’s Object and Animal Recognition With Raspberry Pi and OpenCV guide on the Core-Electronics learning website I was very keen to explore it, not having appreciated how accessible this technology is. I wondered if this might be a path to building the semi-autonomous and reliable bird photography camera I wanted. This idea has worked, albeit with several challenges along the way, and this article describes my journey to that success.

Materials Required
- Raspberry Pi model 4 with Raspian Buster OS
- Raspberry Pi HQ (or other) camera and lens (I am using a 35mm ArduCam C-mount lens)
- Raspberry Pi camera connection cable
- SD Card - I suggest > 32 GB C10 U3
- Mounting plate - check out the attachments for the DXF laser cutting file
- Optional - mini spirit level (AliExpress)
- Camera tripod
- Rechargeable battery pack and USB-C power cable (I am using a 20,800mAH battery)
- Access to SSH for remote connection to the headless Raspberry Pi
- Mobile device with an internet browser and good-sized screen for focusing the camera
- Optional – Raspberry Pi mounted tiny LCD screen (not very helpful in my opinion).
I mounted a Raspberry Pi 4 Model B 4GB and HQ camera with an ArduCam C-mount 35mm lens on a Perspex plate that I cut and drilled from drawings made from published Raspberry Pi schematics and attached it to a tripod using the inbuilt camera mount. Access to the Raspberry Pi USB-C power connector was obstructed when using one of the tripods I tried but was fine on another. The 35mm lens has an ‘effective focal length’ of 193mm (Crop factor 5.51 x 35) and an A2 sheet would fill the width of the frame at ~3.3 meters. Deploying the camera outdoors identified a few other issues that needed to be dealt with but more on that later.
 |
 |
I loaded the code set from Tim’s guide and it all worked the first time. I thought it was quite amazing. I set Tim’s object-ident-2.py script to only recognize birds and the object detection ‘output’ window confirmed that this also worked well. What I needed, however, was still images of birds, without rectangles and text on them, and this is where one of the main challenges of my project began.
I made several modifications and additions to Tim’s object-ident-2.py script and renamed my modified version “birdcam.py” with acknowledgment to Tim. As advised in his guide, I kept all my code in the /home/pi/Desktop/Object_Detection_Files directory. The first change I made was to add the following line, just after the point where an object has been identified and immediately before the lines that set up the rectangle around the object detected and the object identity and confidence rating text on the image, which are under the if (draw): statement. This new line captures an unannotated time-stamped still image whenever a bird, is detected (below left).
cv2.imwrite("Trigger_" + time.strftime("%Y-%m-%d_%H-%M-%S") +"_1.jpg",img)
 |
 |
This worked fine but for one thing. The maximum image resolution supported by Raspberry Pi cameras running video (as they are when using opencv) is 1920 x 1080, but the camera sensor on the HQ camera offers still image resolution up to 4056x3040 pixels. I wanted to use that higher resolution for my still images but could not access that using opencv.
My attempts to run raspistill commands from within the object-ident-2.py script all failed. I tried:
import os
	.
	.
	.
os.system("raspistill -o bird.jpg")
and also...
import subprocess
call = "raspistill -o bird.jpg"
	.
	.
	.
subprocess.call(cmd, shell=True)
In both cases the process failed with the error below:
mmal: mmal_vc_component_enable: failed to enable component: ENOSPC
mmal: camera component couldn't be enabled
mmal: main: Failed to create camera component
mmal: Failed to run camera app. Please check for firmware updates
I checked the camera operation outside of python and the above two system command calls in a separate test python script and everything worked fine. Online investigation around this error revealed that it is often reported but seldom adequately explained. However, I eventually found references suggesting that the camera does not like simultaneously answering to two masters (raspicam and OpenCV in this case). This does seem to explain my problem. It may be possible, but I could not find any way of getting OpenCV to temporarily release the camera so that I could run raspistill commands from within the python script.
I ultimately solved this problem by writing a shell script with an infinite loop that calls birdcam.py, which then exits back to the shell script when a bird is detected. The shell script takes a series of full resolution (4056x3040) time-stamped images using raspistill in burst mode, saves them on the SD card, and then restarts the python script (birdcam.py) and waits for the next bird sighting. Raspistill worked fine once the python script exited and this solution works well for me.
raspistill -ex sports -bm -n -o HiRes_$(date +"%Y-%m-%d_%H-%M-%S-")%02d.jpg -t 10000 -tl 0 -th 0:0:0 --thumb none CONTENT UPDATE
raspistill -ex sports -bm -n -o HiRes_$(date +"%Y-%m-%d_%H-%M-%S-")%02d.jpg -t 10000 -tl 0 -th 0:0:0 --thumb none CONTENT UPDATE
Using -t 10000 I get around 20 images in each burst when saving directly to the SD card although the number varies quite a bit between bursts. Initially, I was saving the images to a USB flash drive for ease of transfer of the image files to my iMac for culling, cropping, etc but I found the burst frame rate was 3 times faster writing to the SD card, meaning fewer missed photo opportunities when bird visits were fleeting. A USB SSD drive may be another fast and secure option to consider that would also simplify retrieval of the images.
In my experience to date, less than 1% of images are really worth keeping so while there’s more culling work to do later, the more photos you take the more likely you are to get one or two great images. Depending on the setting and the type of birds involved, the birds may flee halfway through the burst but at other times they hang around for several consecutive photo bursts.
Exit from the python script to taking the high-resolution photos via the shell script takes a fraction of a second. The time from saving the trigger image to the first high-resolution raspistill image is <130ms. A short delay here and there is not really a problem in this long-term ‘bird watching' game. Patience is an essential ingredient aided by the ability to run the camera unattended. Powering my headless Raspberry Pi and camera setup with a 20,800 mAh portable charger (battery booster) provides up to 12 hours of continuous operating time but this will vary depending on how much triggering activity occurs.
The quality of the HQ camera still images seems amazing to me and although I’m no camera aficionado it is certainly meeting all of my highest expectations.

Californian Quail
One of my challenges with the shell script was providing a mechanism to exit from the infinite loop gracefully and finish the bird cam session. Exiting out of the Python script with [Ctrl-C] only resulted in the shell script re-starting it. I coded a second stage for the exit in the shell script but a final photo burst was recorded before the exit, which was a bit untidy. Eventually, I learned how to parse the return code from the python script user-initiated exit to the shell script and close all the processes in one go. As part of this I disabled [CTRL-C] while the shell script was running to avoid unpredictable outcomes. It now closes immediately with no superfluous photo burst.
Running the Raspberry Pi headless in the wild raised other challenges. Putting aside the obvious hazards of exposing the unprotected setup to the hot sun and unexpected rain, the principal challenge was focusing the camera. A custom-made weather-proof housing might need to be next on the project plan, but I rather like the raw technology look of the unprotected setup.
The lens I am using has a pretty narrow depth of field at a fairly close range. I’m usually 2-4 metres away from my target, so it needs to be focussed fairly precisely. Initially I tried doing this using a 2.8” GPIO mounted LCD screen on the Raspberry Pi but this simply wasn’t good enough for my old eyes, so I’ve taken it off.
The solution to the focussing issue for me was to use RPi_Cam_Web_Interface ( https://elinux.org/RPi-Cam-Web-Interface ) which I already had installed on my Raspberry Pi from an earlier project. I can use this outdoors on my iPad to focus the camera.
I achieve this by connecting to my Raspberry Pi via ssh on my iPad while outdoors standing next to Raspberry Pi and camera. I then start up RPi_Cam_Web_Interface and open the app’s web page in the Safari web browser to see the live camera image. I can then focus the camera using the app’s 1920x1080 resolution preview screen, which I do using a focussing board to enhance precision. These lenses are quite fiddly and focussing them well takes a bit of practice.

Once I think the camera is in focus, I record a high-resolution still image using the appropriate button on the RPi_Cam_Web_Interface screen, which I can then display and zoom in on. This greatly assists confirming whether the focus is good enough or not. Once I’m satisfied I shut down RPi_Cam_Web_Interface and logout of ssh.
One limitation of RPi_Cam_Web_Interface in this setting is that if the autostart option has been selected when installing it ‘out of the box’, there doesn’t appear to be any way to exit from it within the app itself. The installation autostart can be disabled by commenting out the relevant lines in /etc/rc.local under the # START RASPIMJPEG SECTION. I conveniently found that RPi_Cam_Web_Interface can still be stopped and re-started on demand from a terminal session without modifying /etc/rc.local by running the following shell scripts included in my RPi_Cam_Web_Interface installation package:
 $ bash ~/Pan-Tilt-Camera-master/web-interface/start.sh
 $ bash ~/Pan-Tilt-Camera-master/ web-interface/stop.sh
After shutting down RPi_Cam_Web_Interface with the above shell script, I then go indoors and log in to the Raspberry Pi with ssh from my desktop iMac, and start my shell script (drearily called startbirdcam.sh) that runs my birdcam program. I find doing this on my iMac is much more convenient than using the iPad to monitor and manage things while the bird watching process is underway, although an iPad or even a smartphone could be used.
I’ve added some code to echo status information to the screen periodically, to confirm that the program is still running and also to monitor the CPU temperature. Whenever a bird detection occurs, the time is displayed together with a number that increments each time a bird sighting occurs, so that I know how much triggering activity there has been. A large number either means lots of bird activity or lots of false triggering.


|
Keeping the Pi cool with a sun hat |
Console screen shot with Backyard Birdcam running |


When running this setup indoors during testing, the CPU soon heats up to the 80-85°C range but outdoors it has mostly stayed below 60 °C when in the shade, often assisted by the presence of some breeze. However, when the camera is exposed to full sun, the CPU has risen above 80 °C and although a sun hat soon brought that back by 10 °C or so, I am still planning to add a heatsink to the CPU for good measure.
Another consequence of running the Raspberry Pi headless is that the python script crashes if there is no display attached, as it has nowhere to display the object detection ‘output’ window. I dealt with this by commenting out the line below, which normally displays this window.
# cv2.imshow("Output",img)
Not having the ‘output’ window does of course mean that you can’t see what is happening visually which can be problematic if you are getting a lot of false object detection triggers. The way I have addressed this is to save a copy of the annotated object detection frame that I can inspect later, by positioning the code line below after the lines that setup the annotations.
cv2.imwrite("Trigger_" + time.strftime("%Y-%m-%d_%H-%M-%S") +"_2.jpg",img)
I have suffixed the unannotated and annotated image names “_1.jpg” and “_2.jpg” respectively so that if I do want to save both images, they will sort adjacent to each other and the two image series are easily differentiated. However, most of the time the unannotated image is superfluous.
Inspecting the saved annotated images allows me to see if trigger events are being initiated by birds or if they are false because I can see what object is triggering them. This setup is not completely immune to false triggering but I suspect it occurs less often than with motion sensing technologies. I find false triggering tends to occur if a particular shaped leaf or bunch of leaves is in the frame, especially if it is moving around in the breeze, or when changing shadows and light levels occur with the sun going behind a cloud, turning innocent shapes into birds.
When I see lots of triggering happening but no birds in sight I look at the trigger images and either angle the camera away from the imposter or whip out the secateurs and do some quick pruning. As described in Tim’s guide, you can also adjust the object likelihood threshold and the nms threshold as an additional means to alter the trigger sensitivity, but I haven’t really explored this.
This project has been lots of fun and I have learned a lot through the course of it, including in a number of unanticipated areas as various challenges emerged and ideas surfaced. On top of that, I now have a great piece of wildlife photography kit that could also easily be deployed in a wide range of different settings for all sorts of other purposes. My wife insists that I also confess that it has been a major distraction for me over the last few weeks causing several other less fun tasks to be side-lined by procrastination.

The need to be able to review the trigger images inspired me to explore how to transfer files from the Raspberry Pi to my iMac on demand so I could have a look at them and quickly sort things out. I started off doing this with SFTP which was easy but a bit tedious, so after some reading up I have now written a few very short shell scripts that use SCP to do this as well as some other useful file transfer tasks. This works on my iMac but not on a Win10 PC and I haven’t yet further explored how to make that work.
SCP Shell Scripts for file transfers:
‘getobj’ - transfers all trigger images to my iMac
‘getimages’ - transfers all trigger images and high-resolution burst images to my iMac
‘backupobjprogs’ - backs up all the files in the Object_Detection_Files directory to my iMac
Example: ‘getobj’
scp ~/Desktop/Object_Detection_Files/obj_log/*
[email protected]:~/Birdcam/Object_Detection_Files/obj_log
With an extra terminal session running and an iMac Finder window open, I can transfer and review the trigger images on my iMac very quickly using the SCP shell script. Setting up SSH keys so that I don’t have to keep entering my iMac password for the scp command to run would be a convenient enhancement that I’ll get around to sometime. It is also very easy to go in at this time and delete any false trigger images and their corresponding high-resolution images from the Raspberry Pi so that you don’t have to deal with them later.
I began to think this process might work even better if I could automatically send the trigger images to a web page where I could view them without having to transfer them to my iMac and so I decided to have a look at doing this. As a complete novice in this area, I thought the quickest way for me to achieve this was probably to try and install a pre-built open-source web photo gallery, and after some purposeful background research, I chose the free Lychee photo management tool (https://lycheeorg.github.io/docs/org.html) and managed to get it up and running in a couple of hours. I then added the following couple of lines of code to birdcam.py to save a copy of these images to Lychee’s import folder in real-time. After opening Lychee in a browser it only takes a few mouse clicks to import the images into the photo gallery. I did have to change the permissions on the Lychee import directory before birdcam.py could write to it.
os.chdir("/var/www/html/Lychee/uploads/import")
cv2.imwrite("Trigger_" + time.strftime("%Y-%m-%d_%H-%M-%S") +".jpg",img)
This approach does indeed work well, both because it is quick and easy but also because images can be checked from anywhere a browser can be accessed on my local network, eg phone or iPad.
- Roger
 |
 |
 |
 |
 |
|
