Since you’ve got your new Pioneers Platform for Pycom assembled, with a Lopy4, Expansion Board, and Lora Antenna, let's start sending data to the cloud! The Things Network is a great free service that collects data transmitted over LoRaWAN. The best thing about The Things Network(TTN) is that once you are set up to connect you can connect over ANY TTN gateway! These gateways are all over the world! There is a great a coverage map of The Things Network. If there is not one in your area, you can always set up your own TTN Gateway, or follow our tutorial on making a TTN gateway yourself. This tutorial will be written for the Pycom Lopy4, but it could apply to any LoRaWAN device with little modification.
Setting Up The Things Network
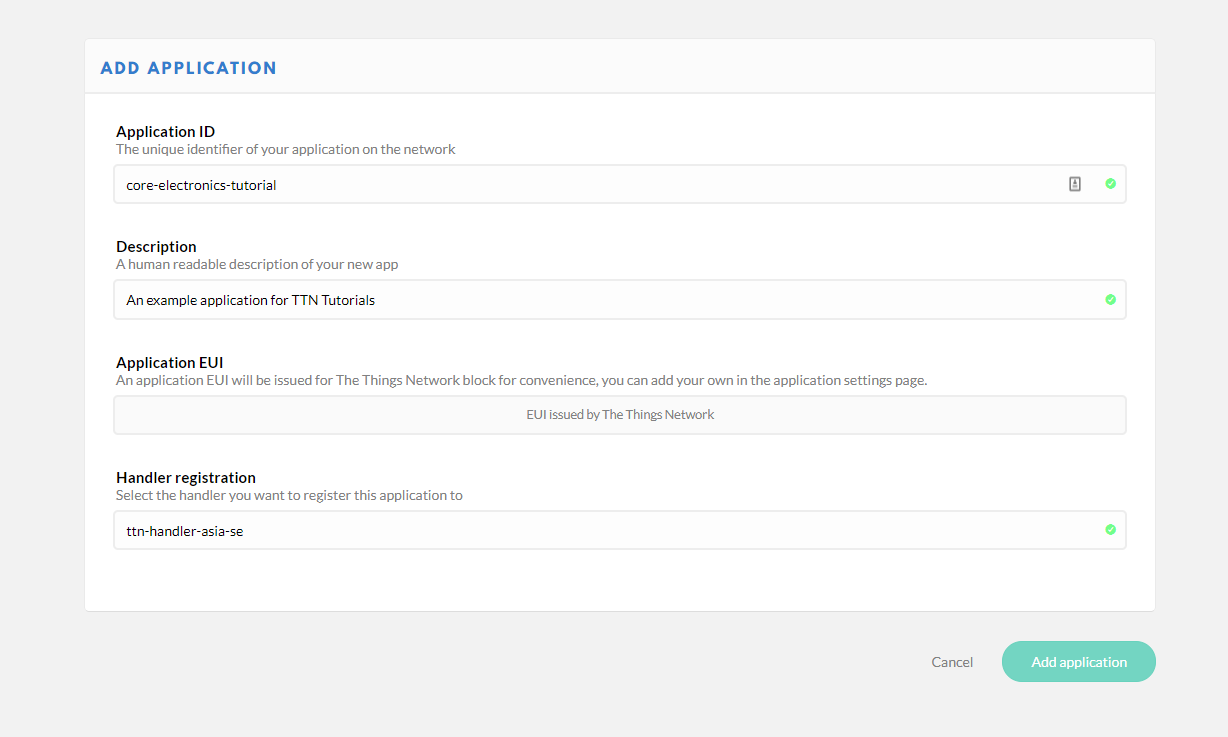
The first step to getting your Pycom Lopy4 or other LoRaWAN device on the Things Network. Create an account on the site, and then navigate to the “Console” under your account name. We are creating a new application. Under the application option, we see the option to “Add Application”
Within the add application window, we will create an Application ID, this needs to be all lowercase with dashes instead of spaces. This cannot be changed later on so make sure you like it! Make the description whatever you like and choose a handler registration that is appropriate for your area. If you are in Australia we recommend that you use “ttn-handler-asia-se”.
Register Your Device
Now we are ready to add a device, but first, we need to know the Device EUI. Finding this is easy though! Connect to the Lopy4 on REPL, and enter these lines of code:
from network import LoRa
import binascii
lora = LoRa(mode=LoRa.LORAWAN)
print(binascii.hexlify(lora.mac()).upper().decode('utf-8'))
Your Device EUI should print out as a 16-character code. Just copy it to your clipboard for now by selecting it and using ctr+shift+c.
Next, we need to add our device to our new TTN application. In the application overview window in The Things Network select “register device”.
Create a unique Device-ID using lowercase letters and dashes instead of spaces. Leave the Device EUI as it is for now.
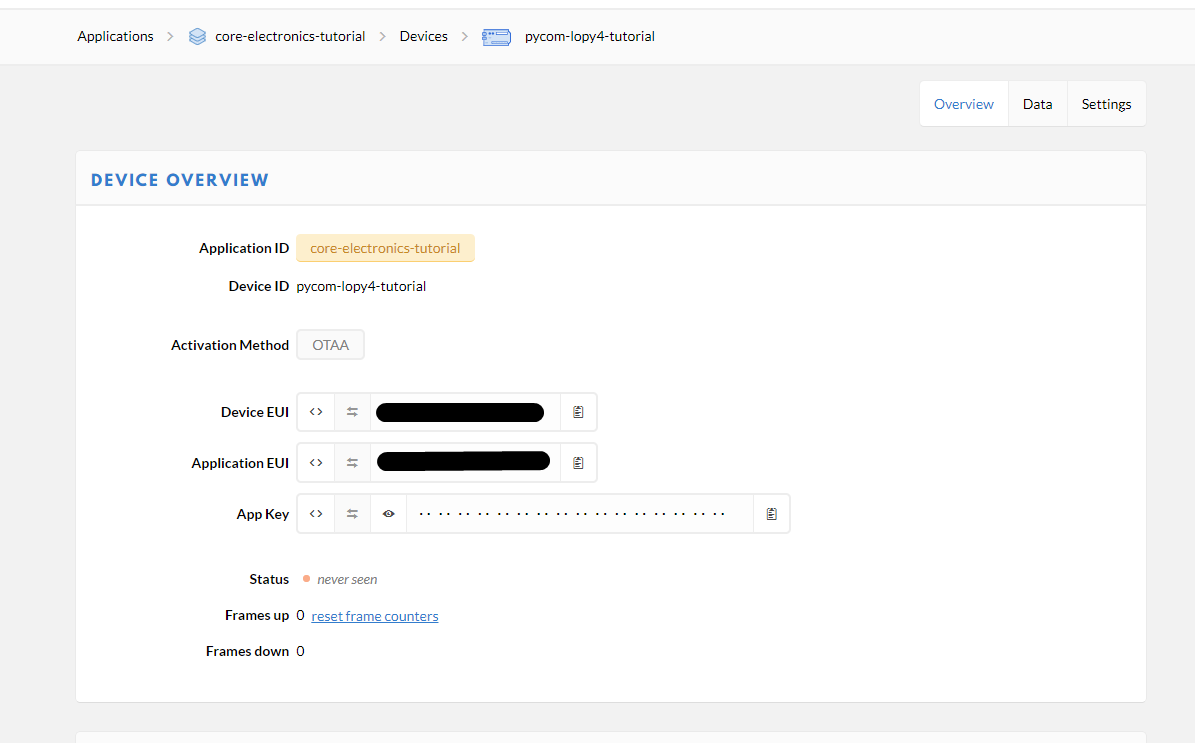
Hit register and it will take you to the device overview page. On the Device Overview page, we can see all the information about our new device! Go to the settings for the device and add a description, and paste in your copied Device EUI into the Device EUI field. Now we just need to program our device to match. Here is some example code to get you started communicating over TTN. Copy your App EUI and App Key into the relevant fields in the code:
from network import LoRa
import socket
import utime
import binascii
import pycom
import ustruct
import machine
from machine import ADC

# takes battery voltage readings
def adc_battery():

	adc = ADC(0)                                        # initialise adc hardware
	adc_c = adc.channel(attn=3, pin='P16')              # create an object to sample ADC on pin 16 with attenuation of 11db (config 3)
	adc_samples = []                                    # initialise the list
	for count in range(100):                            # take 100 samples and append them into the list
		adc_samples.append(int(adc_c()))

	adc_samples = sorted(adc_samples)                   # sort the list
	adc_median = adc_samples[int(len(adc_samples)/2)]   # take the center list row value (median average)
	# apply the function to scale to volts
	adc_median = adc_median * 2 / 4095 / 0.3275
	print(adc_samples)

	return adc_median

# disable LED heartbeat (so we can control the LED)
pycom.heartbeat(False)
# set LED to red
pycom.rgbled(0x7f0000)

# lora config
lora = LoRa(mode=LoRa.LORAWAN, region=LoRa.AS923)
# access info
app_eui = binascii.unhexlify('XXXXXXXXXXXXX')
app_key = binascii.unhexlify('XXXXXXXXXXXXXXXXXXXXXXXXXXXXXXXXXXXX')

# attempt join - continues attempts background
lora.join(activation=LoRa.OTAA, auth=(app_eui, app_key), timeout=0)

# wait for a connection
print('Waiting for LoRaWAN network connection...')
while not lora.has_joined():
	utime.sleep(1)
	# if no connection in a few seconds, then reboot
	if utime.time() > 15:
		print("possible timeout")
		machine.reset()
	pass

# we're online, set LED to green and notify via print
pycom.rgbled(0x007f00)
print('Network joined!')

# setup the socket
s = socket.socket(socket.AF_LORA, socket.SOCK_RAW)
s.setsockopt(socket.SOL_LORA, socket.SO_DR, 5)
s.setblocking(False)
s.bind(1)

# sending some bytes
print('Sending 1,2,3')
s.send(bytes([1, 2, 3]))
utime.sleep(3)

#text is automatically converted to a string, data heavy (dont do it this way)
print('Sending "Hello World"')
s.send("Hello World!")
utime.sleep(3)

count = 0
# limit to 200 packets; just in case power is left on
while count <= 200:
	lipo_voltage = adc_battery()

	print("Battery voltage:  ", lipo_voltage)
	# encode the packet, so that it's in BYTES (TTN friendly)
	# could be extended like this struct.pack('f',lipo_voltage) + struct.pack('c',"example text")
	packet = ustruct.pack('f',lipo_voltage)

	# send the prepared packet via LoRa
	s.send(packet)

	# example of unpacking a payload - unpack returns a sequence of
	#immutable objects (a list) and in this case the first object is the only object
	print ("Unpacked value is:", ustruct.unpack('f',packet)[0])

	# check for a downlink payload, up to 64 bytes
	rx_pkt = s.recv(64)

	# check if a downlink was received
	if len(rx_pkt) > 0:
		print("Downlink data on port 200:", rx_pkt)
		pycom.rgbled(0xffa500)
		input("Downlink recieved, press Enter to continue")
		pycom.rgbled(0x007f00)

	count += 1
	utime.sleep(10)
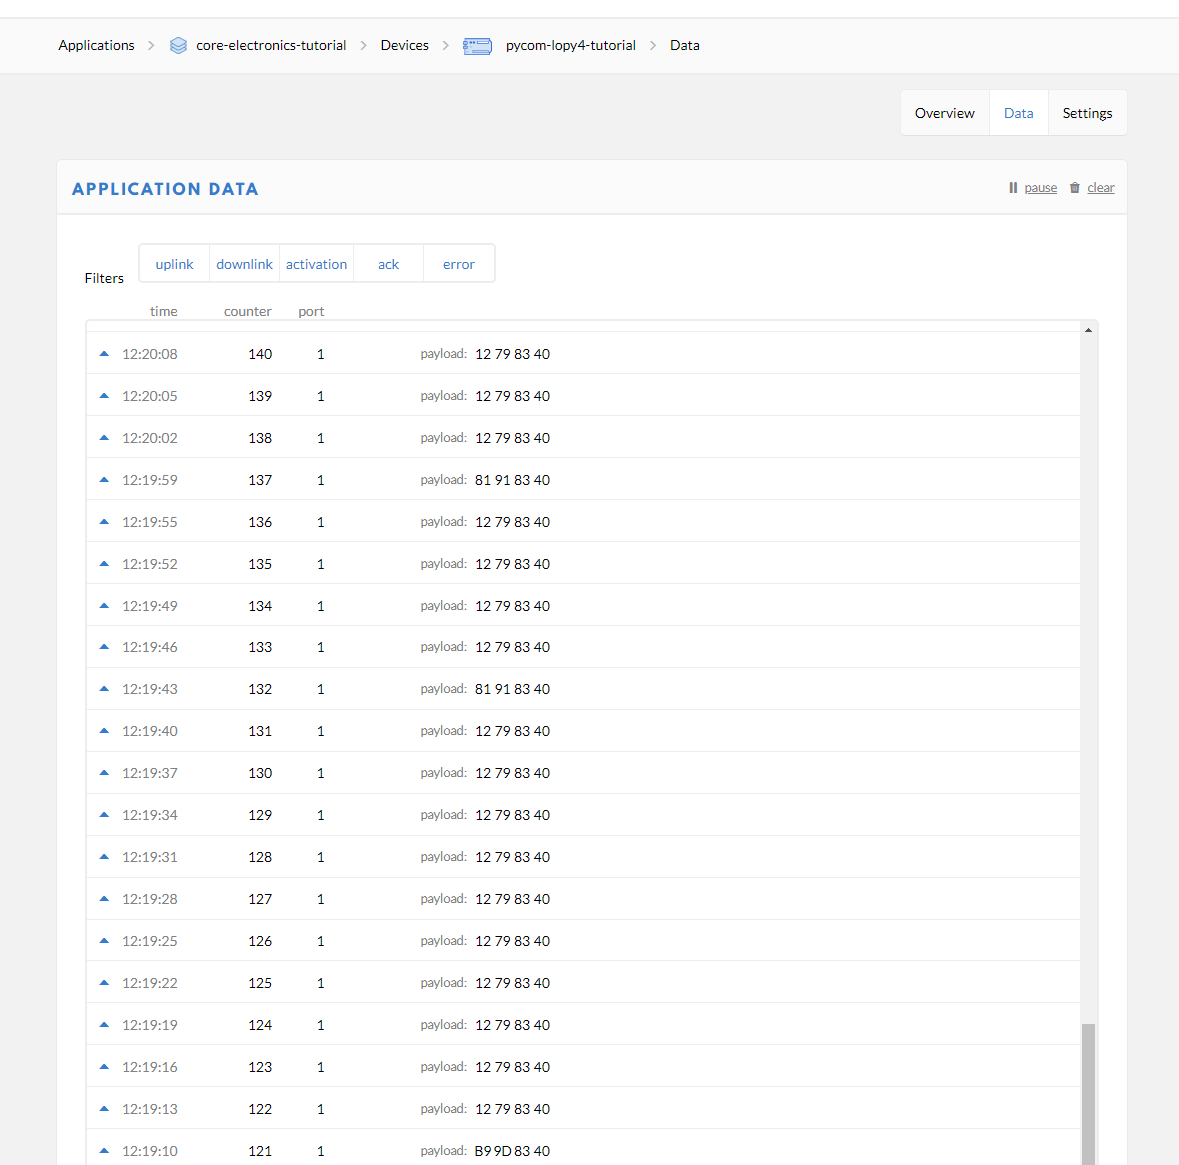
It's worth mentioning that here in Australia we use both AU915 and AS923. We recommend using AS923 because it has a much wider reach in the global market. You are much more likely to find AS923 compatible products than AU915.. The first consideration you should make is what frequency your local gateways operate on. In Newcastle we use AS923, and in Sydney, AU915 is used. If you aren't sure what your local gateway's frequency is, just try using AS923, and if it doesn't connect, switch to AU915. Now run your code! In the Data view, you should see payloads coming in!
You will need to refresh your TTN page the first time you connect to see the data stream start.
Now you are ready to create your own program and start getting some useful data! One thing you will quickly learn is that the data sent over LoRaWAN need to be in bytes. The example sketch converts our data into bytes before transmitting. There are a couple of different methods used in this example. If you want to learn how to encode and decode your payload for transmission over LoRaWAN, check out our Decoding Payloads on The Things Network Tutorial! If you want to get started on this crazy IoT ride, check out our Pioneers Platform for Pycom with the Pycom Lopy4 and Expansion board. That’s everything you need to get started! As always if you want to learn more about Pycom and their full line of products check out our Pycom Tutorials. If you want to learn how to connect to TTN using ABP rather than OTAA check out the Your First LoRaWAN Node on The Things Network Tutorial. We have way more tutorials on the using The Things Network so check them out! These include Encoding and Decoding on The Things Network for decoding your payloads and How to Send your Data to Adafruit.IO from TTN by using IFTTT.
Going Further
If you would like further information about connecting devices to TTN, check out the following resources:
How to setup Pycom LoPy on TTN (note: NEED to use AS923)


