In the lasts article we looked at Building a LoRaWAN Nano Gateway to The Things Network. There wasn't a lot to do there. We put together the Pycom hardware, configured The Things Network to see our Pycom device as a Gateway, then we took code supplied by Pycom, changed a few settings, and started it up.
In this article we'll take a second Pycom LoPy and antenna and build our first Node device. It will use the gateway we created and we'll see the power of The Things Network!
Create the Atom Project for the Node
Having built the gateway, you'll have the Pycom examples code handy. Create another Atom project next to your Gateway and copy in the file: pycom-libraries-master\examples\lorawan-nano-gateway\abp_node.py.
This file is id.py and I use it to get the EUI for either WiFi or LoRa. Add it too.
from network import WLAN
from network import LoRa
import binascii

print()

lora = LoRa()
print("Device EUI (LoRa): %s" % (binascii.hexlify(lora.mac()).decode('ascii')))

wl = WLAN()
print("Device EUI (WLAN): {}".format(binascii.hexlify(wl.mac())[:6] + 'fffe' + binascii.hexlify(wl.mac())[6:]))
Make sure your LoPy (or FiPy) is connected to Atom and run id.py. You'll need the Device EUI (LoRa) in just a minute.
Create an Application on TTN
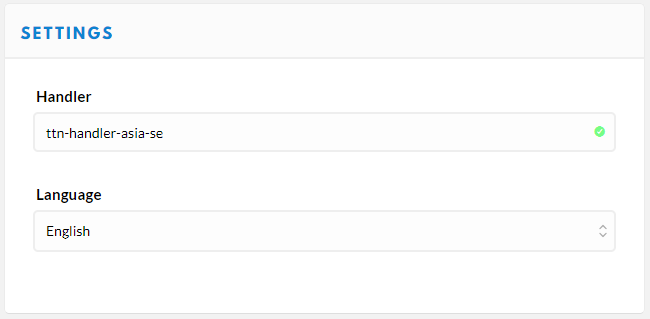
Open the Console on the TTN web site. Before we can create an application, we must first check which Handler we have. At the top right is your avatar, click that, then Settings. Note which Handler you are configured for. Mine is ttn-handler-asia-se.
 The Things Network console settings
Select Applications at the top of the page. On the right is a link to add application. The Application ID needs to be in a specific format: "Application ID can only exist of lowercase alphanumeric characters, nonconsecutive - and _ and it cannot start or end with a - or a _" so I tend to use this form: your-first-lorawan-node-on-ttn-tutorial. A description is optional. Ensure the Handler is as per your Settings. Click Add application at the bottom of the page.
Create a Device
You'll now be looking at the Overview of your TTN Application. We want to add a device, so go to Devices and click register device. The Device ID can be whatever you like (again, formatting rules apply). The Device EUI has to be the one from your Node device. You need the Device EUI (LoRa) which is always 16 characters long. With those two fields filled, you can click Register at the bottom of the page.
You'll now be shown the Overview of the device. We need to change the Activation Method, so click Settings at the top at the top right. Change Activation Method to ABP. Click Save. Now the device overview shows even more settings. Again it's time to put TTN and Atom side-by-side to copy and check some settings. Open abp_node.py.
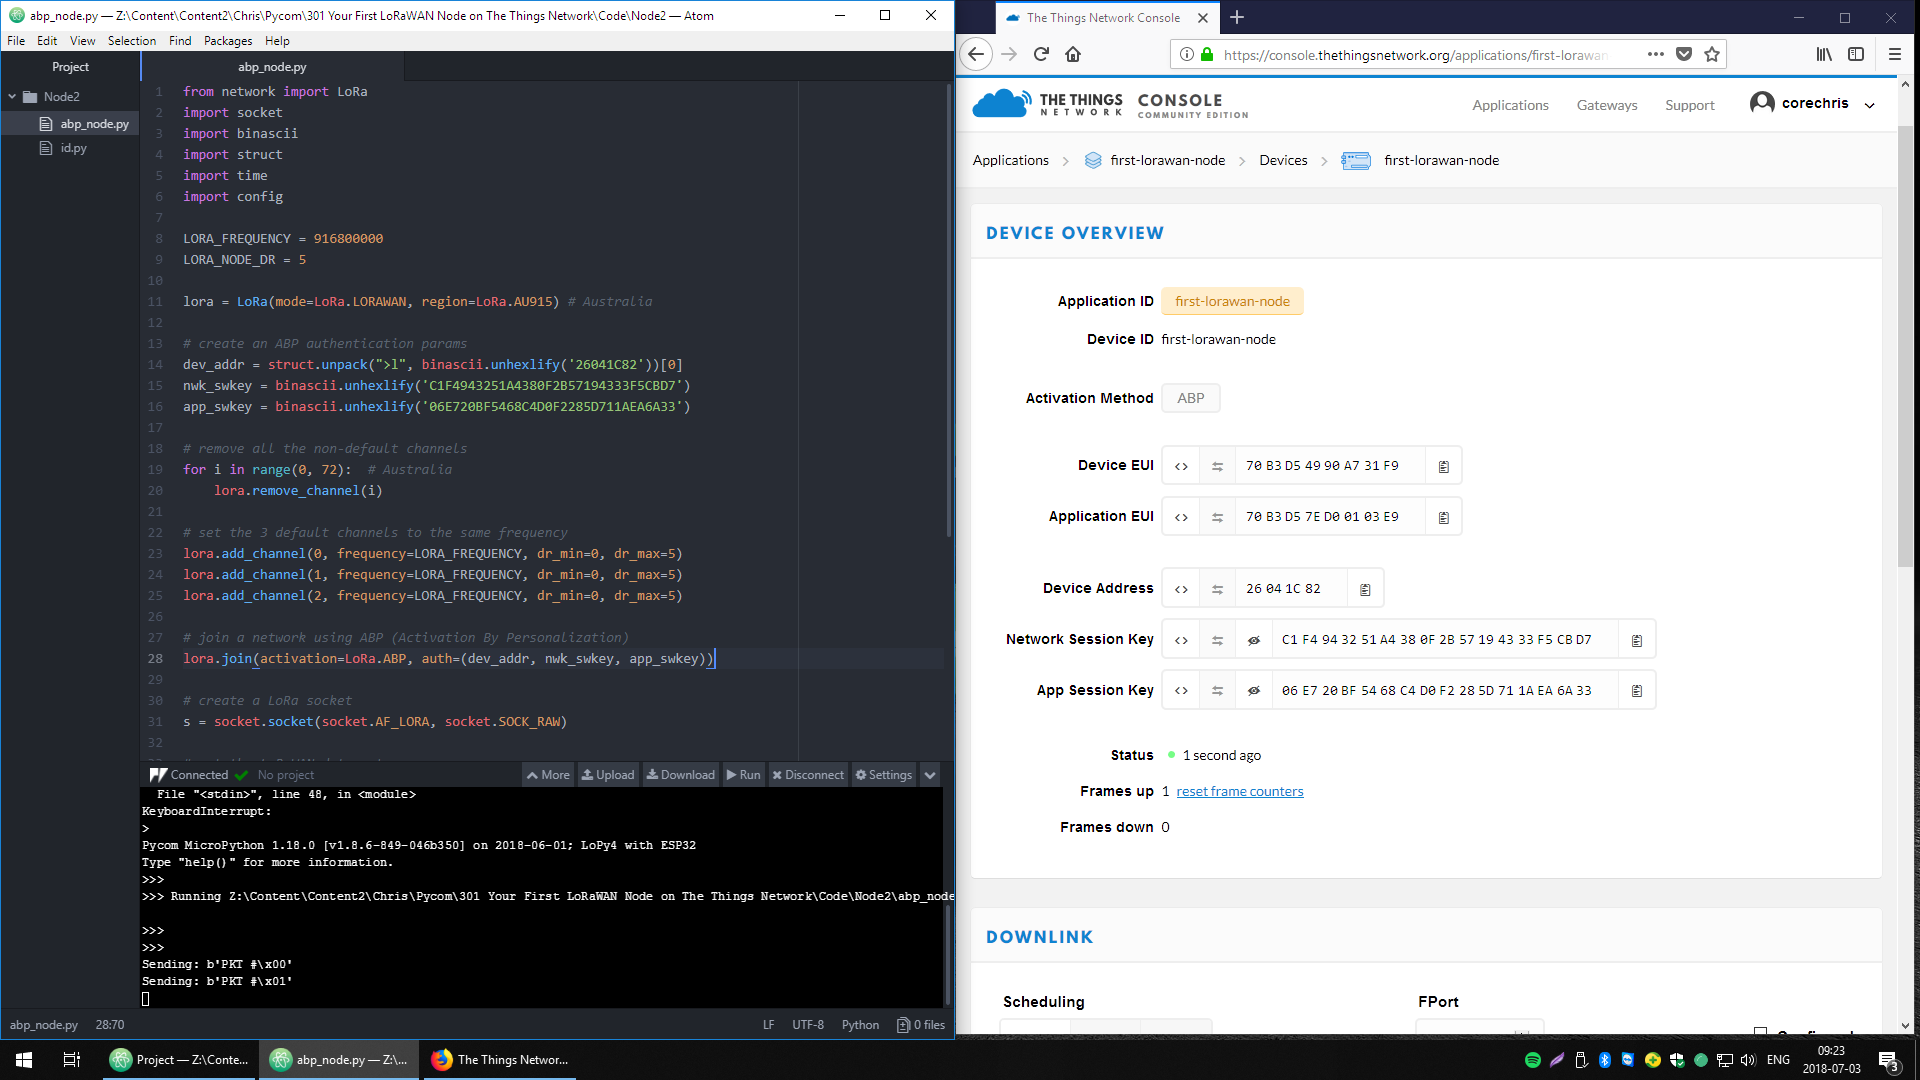 The Things Network and Atom IDE side by side
Walking down the code the first thing we need to change is line 14, region=LoRa.EU868. See comments above this line for a setting appropriate to you. Lines 17-19 are the ABP authentication parameters. We need to copy into our code file the parameters in TTN:
- dev_addr from Device Address
- nwk_swkey from Network Session Key
- app_swkey from App Session Key
Next, lines 22 & 23 remove channels from the lora radio. For Australia we need to remove all 72 channels. So these lines are updated to:
for i in range(0, 72):
    lora.remove_channel(i)
Lines 26-28 add three channels on the same frequency. Since we didn't copy the config.py file into this project, we need to define LORA_FREQUENCY and alter these three lines. You'll need to open your Nano Gateway project and copy the LORA_FREQUENCY line from the config.py file into the Node project's abp_node.py file. At the top, after the "import" commands is best. Alter the three lines to remove config.
lora.add_channel(0, frequency=LORA_FREQUENCY, dr_min=0, dr_max=5)
lora.add_channel(1, frequency=LORA_FREQUENCY, dr_min=0, dr_max=5)
lora.add_channel(2, frequency=LORA_FREQUENCY, dr_min=0, dr_max=5)
A few lines later we have the same problem with LORA_NODE_DR. Again, copy in from the Gateway project and remove config.
s.setsockopt(socket.SOL_LORA, socket.SO_DR, LORA_NODE_DR)
That's it. Your node code should be ready to roll! Hit Run in Atom. If you're like me, you'll now see the mistakes you made! Here's the program listing so you can check for errors.
abp_node.py
from network import LoRa
import socket
import binascii
import struct
import time
#import config

LORA_FREQUENCY = 916800000
LORA_NODE_DR = 5

lora = LoRa(mode=LoRa.LORAWAN, region=LoRa.AU915) # Australia

# create an ABP authentication params
dev_addr = struct.unpack(">l", binascii.unhexlify('26041C82'))[0]
nwk_swkey = binascii.unhexlify('C1F4943251A4380F2B57194333F5CBD7')
app_swkey = binascii.unhexlify('06E720BF5468C4D0F2285D711AEA6A33')

# remove all the non-default channels
for i in range(0, 72):  # Australia
    lora.remove_channel(i)

# set the 3 default channels to the same frequency
lora.add_channel(0, frequency=LORA_FREQUENCY, dr_min=0, dr_max=5)
lora.add_channel(1, frequency=LORA_FREQUENCY, dr_min=0, dr_max=5)
lora.add_channel(2, frequency=LORA_FREQUENCY, dr_min=0, dr_max=5)

# join a network using ABP (Activation By Personalization)
lora.join(activation=LoRa.ABP, auth=(dev_addr, nwk_swkey, app_swkey))

# create a LoRa socket
s = socket.socket(socket.AF_LORA, socket.SOCK_RAW)

# set the LoRaWAN data rate
s.setsockopt(socket.SOL_LORA, socket.SO_DR, config.LORA_NODE_DR)

# make the socket blocking
s.setblocking(False)

for i in range (200):
    pkt = b'PKT #' + bytes([i])
    print('Sending:', pkt)
    s.send(pkt)
    time.sleep(4)
    rx, port = s.recvfrom(256)
    if rx:
        print('Received: {}, on port: {}'.format(rx, port))
    time.sleep(6)
Watching it Work
When it works, your node will print lines in the REPL box like this:
>>>
>>>
Sending: b'PKT #\x00'
Sending: b'PKT #\x01'
The gateway will now be doing something far more interesting:
[ 16158.282] Received packet: {"rxpk": [{"data": "QFMUBCYAAAACUtpNnmxsFtmdeQ==", "time": "2018-07-02T04:00:50.122444Z","chan": 0, "tmst": 1297471302, "stat": 1, "modu": "LORA", "lsnr": 7.0, "rssi": -12, "rfch": 0, "codr": "4/5", "freq": 916.7999, "datr": "SF7BW125", "size": 19}]}
[ 16158.301] Push ack
[ 16168.284] Received packet: {"rxpk": [{"data": "QFMUBCYAAQACYbeFjX5t2ktTrQ==", "time": "2018-07-02T04:01:00.124416Z","chan": 0, "tmst": 1307473181, "stat": 1, "modu": "LORA", "lsnr": 6.0, "rssi": -12, "rfch": 0, "codr": "4/5", "freq": 916.7999, "datr": "SF7BW125", "size": 19}]}
[ 16168.304] Push ack
[ 16174.063] Pull ack
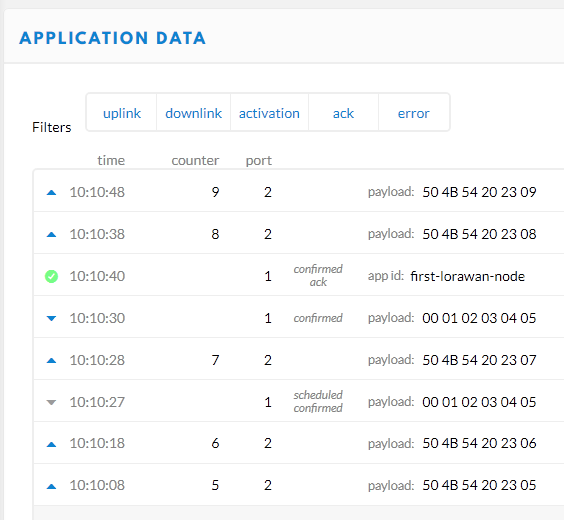
Going to TTN, we can now switch to our Device's Data tab. Data should be slowly filling the Application Data box but its quite possible nothing will appear. Hop over to the device's Overview tab and click reset frame counters at the bottom. You'll need to click OK on the dialog. Now have a look at the Data tab.

It's interesting to note here that TTN is seeing six bytes for each transmission. As can be seen from the REPL box on the node, each uplink message carries six bytes: Sending: b'PKT #\x17. The first byte is the character P, the second byte is K, then T, then a space, then a hash #, then a byte shown in hexadecimal: \x17
The Data panel on TTN shows all the characters in their hexadecimal form:

Simulating a Downlink Message
While looking at your Device (Node) in TTN, swich over to the Overview tab and scroll down to find the Downlink box. This is where we can simulate sending data from TTN back down to the LoPy. Because this message goes directly to the LoPy it must be in bytes. So let's send a set of ascending numbers, just as an example:
 Configuring a downlink message in The Things Network
Click Send and switch back to the Data tab. You will see the conversation happen in real time.
 Sending a downlink message in The Things Network
Third from the bottom we see a message marked scheduled confirmed that has a payload of 01 02 03 04 05. Two slots up we see the same payload marked confirmed. The gateway now has the message. Finally a green check appears to say the TTN got confirmation back from the node that it acknowledged receipt of the message (confirmed ack). This is how TTN can send a message to a node, that might have to wait hours or days to be delivered, and then know when it got through.
Where We Stand
The final goal is to have LoRa devices sensing and acting on their environment and having the devices work together. Where we stand now is that we've implemented all of LoRaWAN. The messages between the devices and TTN are encrypted, we can send and receive messages in the byte form that LoRaWAN requires. Next we'll look at turning bytes back into JavaScript Object Notation (JSON) for integration with a plaform that can make all our devices work together. A platform like NodeRED or Adafruit IO. More to come!

