


Adafruit PiCowBell HSTX DVI Output for Pico - Works with HDMI Displays
In stock, ships same business day if ordered before 2PM
Delivered by Tue, 14th of Jul
Quantity Discounts:
- 10+ $11.11 (exc GST)
- 50+ $10.88 (exc GST)
Ding dong! Hear that? It's the PiCowbell ringing, letting you know that the new Adafruit PiCowbell HSTX DVI Output for Pico is in stock and ready to display images and graphics from a microcontroller directly to an HDMI monitor or television! Note that it doesn't do audio, just graphics.
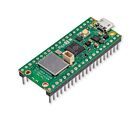
The PiCowbell is the same size and shape as a Pico and is intended to socket underneath to make your next video output project super easy. Mini HDMI connector for use with standard HDMI cables? Yes! STEMMA QT / Qwiic connector for fast I2C? Indeed. Reset button & extra switch for restarting code or changing configuration? Bien sur.
Compared to the original DVI PiCowbell, this board has very similar setup:
- Uses the HSTX-specific pins for RP2350 usage, thats GPIO 12-19
- Has a slimmer slide-switch
- Adds 4 'USB host port' pads that can be used with PIO-USB to add a peripheral. Adafruit recommend a USB A socket cable for adding a proper USB host port.
You can use this board with either a Pico 1 (RP2040, using PIO-DVI) or Pico 2 (RP2350, using PIO-DVI or HSTX-DVI) . However, Adafruit recommend using the Pico 2 or Pico 2W with this board since you can use the improved HSTX peripheral which means you can save a PIO and processor time when generating video.
The PiCowbell provides you with:
- Right angle JST SH connector for I2C / Stemma QT / Qwiic connection. Provides 3V, GND, IO4 (SDA), and IO5 (SCL). Also connected through to the HDMI sink (monitor) with level shifting, so the EDID can be read.
- Mini HDMI connector for DVI output to any HDMI display or monitor.
- GPIO12: D0+
- GPIO13: D0-
- GPIO14: Clock +
- GPIO15: Clock -
- GPIO16: D2+
- GPIO17: D2-
- GPIO18: D1+
- GPIO19: D1-
- Pin breakout for HDMI extras: Utility, CEC, and HotPlug pins
- Reset button - Press to restart your program
- Slide switch - On GPIO #3 for whatever purpose you wish.
- USB host port pads - that can be used with PIO-USB to add a peripheral. Adafruit recommend a USB A socket cable for adding a proper USB host port.
- Many pads on the 'Bell have a duplicate hole pad next to it for solder-jumpering
- The ground pads have white silkscreen rectangles to easily identify
- Gold-plated pads for easy soldering
In Arduino, Adafruit use Adafruit's fork of PicoDVI (RP2040 or RP235) or Adafruit_DVI_HSTX (RP2350 only) to create an internal framebuffer of 320x240 or 400x240 16-bit pixels that is then continuously blitted out as pixel-doubled 640x480 or 800x480 digital video. Whatever you 'draw' to the internal memory framebuffer appears instantly on the digital display in crisp color. Since the library is a subclass of AdafruitGFX, it'll be familiar to folks who have used Adafruit's TFT or OLED displays before.
There's also DVI output support in CircuitPython - but note that it uses a lot of memory, so in particular if you want to use Pico with WiFi support, you should go with a Pico 2 since it has more SRAM.
They also connected the HDMI-connectors I2C pins to the SDA/SCL of the Pico (through a safe level shifter) so you can read the EDID EEPROM of displays, and have broken out the CEC and Utility pads. The Hot Plug Detect pin is also available. Read this pin to know when a display has been connected!
Each order comes with an assembled PCB and header. You will need to solder in the header yourself, but it's a quick task.
Please Note! There are numerous possible configurations, and Adafruit stock various headers depending on how you want to solder and attach. Especially if you want the Pico on top so that the BOOTSEL button and LED are accessible.
- Use the Pico Stacking Headers if you want to be able to plug into a breadboard or other accessory with sockets.
- Use the Pico Socket Headers if you want to plug directly in and have a nice solid connection that doesn't have any poking-out-bits.
- Use the Short Socket Headers for a very slim but pluggable design; note that you'll want to trim down the Pico's headers or use the short plug headers on the Pico to have a skinny sandwich.
- Solder the PCB directly to the Pico headers - of course, this is very compact and inexpensive, but you won't be able to remove the PiCowbell.
Technical Details
Product Dimensions: 52.4mm x 20.3mm x 4.9mm / 2.1" x 0.8" x 0.2"
Product Weight: 4.5g / 0.2oz
Exact shipping can be calculated on the view cart page (no login required).
Products that weigh more than 0.5 KG may cost more than what's shown (for example, test equipment, machines, >500mL liquids, etc).
We deliver Australia-wide with these options (depends on the final destination - you can get a quote on the view cart page):
- $3+ for Stamped Mail (typically 10+ business days, not tracked, only available on selected small items)
- $7+ for Standard Post (typically 6+ business days, tracked)
- $11+ for Express Post (typically 2+ business days, tracked)
- Pickup - Free! Only available to customers who live in the Newcastle region (must order online and only pickup after we email to notify you the order is ready). Orders placed after 2PM may not be ready until the following business day.
Non-metro addresses in WA, NT, SA & TAS can take 2+ days in addition to the above information.
Some batteries (such as LiPo) can't be shipped by Air. During checkout, Express Post and International Methods will not be an option if you have that type of battery in your shopping cart.
International Orders - the following rates are for New Zealand and will vary for other countries:
- $12+ for Pack and Track (3+ days, tracked)
- $16+ for Express International (2-5 days, tracked)
If you order lots of gear, the postage amount will increase based on the weight of your order.
Our physical address (here's a PDF which includes other key business details):
40 Aruma Place
Cardiff
NSW, 2285
Australia
Take a look at our customer service page if you have other questions such as "do we do purchase orders" (yes!) or "are prices GST inclusive" (yes they are!). We're here to help - get in touch with us to talk shop.
Have a product question? We're here to help!

- ATmega168-20PU Atmel AVR MicrocontrollerSKU: 002-556-ATMEGA168-20PU Brand: Core Electronics8-bit Microcontroller - MCU 16kB Flash 0.5kB EEPROM 23 I/O Pins.
-
- 1/2W 0.5W Zener Diode Pack 280pcs (3.3V to 47V, 10 of each)SKU: CE05126 Brand: Core Electronics
You'll never fall short of a Zener Diode with this pack. It includes 280 pcs, ...


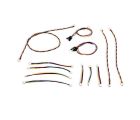
- PiicoDev Cable Expansion KitSKU: CE09146 Brand: PiicoDev
Top up your PiicoDev Starter kit with a range of the most used cables!
- PiicoDev Starter Kit for Raspberry Pi PicoSKU: CE08256 Brand: PiicoDevGet started coding high-tech sensors and modules with the PiicoDev® Starter Kit ...
- PiicoDev LiPo Expansion Board for Raspberry Pi PicoSKU: CE07693 Brand: PiicoDev
The PiicoDev® LiPo Expansion Board for Raspberry Pi Pico is a great way to s ...
- Raspberry Pi Pico 2WH (Wireless WiFi, with Headers)SKU: CE10155 Brand: Raspberry Pi
The Raspberry Pi Pico 2W with Headers pre-soldered. Ready for quick prototypi ...

Videos
View AllGuides

How to add GPS to a Raspberry Pi Pico | Get Real-Time Location in Your Project!

Raspberry Pi 5 Vs Raspberry Pi 4 Model B | Comparison & Benchmarking

Raspberry Pi 5 | Review, Performance & Benchmarks

3D Printed Case For Raspberry Pi Pico and PiicoDev Boards
Projects

safePower

ESP32 IR-Triggered Camera with Home Assistant Integration

LuMa 1 - The Neo Disco Ball
Educational Workshops

Raspberry Pi Workshop for Beginners

Makers love reviews as much as you do, please follow this link to review the products you have purchased.
Product Comments