
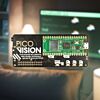


PicoVision (Pico W Aboard)
Available with a lead time
Expect dispatch between Aug 10 and Aug 13
Quantity Discounts:
- 6+ $64.54 (exc GST)
- 12+ $62.52 (exc GST)
A powerful digital video stick for bold audio visual adventures, with dual RP2040 chips and a conveniently HDMI-shaped output connector to boot!
Use PicoVision to make and run your own homebrew games, draw digital art, recreate beloved demos, screensavers or WinAmp visualisations, visualise data, subvert advertising billboards, emulate CeeFax or whip up some last minute signage for your cyber night market.
We managed to cram a lot into this little thing...
- GPU (RP2040)Does all the heavy-lifting to display buttery-smooth, high-res, animations on your TV or monitor via HDMI.
- CPU (Pico W)Runs your code and provides an interface to other gadgets through USB, Wi-Fi, and Bluetooth!
- HDMI connectorMake use of TVs, monitors, giant projectors, or even tiny displays for building into a cosplay outfit.
- Line out audioBash out some bleeps and bloops! This digital audio interface can produce some quality noise.
- microSD cardNever run out of space for your lovely assets by adding a sizeable microSD card to your setup.
- Qw/ST connectorAdd sensors or other types of breakout to your project so they can react to the world around them.
- On-board reset and user buttonsCreate a simple user interface for your project without needing to add any extras.
You can program PicoVision using C++ or MicroPython. C++ will get you the best performance, but if you're a beginner we'd recommend MicroPython for ease of getting started. Either way, you'll have access to our in-house PicoGraphics libraries which will let you easily manipulate shapes, text and images, some exciting new vector graphics and font functionality courtesy of PicoVector, and the ability to make bleeps, bloops and other fun electronic noise with PicoSynth.
Features
- Raspberry Pi Pico W Aboard (CPU)
- Dual Arm Cortex M0+ with 264kB of SRAM
- 2MB of QSPI flash supporting XiP
- Powered and programmable by USB micro-B
- 2.4GHz wireless
- Bluetooth 5.2
- RP2040 (GPU)
- Another dual Arm Cortex M0+ with 264kB of SRAM
- Higher resolution modes use significant GPU overclocking*
- Connects to the CPU as an I2C peripheral device
- 2 x 8MB PSRAM chips for frame double-buffering
- DV (Digital Video) Out (over HDMI shaped port)
- PCM5100A DAC for line level audio over I2S, wired to a 3.5mm stereo jack
- MicroSD card slot
- Three user buttons (one wired to CPU, two to GPU)
- Reset button **
- Status LED (GPU)
- Qw/ST (Qwiic/STEMMA QT) connector
- Fully-assembled (no soldering required)
- Spare/extra pins broken out as unpopulated headers (these require soldering) ***
- C++/MicroPython libraries
Pinout and Schematic

- Download a printable PDF version
- Schematic (coming soon)
How it works
PicoVision uses two RP2040s - one on a Pico W as a "CPU" and one as a "GPU" - to produce high resolution (for a microcontroller) DV output by swapping the contents of two physical PSRAM frame-buffers back and forth between them.
The two PSRAMs act as a front and back buffer. The "CPU" (the Pico W) writes to one while the "GPU" (RP2040) reads from the other, applies some "hardware" effects and generates the DV signals.
You can find out more about the hardware here.
The ingenious firmware for PicoVision's GPU has been developed with the considerable help of long-time collaborator and software wizard Mike Bell.
Connecting Breakouts
The Qw/ST connector on PicoVision makes it super easy to connect up Qwiic or STEMMA QT breakouts. If your breakout has a QW/ST connector on board, you can plug it straight in with a JST-SH to JST-SH cable.
- List of breakouts currently compatible with our C++/MicroPython build.
Notes
- * Click here for a list of supported display resolutions, and some caveats. Note that some higher resolution modes require significant overclocking of the CPU, so are not guaranteed to work on all PicoVisions.
- ** By default, the reset button resets both the CPU and GPU. If, for some hackerly reason you want to make it just reset the CPU, there's a cuttable trace on the back of the board.
- *** Pimoroni has broken out some spare pins as unpopulated headers along the bottom of the board. You can find the serial wire debug pins for both the GPU and CPU here, plus a number of unused / extra GPIO (hey, why not use the spare pins on the GPU as an I/O Expander!). As they're unpopulated, soldering is required to use these.
- Our software doesn't support audio output over HDMI, but if you're brave and want to attempt passing I2S audio data from the CPU (or the PSRAM buffers!) to the DV connector, the board is wired to support this.
- Note that PicoVision doesn't output SCART/composite signals, so if you want to use it to play Doom on an old CRT TV or monitor you will need an additional HDMI to composite converter/adaptor.
About Pico W Aboard
Our Pico W Aboard products come with a built in Raspberry Pi Pico W. This means you get all the advantages of a RP2040 microcontroller - a speedy fast dual-core ARM processor, a dynamic, growing ecosystem and a choice of different programming methods to experiment with. Most excitingly though, Pico W has wireless and Bluetooth connectivity built in, so your Pico/RP2040 devices can communicate with each other, and the internet! ??
This product is listed in:
Raspberry Pi>Pico>RP2 Based BoardsDevelopment Boards>Peripherals included!
Exact shipping can be calculated on the view cart page (no login required).
Products that weigh more than 0.5 KG may cost more than what's shown (for example, test equipment, machines, >500mL liquids, etc).
We deliver Australia-wide with these options (depends on the final destination - you can get a quote on the view cart page):
- $3+ for Stamped Mail (typically 10+ business days, not tracked, only available on selected small items)
- $7+ for Standard Post (typically 6+ business days, tracked)
- $11+ for Express Post (typically 2+ business days, tracked)
- Pickup - Free! Only available to customers who live in the Newcastle region (must order online and only pickup after we email to notify you the order is ready). Orders placed after 2PM may not be ready until the following business day.
Non-metro addresses in WA, NT, SA & TAS can take 2+ days in addition to the above information.
Some batteries (such as LiPo) can't be shipped by Air. During checkout, Express Post and International Methods will not be an option if you have that type of battery in your shopping cart.
International Orders - the following rates are for New Zealand and will vary for other countries:
- $12+ for Pack and Track (3+ days, tracked)
- $16+ for Express International (2-5 days, tracked)
If you order lots of gear, the postage amount will increase based on the weight of your order.
Our physical address (here's a PDF which includes other key business details):
40 Aruma Place
Cardiff
NSW, 2285
Australia
Take a look at our customer service page if you have other questions such as "do we do purchase orders" (yes!) or "are prices GST inclusive" (yes they are!). We're here to help - get in touch with us to talk shop.
Have a product question? We're here to help!
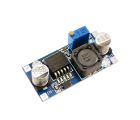
 Adjustable Switching Power Supply Module IN 4V-35V OUT 1.5V-30V LM2596S Step-Down ConverterSKU: CE05572 Brand: Core ElectronicsA versatile power supply DC-DC converter module that offers a wide range for bot ...
- NeoPixel Stick - 8 x WS2812 5050 RGB LED with Integrated DriversSKU: ADA1426 Brand: AdafruitMake your own little LED strip arrangement with this stick of NeoPixel LEDs. Ada ...
- Slip Ring with Flange - 22mm diameter, 12 wires, max 240V @ 2ASKU: ADA1196 Brand: AdafruitWith a slip ring assembly, your electronics can now twist and turn safely. Add w ...
- 16mm Illuminated Pushbutton - Red MomentarySKU: ADA1439 Brand: AdafruitA button is a button, and an LED is a LED, but this LED illuminated button is a ...


Videos
View AllGuides

How to add mmWave Radar to a Pico | Detect and Track Humans

How to Control a Water Pump with a Raspberry Pi Pico

How to add GPS to a Raspberry Pi Pico | Get Real-Time Location in Your Project!

Raspberry Pi 5 Vs Raspberry Pi 4 Model B | Comparison & Benchmarking
Projects

safePower

ESP32 IR-Triggered Camera with Home Assistant Integration

LuMa 1 - The Neo Disco Ball
Educational Workshops

Raspberry Pi Workshop for Beginners

Makers love reviews as much as you do, please follow this link to review the products you have purchased.
Product Comments