Arduino MKR ZERO (I2S bus & SD for sound, music & digital audio data)
In stock, ships same business day if ordered before 2PM
Fastest delivery: Tomorrow*
Disclaimer:
For next-day delivery, the shipping address must
be in the AusPost next-day network, eParcel Express must be selected, and the order must be placed
before 2PM AEST Mon-Thurs excluding NSW Public Holidays. Orders may be delayed due to AusPost
pickup timings and order verifications. eParcel Express is typically a 1-day service within the
AusPost next-day network, though it is sometimes 2+ days.
Quantity Discounts:
- 25+ $52.90 (exc GST)
- 100+ $50.11 (exc GST)
Recommended Essentials:
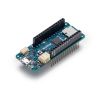
The MKR ZERO brings you the power of a Zero in the smaller format established by the MKR form factor. The MKR ZERO board acts as a great educational tool for learning about 32-bit application development. It has an on-board SD connector with dedicated SPI interfaces (SPI1) that allows you to play with MUSIC files with no extra hardware! The board is powered by Atmel’s SAMD21 MCU, which features a 32-bit ARM Cortex® M0+ core.
Warning: Unlike most Arduino & Genuino boards, the MKRZero runs at 3.3V. The maximum voltage that the I/O pins can tolerate is 3.3V. Applying voltages higher than 3.3V to any I/O pin could damage the board.
The board contains everything needed to support the microcontroller; simply connect it to a computer with a micro-USB cable or power it by a LiPo battery. The battery voltage can also be monitored since a connection between the battery and the analog converter of the board exists.
You can find here your board warranty information.
Getting Started
In the Getting Started section, you can find all the information you need to configure your board, use the Arduino Software (IDE), and start to tinker with coding and electronics.
Technical Specifications
| Microcontroller | SAMD21 Cortex-M0+ 32bit low power ARM MCU |
| Board Power Supply (USB/VIN) | 5V |
| Supported Battery(*) |
Li-Po single cell, 3.7V, 700mAh minimum |
| DC Current for 3.3V Pin | 600mA |
| DC Current for 5V Pin | 600mA |
| Circuit Operating Voltage | 3.3V |
| Digital I/O Pins | 22 |
| PWM Pins |
12 (0, 1, 2, 3, 4, 5, 6, 7, 8, 10, A3 - or 18 -, A4 -or 19) |
| UART | 1 |
| SPI | 1 |
| I2C | 1 |
| Analog Input Pins |
7 (ADC 8/10/12 bit) |
| Analog Output Pins |
1 (DAC 10 bit) |
| External Interrupts |
8 (0, 1, 4, 5, 6, 7, 8, A1 -or 16-, A2 - or 17) |
| DC Current per I/O Pin |
7 mA |
| Flash Memory |
256 KB |
| Flash Memory for Bootloader |
8 KB |
| SRAM |
32 KB |
| EEPROM | no |
| Clock Speed |
32.768 kHz (RTC), 48 MHz |
| LED_BUILTIN | 32 |
| Full-Speed USB Device and embedded Host |
OSH: Schematics
The MKR ZERO is open-source hardware! You can build your own board using the following files:
Li-Po batteries, Pins, SD and board LEDs
On-board SD
The on- board SD connector allows you to play with files without adding any extra hardware to the board. Furthermore SD card is driven by a dedicated SPI interface (SPI1) and so any of the pins of the header is busy during SD usage. The SD library automatically recognizes the MKR ZERO and so any modification to the sketch is needed to use it aprat from choosing the right SS pin (SDCARD_SS_PIN).
Battery capacity
Li-Po batteries are charged up to 4,2V with a current that is usually half of the nominal capacity (C/2). For Arduino MKR ZERO we use a specialized chip that has a preset charging current of 350mAh. This means that the MINIMUM capacity of the Li-Po battery should be 700 mAh. Smaller cells will be damaged by this current and may overheat, develop internal gasses and explode, setting on fire the surroundings. We strongly recommend that you select a Li-Po battery of at least 700mAh capacity. A bigger cell will take more time to charge, but won't be harmed or overheated. The chip is programmed with 4 hours of charging time, then it goes into automatic sleep mode. This will limit the amount of charge to max 1400 mAh per charging round.
Battery connector
If you want to connect a battery to your MKRZero be sure to search one with female 2 pin JST PHR2 Type connector. Polarity : looking at the board connector pins, polarity is Left = Positive, Right = GND
Additional I2C Port
The MKRZero has an additional connector meant as an extension of the I2C bus. It's a small form factor 5-pin connector with 1.0mm pitch. The mechanical details of the connector can be found in the connector datasheet. The I2C port in addition to the SDA and SCL signals includes the GND and +5V power rails and a digital pin that might be useful when designing an expansion. The pinout is shown in the following image:
Vin
This pin can be used to power the board with a regulated 5V source. If the power is fed through this pin, the USB power source is disconnected. This is the only way you can supply 5v (range is 5V to maximum 6V) to the board not using USB. This pin is an INPUT.
5V
This pin outputs 5V from the board when powered from the USB connector or from the VIN pin of the board. It is unregulated and the voltage is taken directly from the inputs. As an OUTPUT, it should not be used as an input pin to power the board.
VCC
This pin outputs 3.3V through the on-board voltage regulator. This voltage is the same regardless the power source used (USB, Vin and Battery).
LED ON
This LED is connected to the 5V input from either USB or VIN. It is not connected to the battery power. This means that it lits up when power is from USB or VIN, but stays off when the board is running on battery power. This maximizes the usage of the energy stored in the battery. It is therefore normal to have the board properly running on battery power without the LED ON being lit.
CHARGE LED
The CHARGE LED on the board is driven by the charger chip that monitors the current drawn by the Li-Po battery while charging. Usually it will lit up when the board gets 5V from VIN or USB and the chip starts charging the Li-Po battery connected to the JST connector. There are several occasions where this LED will start to blink at a frequency of about 2Hz. This flashing is caused by the following conditions maintained for a long time (from 20 to 70 minutes): - No battery is connected to JST connector. - Overdischarged/damaged battery is connected. It can't be recharged. - A fully charged battery is put through another unnecessary charging cycle. This is done disconnecting and reconnecting either VIN or the battery itself while VIN is connected.
Onboard LED
On MKR ZERO the onboard LED is connected to a dedicated pin (32) and not to 13 as on other boards. It is so suggested to use the LED_BUILTIN define.
(*) Note : DO NOT CONNECT to the male JST connector present on the board anything else than a Li-Po battery whose characteristics are compliant with those indicated above. Please DO NOT POWER VIN with more than 5V.
Exact shipping can be calculated on the view cart page (no login required).
Products that weigh more than 0.5 KG may cost more than what's shown (for example, test equipment, machines, >500mL liquids, etc).
We deliver Australia-wide with these options (depends on the final destination - you can get a quote on the view cart page):
- $3+ for Stamped Mail (typically 10+ business days, not tracked, only available on selected small items)
- $7+ for Standard Post (typically 6+ business days, tracked)
- $11+ for Express Post (typically 2+ business days, tracked)
- Pickup - Free! Only available to customers who live in the Newcastle region (must order online and only pickup after we email to notify you the order is ready). Orders placed after 2PM may not be ready until the following business day.
Non-metro addresses in WA, NT, SA & TAS can take 2+ days in addition to the above information.
Some batteries (such as LiPo) can't be shipped by Air. During checkout, Express Post and International Methods will not be an option if you have that type of battery in your shopping cart.
International Orders - the following rates are for New Zealand and will vary for other countries:
- $12+ for Pack and Track (3+ days, tracked)
- $16+ for Express International (2-5 days, tracked)
If you order lots of gear, the postage amount will increase based on the weight of your order.
Our physical address (here's a PDF which includes other key business details):
40 Aruma Place
Cardiff
NSW, 2285
Australia
Take a look at our customer service page if you have other questions such as "do we do purchase orders" (yes!) or "are prices GST inclusive" (yes they are!). We're here to help - get in touch with us to talk shop.
Have a product question? We're here to help!
Videos
View AllGuides
How to Control a Water Pump with an Arduino
How to add GPS to Your Arduino | Add Real-Time Location to Your Project!
C Programming for Makers
The Maker Revolution
Projects
IR Break-Beam Stopwatch
Coffee Grinder With Arduino
The Hipster Coaster
Educational Workshops
Arduino Workshop for Beginners
Makers love reviews as much as you do, please follow this link to review the products you have purchased.













Product Comments