
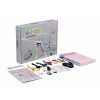
Quirkbot Robotic Creatures Kit (Seeed Studio)
Retired Product
Replaced by: CE05027This product is no longer available. This page is only for reference.


Quirkbot is a little character you can program.
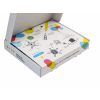
It’s easy to make different shapes and forms: Funny Robots, Toys, Artworks and Much more! Use the included Strawbees construction set with LEDs, Motors and Sensors to realize your own creations and ideas.
Quirkbot Robotic Creatures Kit has everything you need to get started with the the Ultimate maker toy.
Perfect for beginners and schools thanks to the super easy programming, electronics with no soldering and Strawbees mechanics, that will get you started in minutes.
Made for Educators, Maker parents and kids of all ages (recommended for 8 years and up) Check out quirkbot.com for latest info.

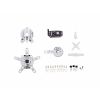
The Electronics of the Quirkbot has been designed so that it is intuitive to remember the names of the different parts. This makes it easy to talk about, and refer to when programming the different functions.

LED AND SENSOR
LEDs and Light Sensors fit on the horn, legs and arms and are held in place with a straw over it. When putting on an LED, be sure that the long pin of the LED is on the FRONT of the Quirkbot so it can reach and connect with that metallic surface.
SERVO BACKPACK
The backpack connects on the back of the Quirkbot and the motor connects to one of the slots on the backpack. The uppermost pin on the backpack will fit into an open slot on the right side of the battery cover, make sure it's placed right! Also make sure to align the black marking on the backpack slot to the black (or the darker) cable of your servo.
SERVO MOUNTS
To fasten the Servo Mount in your construction, here are two examples of how to wrap and connect Strawbees and creating a Servo Mount. You can add more Strawbees connected to each other to increase the friction and pull their legs through the holes to tighten the Servo Mounts.

ATTACHING A STRAW TO THE SERVO HORN
When putting a straw on the Strawbees on the servo motor arm, make sure to slide it over both the Strawbees and the motor arm itself.

CHARGING
Quirkbot has its own rechargeable battery. The battery starts chargin when the USB cable is connected to a computer or other power sources like a phone charger.
GET HELP
There will always be someone helpful to answer any question you have at the forum: forum.quirkbot.com. Please don’t hesitate to ask!

Quirkbot is easy to code directly from the web with a graphical language. To program the Quirkbot you first go to code.quirkbot.com. When you have created an account you can start creating and uploading code to your Quirkbot.
GOT TO CODE
1.UPLOAD CODE
First time you try to upload, the interface will install a small plugin in your browser, and on a Windows computer you will have to install drivers. The interface will guide you trough how to do it.
2.CREATING CODE
You create new code in the Quirkbot by connecting nodes together and changing the values of them. Here is how you do some basic things:
2.1 ADD & DELETE NODES
By dragging and dropping into your program, and press the X to get rid of them.

2.2 CONNECT & DISCONNECT THE NODES
The connections makes a continuous stream of data go from one node to the other.

2.3 CHOOSE PLACE
All Nodes that control some external part like an LED or Servo Motor needs ti know where that part is placed.

2.4 CHOOSE PLACE
SAVE YOUR CODE AND GIVE IT A NAME
When you do this the code will automatically get a web address. If you want to share your code just share this address, Don’t worry, none but you can change it. If someone shares code with you and you want to make your own copy, press Clone CODE. This is now your code and you can make any changes.

2.5 CHANGE VALUE
By dragging the slider or type in the value directly.

3. ATTACHING LEDS AND LIGHT SENSORS
DOCUMENTATION FOR THE NODES
The Nodes Documentation is starting to take shape and will soon have more useful examples. Dig in deeper there if you want to read up on specific nodes and how they function.
THE FORUM
Check out the Quirkbot Forum! Don’t be afraid to ask us any question.

The Qurikbot and Strawbees system had been developed together with educators to meet their growing interest for maker education and the need for creativity and programming in the classroom. Through many workshops around the world with Kids Hack Day and other close partners we have figured out some key success factors and demands that a maker tool needs to have in an Educational setting. The Quirkbot significantly lowers many existing barriers and completely eliminate others, while still remaining a very open system. This helps the kids and teachers that feels less confident with new tech to really flourish, while not limiting the natural nerds and hackers in a group. It also promotes group learning and sharing. We are continuously developing educational materials and an Educator's Guide is available as a free download on our website. Quirkbot.com


1xQuirkbot Board: Programmable toy that connects to electronics and Strawbees.
1xMotor Backpack: For connecting the Servo Motor to the Quirkbot.
1xServo Motor 120°: This motor can move 120 degrees.
1xSmall Strawbees pack: For building structures with drinking straws and cardboard.
1xStraws pack (50 straws): Flexible building material.
1xElectric Strawbee: To light up your structure and have fun with the light sensor.
1xUSB Cable: For charging and programming.
1xServo Extension Cable: To move things further away from the Quirkbot.
1x Plastic Component Box: To keep all the components tidy.
1xGuide Booklet: With clear pictures and text to get you started.
3x Light Sensor: Sensing light for fun interaction.
6xAlligator Clips: For Touch functions and many other things.
10x Dual Color LEDs: Lights with 2 colors that you can attach to the Quirkbot.
Sticker

Exact shipping can be calculated on the view cart page (no login required).
Products that weigh more than 0.5 KG may cost more than what's shown (for example, test equipment, machines, >500mL liquids, etc).
We deliver Australia-wide with these options (depends on the final destination - you can get a quote on the view cart page):
- $3+ for Stamped Mail (typically 10+ business days, not tracked, only available on selected small items)
- $6+ for Standard Post (typically 6+ business days, tracked)
- $10+ for Express Post (typically 2+ business days, tracked)
- Pickup - Free! Only available to customers who live in the Newcastle region (must order online and only pickup after we email to notify you the order is ready). Orders placed after 2PM may not be ready until the following business day.
Non-metro addresses in WA, NT, SA & TAS can take 2+ days in addition to the above information.
Some batteries (such as LiPo) can't be shipped by Air. During checkout, Express Post and International Methods will not be an option if you have that type of battery in your shopping cart.
International Orders - the following rates are for New Zealand and will vary for other countries:
- $11+ for Pack and Track (3+ days, tracked)
- $16+ for Express International (2-5 days, tracked)
If you order lots of gear, the postage amount will increase based on the weight of your order.
Our physical address (here's a PDF which includes other key business details):
Unit 18, 132 Garden Grove Parade
Adamstown
NSW, 2289
Australia
Take a look at our customer service page if you have other questions such as "do we do purchase orders" (yes!) or "are prices GST inclusive" (yes they are!). We're here to help - get in touch with us to talk shop.
Have a product question? We're here to help!
Guides

The Maker Revolution
Projects

Accurate IoT Clock With ESP8266

Days2Bin: Pico Powered Bin Reminder

Raspberry Pi Video Looper Display Installation | Overshare Video Festival

Makers love reviews as much as you do, please follow this link to review the products you have purchased.
Product Comments