The PiicoDev Magnetometer unlocks a lot of sensing abilities for your project. In this guide we'll walk through how to sense an angle with a small magnet and print the angle on a PiicoDev OLED.
This guide covers what the sensor is reading, a simple setup using some 3D printed parts, a walkthrough of the code that runs the module and how you can use it in your projects!
As always if you have any questions, queries, or things to add please let us know your thoughts!

Parts
- Raspberry Pi Pico with pins soldered (pointing down)
- PiicoDev Magnetometer QMC6310
- PiicoDev Expansion Board for Raspberry Pi Pico
- PiicoDev Cables - 100mm and 50mm
- PiicoDev platform - helps secure everything together.
- A small rare earth magnet
- A PiicoDev OLED Module
- Assorted M2.5 standoffs
- 3D printed parts
How the sensor works
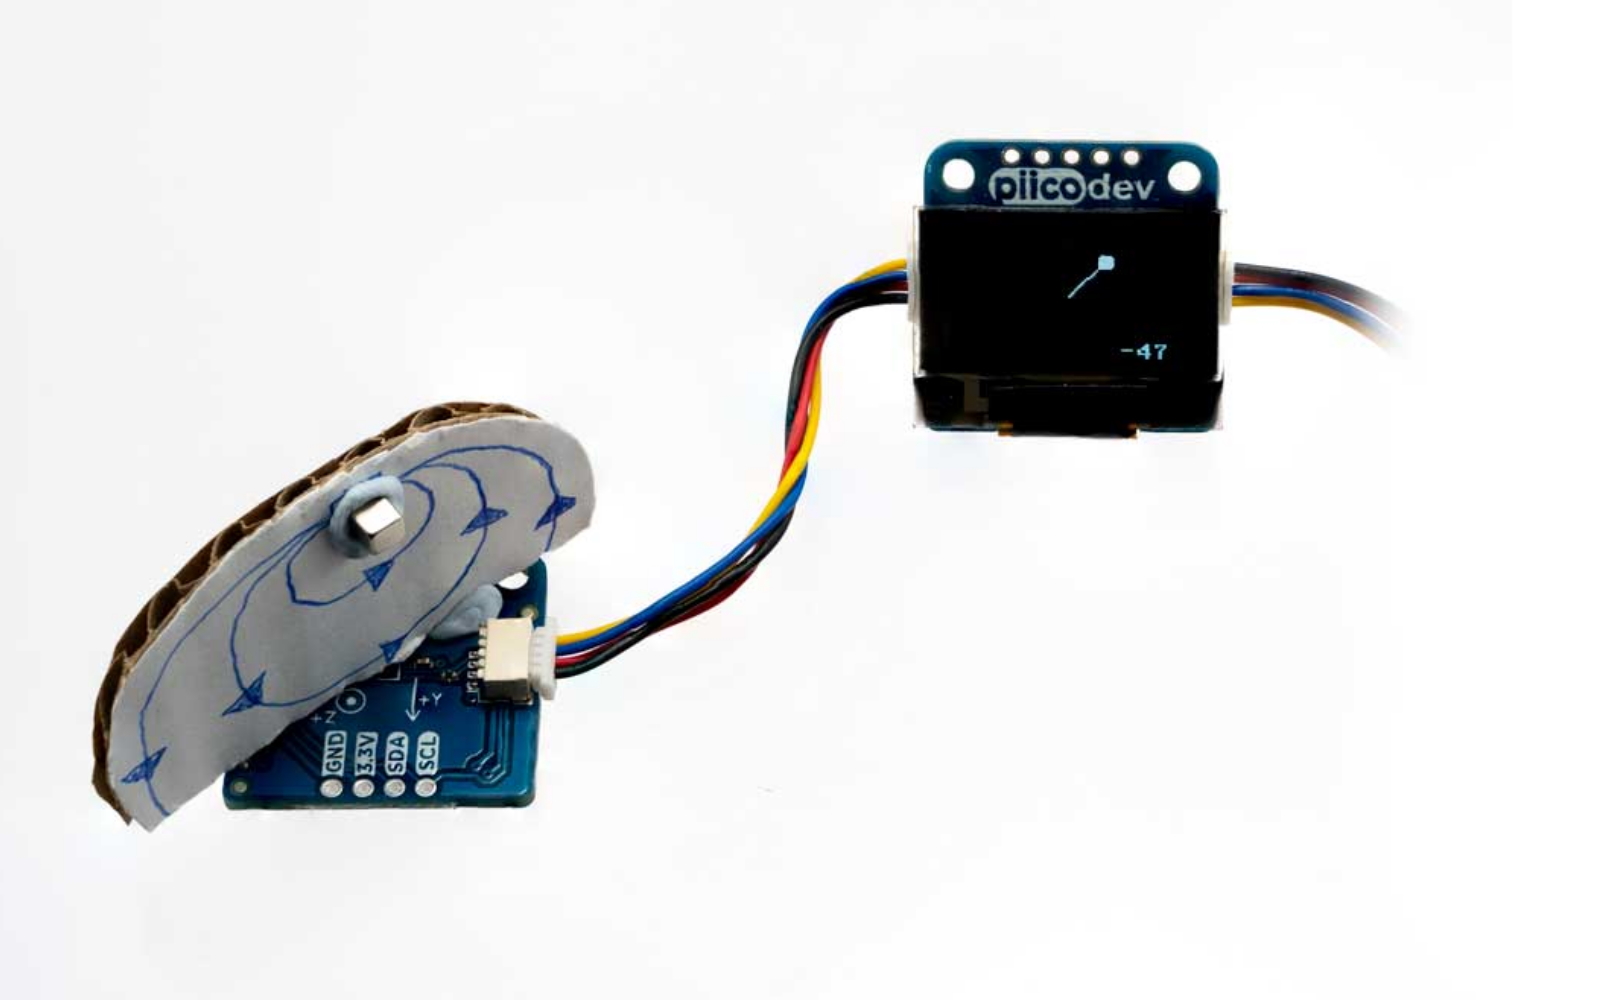
The super small QMC6310 magnetometer reads the magnetic flux through the sensor in three-axis. With the magnet oriented above one of the axis, we can do some calculations and receive the angle of the field in 2 dimensions! The photos below show how the flux moving through the sensor.

Building your own!
1. Gather all of your parts - 3D print the required files if you are making the same jig that I am - all of the items are shown in the image below (a download link is at the bottom of the page)
3D printing

Have a look at Aidan's 3D printing cheat sheet and our huge range of 3D printing guides if you're having issues with your printer.
I printed both parts together with a 0.4mm nozzle, 1.2mm wall thickness, and 15% gyroid infill, make sure to have good bed adhesion!
Once everything is done printing, colour in the arrow on 'holder.stl' the with a permanent marker to make it stand out!
Push the magnet into place, its been designed as an interference fit so it won't come loose (and you can remove the magnet with some pliers for other projects).
2. Secure everything together, you can use a PiicoDev platform or custom design your own attachment, check out the PiicoDev Mounting guide for guidance.
Make sure to have some longer standoffs ready to go incase the sensor reading overflows - I found that 12mm was a happy medium.

3. Plug and play
For the remainder of the tutorial we'll be working in Thonny - if you're unfamiliar working with Thonny see our guide for Thonny and Raspberry Pi Pico.
Download the files required for this project, there is a .zip available with all of the necessary code
The code
Below is the main.py file used on the Pico, all of the functions are explained further down in the article!
# Display the current angle of a magnet using the PiicoDev Magnetometer

from PiicoDev_QMC6310 import PiicoDev_QMC6310
from PiicoDev_SSD1306 import *
from PiicoDev_Unified import sleep_ms
import math

magSensor = PiicoDev_QMC6310(range=1200, calibrationFile = None,odr = 3) # Initialise the sensor without running a calibration and range of 3000uT

display = create_PiicoDev_SSD1306() # Initialise an OLED

def magList(): # Outputs a list of the magnetometers flux - [X,Y,Z]
    data = magSensor.read()
    try: # If Nan is returned (the sensor's readings are higher than the set range) the program wont crash and a fault state is sent [0,0,0]
        magList = [int(data['x']),int(data['y']),int(data['z'])]  # Read and unpack the data
    except:
        print('Number out of range')
        magList = [0,0,0]
    return magList

def magAngle(rotationAxis): # Parse in the axis of rotation
    magData = magList()
    magData.pop(rotationAxis.index(1))
    ang = math.atan2(magData[0],magData[1])
    return math.degrees(ang)

def drawCompass(heading):
    rads = radians(heading + 180) # convert heading to radians and offset by 180 degrees (to account for y increasing down the display)
    length = 25 # compass needle length (in pixels) from centre

    # Convert polar coordinates (length, angle) to cartesian coordinates (x,y) for plotting on display. Offset the coordinates by half the screen width/height to draw from the centre - rather than the top-left of the display.
    x = int(length * sin(rads) + WIDTH/2)
    y = int(length * cos(rads) + HEIGHT/2)

    # Plot the compass on the display
    display.fill(0)
    display.line(64, 32, x, y, 1) # draw the compass needle
    display.circ(x,y,4)                     # put a north-indicator on the end
    display.text(str(int(heading)),90,57)       # show the heading in the bottom-right corner
    display.show()


rotationAxis = [0, 0, 1]
display.fill(0)
display.show()
while True:
    ang = magAngle(rotationAxis)

    drawCompass(ang)
#     print(ang)

    sleep_ms(5)
Exploring the Code
Imports and Initialisation
Import all of the modules you need, the PiicoDev Magnetometer, PiicoDev OLED and the Unified Library, also include some math functions, only atan2 and degrees are needed!
The Magnetometer needs a couple of parameters to work well for this guide, turn the range all the way up so we can get the magnet as close as possible, disable the calibration and turn the polling rate up as fast as possible.
A few new functions are introduced...
magList()
magList returns the three-axis in a list rather than a dictionary, this way we can use functions such as pop(). It's similar to how a matrix looks!
If the magnetometer's reading exceeds the set value it will return a 'Nan' in that element of the list, to keep the program running there is a check to make sure this does not happen.
We return a list with three-element, in the form [x, y, z]
magAngle(rotationAxis)
The rotationAxis variable tells the function how the magnet is rotated, in our example if we give the function [0, 0, 1], we know it is rotating about the 'z' axes
We take a reading of the Magnetometer and store it in a list called magData.
The rotationAxis.index(1) finds the first instance in the rotationAxis list, and this gets parsed straight into the pop() function that removes that element, leaving us with 2 elements in the list!
To find an angle we have to do some trigonometry, the atan2 function allows for 2 inputs, each corresponding to an axis from the magnetometer, the atan2 function lets us make a continuous measurement around 360 degrees, whereas the standard atan function falls apart.
Finally the angle is converted to degrees and returned.
...and some old ones.
drawCompass(heading)
Displaying the angle is easy! We can reuse the code from Michael's Compass.py example.
Applications
There are so many ways you could embed this sensing method into your projects, from a smooth encoder on your Macropad, sensing something behind a wall or reading the angle of a motor.
The options are limitless!

Files
Attachment - mag-encoder-files.zip

