Ultimaker Cura is an excellent slicing software to get the best out of your 3D printers and make the greatest models it possibly can, but it can do so much more! Cura is a brilliant means to inspire and expand your own creativity particularly once you have dived into its expansive hidden options. So, I have gone through and found the best hidden Cura setting that inspires me to make. Some of the settings will increase the speed or efficiencies of your prints, others will improve the overall aesthetics and others will open doors of functionality. Quick links for the features of this guide is seen below.
- Wire Printing
- Spiral Mode
- Mould Feature
- Fuzzy Skin
- Adaptive Layers
- Ironing Feature
- Concentric Top/Bottom Pattern
- Tree Supports
- Conical Supports
- Colour Blind Assist
There is an Ultimaker Cura Overview Guide on our website which is a great reference point if this is your first time encountering Cura and you want to hit the ground running. Simply put Ultimaker Cura is a software which allows you to turn the computer file of your model into a recipe for a 3D printer to follow. It is completely free software available online with a great track record, used by over a million users worldwide and handles around 1.4 million prints per week. If solutions and advice on how to solve 3D print errors are needed an excellent guide is Improving 3D Printed Models - Ultimaker Cura.
Most of these printing setting here will be hidden features in Cura. To be able to make them visible in the Printer Settings Menu go to |Top Tool Bar > Settings > Configure Setting Visibility| then find the particular setting in the list and click on its Checkbox. If you have got any questions, queries or things you would like to see added please let us know your thoughts!
Wire printing

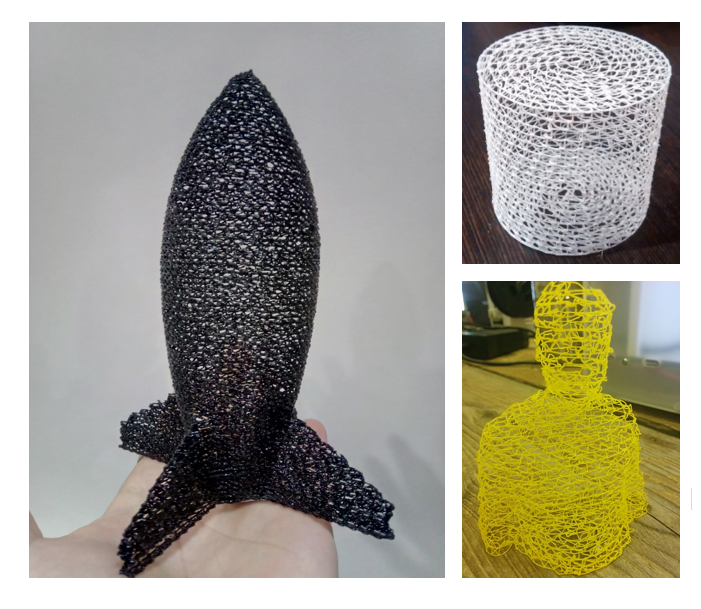
This setting is greats for rough dimensional understanding as it produces a version of the model which has the same size and shape as a solid final product but made with significantly less plastic and at ten times the speed. When a products form factor is still being tested and refined this method will lets you test ergonomics and how it will fit into existing other products super-fast. Also, an idea I have bouncing around is combining a wireframe model with Paper Mache to make some neat custom lamps.
Now components printed using this method are very fragile as they are a single layer with the entire inside of the model hollow. Extra care is important when you take it off the build plate. As this is an experimental setting it will take more effort by the user to print successfully. There are also heaps of parameters solely focused on wire printing. Printing in this method I would recommend using a larger nozzle, increasing flow percentage, maxing line width, increasing temperature, increased cooling and using PLA (or material with similar properties, check out Ultimaker 3D Printer Material Guide for a reference).
To access this option to |Top Tool Bar > Settings > Configure Setting Visibility > Type ‘Wire Printing’ in search bar > Click on Checkbox| makes it visible. You can now find Wire Printing in Print Settings Custom under Experimental heading. Follow a similar process to get related settings.
Spiral Mode

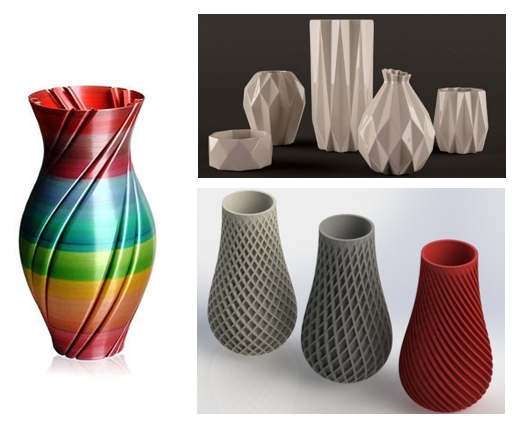
Now, this method means you can only load a single model at a time as the filament will never be retracted and supports won’t be possible. By experimenting with your own machine and material you’ll be able to find the sweet spot. Vase mode is an immensely quick way of printing your file and the three important parameters to adjust to maximise your results are below.
- Wall Line Width - This is the most crucial factor and depends mainly on the nozzle size that is being used. Use a larger nozzle size as it will create a much stronger print. You can also increase the flow of the material and line width inside print settings.
- Speed - Using vase mode you will want to print slower. Each rotation requires a good amount of cooling time before the next rotation is built on top of it. A 25-30 mm printing speed would be a good starting point more if larger nozzle sizes are being used (0.6mm or a 0.8mm). If you find your prints are warping in a weird way this is the setting to change.
- Temperature - Larger mass flow rates require a hotter print head to ensure the filament is reaching temperature. By increasing temperature in 5-10° increments, you'll be able to dial in the perfect temperature for your set up.
Vase mode is available in several different slicing software and in Cura is referred to as Spiralise Outer Contour. To access this option go to |Top Tool Bar > Settings > Configure Setting Visibility > Type ‘Spiralize Outer Contour’ in search bar > Click on Checkbox| to make it visible. You can now find Spiralize Outer Contour in Print Settings Custom under Special Modes heading. Follow a similar process to get related settings.
Mould Feature
The ability to quickly and easily make negatives of CAD designs is a really excellent hidden feature in Ultimaker Cura. This feature will print the selected model in negative with a wall surrounding it. This negative can then be used as a mould to produce casts from it. Silicone rubber or Plaster of Paris are both excellent materials that can fill a plastic mould and produce pleasing components. It is crucial to spend some time considering whether the printed mould part will be a single-use, destroy after the filling material is solidified, mould or a clamshell-type multi-use mould. It is also worth thinking about overflow channels, locating pins and pouring basin locations particularly if it's a reusable mould. Seen below there are three settings that determine the dimension of the negative in combination with the original CAD design.
- Minimal Mould Width - Determines the minimum width of the mould.
- Mould Roof Height - Determines the height of the mould above the horizontal parts in your model.
- Mould Angle - Determines the maximum angle the mould may make outside of the model. Can be implemented in such a way that no support needed on the outside of the mould.
To access this option go to |Top Tool Bar > Settings > Configure Setting Visibility > Type ‘Mold’ in search bar > Click the Checkbox| to make them visible. You can now find ‘Mold’ in Print Settings Custom under Special Modes. Follow a similar process to get related settings.
Fuzzy Skin

To access Fuzzy Skin option to the |Top Tool Bar > Settings > Configure Setting Visibility > Type ‘Fuzzy Skin' in search bar > Click on Checkbox| to make it visible. You can now find Fuzzy Skin in Print Settings Custom under Experimental Modes. Follow a similar process to get related settings.
Adaptive Layers
Adaptive Layers is a method of retaining quality whilst increasing the speed of the print. When properly set up the 3D printer will take more time in certain sections to print at a higher resolution and faster in other areas where this is not required. It does this by analysing the geometry of the CAD model. Areas with major curvature or changes will be printed with thinner layers while areas with minor variations will be printed with thicker layers. This results in curved surfaces looking great whilst having a smaller total print time as compared to just using the smaller layer height for the entire object.
There are a few settings available which will allow you to decide exactly how adaptive layers will be implemented.
- Adaptive Layers Minimum Variation - This controls the maximum allowed layer height difference compared to the base layer height setting.
- Adaptive Layers Variation Step Size - Determines the difference in the height of the next layer compared to the previous one.
- Adaptive layers Threshold - Determines how often thinner layers will be used. Smaller values result in more layers that are thin.
To access Adaptive Layers go to the |Top Tool Bar > Settings > Configure Setting Visibility > Type ‘Adaptive Layers’ in search bar > Click on Checkbox| to make it visible. You can now find Adaptive Layers in Print Settings Custom under Experimental Modes. Follow a similar process to get related settings. As this is an experimental setting it will take some practice to get the best possible result but I see a huge potential for this technology into the future.
Ironing Feature

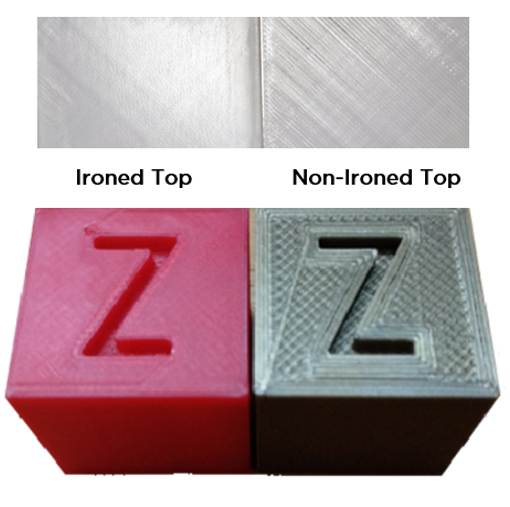
- Ironing Pattern - The print nozzle will follow a pattern which will be ironed into the surface.
- Ironing Line Spacing - Determines the space between every line.
- Ironing Inset - Ironing is applied to an offset of the outer edge of the model in the X-Y direction.
- Ironing Flow - While ironing this is the amount of material being extruded on to the top of the last layer.
- Ironing Speed, Acceleration and Jerk - These three setting determine the exact movements of ironing to fine-tune the process.
To access Ironing go to |Top Tool Bar > Settings > Configure Setting Visibility > Type ‘Ironing’ in search bar > Click on Checkbox| to make it visible. You can now find Ironing in Print Settings Custom under Shell. Follow a similar process to get related settings.
Concentric Top/Bottom Pattern

To access Concentric Top/Bottom Pattern go to |Top Tool Bar > Settings > Configure Setting Visibility > Type ‘Top/Bottom Pattern’ in search bar > Click on Checkbox| to make it visible. You can now find Top/Bottom Pattern in Print Settings Custom under Shell. Follow a similar process to get related settings.
Tree Supports

There are a couple of settings which will allow you to get the best possible result seen below:
- Tree Support Branch Angle - Determines the maximum overhang angle the branch may use to print sideways.
- Tree Support Branch Distance - Determines the support density.
- Tree Support Branch Diameter - Determines the diameter of the branch where it touches the model.
- Tree Support Branch Diameter Angle - Determines the growth angle of the branches, a larger angle increases the bottom width.
- Tree Support Collision Resolution - A method to check and avoid collisions.
To access Tree Support go to |Top Tool Bar > Settings > Configure Setting Visibility > Type ‘Tree Support’ in search bar > Click on Checkbox| to make it visible. You can now find Tree Support in Print Settings Custom under Experimental. Follow a similar process to get related settings.
Conical Supports

- Conical Support Angle - Determines the growth angle of the conical from the build plate. A larger angle increases the bottom width of the support.
- Conical Support Minimum Width - Determines how small the conical support can be at the base of the build plate.
To access Conical Support go to |Top Tool Bar > Settings > Configure Setting Visibility > Type ‘Conical Support’ in search bar > Click on Checkbox| to make it visible. You can now find Conical Support in Print Settings Custom under Experimental. Follow a similar process to get related settings.
Colour Blind Assist
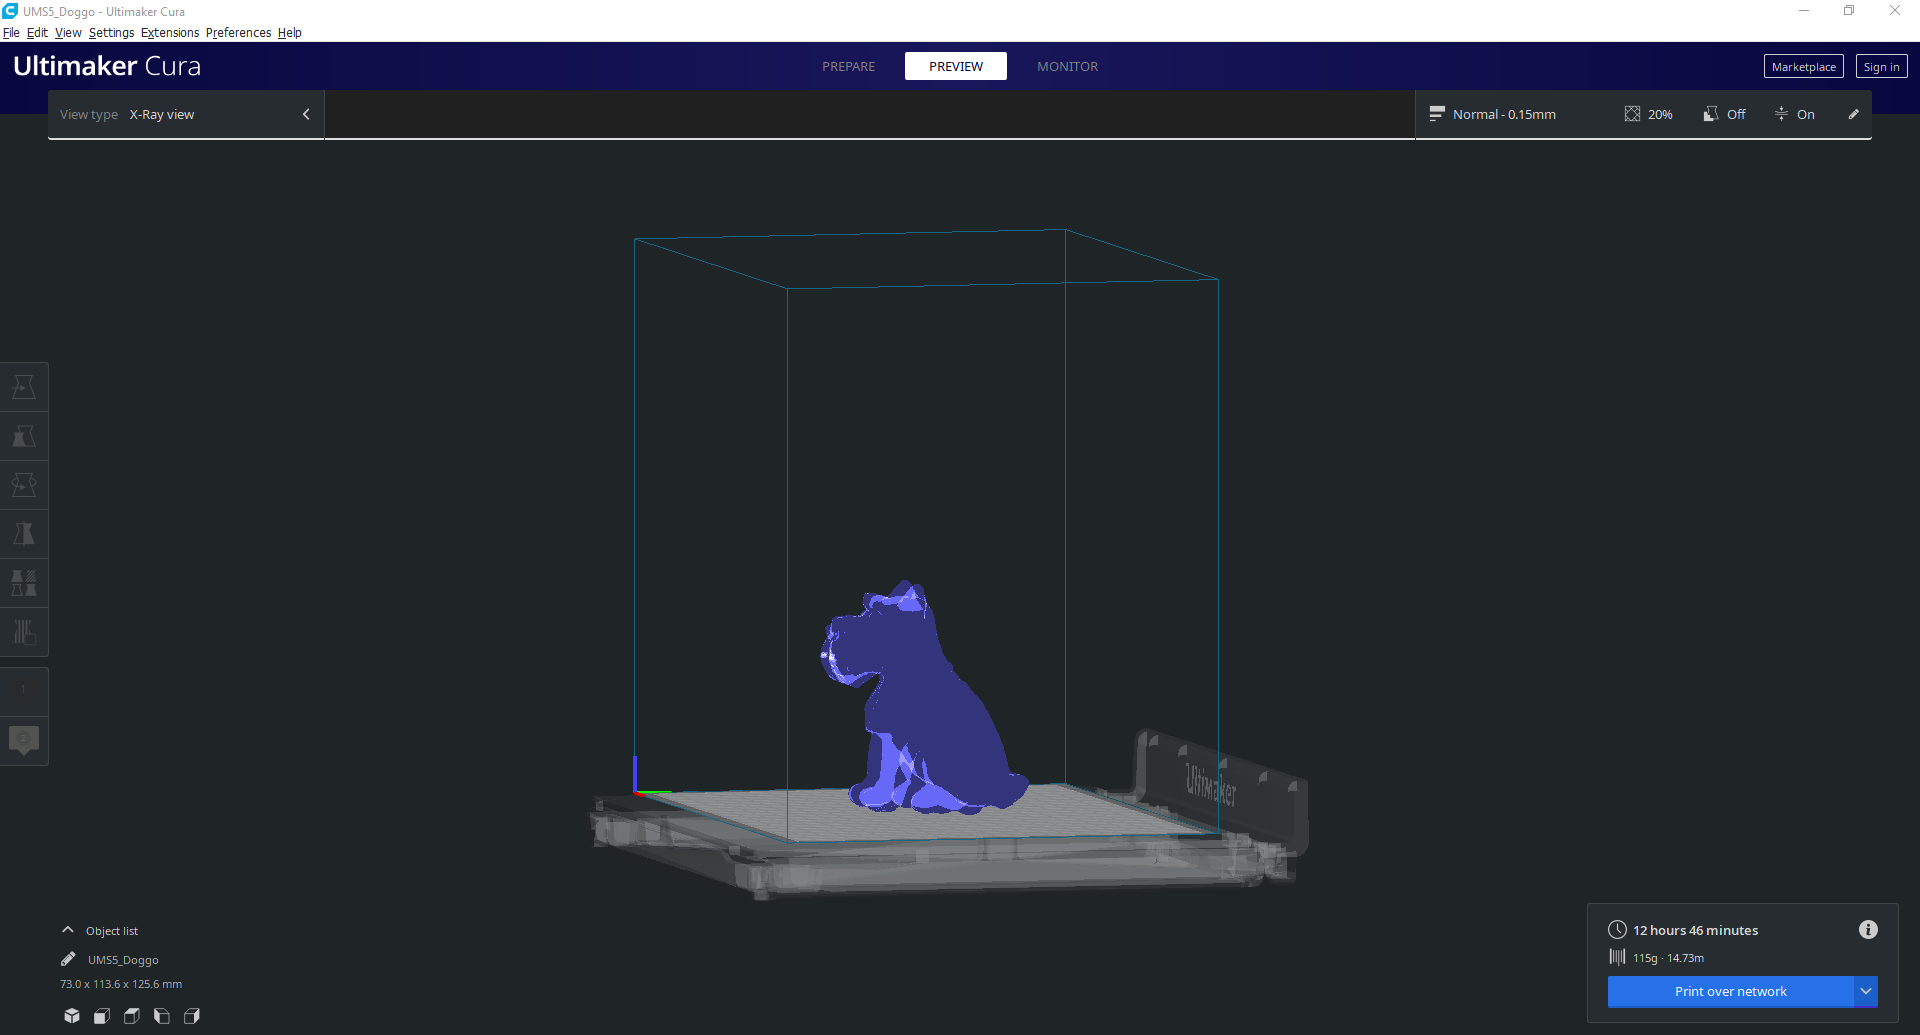
And a very important feature for those in need, new themes have been installed in Cura by default with a Colourblind Assist Light and Colourblind Assist Dark. This will make a higher distinction between colours in the application, with changes like the yellow/green lines in the layer view. Cura can also be swapped into Dark mode by altering its theme. You can see a screenshot of Colourblind Assist Dark below.
To access this feature go to |Top Tool Bar > Preferences > General > Theme| from here the pull-down menu can be used to select a theme.


