This project is to build a super cheap wireless adapter based on Raspberry Pi Zero and ENC28J60 ethernet module for Xbox 360
I have two Xbox 360 consoles and today I want to connect them together but I only have one OEM wireless adapter. It looks like this:

There are a few issues with using this device. Mainly, it is difficult to plug into the back of the console after you've installed the console to the TV cabinet. Taking a look at the usual places (eBay and EBGames), WHAT! $48 AUD for a second-hand wireless adapter?! I bought my second Xbox 360 for AU$75. There must be a cheaper way to give my Xbox 360 a wireless Internet connection.
A quick Google tells me that the easiest alternative is to use a wireless router as a wireless repeater to provide an internet connection to Xbox (using a Wired connection out to the Router). But the cheapest wireless router to support repeater mode is about AU$50, and that's without the additional power supply and bulky router box. I remember that I used to share a wireless connection to ethernet from my Mac PC to my Xbox. If I can do the same with a super cheap computer, then I can build my own wireless adapter for a fraction of the price.
Talking about a super cheap computer, who can beat the Raspberry Pi Zero! I ordered one from Core-electronics directly for AU$10.48 incl. shipping! Now I need an Ethernet module for the Pi and a PC USB wireless dongle. According to Raspi.TV, the ENC28J60 chip is supported by Raspbian out of the box, so I picked one of those up. According to my reading, EDUP wireless adapter is well supported by Raspberry Pi and it is super cheap as AU$2.99 on eBay. Adding other pieces the total cost is:
- Raspberry Pi Zero: $10.48
- ENC28J60 Ethernet Module: $4.00
- EDUP wireless adapter: $2.99
- USB OTG cable: $1.00
- 0.5M Cat5 Ethernet cable: $1.00
- Male to Female jump leads: $1.00
- 2GB Micro SD card: $4.00
Hooray! Cheaper than the official second-hand adapter price, and it can be used with any 2 computers/consoles.

Now let's do it!
Step 1 - Download and Install Raspbian
Download the Raspbian image from https://www.raspberrypi.org/downloads/raspbian/
Since we only need the wireless bridge feature, just download the smallest RASPBIAN STRETCH LITE image (The image size is 1.8GB and after burning, there is still 700MB free space on my 2GB SD card). Then burn it to the Micro SD card. I am using the official Mac guide https://www.raspberrypi.org/documentation/installation/installing-images/mac.md and you can find all the guides from https://www.raspberrypi.org/documentation/installation/installing-images/README.md.
Step 2: Change the keyboard layout
Otherwise, you won't be able to type double quotation from your UK layout keyboard. Or you won't know where the buttons are. Unless your keyboard is labelled as a UK keyboard. In which case, this step probably won't apply to you.
Log in to the console via default username and password:
login: pi
Password: raspberry
pi@raspberrypi:~$ sudo vi /etc/default/keyboard
This will open a text editor, you'll need to change the line below
XKBLAYOUT="gb"
To read
XKBLAYOUT="us"
Save the file and reboot your Pi. Now you have your Keyboard in the right layout.
Step 3: Connect the wireless dongle to Raspberry Pi Zero and enable it.
I use the static IP address just for easy debug and safety.
pi@raspberrypi:~$ sudo vi /etc/network/interfaces
allow-hotplug wlan0
auto wlan0
iface wlan0 inet static
wpa-ssid "My SSID"
wpa-psk "My Password"
address 192.168.1.254
netmask 255.255.255.0
network 192.168.1.0
broadcast 192.168.1.255
gateway 192.168.1.1
wpa-ssid is your wireless name, wpa-psk is your wireless password, other settings are set according to your wireless router requirements. Save and reboot your Pi, your wireless adapter should work by now.
Step 4: Prepare the SPI configuration for ENC28J60 module
pi@raspberrypi:~$ sudo vi /boot/config.txt
Uncomment the line by removing the # symbol at the start of the line.
dtparam=spi=on
Add following line to the file
dtoverlay=enc28j60
Shutdown your Pi and let's get onto the hardware part.
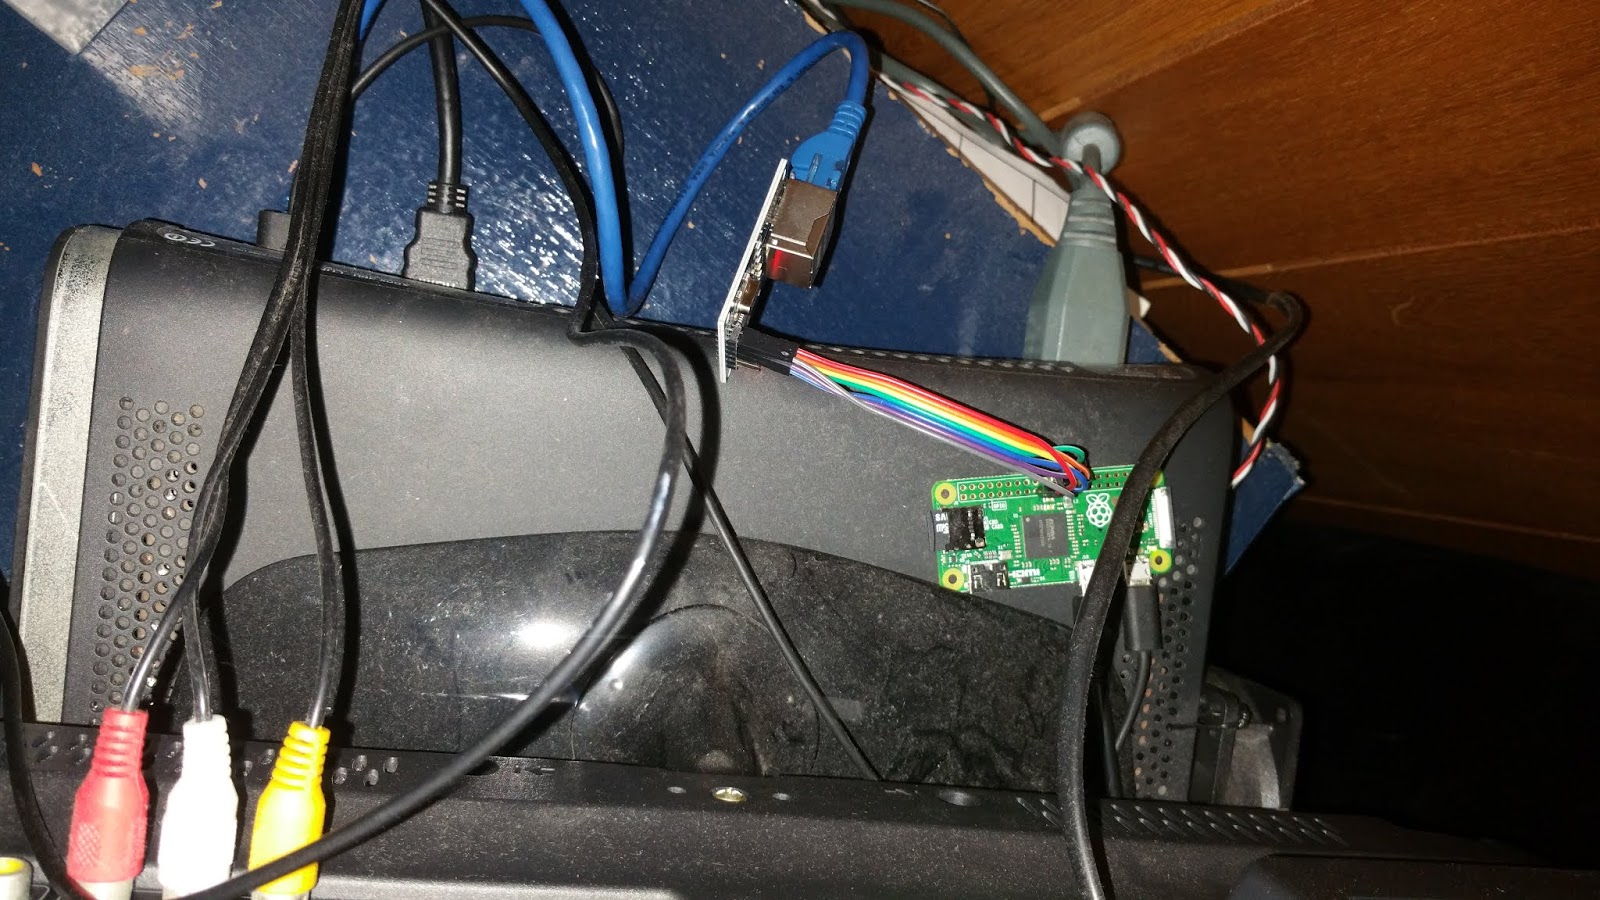
Step 5: Connect the cables between Pi and ENC28J60.
According to Raspi.TV (the photo on their website actually misconnect the 3.3v lead :D), we only need connect 7 leads:
ENC28J60 ------ Pi
INT/LNT ------ Pin 22 (BCM 25)
SO ------ Pin 21 (BCM 9/MISO)
SCK ------ Pin 23 (BCM 11/SCLK)
Q3/3.3 ------ Pin 17 (3.3v)
GND ------ Pin 20 (GND)
CS ------ Pin 24 (BCM 8/CE0)
ST ------ Pin 19 (BCM 10/MOSI)

Step 6: Set up the bridge between the 2 network interfaces
I did this according to pathead's instruction. I add the installing dnsmasq package and auto open iptables steps.
pi@raspberrypi:~$ sudo apt-get install dnsmasq
pi@raspberrypi:~$ sudo vi /etc/network/interfaces
allow-hotplug eth0
iface eth0 inet static
address 172.24.1.1
netmask 255.255.255.0
network 172.24.1.0
broadcast 172.24.1.255
pi@raspberrypi:~$ sudo mv /etc/dnsmasq.conf /etc/dnsmasq.conf.orig
pi@raspberrypi:~$ sudo vi /etc/dnsmasq.conf
interface=eth0 # Use interface eth0
listen-address=172.24.1.1 # Explicitly specify the address to listen on
bind-interfaces # Bind to the interface to make sure we aren't sending things elsewhere
server=8.8.8.8 # Forward DNS requests to Google DNS
domain-needed # Don't forward short names
bogus-priv # Never forward addresses in the non-routed address spaces.
dhcp-range=172.24.1.50,172.24.1.150,12h # Assign IP addresses between 172.24.1.50 and 172.24.1.150 with a 12 hour lease time
pi@raspberrypi:~$ sudo vi /etc/sysctl.conf
Uncomment the following line
net.ipv4.ip_forward=1
pi@raspberrypi:~$ sudo iptables -t nat -A POSTROUTING -o wlan0 -j MASQUERADE
pi@raspberrypi:~$ sudo sh -c "iptables-save > /etc/iptables.ipv4.nat"
pi@raspberrypi:~$ sudo vi /lib/dhcpd/dhcpd-hooks/70-ipv4-nat
iptables-restore < /etc/iptables.ipv4.nat
pi@raspberrypi:~$ sudo vi /etc/rc.local
Add following line before "exit 0"
iptables -t nat -A POSTROUTING -o wlan0 -j MASQUERADE
exit 0
Shutdown your Pi and ready to use it!

Before I plug in my home-made adapter, there is no Available Networks
Plug in the ethernet and USB cable
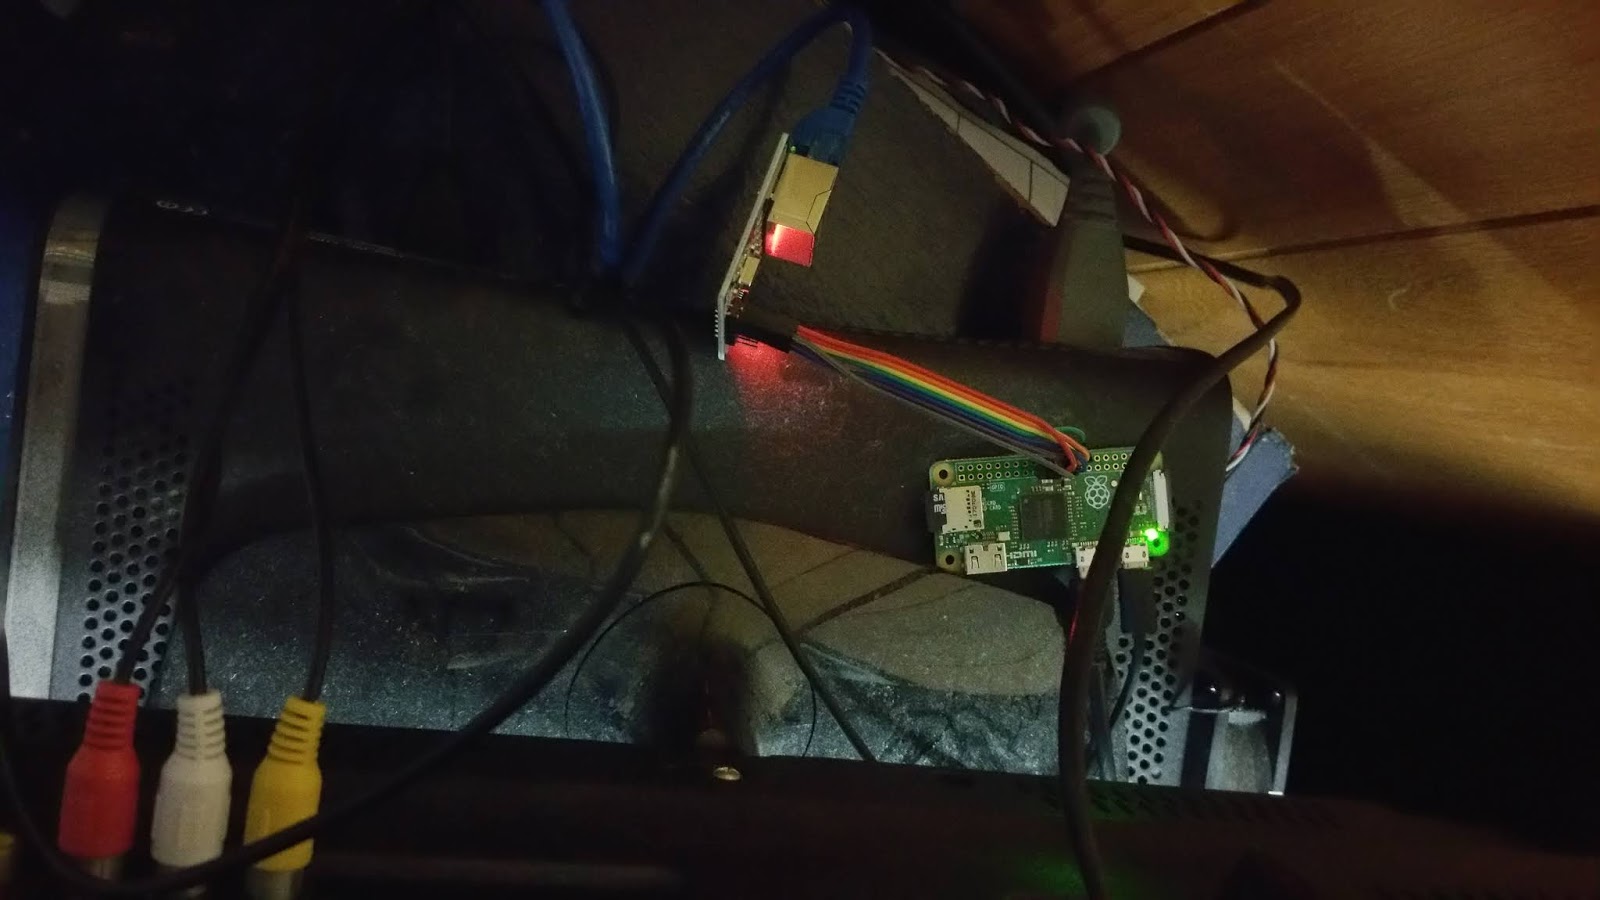
Pi Zero starts working...
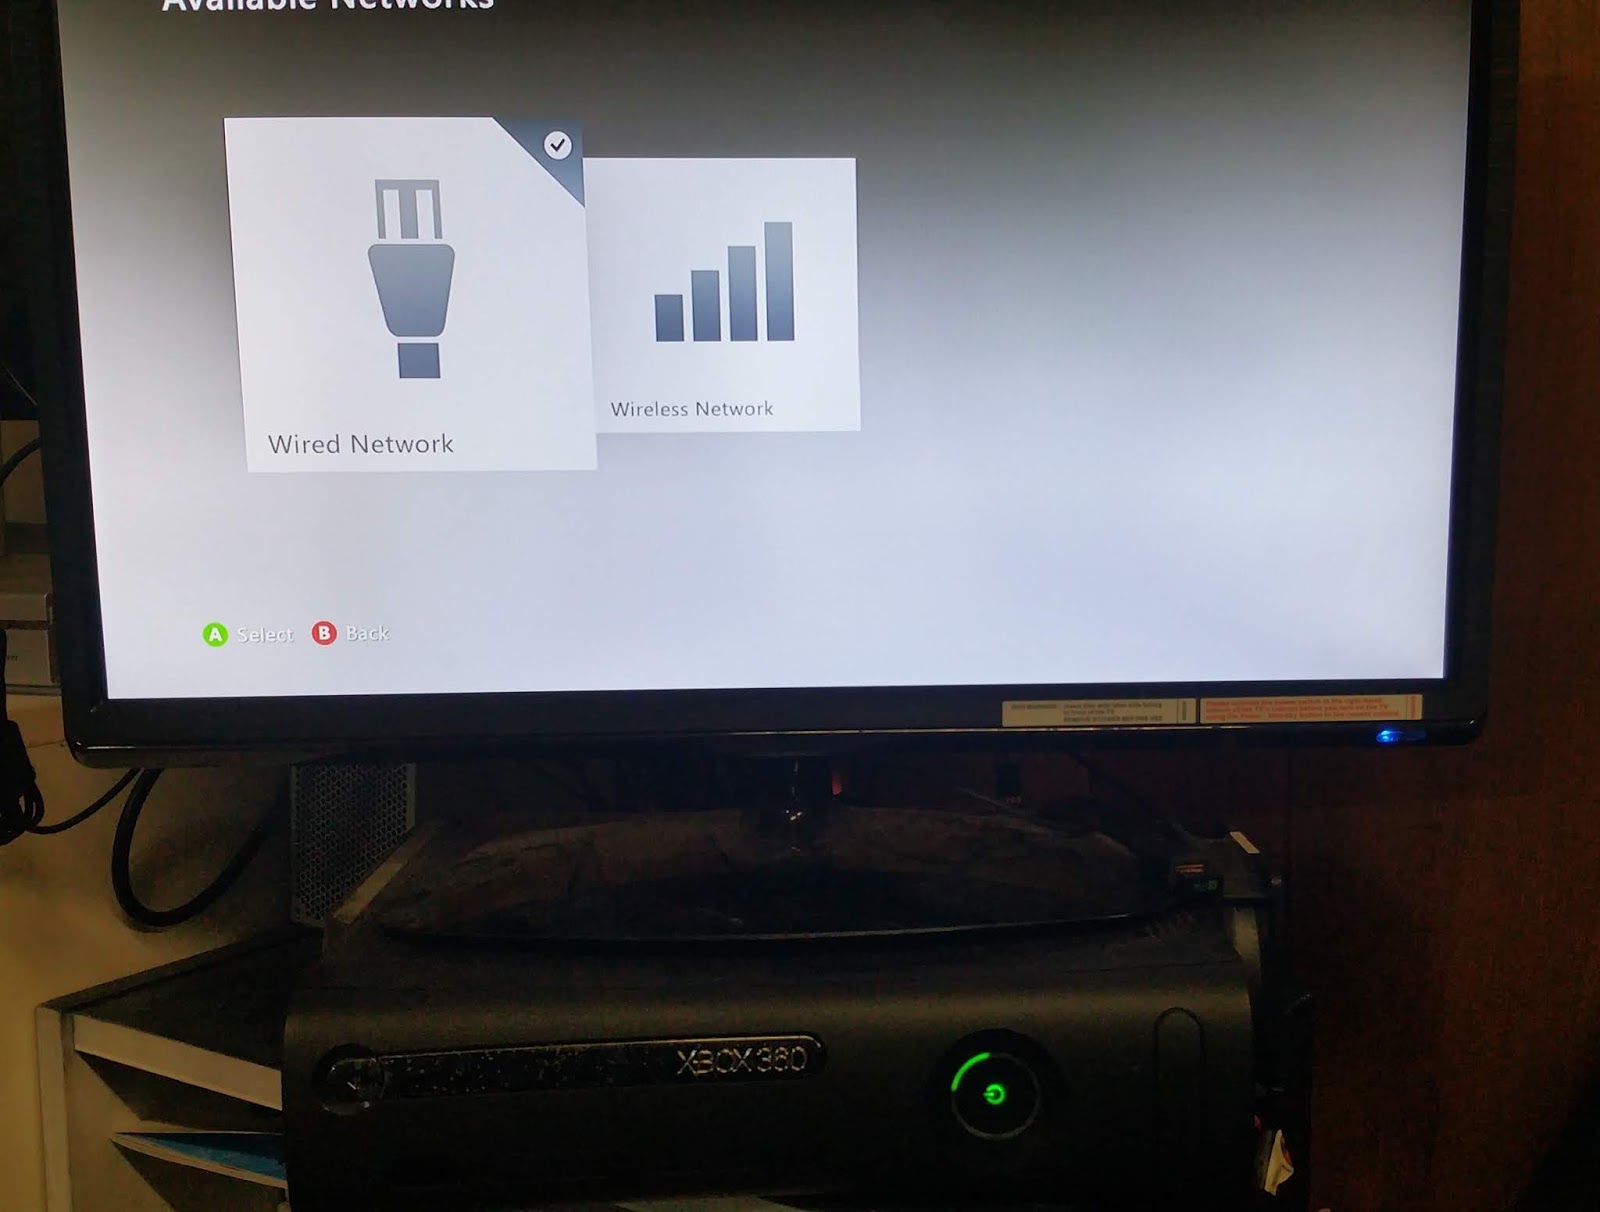
Yes! We have an available Wired Network
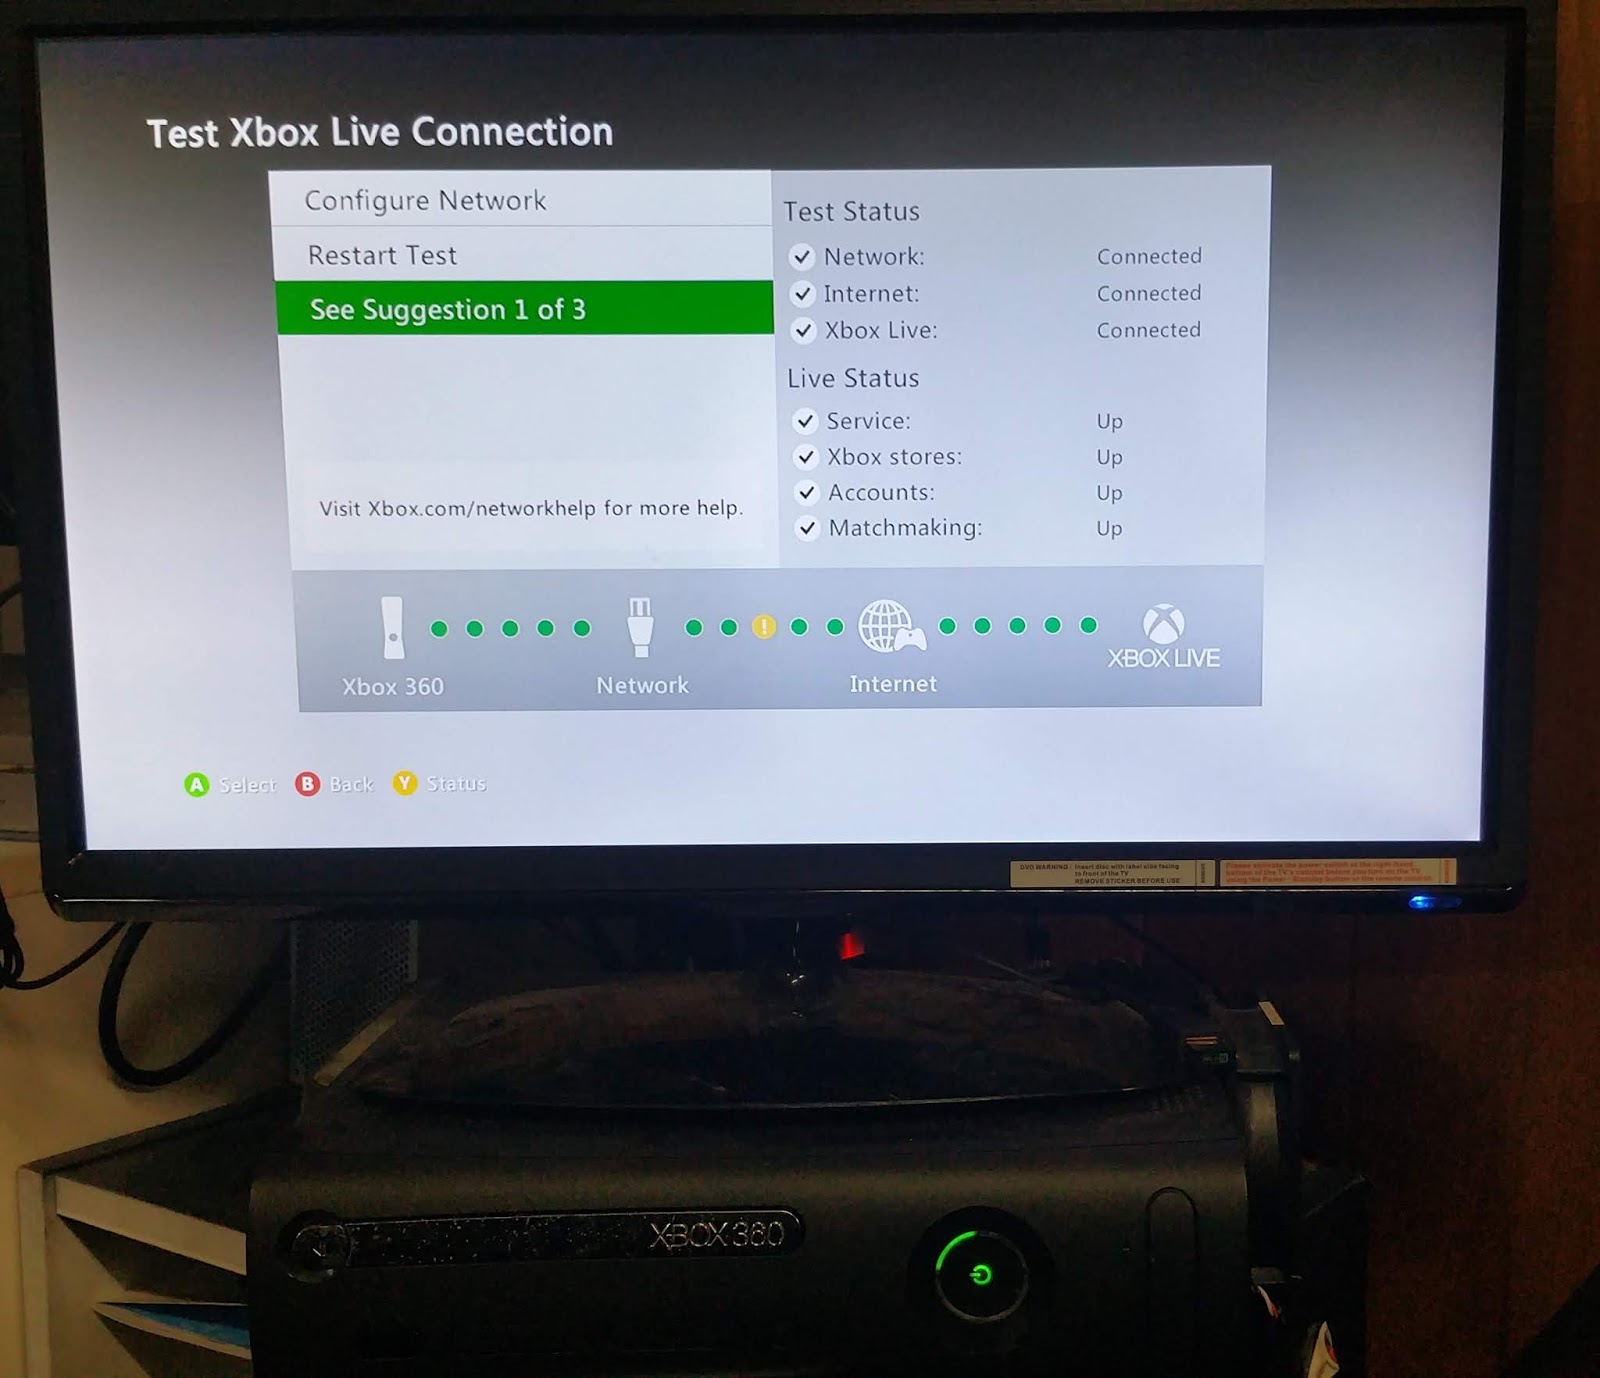
Run the network connection test, looks good

Check the IP address which is allocated by our Pi Zero dnsmsq
Since we are only using 3.3v and the whole thing can run by normal USB port! Of course if the power is not sufficient, I have a plan B because I have replaced my broken factory power supply by a normal computer ATX 350W power supply with additional external chassis cooling fan :D
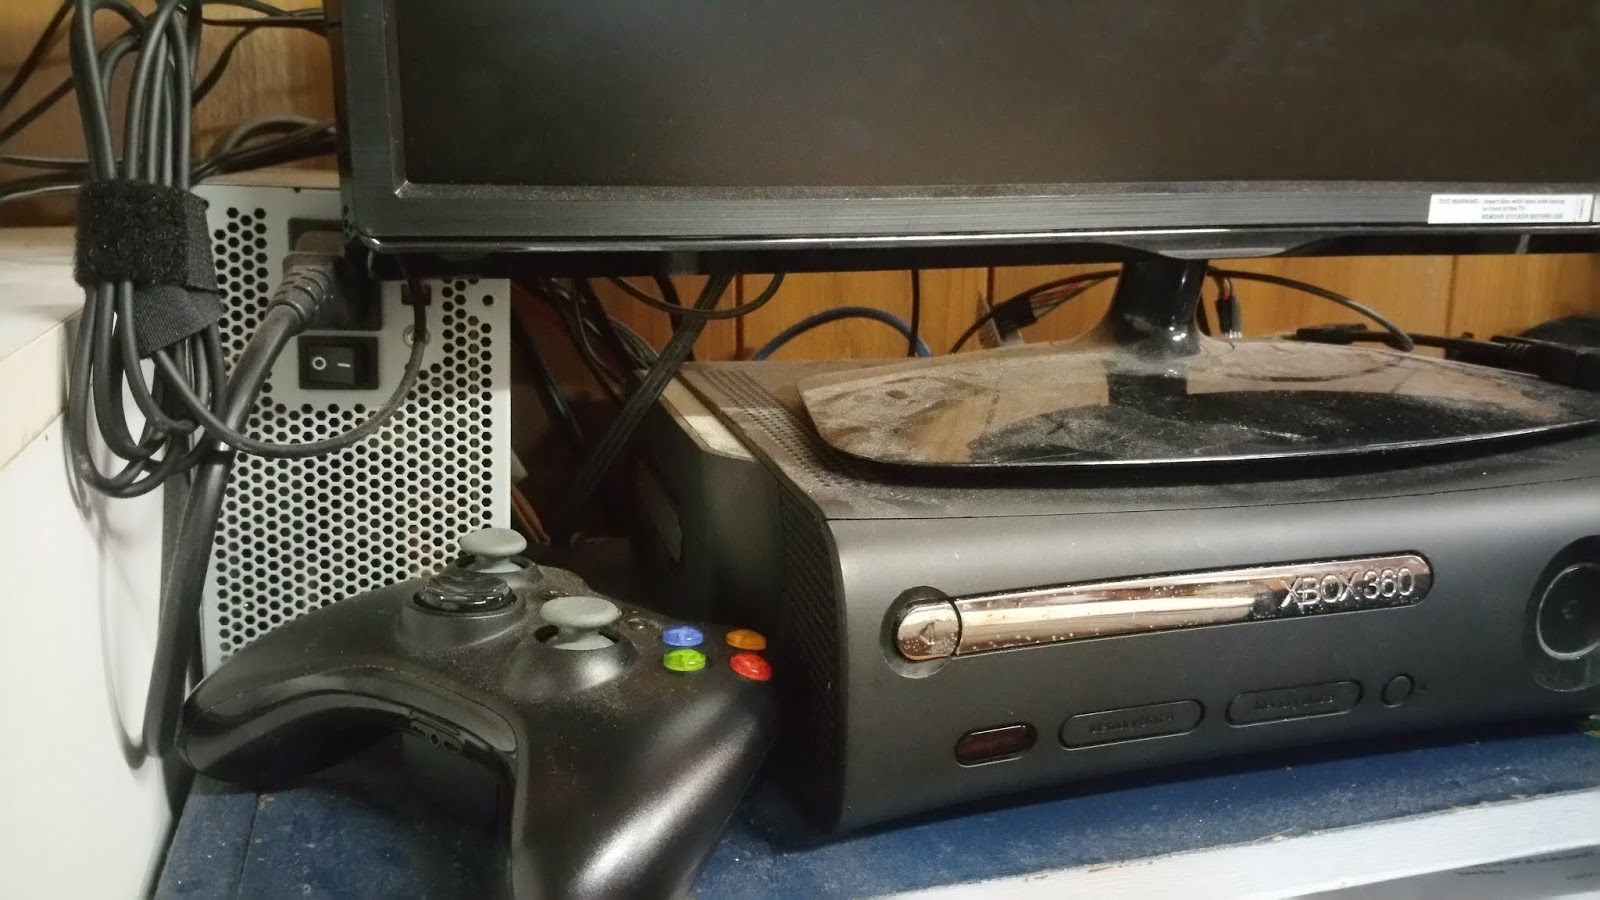
My ATX-box power supply

And external chassis cooling fan
Enjoy hacking!
SIZEOFINFINITY[∞]
References:
Ethernet On Pi Zero - How To Put An Ethernet Port On Your Pi - Raspi.TV
https://raspi.tv/2015/ethernet-on-pi-zero-how-to-put-an-ethernet-port-on-your-pi
How To: Wifi to Ethernet Bridge(Updated for RPi 3) - Raspberry Pi Forums
