Introduction:
Hi everybody. Over the past few weeks, I have been working on an intuitive system that makes working and tinkering with the Piicodev ecosystem even easier! Everybody interested in electronics knows about the universal circuit symbols, such as a light being a circle with a cross, and a fuse is a line cutting through a rectangle, these various symbols have made electronic projects SO easy to plan out and visualise. I decided to create a set of 32 unique symbols that correlate to each Piicodev item so that the same ease of planning the wiring is introduced to this amazing Piicodev environment. This is my Piicodev Schematic Project - download the .svg/.png files.
Features:
- Easy to remember symbols for each Piicodev module, including adapters and wires.
- Different shaped outlines represent different sizes of modules
- The symbols can easily be hand drawn, much like the universal circuit symbols

Development Process:
Using Canva, I compiled a collection of these symbols, obviously having drawn inspiration from the universally accepted circuit symbols that have been instrumental in simplifying electronics projects for years. The software allowed me to create each symbol whilst ensuring that each one accurately represents its corresponding Piicodev module.
Applications of My System:
The primary application of the Piicodev schematic system lies in its ability to streamline electronics project planning. Whether you are working on a small IoT project or a more complex robotics application, these symbols offer a visual language that simplifies the process of laying out your design. Beginners can especially benefit from this feature, as it provides a straightforward method to understand and plan their projects. In collaborative environments involving multiple contributors, the schematic system can also establish a standardised visual language, which facilitates seamless communication among team members, promoting a clear understanding of the wiring layout and minimising the risk of errors or misunderstandings during the implementation phase.
Examples of Use:
This simple diagram I have created illustrates a MicroBit with 3 modules daisy-chained. With appropriate code, the diagram shows a button that, when pressed, changes the pitch of a buzzer module and the colour of an RGB module.

This is an example of a more complex diagram, illustrating a simple weather station. The transmitter is a Raspberry Pi connected to a transceiver module, then a splitter is used to connect the atmospheric sensor and the real-time clock (RTC). The receiver is a Raspberry Pi Pico connected to the receiving transceiver and an OLED module, displaying the time and atmospheric data.

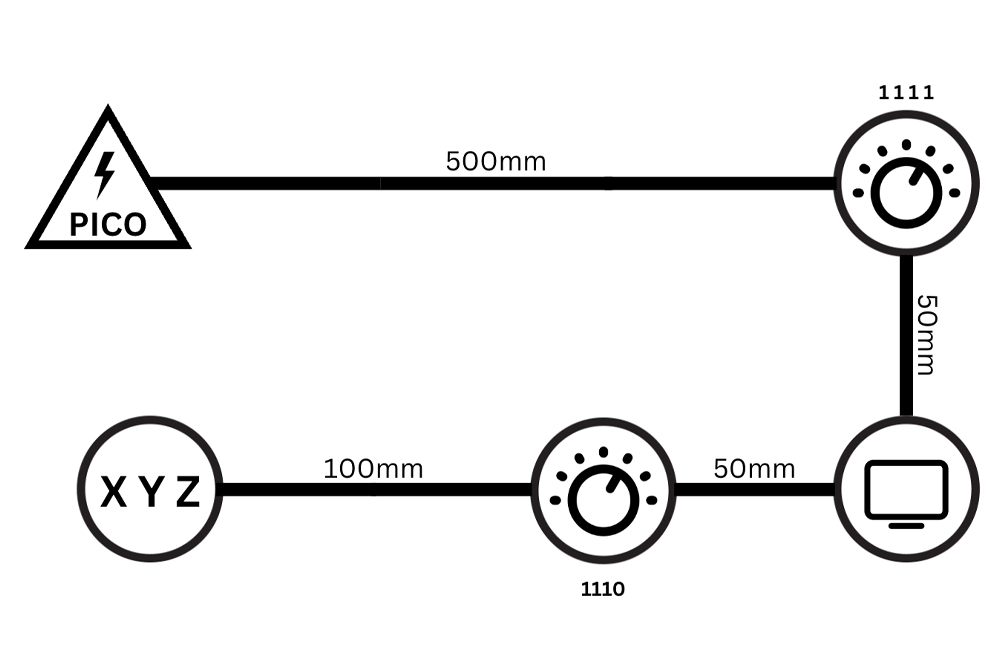
This is Michael’s Piicodev Sketcher Project. You can see that I have the Raspberry Pi Pico connected to a rotary potentiometer, daisy-chained to the OLED display, another potentiometer, and an accelerometer, just as Michael did in the tutorial.
This is Liam’s Buzzbox Project Project. As you can see, the project consists of a Raspberry Pi Pico with 4 daisy-chained buzzer modules to create a system that can read MIDI files and play them.

Final Remarks
Additionally, I have put together a GitHub repository of all the icons in PNG and SVG format, and have been working on dedicated Fritzing parts, so anybody can easily create a Piicodev schematic with that amazing software.
Happy making!

