[Update – Until there is correct compatibility of NPM with the new Raspberry Pi ‘Bullseye’ OS I highly recommend at this stage flashing and using the previous Raspberry Pi ‘Buster’ OS onto your Micro-SD for use with this guide – Official 'Buster' Image Download Link Here]
Perfect device to let you know if you can ride your bike to work or not.
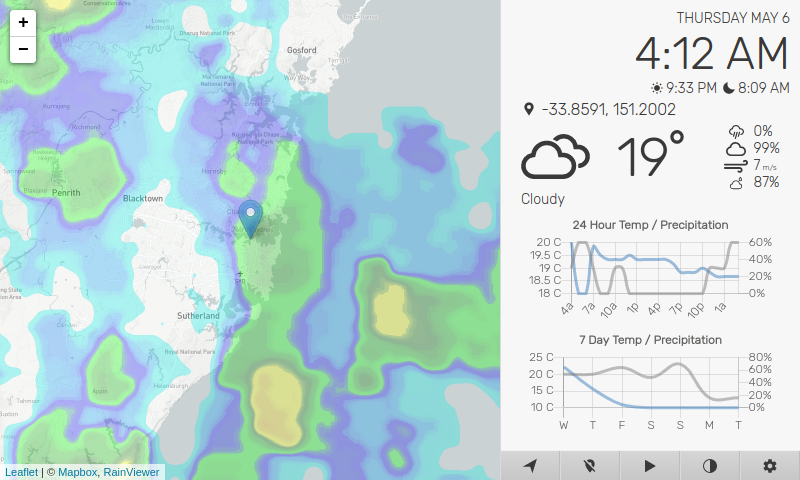
This is a neat little use of a Raspberry Pi and a 7-inch touch display. This project will inform you at a glance of the current and future weather and let you know if there is or was rain in your local area. You can also use the touch controls to view anywhere on the map. This is simple to create with the toughest part of the process is creating API Keys for the weather database services to access the data. Accessing the data is totally free. Below is the video for this build and shows what the dashboard will look like.
The GitHub that did the hard yards of Python coding it all up can be found here. Explore at your leisure.
Also if you want an Airplane Tracker or a Different Style Super Duper Easy to set up Weather Tracker Click here.
So here is the process I took to make this. With all the parts I set it up within half a day. With better instruction (which I plan on supplying here) you should be able to do so within an hour. This set up collects the information from the Internet. If you are doing it through Wifi you will need to sort the credentials. and authenticating each of them with your email account and waiting time for the Key to become active) but everything else is simple.
Part List
- A Raspberry Pi (in my case I use a Raspberry Pi 4 Model B 2GB but this project is perfect a lower-powered Raspberry Pi)
- 7 Inch Official Raspberry Pi Monitor
- Raspberry Pi Monitor Display
- Mouse and Keyboard for Set Up
Construction
Follow the smooth instructions of Sam to install the LCD correctly and then if you are using the same acrylic stand that I am do the following. Peel all the acrylic sheets stack the three layers together and connect the feet. Screw the two legs stand connectors and just like that your screen will be complete! Connect up some peripherals, slap in an SD card flashed with Raspberry Pi OS, and Switch on the Raspberry Pi. If any of that makes you feel out of your depth this guide will get you right up to speed. We will also be connecting the raspberry pi to the internet. On the first run the Raspberry Pi OS will run you through a start-up guide on how to do this depending on your location.
Terminal Commands
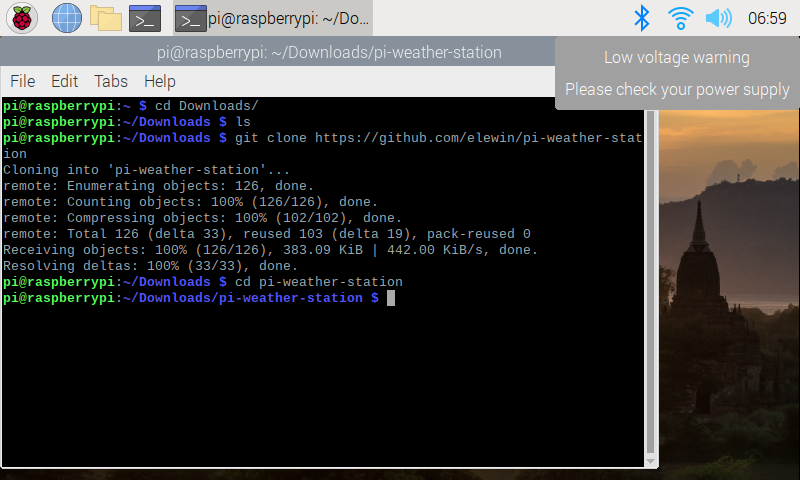
Type the following commands into the terminal to set up your Weather Station. These commands are accessing and download files from the internet. First from Elewin’s Github we will download the Python code used to run the Pi Weather Tracker. Node.js and NPM then get downloaded from the same location which provides tools for Python to run a local webserver. All downloads are open-source (this means the authors make the source code freely available to others who would like to view that code, copy it, learn from it, alter it, or share it). After each command press enter (and type Y and enter) when prompted.
cd Downloads/
git clone https://github.com/elewin/pi-weather-station
curl -sL https://deb.nodesource.com/setup_10.x | sudo bash -
sudo apt install nodejs
npm install
npm start
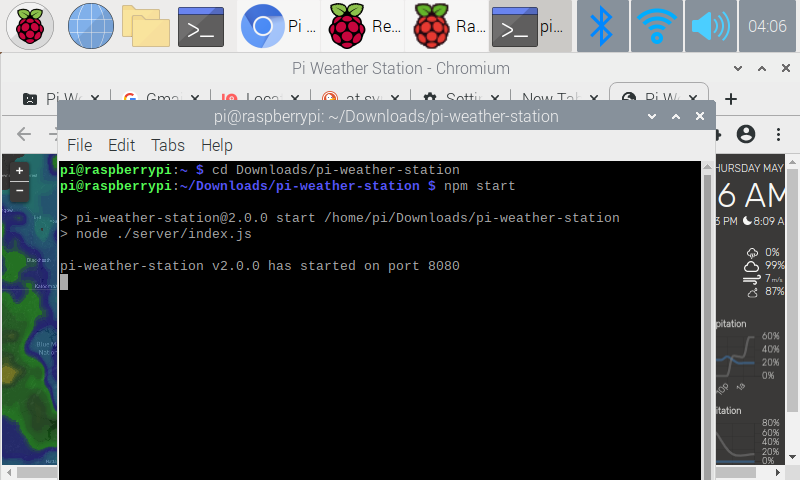
Once you press enter on that final terminal command and you see the following message below all the terminal commands required are complete!
> [email protected] start /home/pi/Downloads/pi-weather-station
> node ./server/index.js
pi-weather-station v2.0.0 has started on port 8080
So if we now open up a web browser (likely your Raspberry Pi will do this automatically) and type into the URL localhost:8080 you will be taken to this page. Data will be missing however so now we will turn our attention to the API Keys.
API Key Gathering
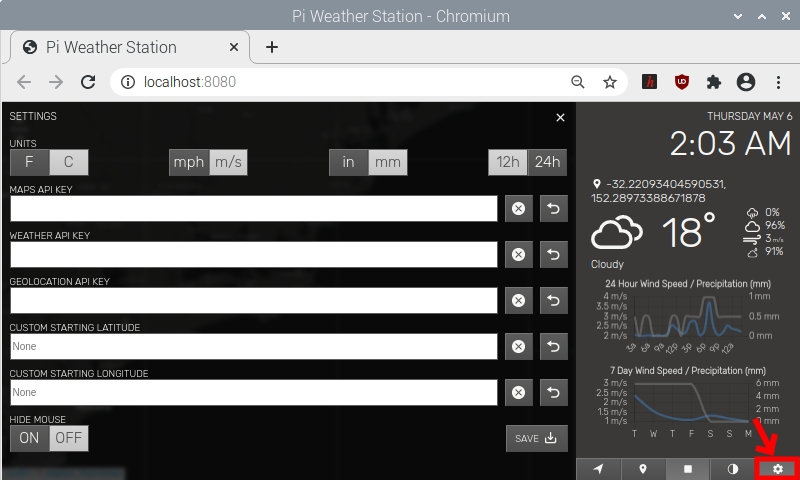
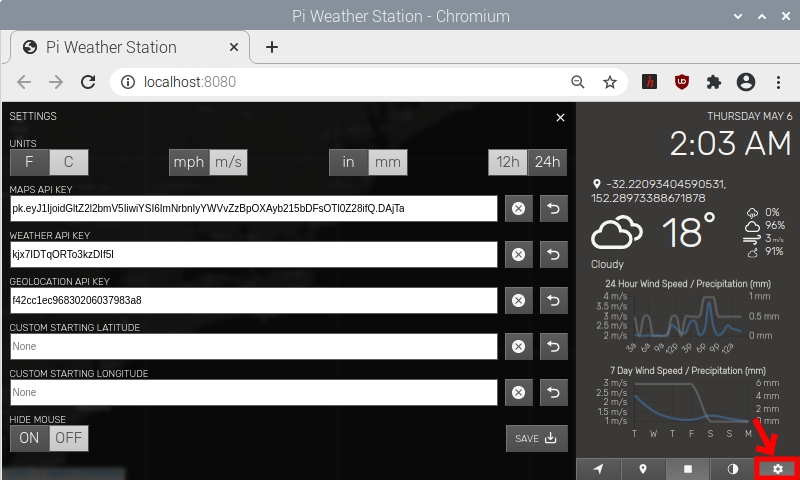
Now we can focus on getting those Keys for the API. APIs are very cool and many weather ones provide live data you can get to your devices noggin for free! Below is an image of what comes up when you press that little cog in the bottom right corner. These empty fields are where we will write our API Keys.
So this project is only going to required us to make API keys with data services and take advantage of the pre-written Python Code that we downloaded. If you are interested in creating code from scratch that harnesses the power of API data a great guide to check out is Cool API Python Scripts.
So, to take full advantage of what this Pi Weather Tracker can offer us we will need to make some Free accounts with the following services. You will need to create for each an email and password and all three will require authentication from your email address.
Locationiq.com (https://my.locationiq.com/dashboard#accesstoken)
Tomorrow.io (https://app.tomorrow.io/development/keys)
Mapbox.com (https://account.mapbox.com/)
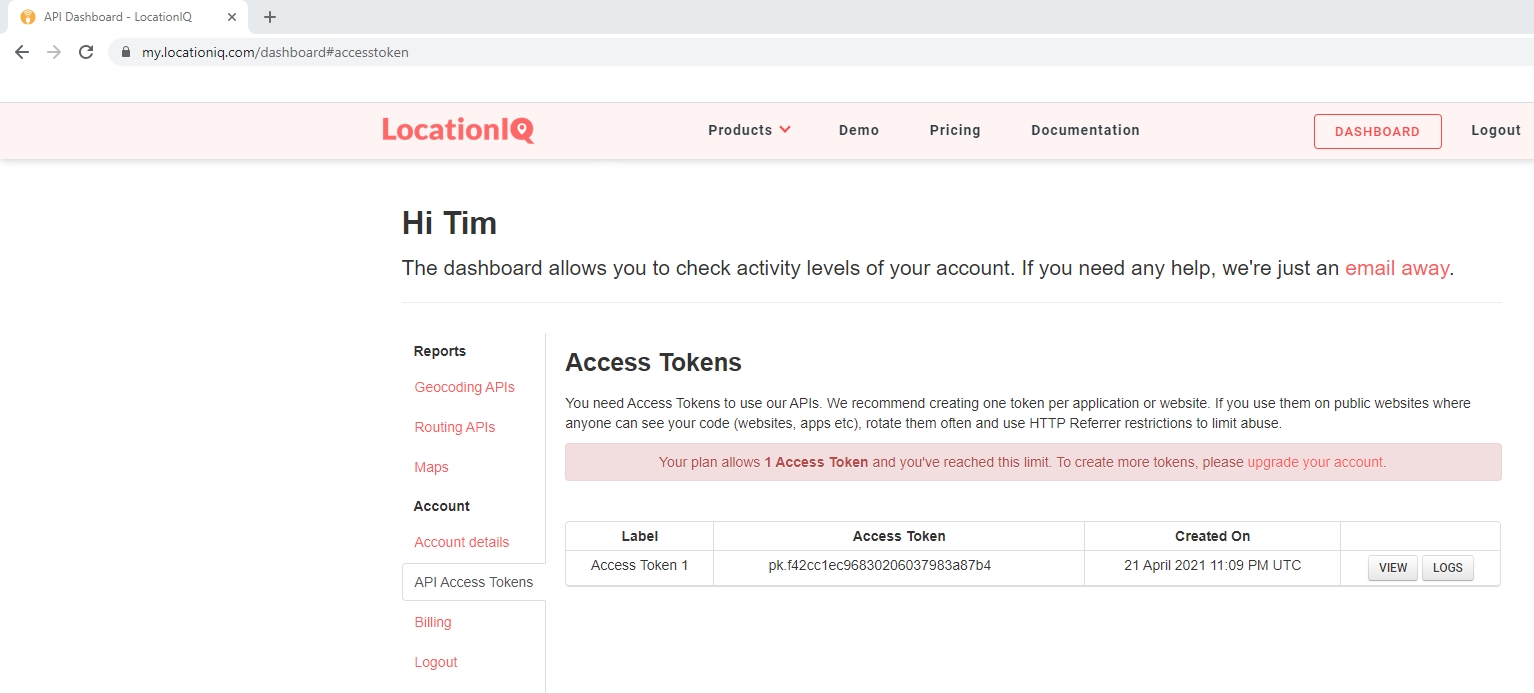
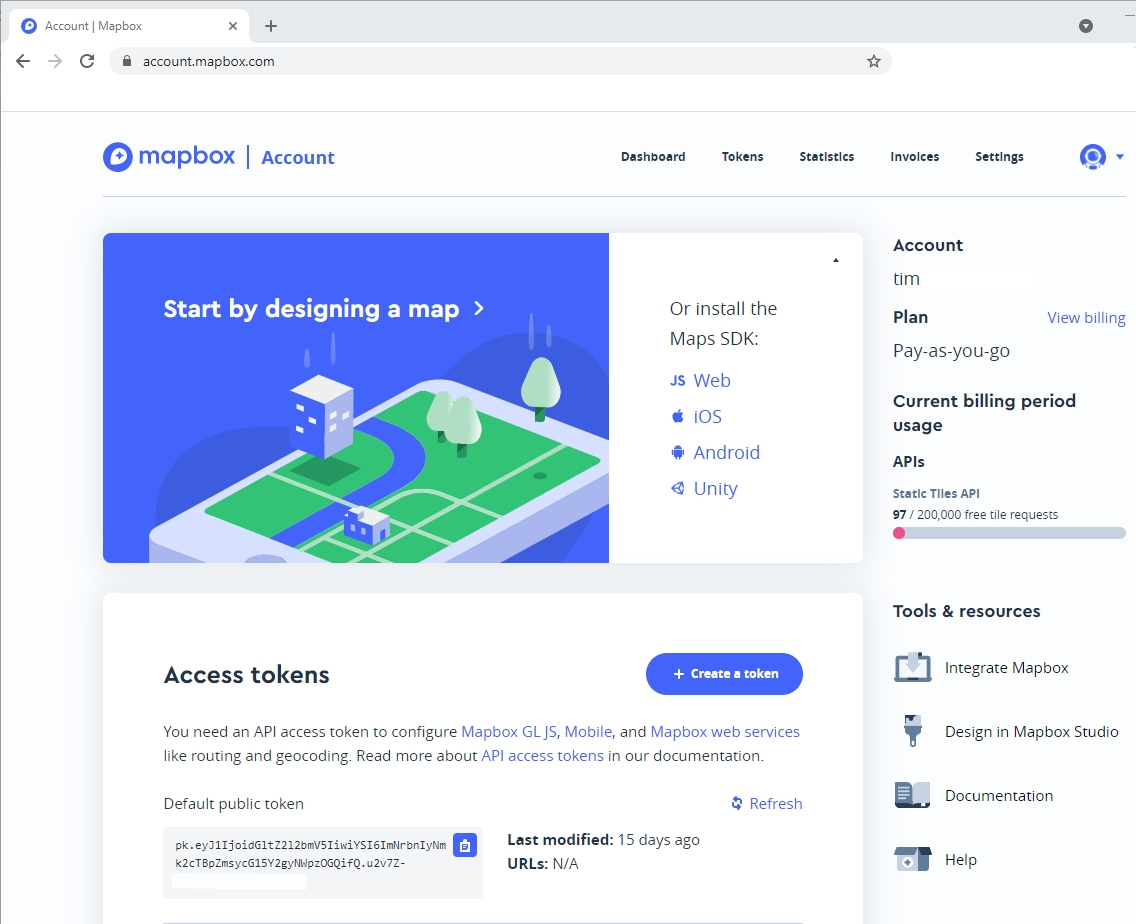
Once the account is created you will be provided a Keys (this will be loooong string of text and numbers) that in conjunction with our website will allow us to access and present the weather data elegantly. Below I will link images of the webpage that displays each of the Keys that was made for me.
Once you have got all three of these API keys transfer that key that you can get from these API into those settings like you can see in the image below. Here you can also write a custom latitude and longitude to focus on. Not necessary however as you can just drag to the right location.
Once that is complete and you click the save button in the bottom of the window everything will be set up and good to go. Sometimes it takes a little bit of time for the data on the server side to accept a new API key so give your set up ~15 minutes to be all ready.
Extra Things Worth Doing
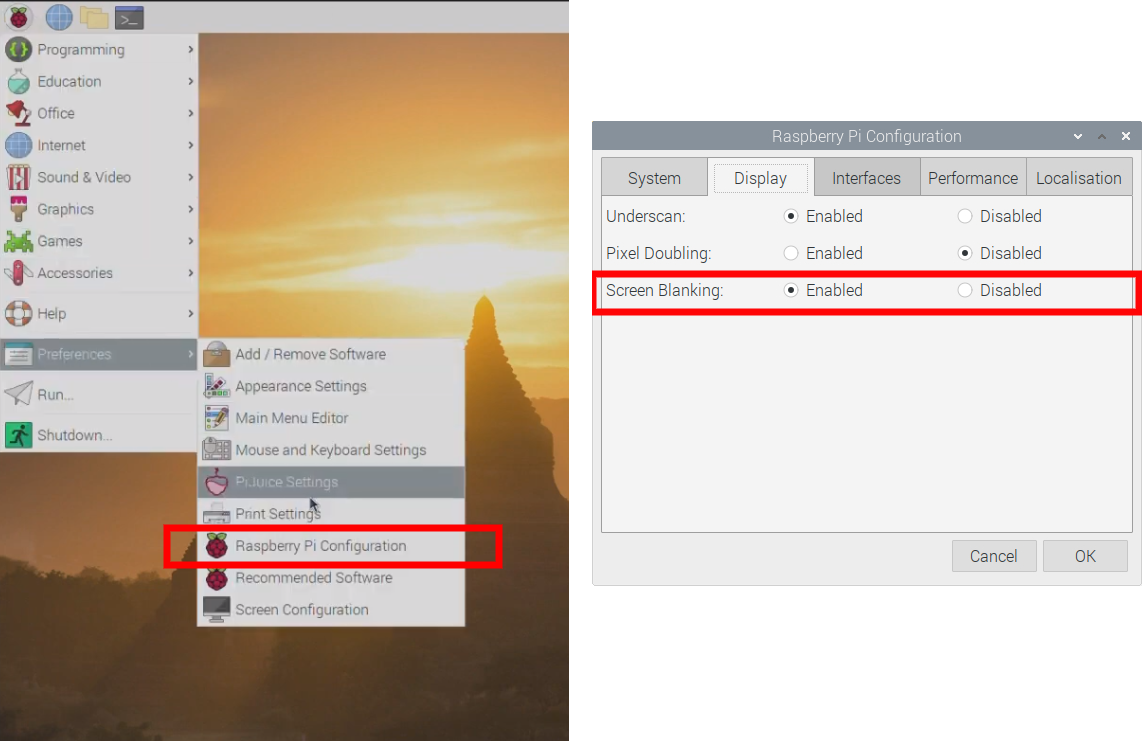
While that is occurring you can do two extra things to make the whole experience even better. Firstly you can prevent the Raspberry Pi from going to sleep by disabling the Screen Blanking option. By default, the Raspberry Pi will blank the screen after 10 minutes without user inputs (like mouse movements or keypresses). You can find this setting using the top tool button, going to preferences then click on the Raspberry PI Configuration under the Display Tab. Check the image below, select disabled and do a restart and it will work perfectly.
Next, you can make it so your Curser will disappear when not receiving mouse movements. This can be done with the following terminal commands, make sure to press Enter after each line. The last line will mean each time the Raspberry Pi is turned on it will run this mouse hiding script.
sudo apt install unclutter
unclutter -idle 0
/etc/xdg/lxsession/LXDE-pi/autostart
What to Do If The Raspberry Pi Restarts
Take a look at the bottom of the page in the comment section to see how to automate this so it opens up every time the Raspberry Pi recieves power.
Now while we are talking about what to do when restarting the Raspberry Pi Weather Viewer to get it back to normal, click on the Raspberry Pi Terminal button and type the following two lines and press enter after each of them.
cd Downloads/pi-weather-station
npm start
Then it will open up just as it should. A quick full screen and a little zoom in and you are good to go!
Sweet. You can even click on the graphs to display different information like the wind speed over the last 24 hours or 7 days.
Where to Now
This is good to be set up anywhere now. Keeping you up to date in this dynamic world we live in. You want more information you say! Well, I have two websites you can check out using your Raspberry Pi screen which doesn’t require API keys to be set up. Windy (windy.com) can be full-sized and give you a whole different style, will provide less information but is quicker to set up.
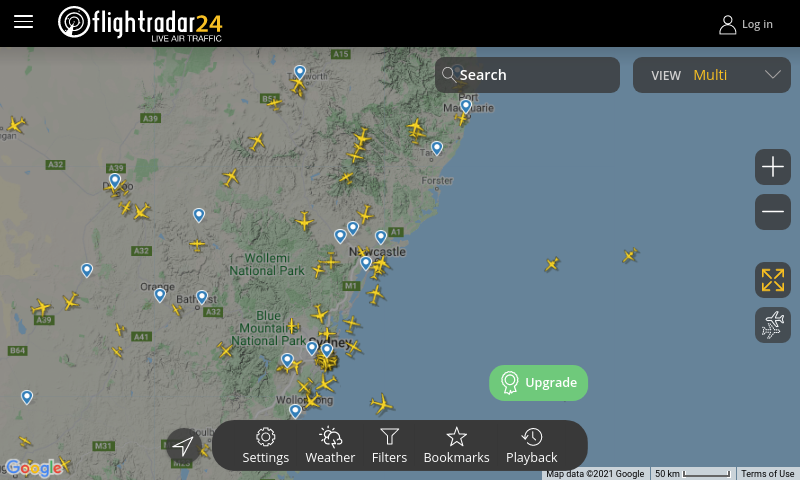
Or if you are into planes and helicopters another great website to check out and full screen is Flight Radar (flightradar24.com). Every single airplane in the air is recorded and data is displayed live on this website. If you really like this one I would recommend disabling the switch-off time out (follow this YouTube video to do just that).

