After purchasing an Anycubic Photon resin printer, I wanted an easy and reliable method for post-curing the prints. This allows the printed resin to achieve maximum material strength and eliminate tackiness in the finish. My requirements were to have high-coverage, rotating base for even exposure, timer control, and airflow/heat control to fine-tune the curing for different resins.
The easiest way to do this was to hack an old (but working) microwave and retrofit it with UV bulbs. I spent a total of $10 on this project, with $5 added for material usage and it took about a day to complete.
Hardware Requirements
-
UV bulbs (ensure you use the correct wavelength for your resin, mine is 405nm, I found these on Gumtree from a gel nail curer for very cheap, the power supply board was also included as a bonus)
-
Sockets and mounting hardware for the bulbs (I used some thin right-angle brackets and drilled holes for the sockets, and mounted these to the inside walls at varying heights and angles to give even coverage inside the microwave)
-
Microwave (I got mine for free off of gumtree/marketplace)
-
UV-resistant mains-rated hookup wire and connectors
-
Reflective foil and/or reflective tape (I used aluminium for both)
Cleaning out Microwave Components
The first thing you’ll want to do is to open up your microwave and remove all unnecessary components. WARNING: THIS INVOLVES HANDLING HIGH VOLTAGE CAPACITORS!
The things you’ll want to remove are the magnetron, HV transformer, and large capacitor (again, please be careful in safely discharging this before removing. I take no responsibility if you attempt this project). Then give everything a good clean.

My microwave had lots of food residue, dust, and debris which I cleaned using a blow/suck vacuum, isopropyl alcohol, and cleaning rags. Be sure to leave the power and thermal fuses in place as they provide the required safety measures when dealing with mains power.
Lining the Chamber
Unless your microwave has a highly reflective interior, you’ll want to line it with a reflective material to allow for maximum efficiency and exposure from your UV bulbs. I used hot-glue and aluminium foil (with a heat gun to evenly melt the glue under the foil) and aluminium tape to seal the edges.

Mounting the UV Bulbs
You can just buy your bulbs at your local hardware store or online, but after buying sockets as well, you can easily spend $100 on these alone. I looked around on gumtree/marketplace for a UV Gel Nail curer which I found for $10 (unused). 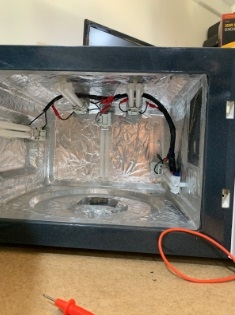 It uses 5 9W UV (405nm) UV lamps for a total of 45W. The benefit here is that it also has the power supply board required to drive these bulbs (HV DC) which I salvaged to mount in the microwave.
I used some thin right-angle brackets and drilled holes for the sockets, and mounted these to the inside walls at varying heights and angles to give the most even coverage.
Wiring and Power
This is actually quite easy as all of the control hardware and software is done on the existing microwave control board. After removing the HV transformer and magnetron, you’ll be left with a relay-controlled filtered mains line which I wired up to the input of the power board for my bulbs. This means that just like a standard microwave, they will turn on and off according to the front panel timer. I used the extra wire mentioned in the bill of materials to wire up the bulbs through a drilled hole to the board with a spiral wrap to keep it all tidy.
Make triple sure that you’ve smoothed the edges of the hole that you route your wiring through and protected the cables running through it. A sharp edge can easily cut through the insulation and cause a short (very bad).
The last step here is optional as all microwaves pause/stop when the door is opened as a safety feature. This is a very good thing for microwave radiation, however, I wanted the ability to open the door to check the progress without it pausing. To do this I checked the switch contact positions that are made when the door is closed and hard-wired them to bypass the switches. But this is optional and depends on if you need it or not.
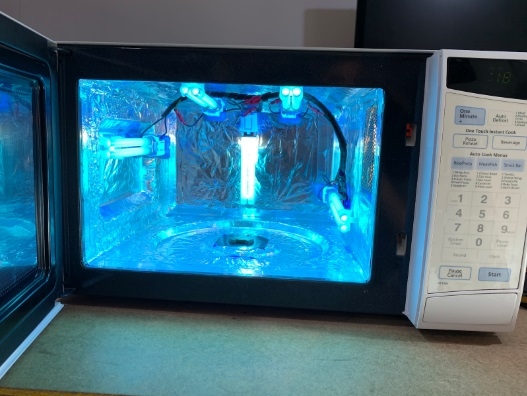
And that’s all folks! if you’re printing with resin, a good curing chamber is a game-changer for high-detail prints, and this one ticks all the boxes and works fantastically. Best of all, it took less than a day to build.
