In this guide, we will be setting up Steam Link on a Raspberry Pi - a small and power-efficient computer that runs Linux. This setup will allow you to stream Steam games from a PC to this Raspberry Pi over your home network's Wi-Fi or ethernet as if it were a wireless monitor. You can set this Pi up in your loungeroom or theatre room and stream your gaming to there without the need to move your whole PC setup. This guide won't be covering the ins and outs of using Steam Link, but moreso how to set it up on a Pi and what you can expect as Valve has made the Steam Link software incredibly intuitive and user-friendly.
Speaking of, what can you expect from this performance-wise? Well first of all this will still be limited by the performance of the PC running the game - this setup is just like plugging in a wireless monitor. I have tried many local streaming systems like this before (even including the original Steam Link hardware), but I was pleasantly surprised by the Pi's performance and have had one set up in our loungeroom for months.
Only streaming over 5Ghz Wi-Fi we reliably get 1080p at 60Hz with a little bit of latency and some occasional connection issues. I wouldn't use this to play any competitive ranked shooters, but for couch games and anything more casual, this has been more than sufficient - even on my extremely average and budget home router.
If you can connect your PC and Pi to the router with ethernet this is a completely different story and the experience becomes extremely smooth. We were able to stream 4k 60Hz without much hassle and even some higher framerates at 1080 with Valve claiming that the Pi 5 can push up to 240Hz at 1080p!
With this set up you can also connect controllers to the Pi itself - either wired or with Bluetooth. Once paired, they work really well and are a breeze to use. We were able to have 8 controllers connected to the Pi at once without any issues. Not every controller is supported, but most of the major brands are, we have a compatibility list below.
What You Will Need
For the Raspberry Pi portion you will need a:
- Raspberry Pi - A Pi 5 will be able to stream at up to 1080p @ 240Hz, and 4k @ 60Hz, and the Pi 4 will be able to run up to 1080p @ 60Hz and 4k @ 30Hz. A 2GB, or larger model will work.
- Cooling Solution - For the Pi 5 we recommend the active cooler, and for the Pi 4 any passive cooler will do but this kit should be more than enough.
- MicroSD Card - At least 16GB in size.
- Power Supply - The Pi 4 and Pi 5 at minimum need a 5v 2.5A USB C power supply. There are different official power supplies for the Pi 5 and Pi 4.
- Mouse and Keyboard
To stream to your Pi you will need:
- Another PC to stream games from - This will be actually running the game and your performance will depend on its capabilities.
- A high-speed home network - We recommend a 5Ghz or better wifi connection as we had many issues trying to stream over 2.4Ghz. An ethernet connection between your router and Pi, or router and PC will be the best option.
- A Steam account.
It is optional but you can connect a controller to your Pi instead of using a keyboard and mouse, the following controllers are either officially supported or known to work:
- The 8BitDo Pro 2 Controller
- The Steam Controller (wired or using the included wireless dongle)
- The official Microsoft Xbox One Wired Controller
- The official Microsoft Xbox One S Controller (wired)
- The official Microsoft Xbox 360 Wired Controller
- The official Microsoft Xbox 360 Wireless Controller for Windows (with wireless receiver)
- Sony DualShock 4 (wired or wirelessly using Bluetooth)
- Sony DualShock 5 (wired or wirelessly using Bluetooth)
- The official Nintendo Switch Pro Controller (wired)
- Razer Raiju, Sabertooth, Serval, and Wildcat controllers
- SteelSeries Stratus Du
Installing Pi OS
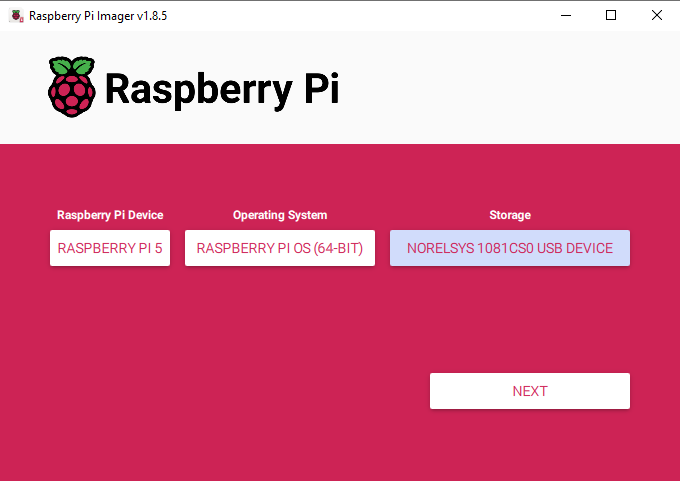
To start we will need to install Pi OS onto the microSD card. Plug your SD card into another computer and download the official Raspberry Pi Imager. Select the Raspberry Pi model you are using, 64-bit Pi OS as the operating system and then the microSD card as the device to install it on. This installation will then download the OS image (which is around 2GB) and after that, the installation should only take a few minutes.
Note: This installation will wipe any data on the SD card.
Once it's done, whack it into your Pi, plug in your keyboard mouse and monitor and run through the first-time installation process. There is nothing special you have to do here and you should set it up as you normally would any device. The only thing to remember is the username that you set as we will need it for later. In this guide we call it "pi" and if you want as little hassle as possible you can use this name as well.
Installing Steam Link
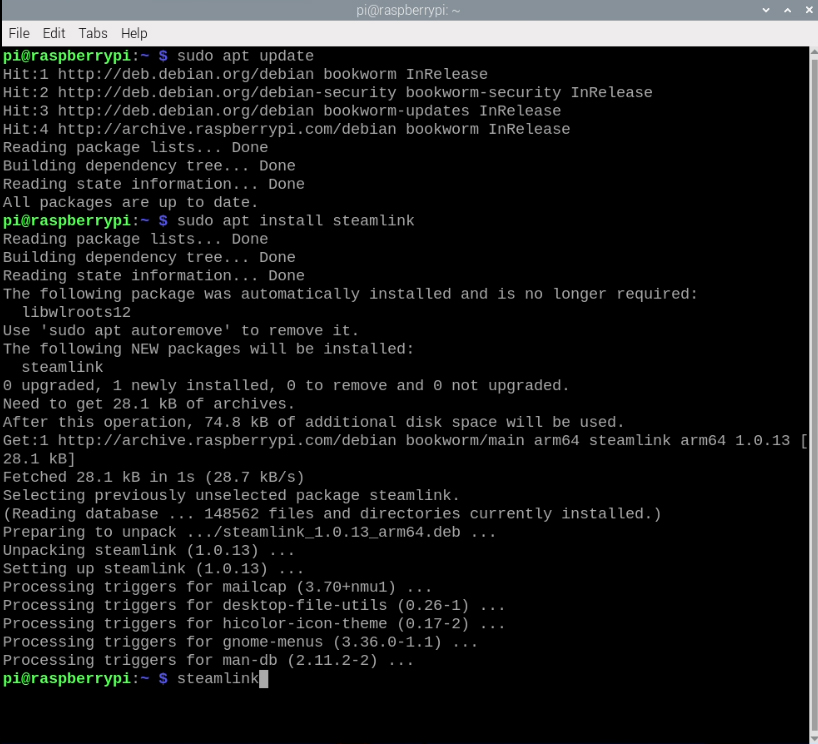
Now that we have booted into our desktop we are ready to get cracking. Open up a terminal window (there should be a shortcut to it by default in the taskbar, or you can press ctrl + alt + T) and enter the following line to update your Pi's package list:
sudo apt update
Then we will install the Steam Link app with the following line:
sudo apt install steamlink
Once that has finished installing launch Steam Link with the following line:
steamlink
This should run a first-time installation and a window may pop up asking you to press enter to continue. Once that has finished, you have set up Steam Link and are ready to go!
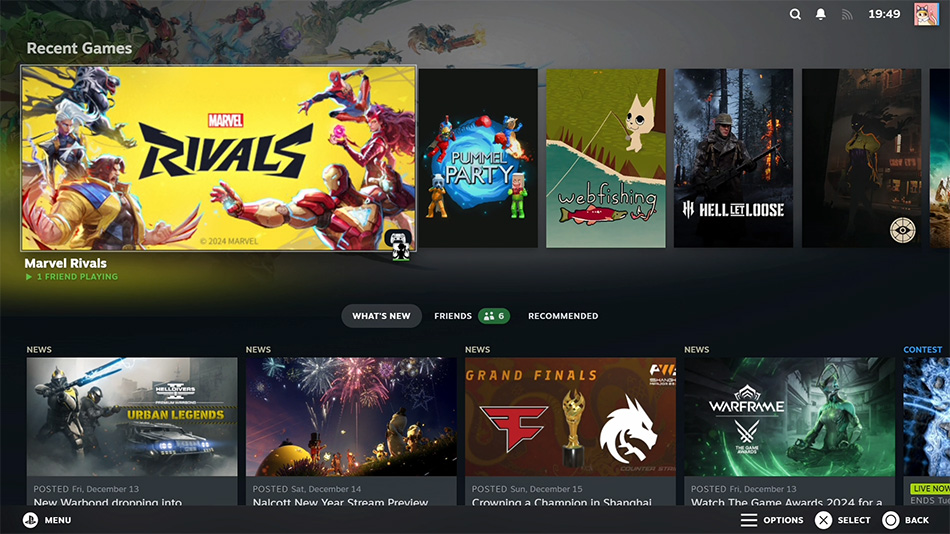
And you are now ready to start using your Steam Link! It will automatically start scanning for any computers on your home network that currently have Steam running, and after a quick pairing process, you will be able to stream your games from it. We won't be covering much on the actual usage of Steam Link as Valve have made it incredibly user-friendly.
Under the settings menu at the top left you will find a heap of helpful things such as a section to pair controllers.

However, we encountered some issues with controllers not being recognised here and found it was easier to manually add them through the Raspberry Pi's Bluetooth menu.
You can exit out of the Steam Link launch menu by hitting the escape key.
In the top right select the Bluetooth icon, and add a device. Then enter pairing mode on your controller and it should appear here. Select it and it will automatically pair. Once it has paired, you should only need to turn the controller on for it to automatically connect to the Pi.
We did sometimes encounter an error where the connection confirmation window wouldn't disappear, but the controller had successfully paired. A quick reboot will fix this, and you may need to do so as it prevented us from pairing any more controllers.

Automatically Launch Steam Link
This next step is entirely optional, but right now you will have to manually open up the Steam Link app every time you turn on your Pi - but we can write a script to automate this process. To do so open a new terminal window and create a new shell script file with the nano editor with the following command:
nano run_steamlink.sh
We will now write some commands that will be executed when the script is run. We will start by sleeping for 4 seconds to give the Pi some breathing room after it boots up. This won't put the Pi to sleep but instead will pause the script for 4 seconds. After that sleep, we will run the command to launch Steam Link.
sleep 4
steamlink
Exit the nano editor by pressing "ctrl + x" and then save it by hitting "y" and then "enter".
Now we need to make this script executable with chmod by entering into the terminal:
sudo chmod +x steam_link.s

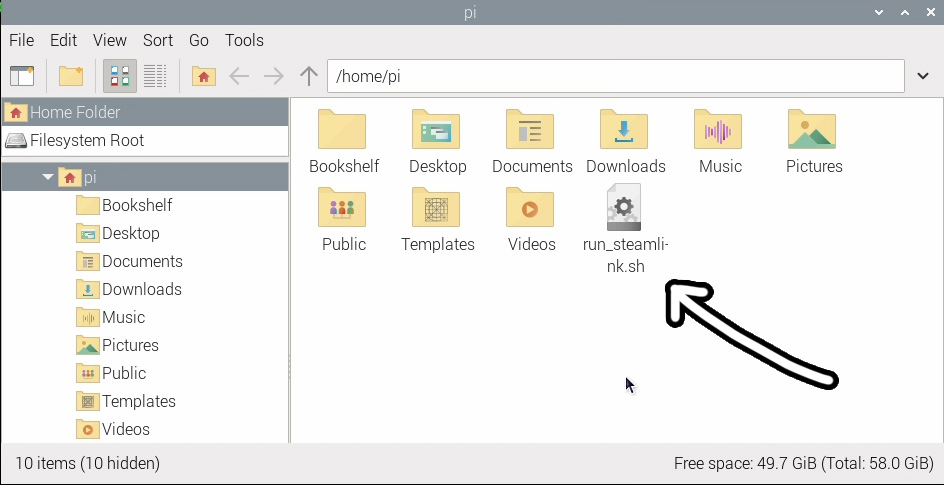
We can test that this script is working correctly by heading to our Pi's home folder (if you open up a new file explorer window it should default to this location). In there, you will find the shell script we just created and you can double click on it and hit execute to verify that it works.
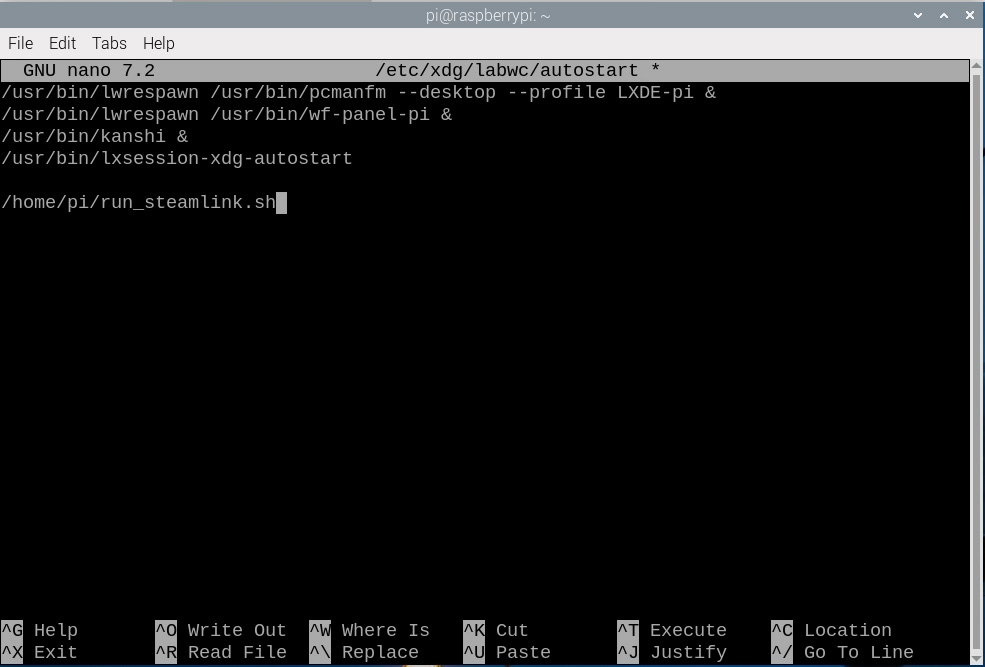
Now we will edit the Pi's autostart file and add this shell script as a process that runs when the Pi turns on. To do so, in a terminal window use the nano editor to open the autostart file with the following command:
sudo nano /etc/xdg/labwc/autostart
There will be a few other lines of code. Use the arrow keys to navigate to a line at the bottom and paste in the following command:
/home/pi/run_steamlink.sh
An important thing here is that this line will differ depending on what you set your username as. If you chose the easy path and called it "pi" then it will be the line above. But if you set your username as something, let's use "jeff" as an example, you need to change the line to reflect it like so:
/home/jeff/run_steamlink.sh
Once you have your line in there, "ctrl + x" to exit the nano editor, then hit "y" and then "enter" to save it. Now your Pi should open Steam Link every time it's turned on!
If you want to stop it from doing this in the future, just come back to this autostart file and delete this line.
Where to From Here?
We now have a Pi set up and ready to stream all our Steam games for some big-screen action. But did you know that Raspberry Pi's can be set up to do a range of tasks around the house like this? If you are interested we have some guides on how to set up a budget local NAS which allows you to share and use files over your home network, and another handy guide on how to set up network-wide ad blocking with PiHole.
Until next time, happy making!

