
In this guide, we are going to be assembling and setting up your Bambu Lab A1 so you can get printing quickly!
A quick but important note: consult your included instruction manual alongside this guide. The packaging layout and shipping materials on these machines can change a little from time to time, so there might be a minor extra step in a future revision. Most of these steps are going to remain very much the same, though.
Let's get right into it!
Assembling the Machine
Inside your A1 box, you will be greeted with a few different layers of parts. It's a good idea to lay everything out on a clear workspace. You should find:
- The lower part of your printer frame (the base).
- The upper part of the printer frame (the gantry).
- A bag with your build plate and instruction manuals.
- A filament spool holder.
- The power cable.
- The purge wiper.
- PTFE tubing.
- Your accessory box.
NOTE: There are a few small things hidden in the foam packaging, so be sure to double-check every nook and cranny before chucking the foam in the bin!
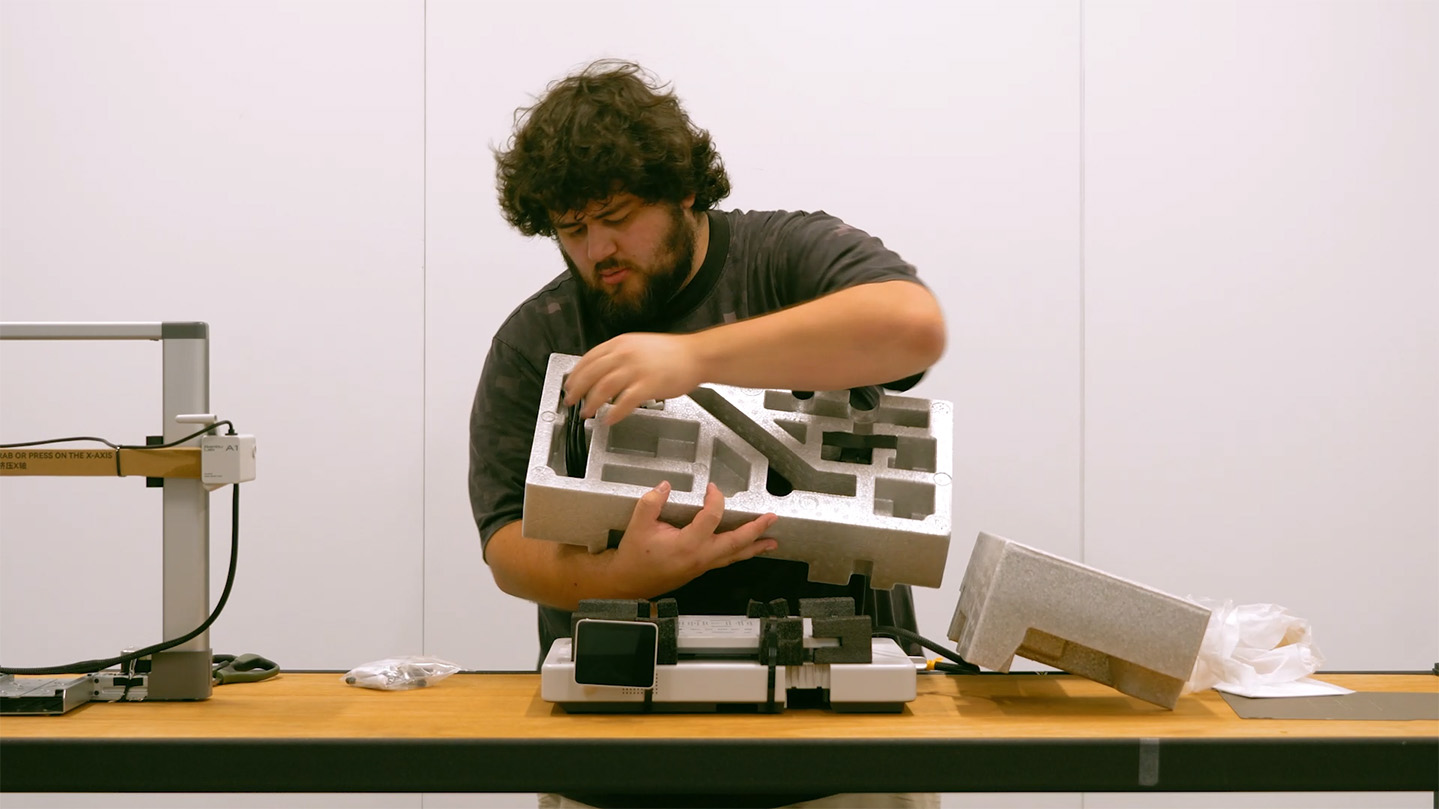
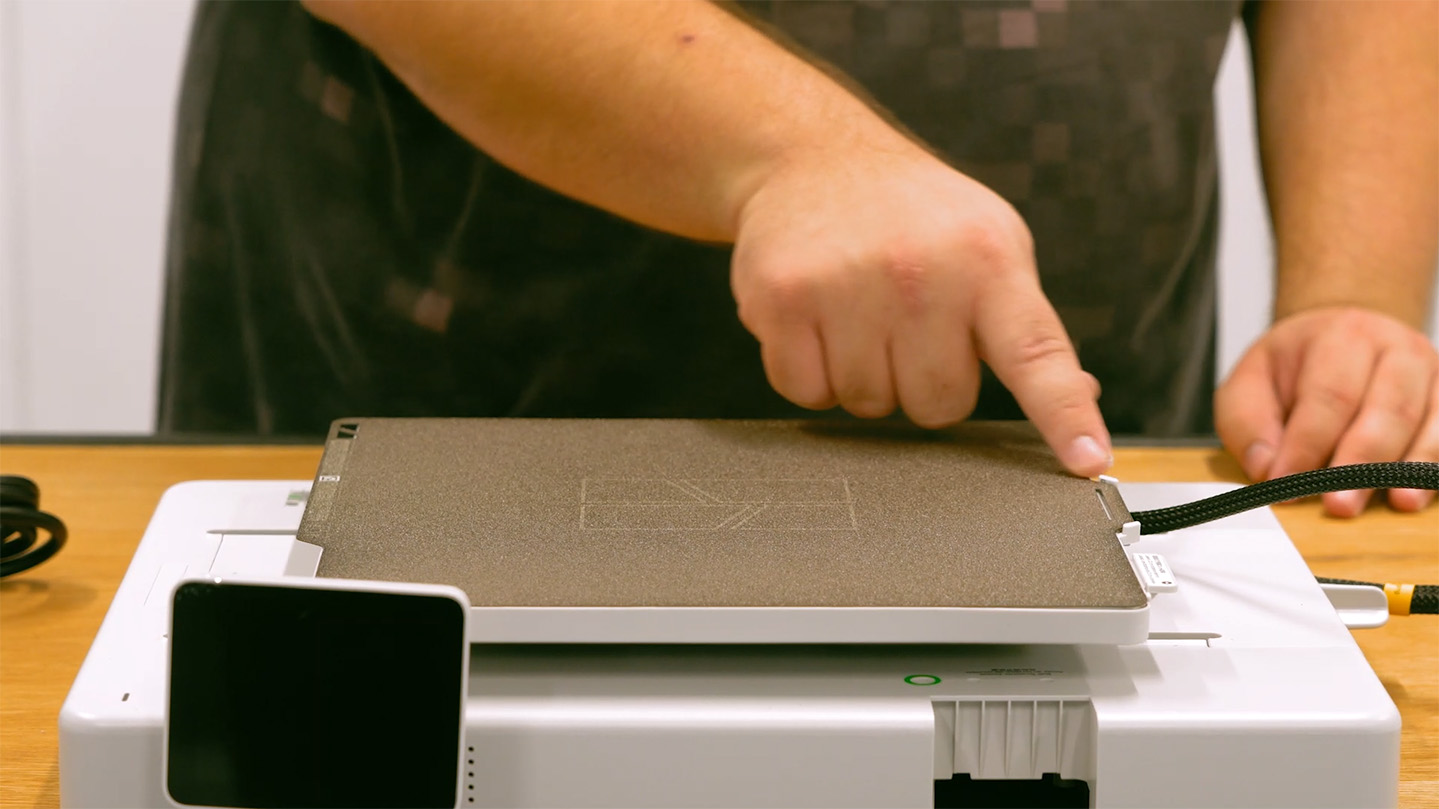
Remove the packaging from your lower frame. The very first thing we will do is put your build plate onto your heat bed. This simply sticks on magnetically. Just ensure you align the lip at the centre-rear of the plate with the matching notch on the heatbed so it sits perfectly square.
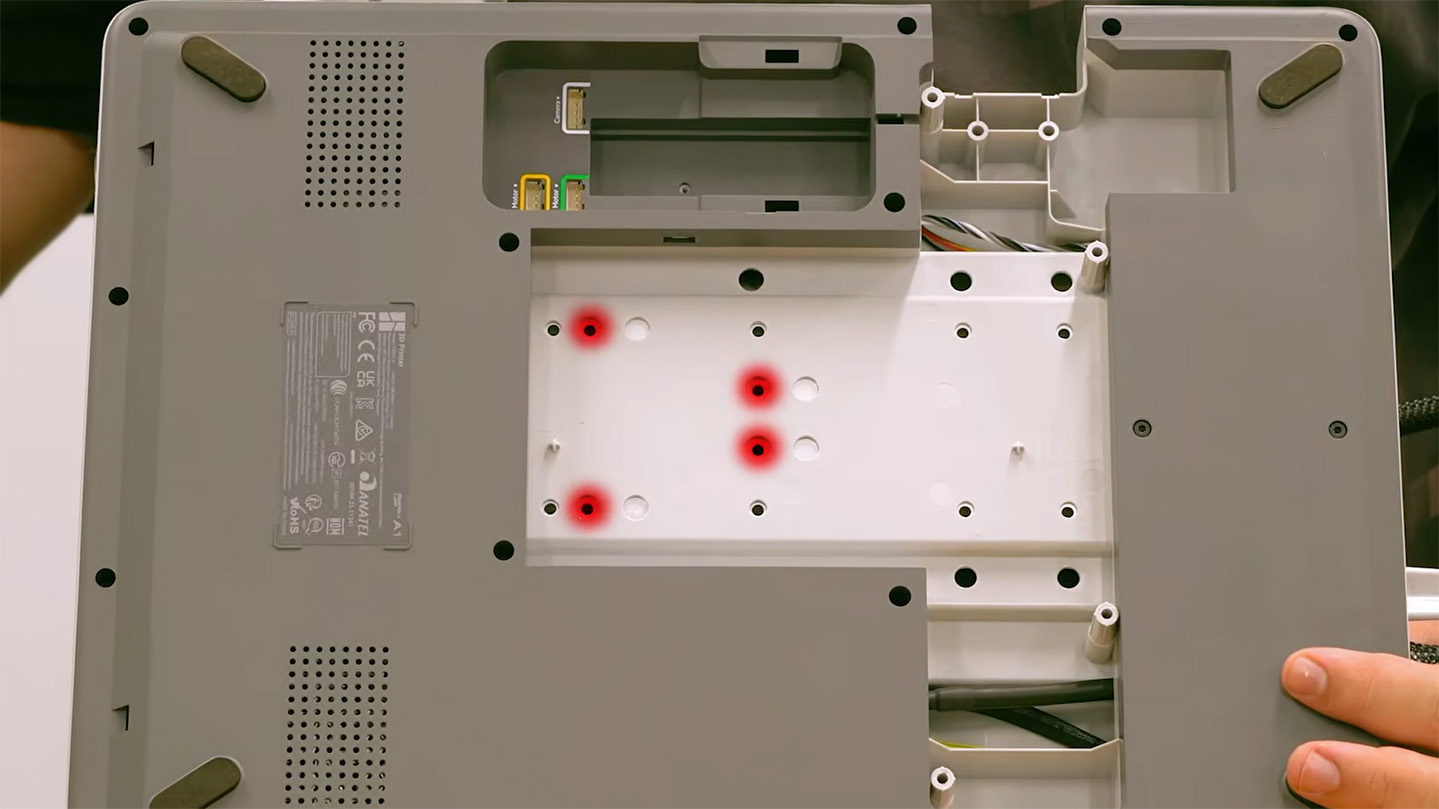
Next, we need to free the print bed. During shipping, the bed is locked tight to prevent damage. Flip the base over so you can see the bottom. You will find 4 screws holding the bed assembly in place. Grab the appropriately sized Allen key from your accessories box and completely remove these 4 screws.
Grab the upper part of your frame and remove any packaging from it. Be very careful not to cut any cables or the rubber belts when removing the tape and foam.
Also, be aware that you may have slightly different packaging here depending on when your machine was manufactured. We had a bolted metal bracket holding our print head gantry in place, but you may have foam blocks and cable ties instead. Whatever packaging is on the top, carefully remove it.
Place your upper frame standing upright on the table. Take your lower frame, insert it through the upright upper frame, and lower it down so they both join nicely. Make sure the screen is on the front side of the printer (that you haven't got it round backwards), and check that both parts of the frame are sitting nice and flush with each other.
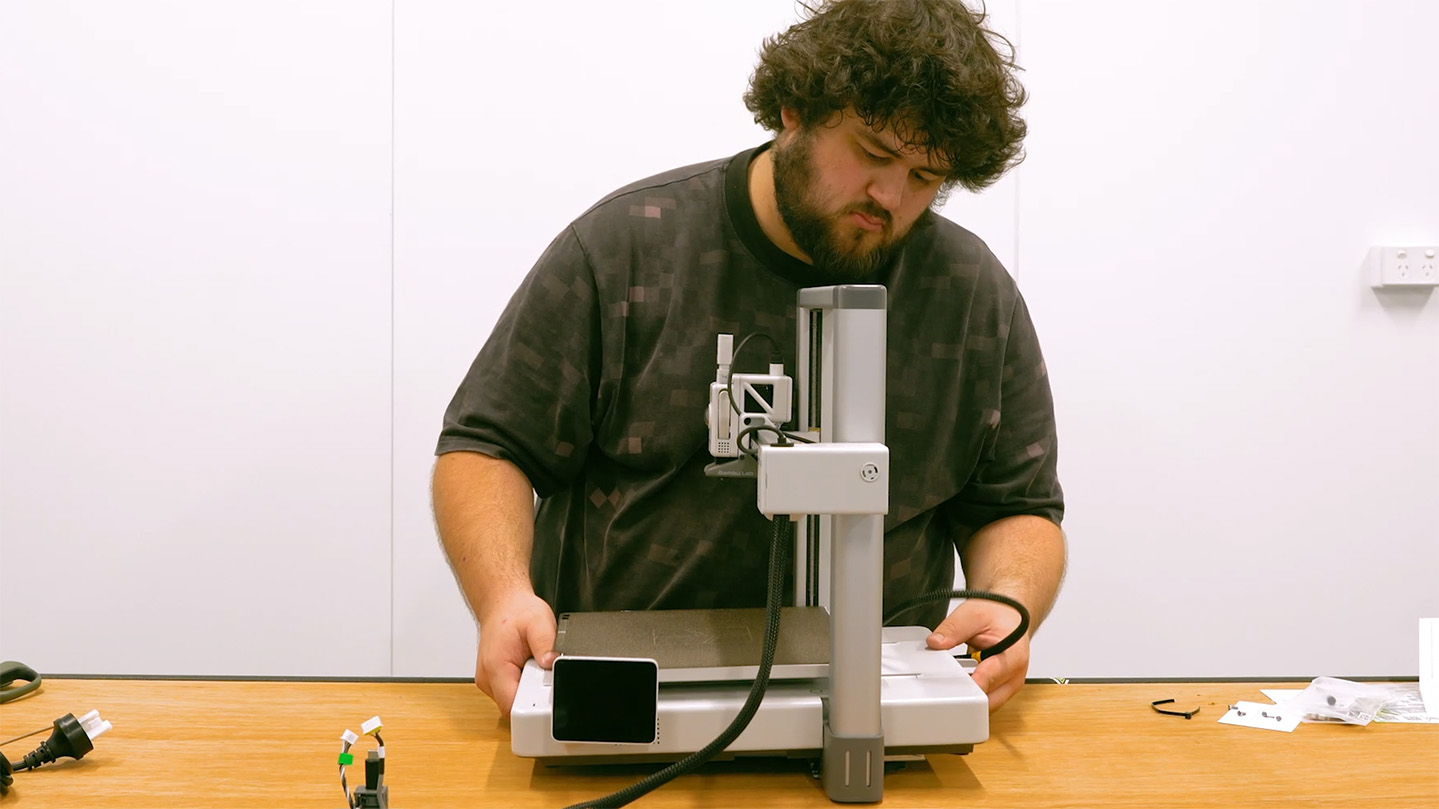
Now it's time to secure the frame pieces together. Slowly slide your print bed forward (move it slowly to avoid generating excessive current from the motors), and pop off the rear panel underneath it.
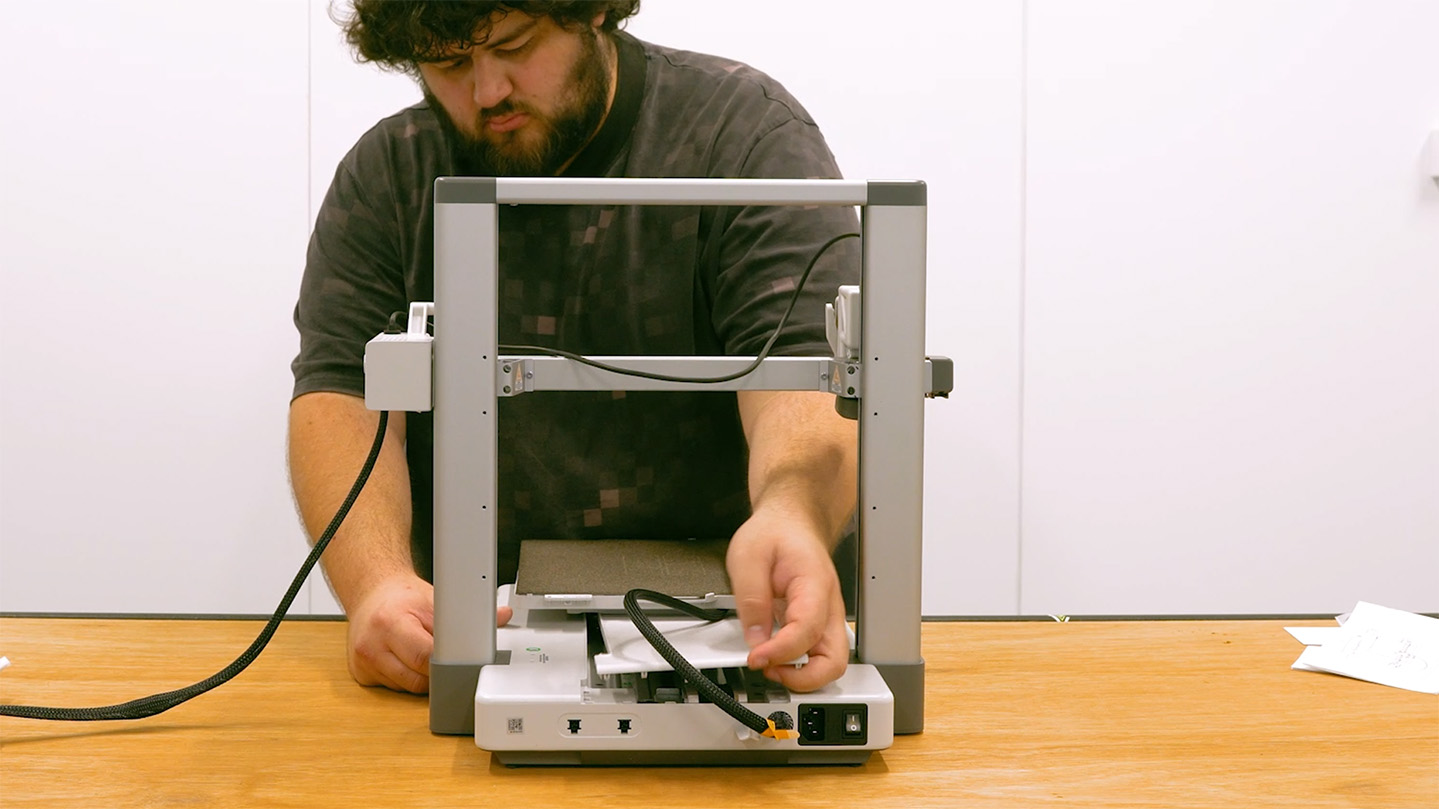
Underneath this panel, you will find 10 screw holes highlighted with green circles. Open your accessories box and find the bag of screws labelled “for base housing”. Go ahead and screw them into all 10 of these holes.
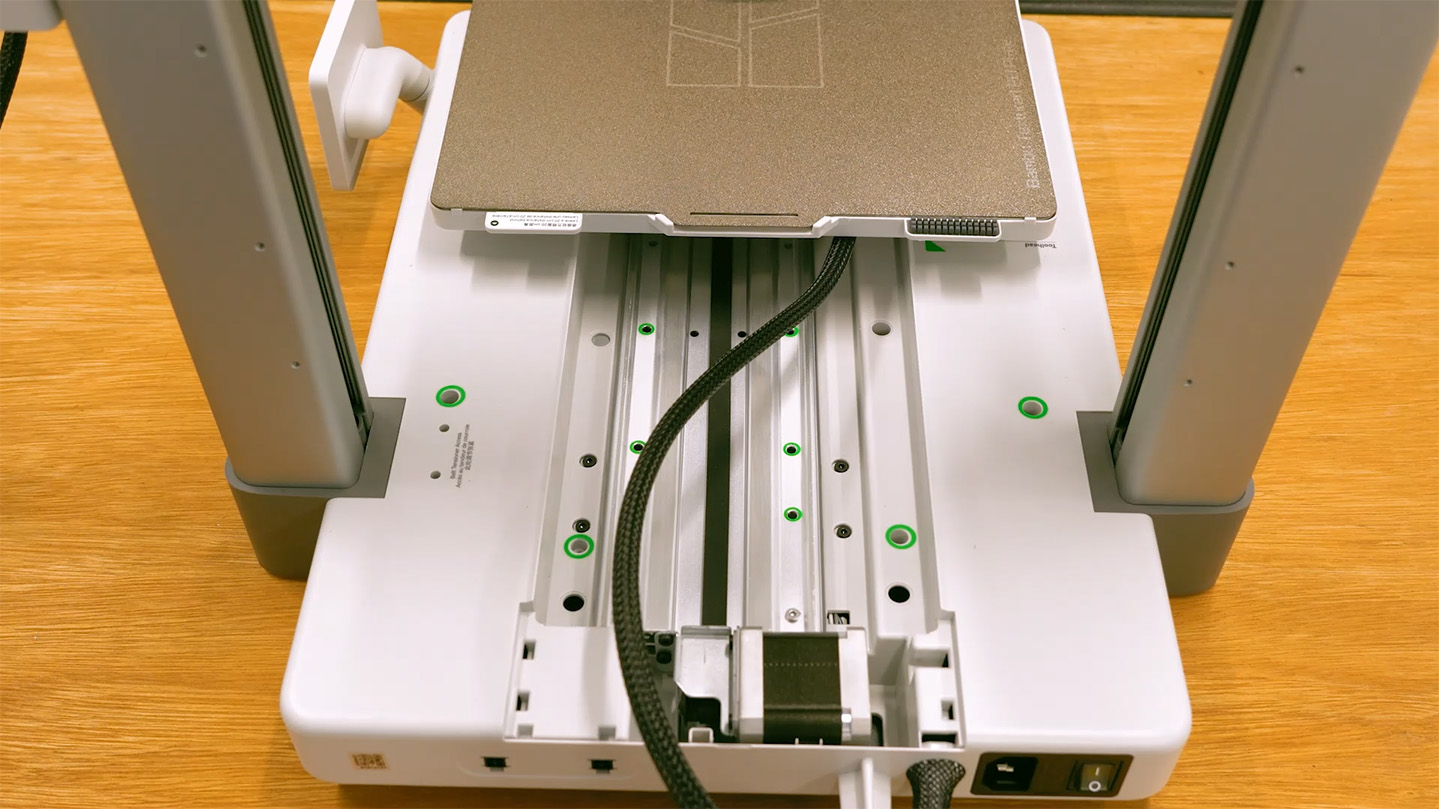
Slowly push your bed all the way backwards. This will reveal two more green-circled holes that need the same screws.
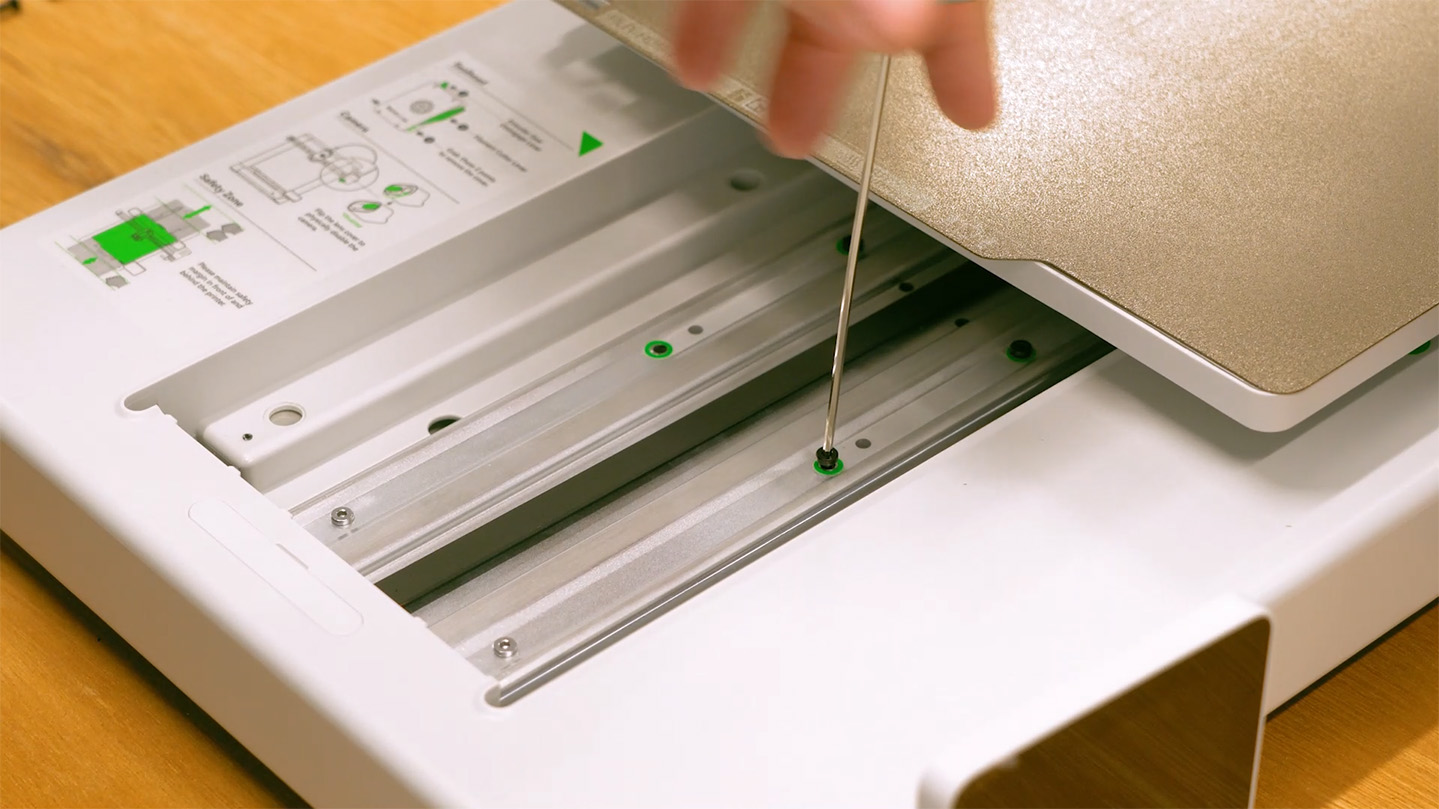
With those locked in, you can move the bed forward again and pop that rear cover back on.
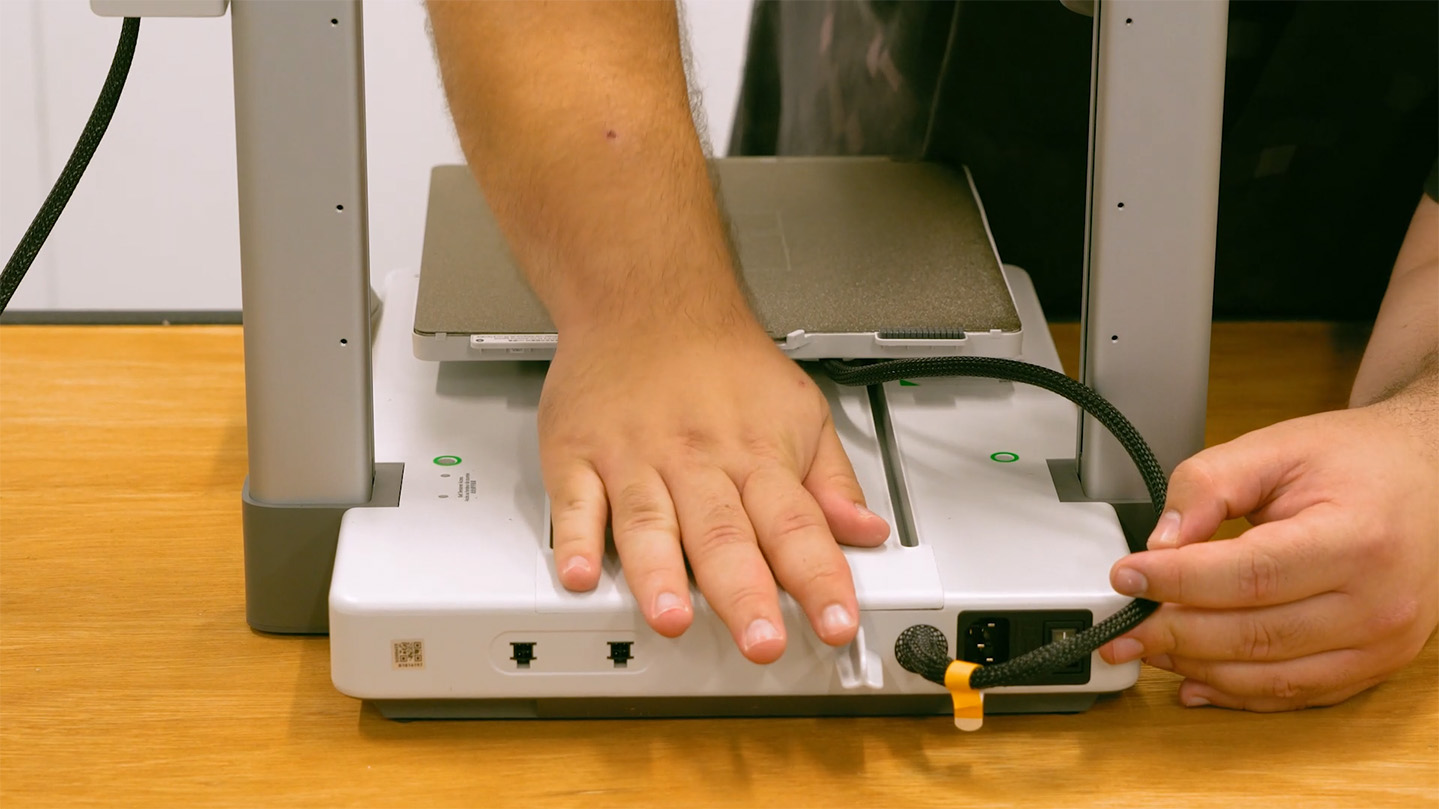
Slide the bed back slowly once again. To get to the electronics underneath, place the printer on the edge of a table so the bottom is accessible. We recommend putting down a little bit of cardboard under the frame so you don't scratch your desk or the printer. Make sure your printer is completely secure and is not going to slip off while you work on it.
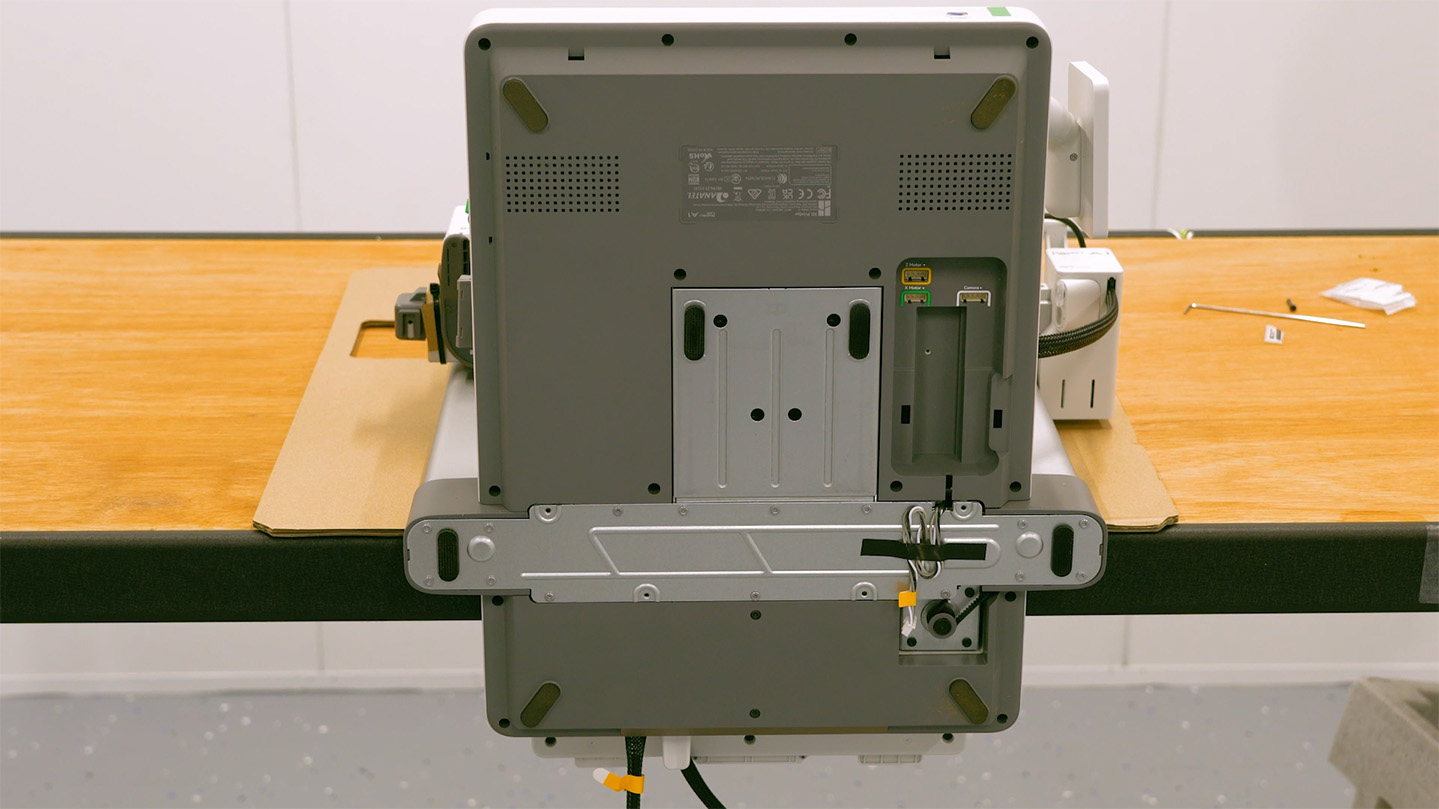
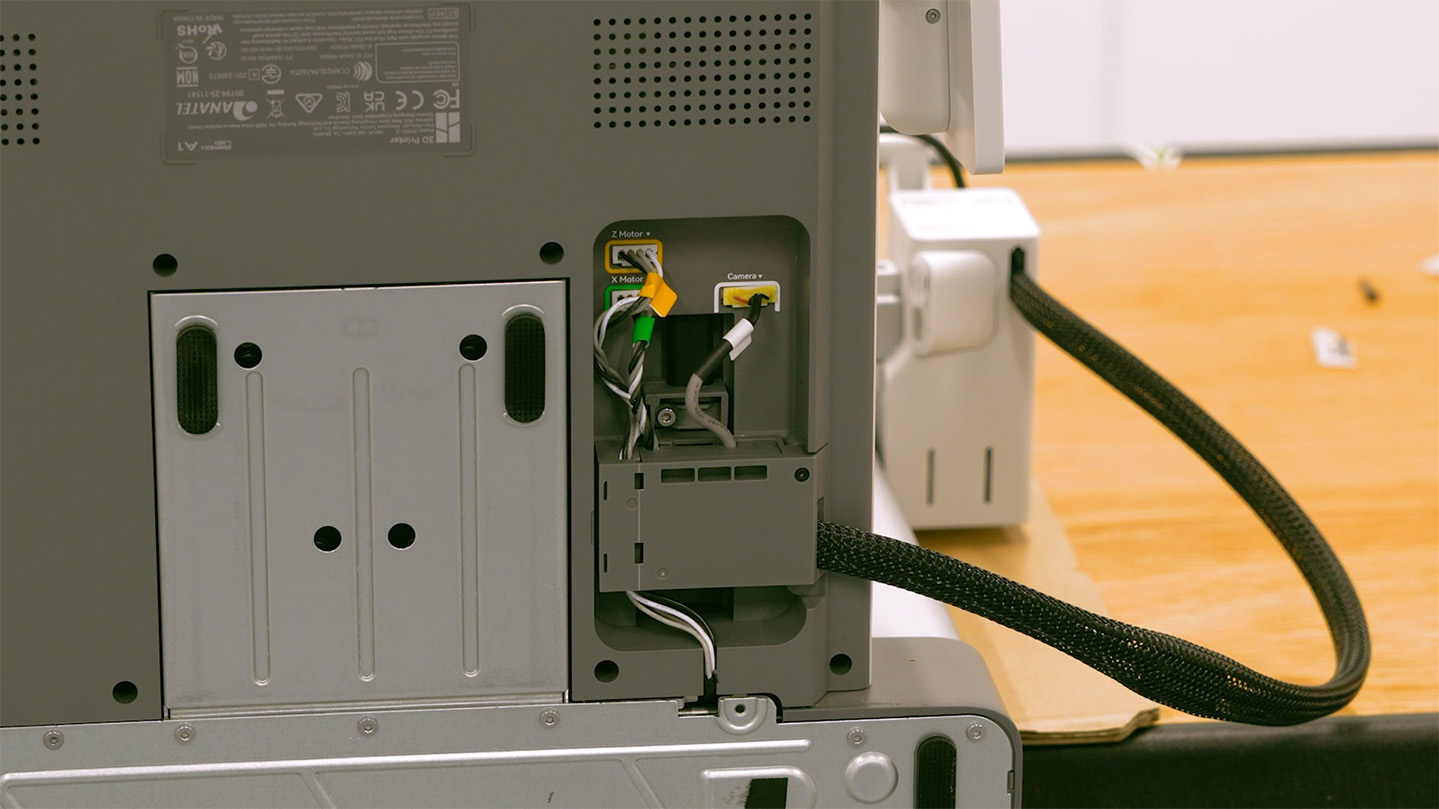
Grab the dangly cable box attached to the upper frame, slot it into its groove on the base, and gently slide it up until it clicks into place. Hold it in place by tightening the captive cable box screw.
Now, go ahead and plug in the other cables: The cable with the green tag goes into the green hole. The cable with the white tag goes into the white hole. It’s some real square peg, square hole stuff here!
The yellow cable, however, will need to be untaped from the bottom of the upper frame, and routed through its channel to its connector. There is a small clip on the cable box to help hold this yellow cable in place. As long as it is routed neatly and the cables aren’t poking out from their compartment to get snagged later, you are good to go.
Carefully put your printer back completely on the table, sitting on its feet. Slowly move the print head to the centre of the rail. At this point in our build, we realised we still had a sneaky bit of packaging attached to the side here, so pull that off if you spot any!
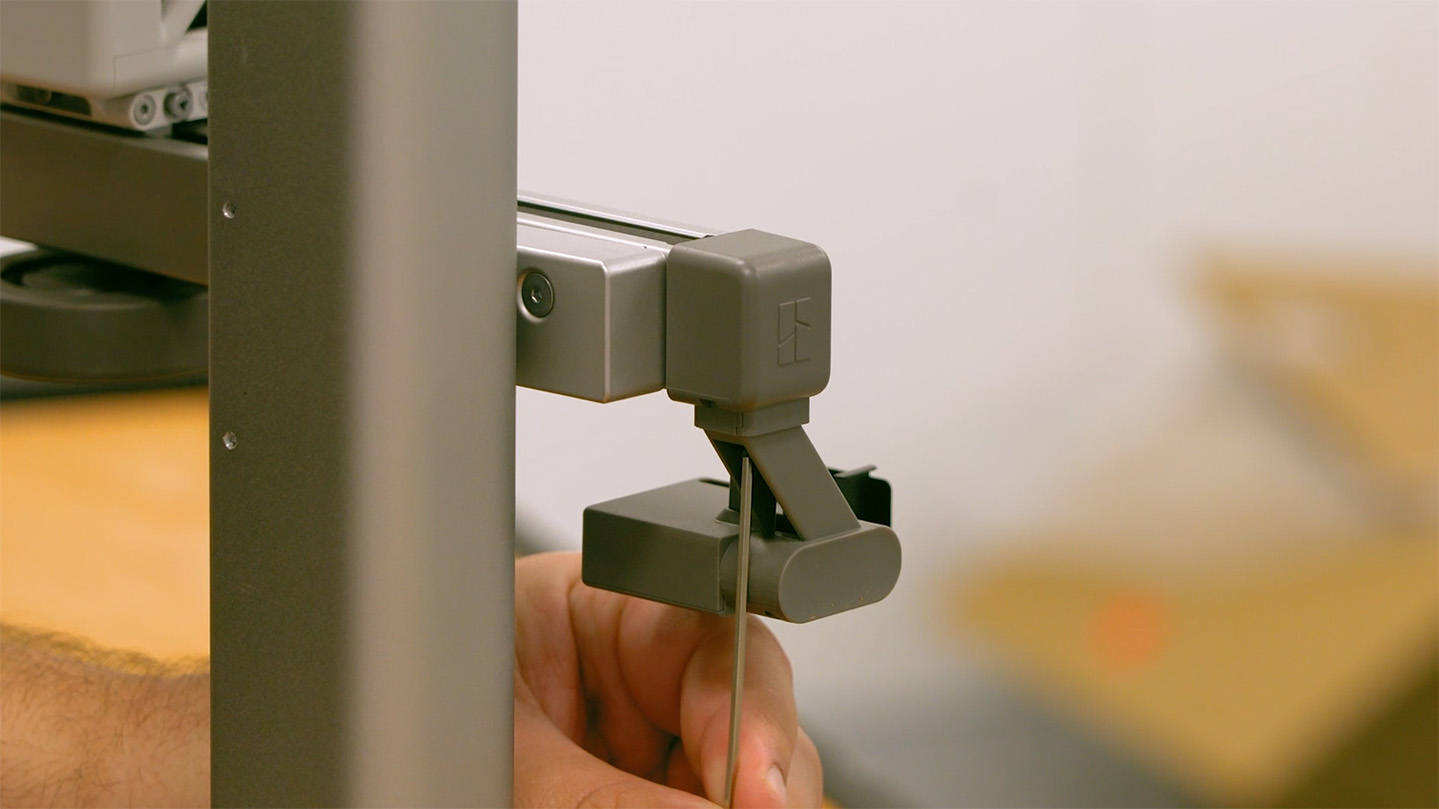
Next, grab your purge wiper and slide it onto the left side of the rail from behind. You will find a single bolt in a bag labelled “for purge wiper”. Screw this into the bottom of the purge wiper to firmly lock it in place.
Spool Holder / AMS Setup
If you are rocking the standard A1 without the AMS Lite, you'll be using the single spool holder included in the box. This holder simply clips securely onto the top of your printer's frame.
Next, you will need to route the filament path. Grab a length of PTFE tube and plug one end firmly into the top of the print head, and the other end into the filament inlet on your spool holder.
A quick note for AMS owners: Do not throw this single spool holder out! The AMS Lite is incredibly helpful, but some "fancy" or advanced filaments (like extremely flexible TPU or highly brittle materials) really don't like being fed through the AMS system. For those tricky materials, you’ll need to bypass the AMS and use this direct-feed spool holder instead. Nothing to worry about for now, but keep it around incase!
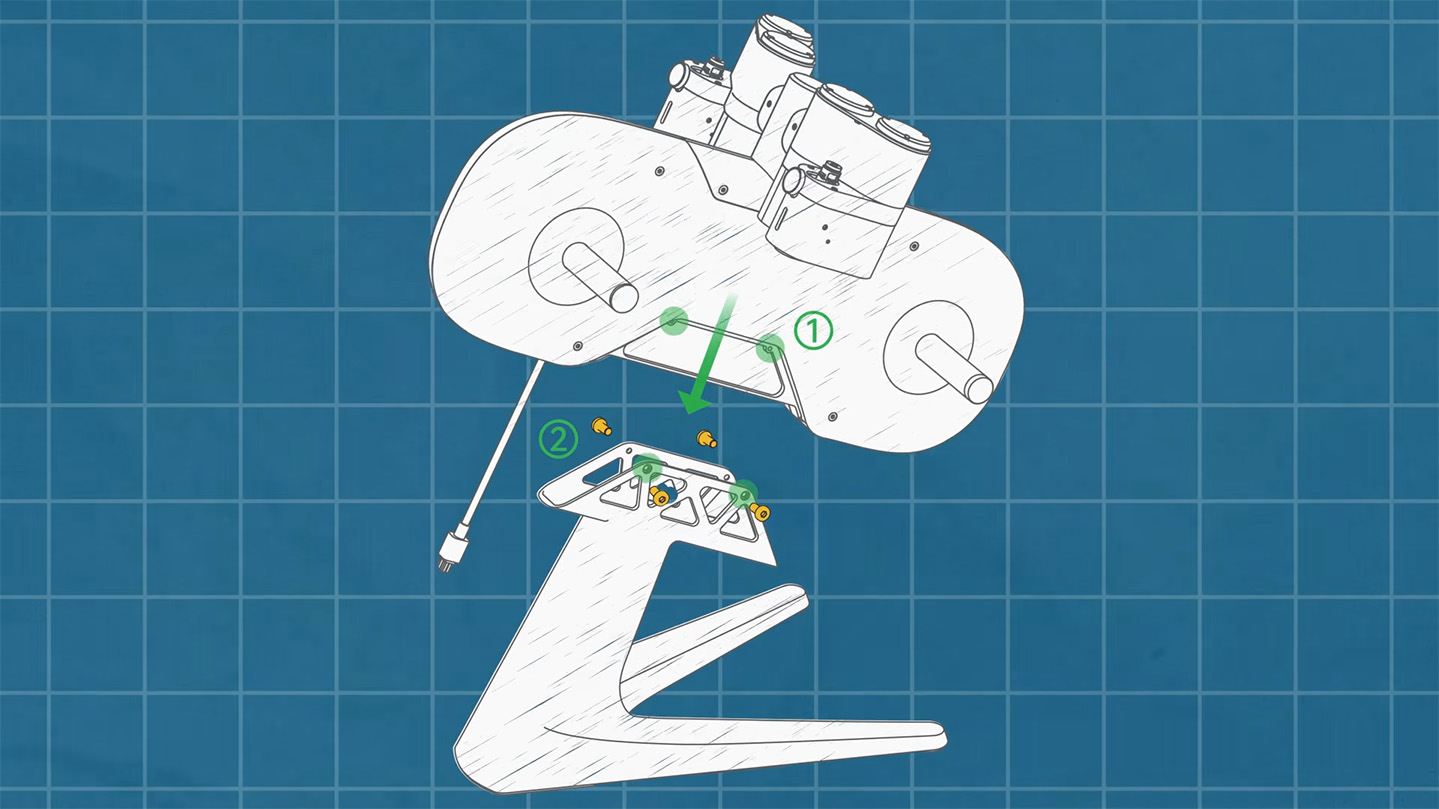
If you snagged the combo kit, setting up the AMS Lite is super straightforward. Start by grabbing the bottom stand of your AMS, and use the 4 screws found in the bag labelled “for ams lite”, to bolt the stand securely to the main AMS body.
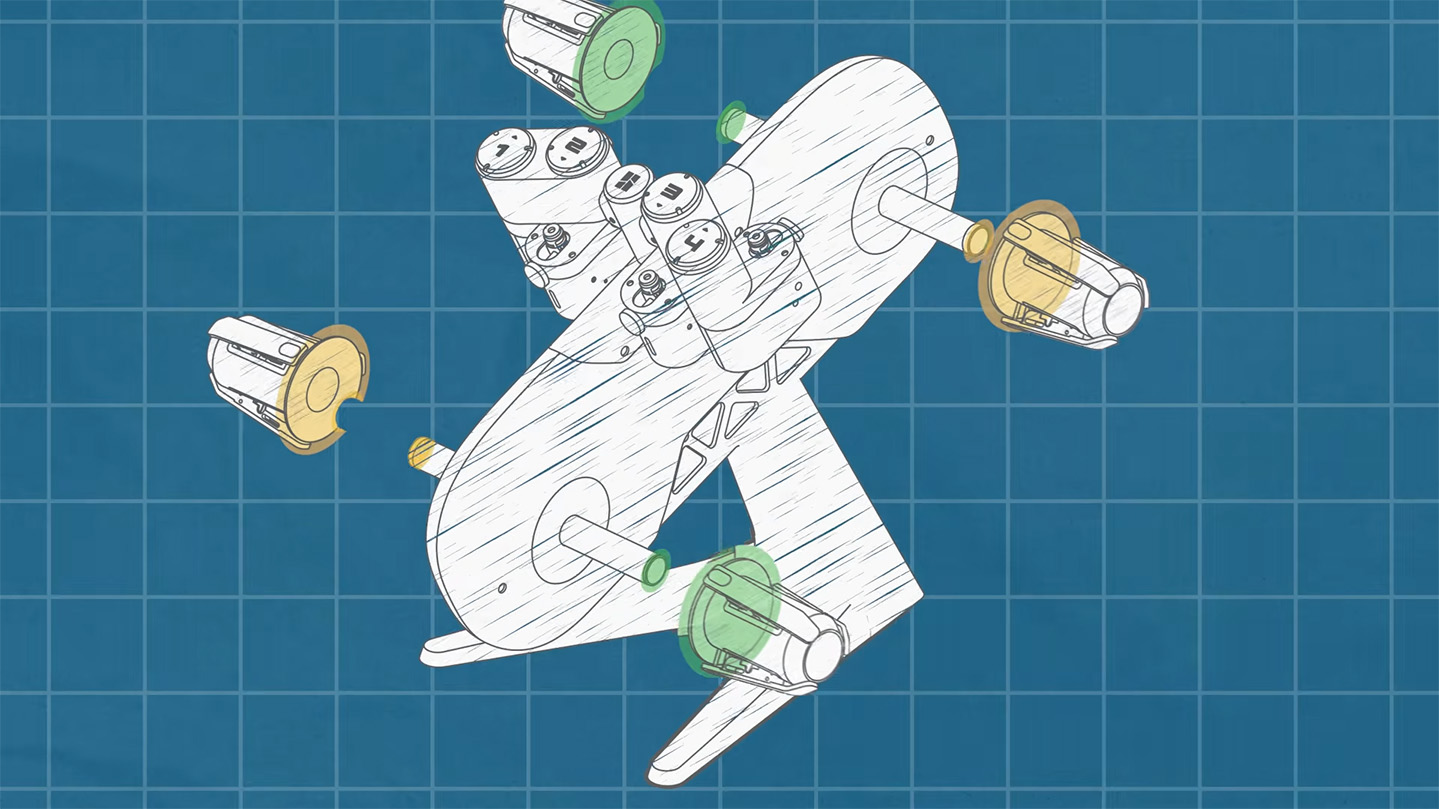
Next, grab the 4 rotary spool holders. These are colour-coded to make your life easy: push the green holders onto the green rods, and the yellow holders onto the yellow rods.
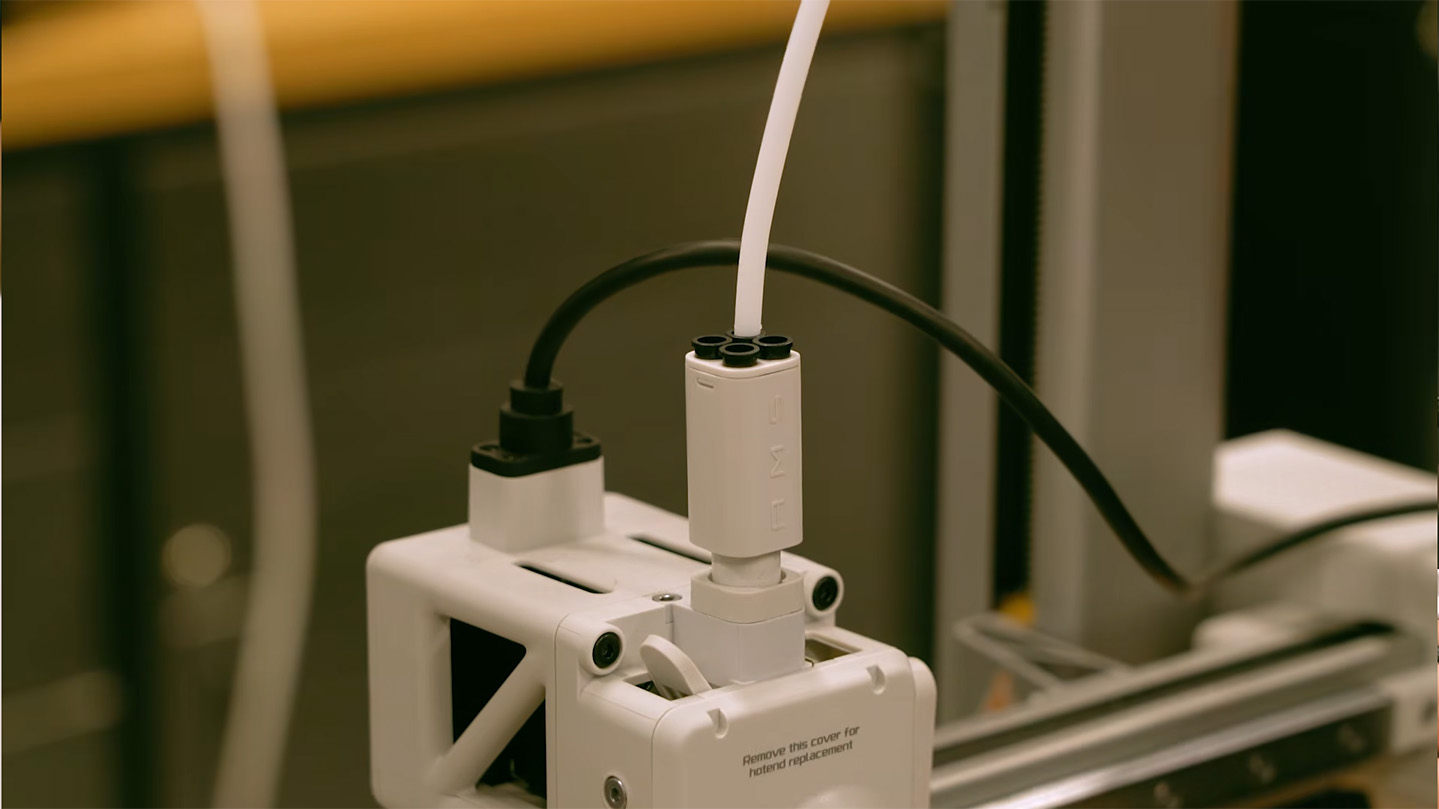
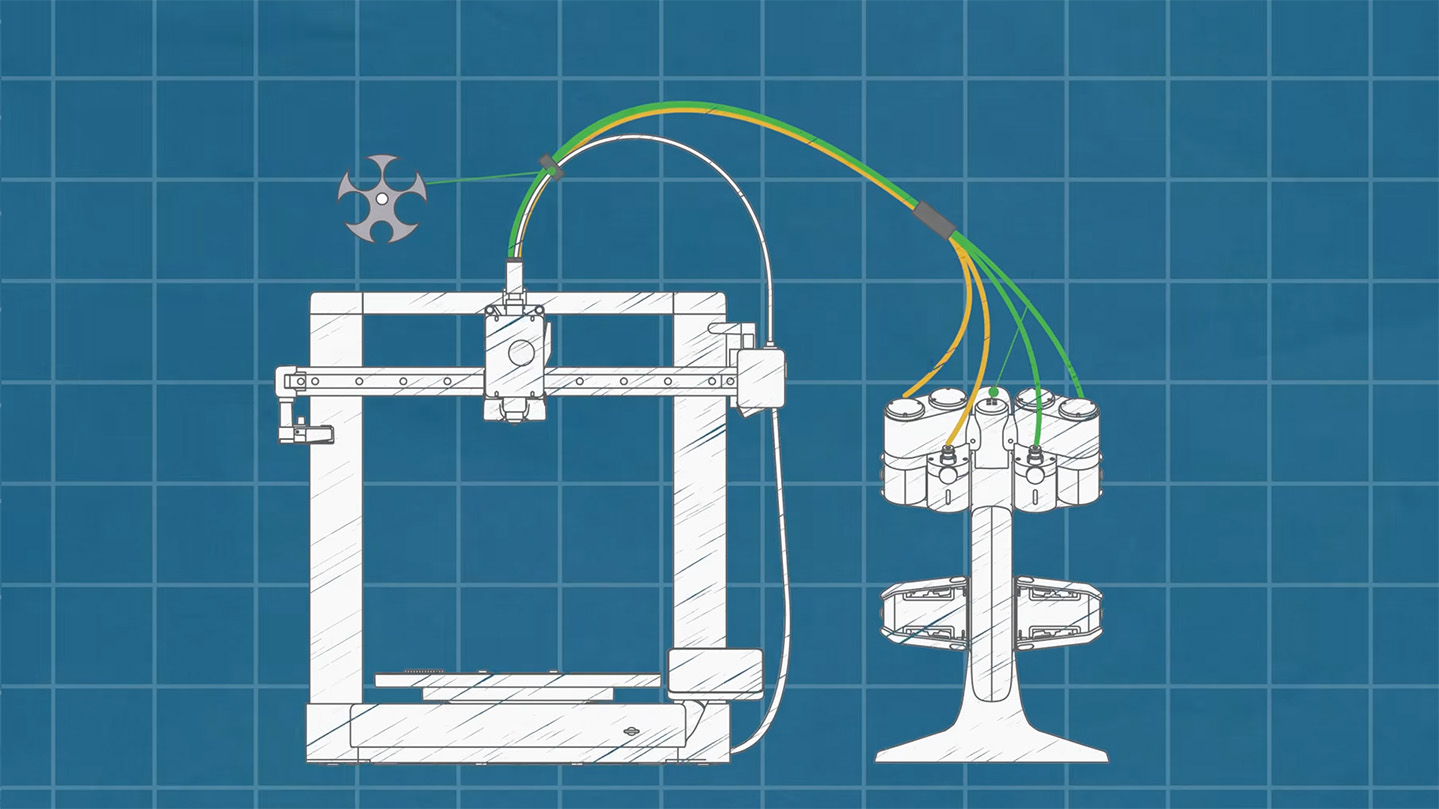
Now grab your bundle of PTFE tubes. You will notice the bundle has a white clip on one side and a grey clip on the other. Take the side with the white clip and plug the 4 tubes directly into the top of your print head. The order of the tubes here does not matter at all.
Take the side with the grey clip and plug those 4 tubes into the outlets on the AMS Lite. Again, the specific order doesn't matter, but you will notice that two of the tubes are slightly longer. Be sure to plug those longer tubes into the side of the AMS that sits furthest away from the machine to ensure they have enough slack.
To keep things neat, take the black cable coming out of your print head and snap it into that white clip on the PTFE tubes. This keeps it safely out of the way while the print head is flying around.
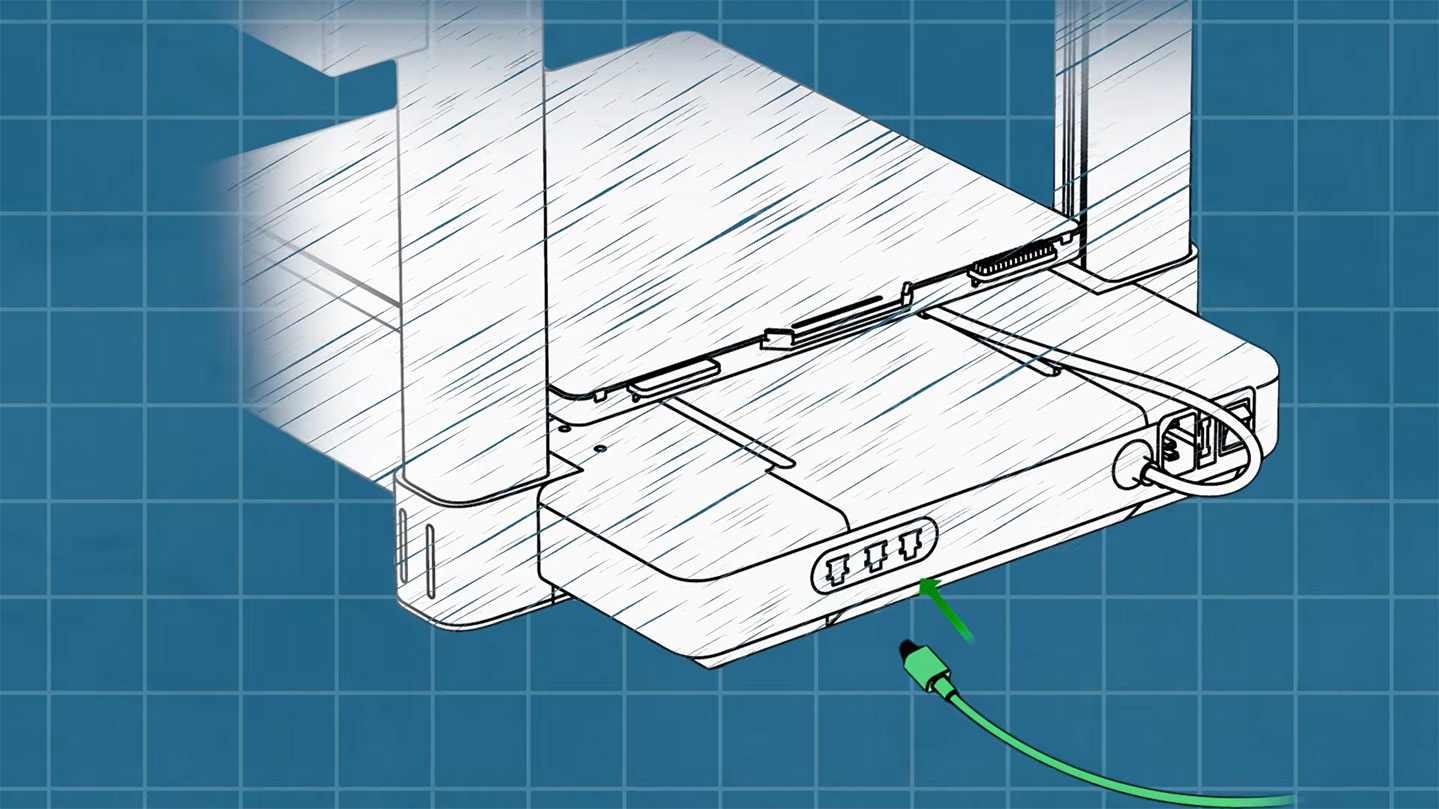
Finally, plug the main cable from the AMS into the port on the back of your A1. This single cable handles both power and data for the unit.
Calibration and Test Print
The first time you turn the machine on, it will guide you through its initial setup and calibration process. It's super straightforward, just follow the steps on the screen.
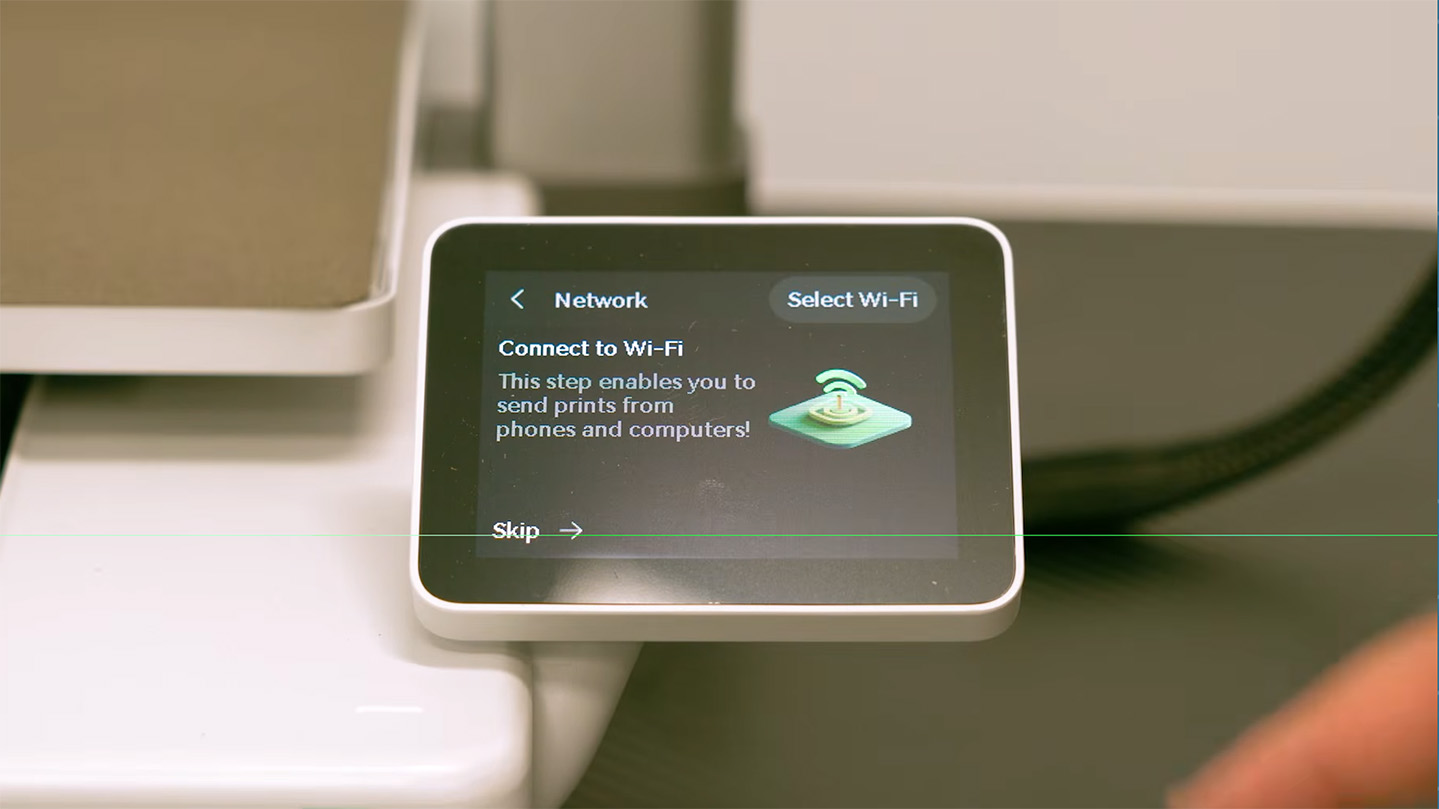
During this process, it will ask you to connect to a Wi-Fi network. Doing so allows you to remotely send prints from your PC or phone, check in on your printer's progress via the Bambu app, and easily update/change settings on the machine.
If you prefer to keep your machine offline, you can simply skip the Wi-Fi setup. You will just transfer your models to the printer using the microSD card slot on the front. Bambu Lab provides instructions on their wiki for updating your printer offline via the SD card, and regardless of whether you are using Wi-Fi or staying offline, getting your machine updated to the latest firmware is highly recommended!
Once you have gone through, set it up, and the machine has calibrated itself (which can take a good 30 minutes or so), you will be greeted by the main home screen. Your printer is officially calibrated and ready to go.
Let’s go ahead and get your first print going! If you hit the Print icon on the screen, you will see all the pre-sliced print files ready to go on the included SD card. We are going to be printing the classic Benchy boat, but first, we need to feed the machine some plastic.
Chances are, you will find a small sample coil of filament in your box, which is just enough to print the Benchy to get you going. If you have a proper roll of filament on hand, you can definitely load that in instead.
If you have the AMS Lite, loading filament is incredibly easy. Simply push your spool onto one of the holders, press the yellow filament release button on the feeder hub, and push your filament up into the AMS inlet until the internal motors detect it. From there, it will grab the filament and automatically load it all the way to the tool head for you.
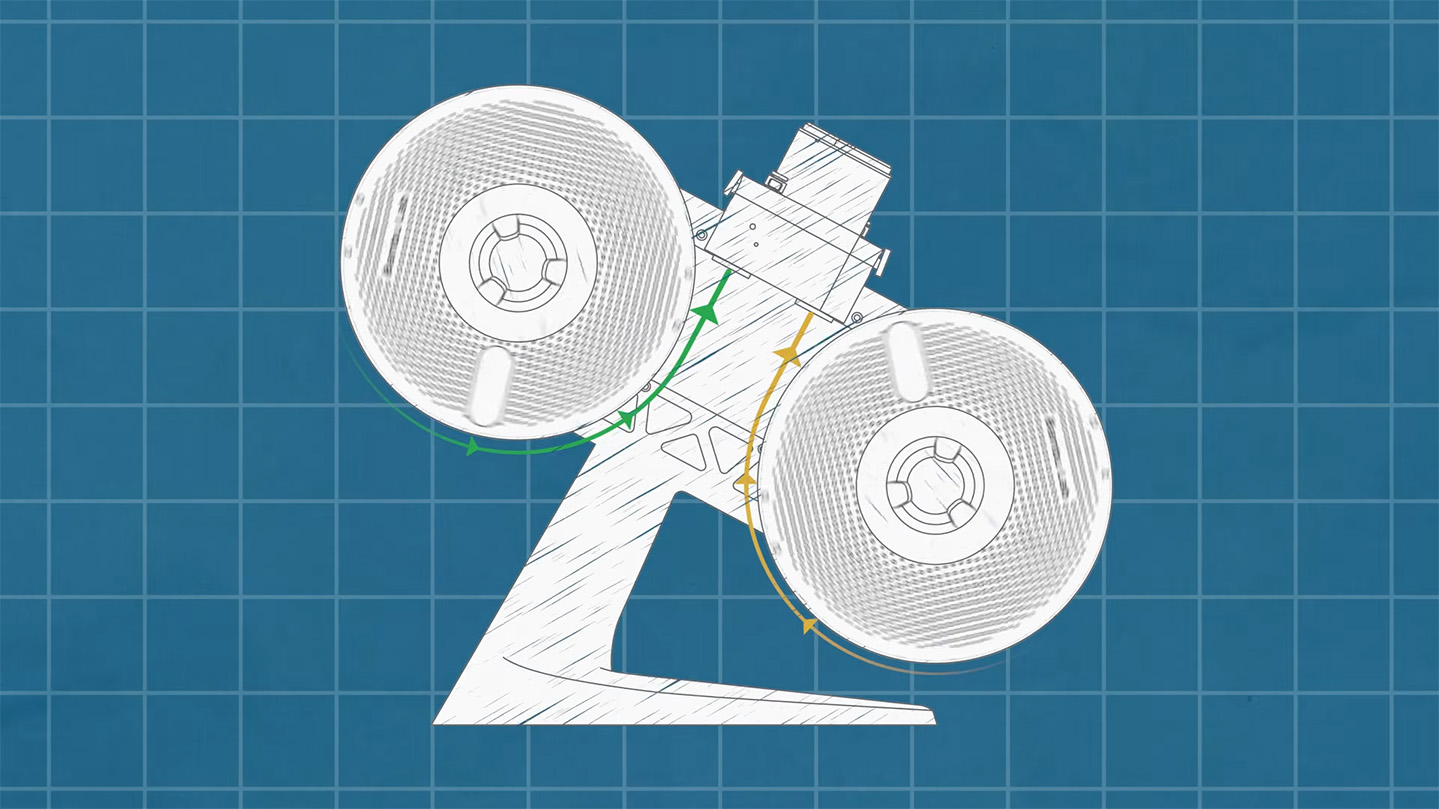
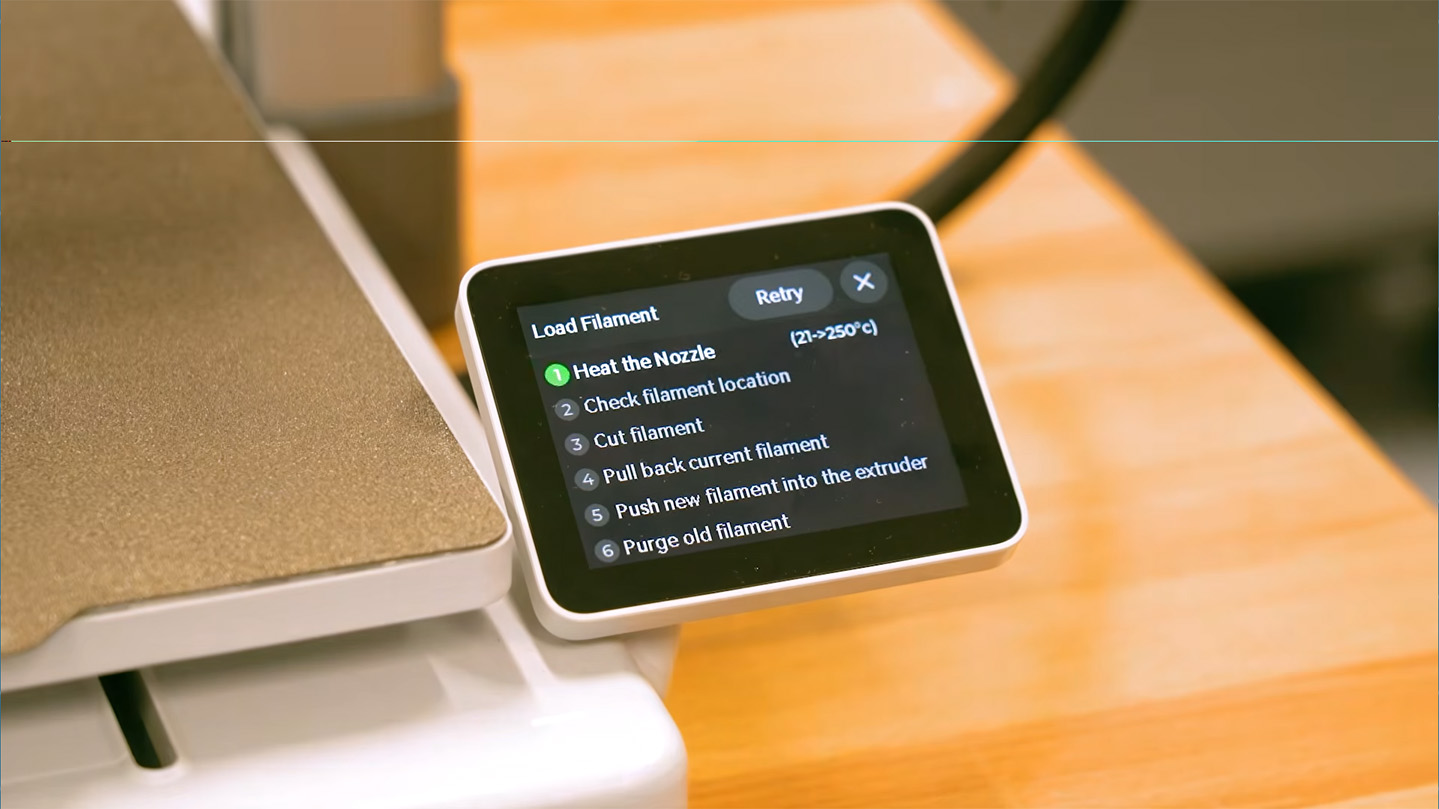
If you are running the standard setup without an AMS, start by selecting Filament on your menu screen, and hit Load. The screen will walk you through the manual loading process.
While the nozzle heats up, put your spool on your holder. Once it reaches the target temperature, the screen will ask you to push the filament through the PTFE tube and down into the print head. Keep pushing gently until the extruder gears grab the plastic and pull it through the heated nozzle.
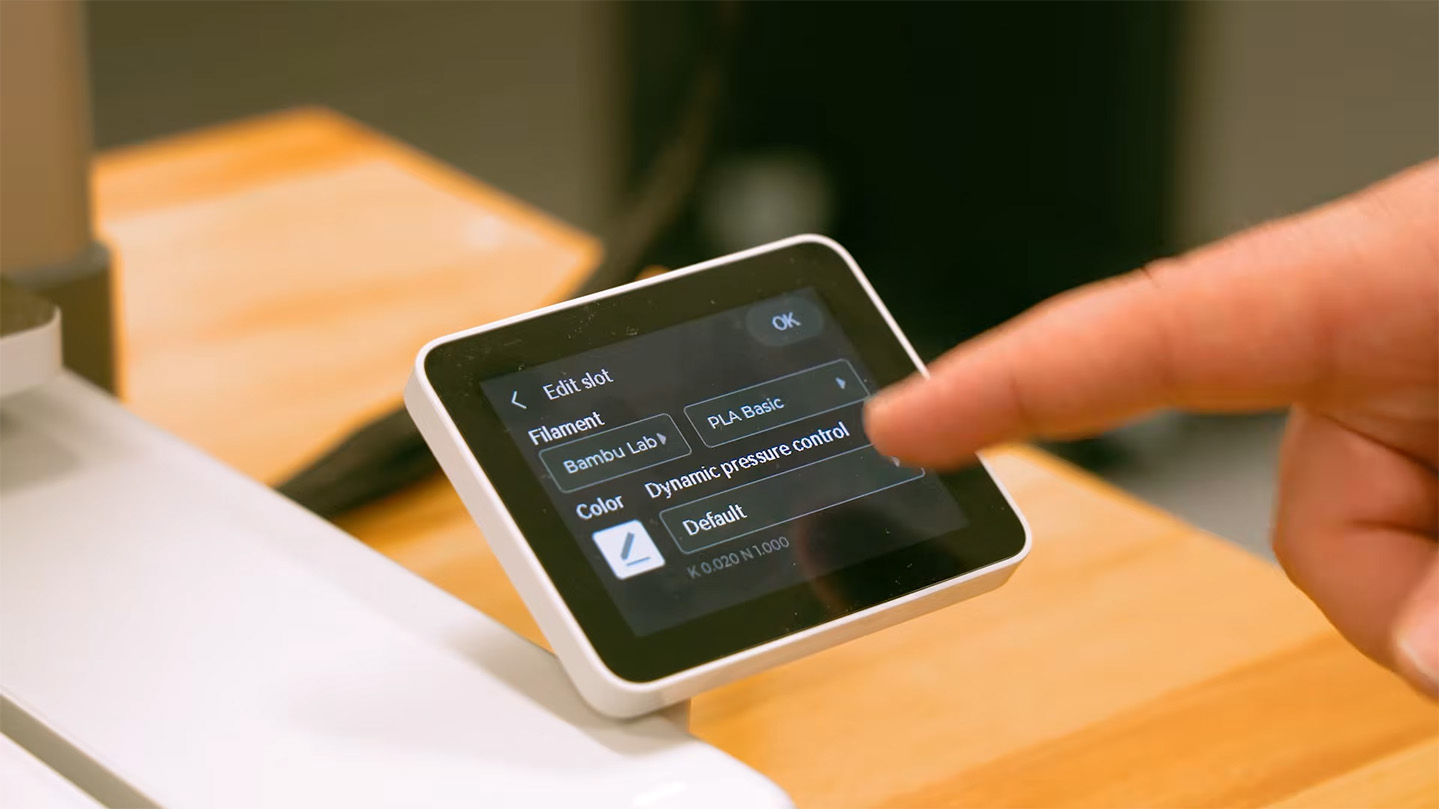
Whether you used the AMS or loaded manually, you may need to tell the machine what filament you just loaded in. On the screen, you can select the material type (like PLA, PETG, etc.), the color, and the brand.
If you are using a random third-party roll and can't find the brand, just select the "Generic" profile for that material type. We put the included Bambu PLA Basic in our machine, so we selected that specific profile.
The AMS has RFID readers embedded within it, so if you are using Bambu-branded filament, the AMS will likely automatically identify what you have loaded in.
Now, we can finally head back to the Print menu, select our Benchy, and start printing. It is a cultural rite of passage in the 3D printing community that a Benchy boat is the very first model you print on a new machine!
After about 20 minutes, the machine will finish up, and you will have your first successful 3D print. Very nice!
Where To From Here
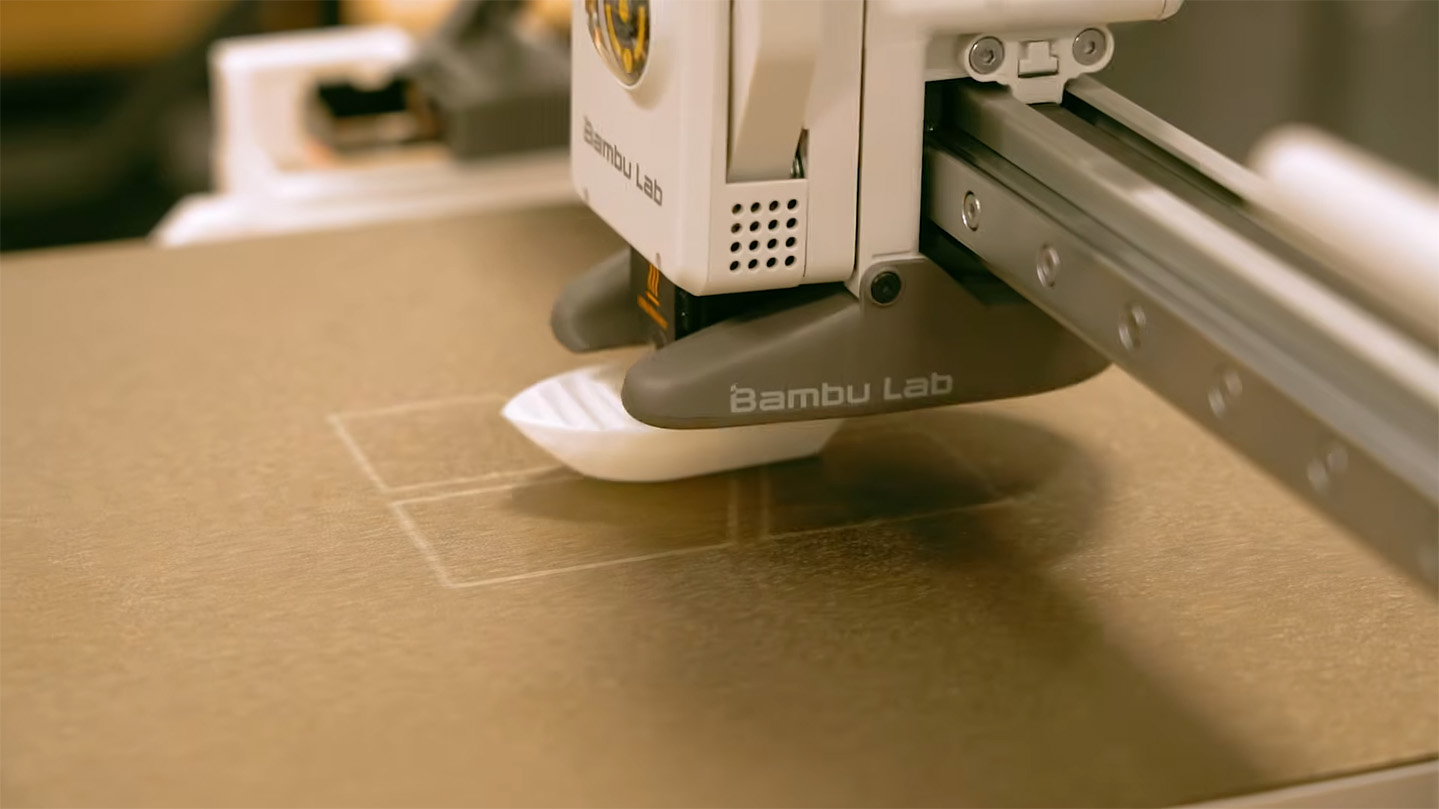
You are now completely set up to go out and print whatever you want! If you are looking for a practical second thing to print, we highly recommend printing a "poop basket" (yes, it is a silly name, but it's what the community calls them!).
When you loaded your filament, and right before your print started, you likely noticed the machine purging little squiggles of plastic out the side. Having a basket right there is incredibly smart so you have a dedicated collector for those purges, rather than letting them pile up on your desk.
To find a basket, head over to MakerWorld (Bambu Lab’s online 3D model library), and search for "A1 poop basket." Find a design you like and download it. Most of these models are brilliantly designed to just clip right onto your frame near the filament wiper.
To slice that downloaded model and send it to your printer, you will need to use a piece of desktop software called Bambu Studio. While we aren't covering the software workflow in this guide, downloading Bambu Studio and learning to slice your own models is the exact right next step on your 3D printing journey.
If you have an AMS and are looking for a great use for it outside of multi-colour prints, check out our multi-material support video! It is a medium-level skill that is definitely worth getting into the habit of using when appropriate!
And with that, your Bambu Lab A1 is fully assembled, calibrated, and ready for action. If you need a hand with anything from this guide or hit any roadblocks, feel free to post about it on our community forum at the bottom of this page. We are all makers over there and are always happy to help.
Until next time, happy making!

