Cura is constantly being improved upon and half the fun is keeping on top of all the new changes and new offerings it gives. For completely free software, they are doing an amazing job. Nailing the recipe for a 3D prints will let you get the greatest possible models out of a 3D printer. And the only way to make the best recipe is to know about and use the right ingredients correctly. So, I have gone through and found the best new Cura setting that inspires me and helps me to make.
It has been a while since I have hit you up with the newest and exciting Cura features so here are my favourites. Below is the contents of this guide.
- Make Overhangs Printable
- Cura Mesh Fixes
- New Print Profiles
There is an Ultimaker Cura Overview Guide on our website which is a great reference point if this is your first time encountering Cura and you want to hit the ground running. Simply put Ultimaker Cura is a software which allows you to turn the computer file of your model into a recipe for a 3D printer to follow. It is completely free software available online with a great track record, used by over a million users worldwide and handles around 1.4 million prints per week. If solutions and advice on how to solve 3D print errors are needed an excellent guide is Improving 3D Printed Models.
Some of these printing setting here will be hidden features in Cura. To be able to make them visible in the Printer Settings Menu go to |Top Tool Bar > Settings > Configure Setting Visibility| then find the particular setting in the list and click on its Checkbox. Then you will be able to see them in the print settings menu. If you have got any questions, queries or things you would like to see added please let us know your thoughts!
Make Overhangs Printable
This is a new setting that literally alters your CAD model inside Cura to make overhangs print better and without support. This is such a swell option particularly when the side that is being altered will not be viewed or needs to be dimensionally correct. Let me paint a scenario of when I utilised this setting last. Below is an image of a human skull which I wanted to be printed facing up out of the build platform but with minimal to no supports.
So the above is atomically correct so when you view it from across the platform it will look exactly like the image below. You can see highlighted in red overhang areas which will struggle to 3D print correctly. These are the sections that will be altered by the | Make Overhangs Printable | setting.
So the location of this setting is under the Experimental heading see below for the location of this setting in the Print Setting Advance toolbar where I searched for the name of the setting. Press the three lines next to the search bar if this setting does not show up for you and press in the dropdown toolbar | All |. Otherwise to make only visible in the Printer Settings Menu go to |Top Tool Bar > Settings > Configure Setting Visibility| then find the particular setting in the list and click on its Checkbox.

To demonstrate exactly what this setting does take a look at the four images below. The images on the left have this setting turned off and the images on the right have the setting turned on. Juicy before and after shots.
Overall a very swell setting to use when the occasion is ripe for it.
Cura Mesh Fixes
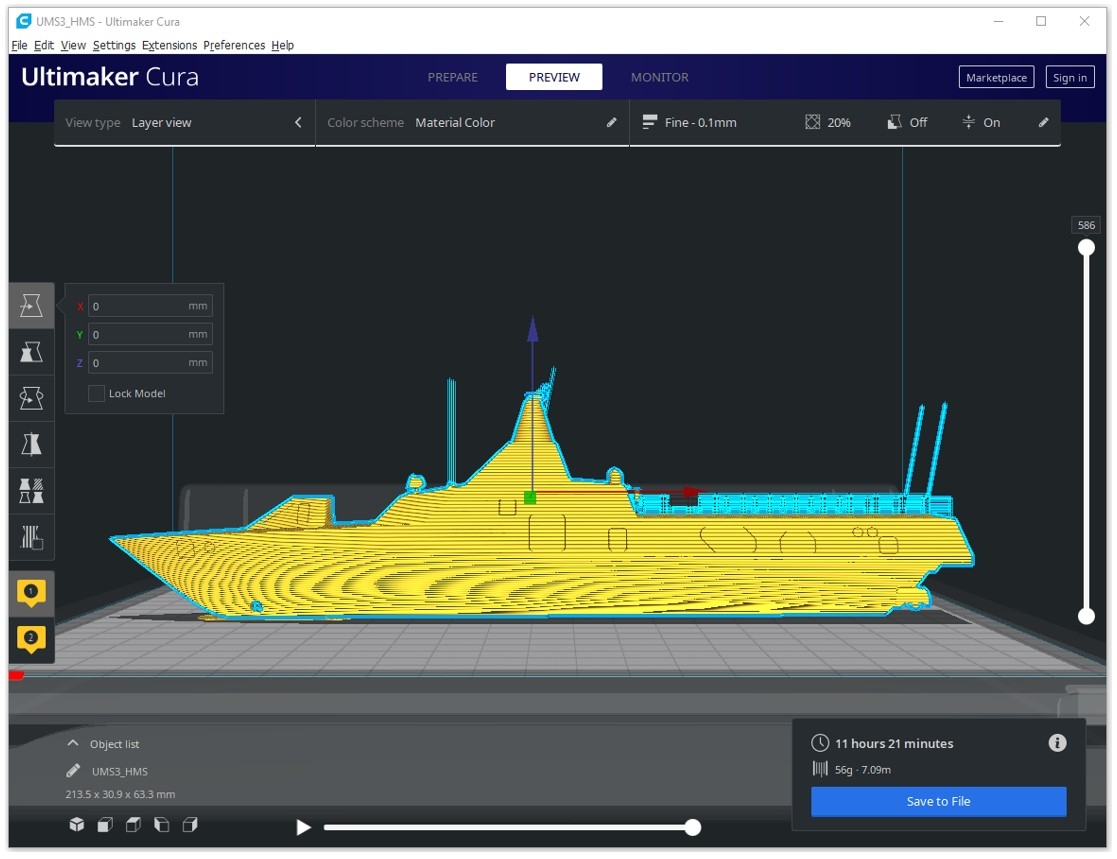
Cura has really up its game in fixing meshes to make models easier to print. These settings like the one above is actually altering the CAD (computer-aided design) files inside Ultimaker Cura. This results in sliced models that either print better or actually makes files printable. I will paint another scenario which I went through and managed to solve using these new Cura settings. Below is an image of a Swedish Visby Corvette Battleship which I wanted to 3D print on the Ultimaker S5 3D Printer.
So I arrange it the way I want it to be printed as you can see in the image below. Now notice the Model Errors Message that has popped up which states that ‘Your model is not manifold. The highlighted areas indicate either missing or extraneous surfaces’. This is the problem that we will be addressing with these new Mesh Fixing Options inside Cura.
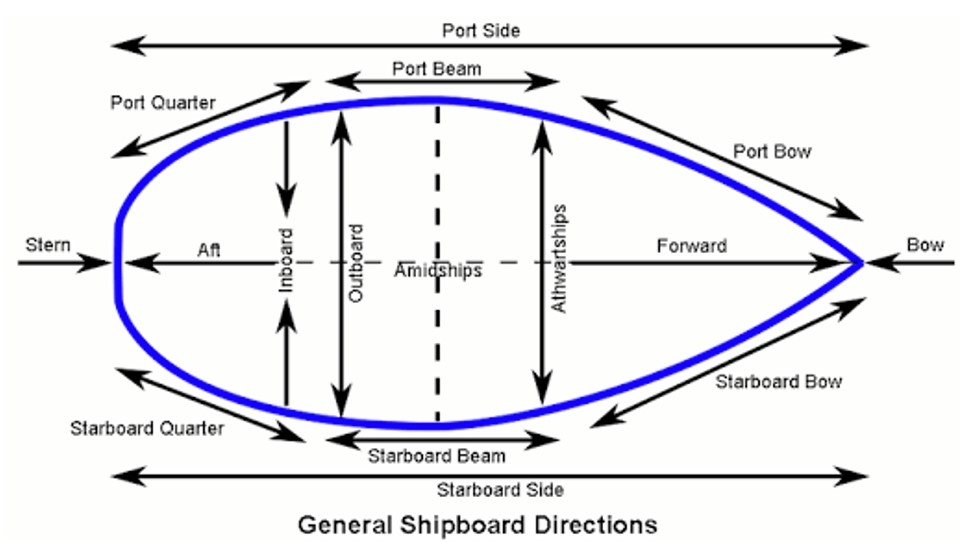
Now In Cura overhung sections that need support appear in red and non-manifold sections appear as Purple with teal dots and Blue with Green dots. So searching for this we can find it at the Stern side on the lower hull of the boat. See below for an image of this. This different angle shows you that the model is not complete and a whole section plane of the lower hull is missing. This boat is definitely liable to sink at the moment. Also see below a quick infographic on how to identify where you are on a ship, nice looking.

So there are a number of option within Cura that can repair problems such as this which are all found under the Mesh Fixes. The ones I will be focusing on are | Remove All Holes |, | Extensive Stitching | and | Keep Disconnected Faces |. Often one or a combination of these can repair STL files with issues, a little bit of trial and error with these may just save you heaps of time. See below for these settings location which is all found under | Mesh Fixes | Heading in the Print Settings Toolbar.

So first thing first I will show you what happens when none of these settings has been altered (by default they are normally all turned off). Below is the ship sliced with that missing plane on the back of it. As you can see a whole chunk of the lower hull has been neglected by the slicing program! That small little problem with the mesh has compounded into a much bigger issue.
Below Is what happens when you click on the check box | Keep Disconnect Faces | which has repaired this gap really well. And it even repaired the whole back of the boat correctly. This single checkbox has fixed all my problems in this particular model. So good!

Now, this setting is not always guaranteed to work, so some trial and error with those three settings highlighted above is the way to go. Another good method is opening the file in another software and then exporting it in another file format. For example, the above is a Step File which is opened really well by Fusion 360. By opening it up in this software the empty plane was in fact there. All softwares read 3D computer files differently. So by exporting the ship from this Fusion 360 Software as an STL file it ended up fixing this issue when I imported it back into Ultimaker Cura. Check out the guide Ways to 3D Print Anything for how to make raw 3D data like this printable using software hops.
New Print Profiles
Engineering, Draft and Visual are the new intent profiles highlights available for S series Ultimaker 3D printers. They rule, do a lot of the hard work for you and are exactly what they say they are. The Ultimaker Materials PLA, Tough PLA and ABS both have the visual and draft profiles. The Ultimaker Materials PLA, Tough PLA, ABS, CPE, CPE+, Nylon, PC all have Engineering Print Profiles. All colour variation of these materials is applicable to these profiles. See below for an image of how to find these Print Profiles. Make sure your 3D printer and materials are set correctly.
These profiles are all about making Ultimaker 3D printers more accessible and reliable, producing the results that you need without the distraction of needing to trial and error your own profiles. I have had some amazing results with the Visual profile using ABS and Tough PLA. Which I will show lower below. Also below is a quick table showing you exactly what materials have which profiles avaliable currently.
What this really means is if you use any of these profiles with the right machines you will get excellent results. This is all about ease of use, selecting fewer options to get the exact result you desire out of the 3D printer and ending up with exactly what you want. Below is a whale I printed with the Visual Intent Profile using Ultimaker Blue ABS and Ultimaker PVA as the support material which I then dissolved (I did not even use a purge tower, don't tell anyone). The model was arranged and scaled the computer model in Cura and then sliced. Further below is a test component created with the Engineering Intent Profile and Ultimaker Pearl PLA. The hole diameters were varied and came out exactly how they should. It was done to figure out which diameter works best with M2.5 screws when screwing them directly into 3D printed components.
If you are interested in exactly what changes these profiles are doing to the models you can sift through the expert settings and see what has changed. This could definitely give you pointers to alter your own favourite profiles. To give you an idea of the depth below is the changes from the Default Intent Profile to the Engineering Intent Profile.
infill_line_width = =line_width
jerk_print = 30
jerk_infill = =jerk_print
jerk_topbottom = =jerk_print
jerk_wall = =jerk_print
jerk_wall_0 = =jerk_wall
jerk_wall_x = =jerk_wall
jerk_layer_0 = 5
line_width = =machine_nozzle_size
speed_print = 30
speed_infill = =speed_print
speed_layer_0 = 20
speed_topbottom = =speed_print
speed_wall = =speed_print
speed_wall_0 = =speed_wall
speed_wall_x = =speed_wall
top_bottom_thickness = =wall_thickness
wall_line_width_x = =line_width
wall_thickness = =line_width * 3


