If you hang around 3D printers, X-Y plotters, CNC machines, drawing machines, or people who use any of them G-code is a term that will universally come up no matter where you find yourself in the world. But what is it? And how is it being used by these machines to do what they do? And importantly how can you manually alter it to make the machines do things that they otherwise wouldn’t be able to do (say in reference to 3D printers due to the limitations of the slicing software being utilised). Well, let’s take a dive into what has become the universal control method for machines running under computer numerical control (CNC). So let us take a look under the petticoats of CNC machines and then reap the rewards doing so in a 3D printer application. We will alter the G-Code of a 3D printer to enable multiple nozzle temperature changes mid-print. This is a feature available in the Prusa slicer but currently cannot be done in Ultimaker Cura without importing scripts or add-ons. I will use a free software called Repetier-Host to view the G-Code but you can use any text editor you would like to. Repetier-Host is really good as it is designed specifically to view G-Code, producing a 3D rendered view to help visualisation and explanations to the syntax to make understanding the lingo of G-Code much easier. See below for contents of this guide.
-G-Code Overview
-Overview of Repetier-Host
-Finding G-Code from a Model Sliced by Ultimaker Cura
-Altering G-Code In Repetier-Host for Temperature Tower
What is a CNC Machine you ask, put simply Numerical control is the automated control of machining tools and 3D printers by means of a computer. A CNC machine processes a piece of material to meet specifications by following a coded programmed instruction and without a manual operator directly controlling the machining operation. Truly they are some of the best machines in the world and have an incredible history dating back to WWII aeronautical manufacturing by the Americans. John T. Parsons was making helicopter components in the 1940s using punch cards and lots of human effort to create a very labour-intensive 2.5 axis milling/drilling machine. Depending on your definition you could also fairly argue that the automation of machine control began in the 19th century with cams that 'played' a machine tool in a similar way to the elaborate cuckoo clocks or musical boxes of the time. Thomas Blanchard did this in 1818 by automating lathes to streamline the process of manufacturing barrels.
There is an Ultimaker Cura Overview Guide on our website which is a great reference point if this is your first time encountering Cura and you want to hit the ground running. Simply put Ultimaker Cura is a software which allows you to turn the computer file of your model into a recipe for a 3D printer to follow. It is completely free software available online with a great track record, used by over a million users worldwide and handles around 1.4 million prints per week. If solutions and advice on how to solve 3D print errors are needed an excellent guide is Improving 3D Printed Models.
If you have got any questions, queries or things you would like to see added please let us know your thoughts!
G-Code Overview
You read and hear me rabbiting on about 3D printing slicers creating recipes for 3D printers to follow, well G-Code is the rawest form of the recipe. It is as though it is a step by step guide for a chef to follow to make a cake where every direction of hand movement, oven temperature setting, mixing process to follow (down to every motion) is written down from start to end. CNC machines (don’t tell them that I’ve told you this they’ll stop working and get me in trouble) are ‘dumb’ and require this level of guidance to work. There is no assumptions or inspiration with these devices which means absolutely every movement needs to be drip feed to them and compiled successfully before they can ever succeed in the eyes of their operator.
More generally, G-Code is the language that humans use to tell the CNC machines to do something. The G-Code outlines commands for the printer head to move to and fro, the print bed to go up and down and the temperatures of the system to be set. They consist of numbers and letters. There are various standards of this, some CNC machines insist on encoding their g-code to be read correctly (making altering them hard) and other open-source platforms (Ultimaker bringing it in force) enable you to easily get inside, alter and tinker to the betterment of everyone. See below for an example of a g-code line and a whole bunch of syntax explaining the line.
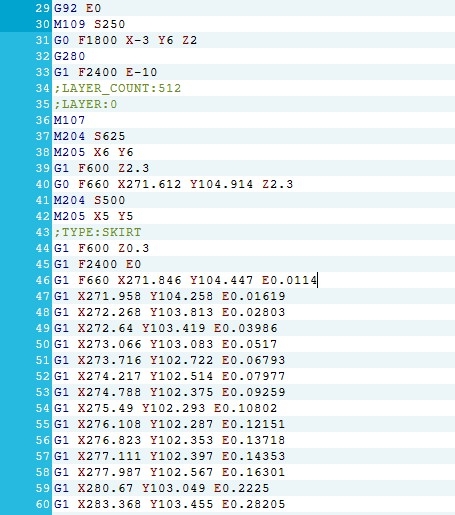
So above is just a single line of G-Code, to create an entire 3D model or to carve out a chunk of metal to the desired size and dimension you need a lot of these commands. See below for a small section of G-Code that can be used to print a 3D Model. This G-Code was produced by Ultimaker Cura.
Overview of Repetier-Host
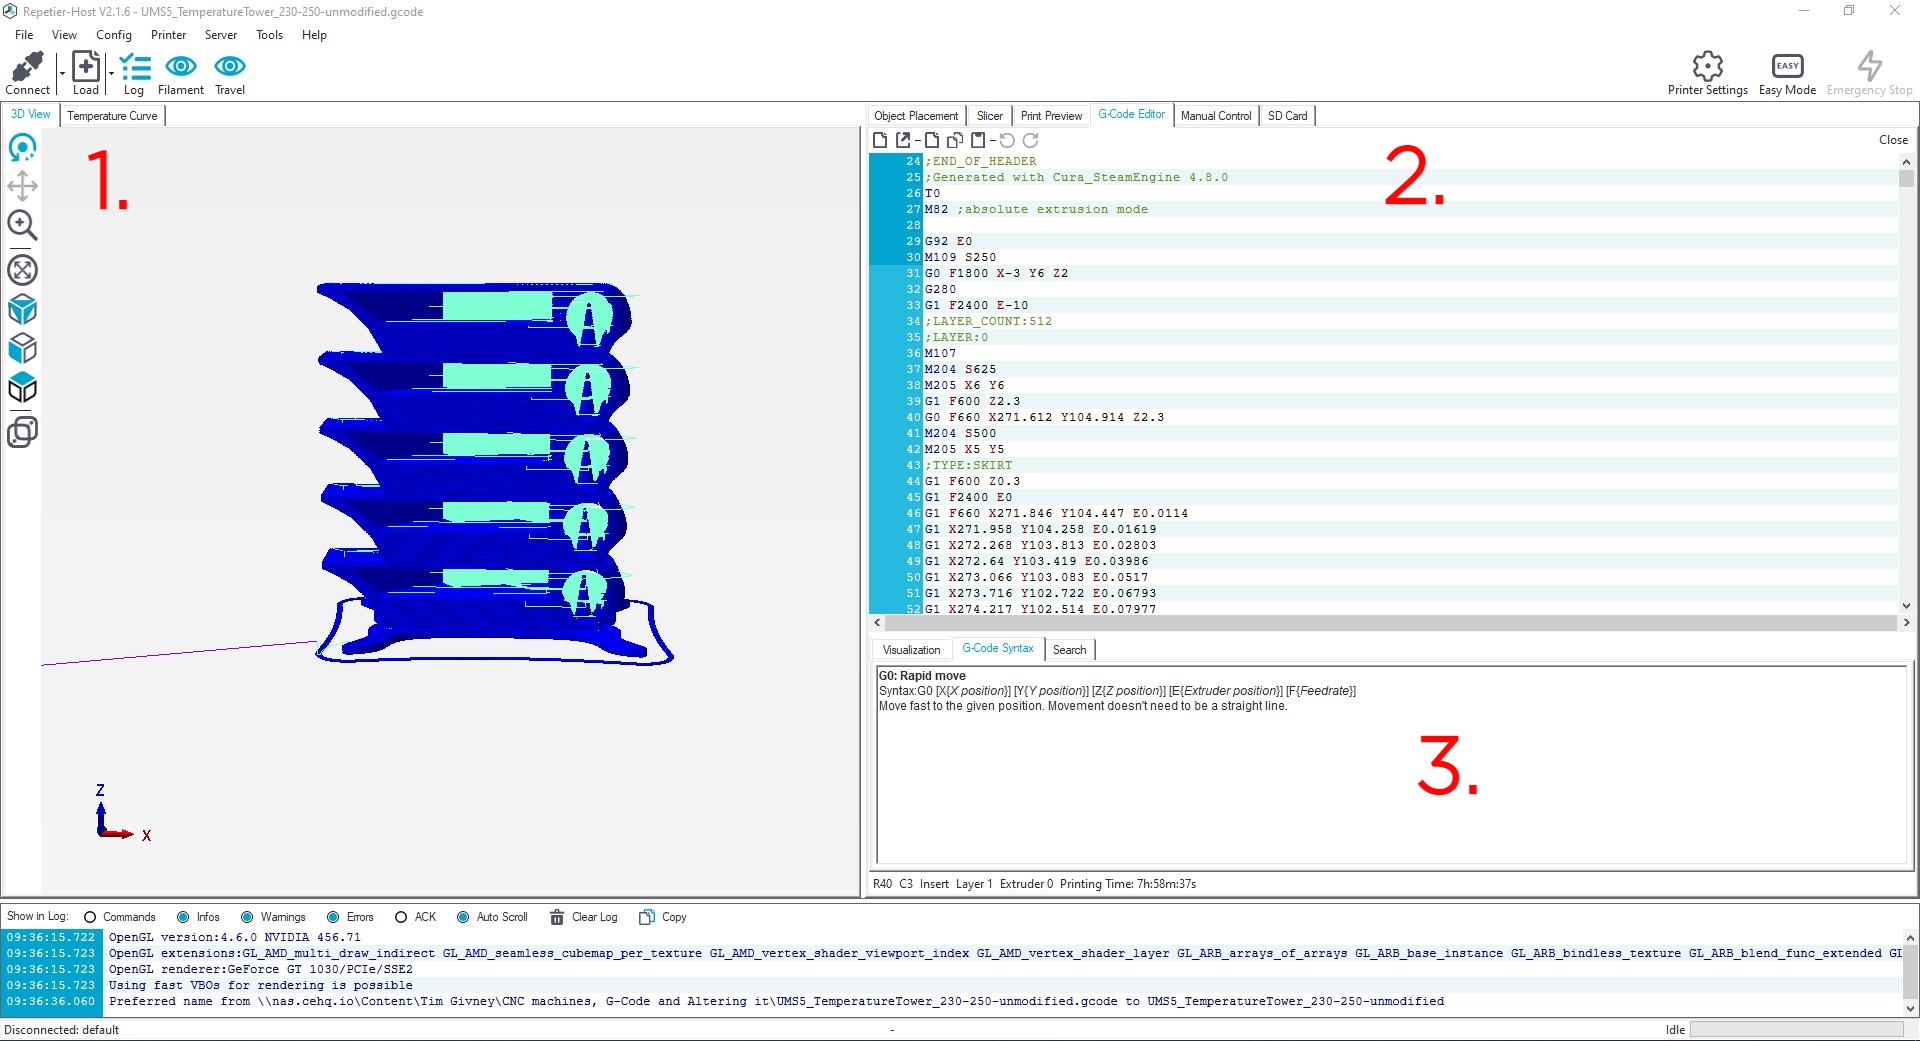
Now it may have a weird name but this free software (which you can download at this location) is an amazing way to understand G-code. Below shows a screenshot of this software after opening up some G-code. This G-code will produce a temperature testing tower model. Temperature testing towers are an excellent way to determine the optimal temperature at which to print a filament. The image has been annotated with some numbers;
1. This area of the software shows a 3D render of what will be created using this G-Code.
2. Shows the actual G-Code in which you can scroll through and edit to your heart's content.
3. This section has three tabs, the G-Code Syntax tabs so you can understand what the numbers and letters mean, a Visualisation Tab to help change what you can see in the 3D render section and the last tab gives a search option to find exactly the desired sections in the G-Code.
Finding G-Code from a Model Sliced by Ultimaker Cura
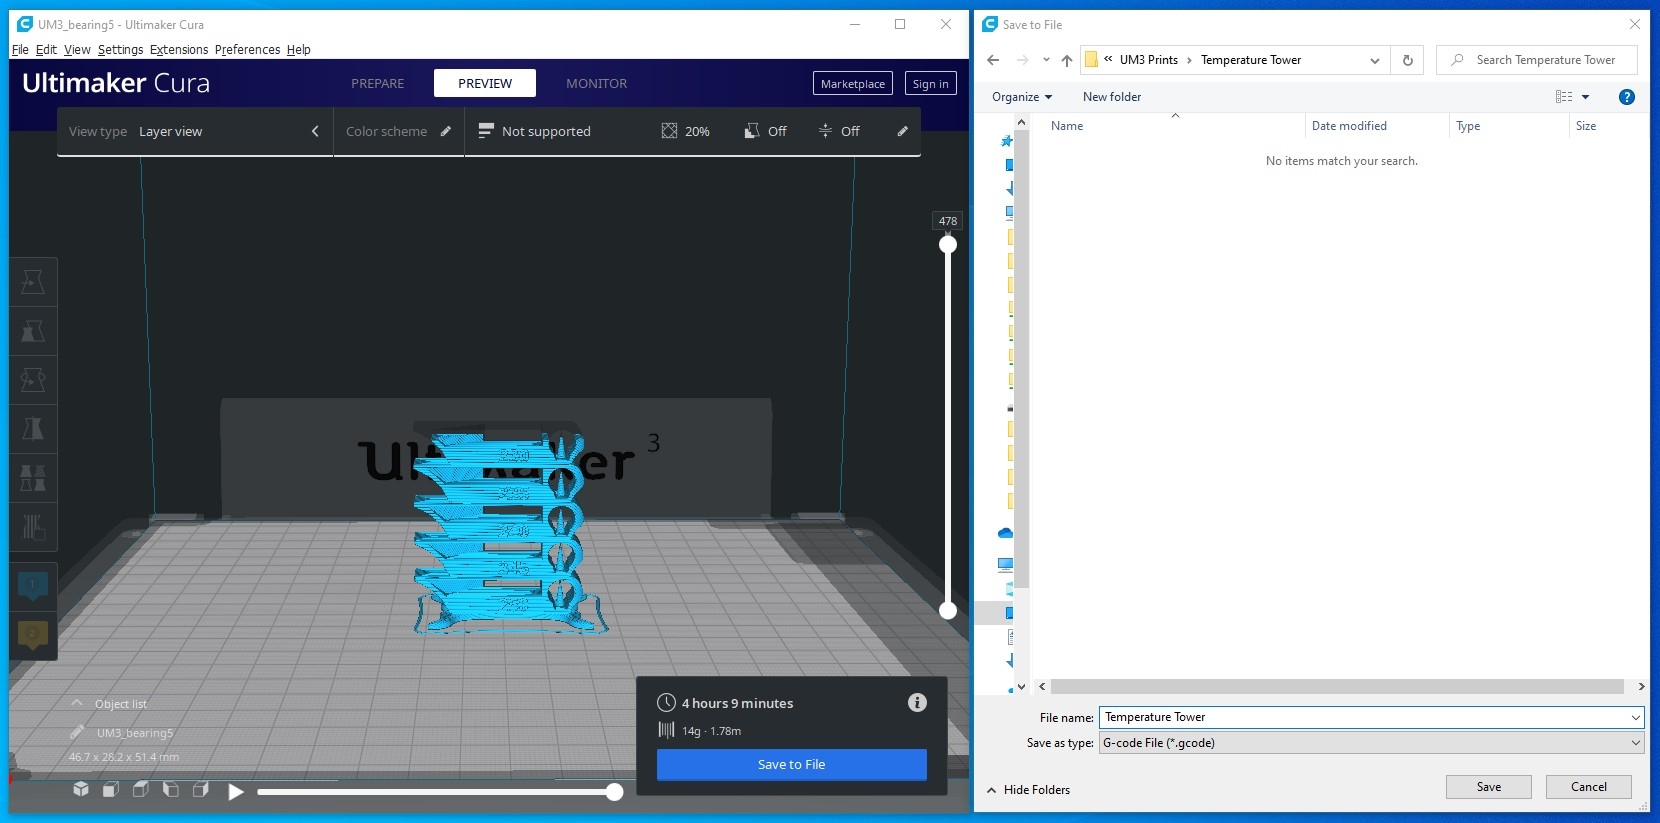
So the easiest way to see the 3D printers recipe in all its glory is to save a Cura sliced file and then open it up with your favourite text editor. A great tool to help visualise each step in the g-code instead of it just being an impenetrable wall of text is to use the Repetier-host described above. Below you can see a file for a temperature Tower about to be saved as G-code. If you are using an Ultimaker S5 3D Printer you will need to alter the Save as Type Field to make sure it gets saved as G-Code and not the different default file type (Ultimaker Format Package (.ufp)) of those printers. This is true also of the Ultimaker S3 3D Printer. The Ultimaker S3 and S5 will be able to run G-Code directly without needing the change the file format to the default.
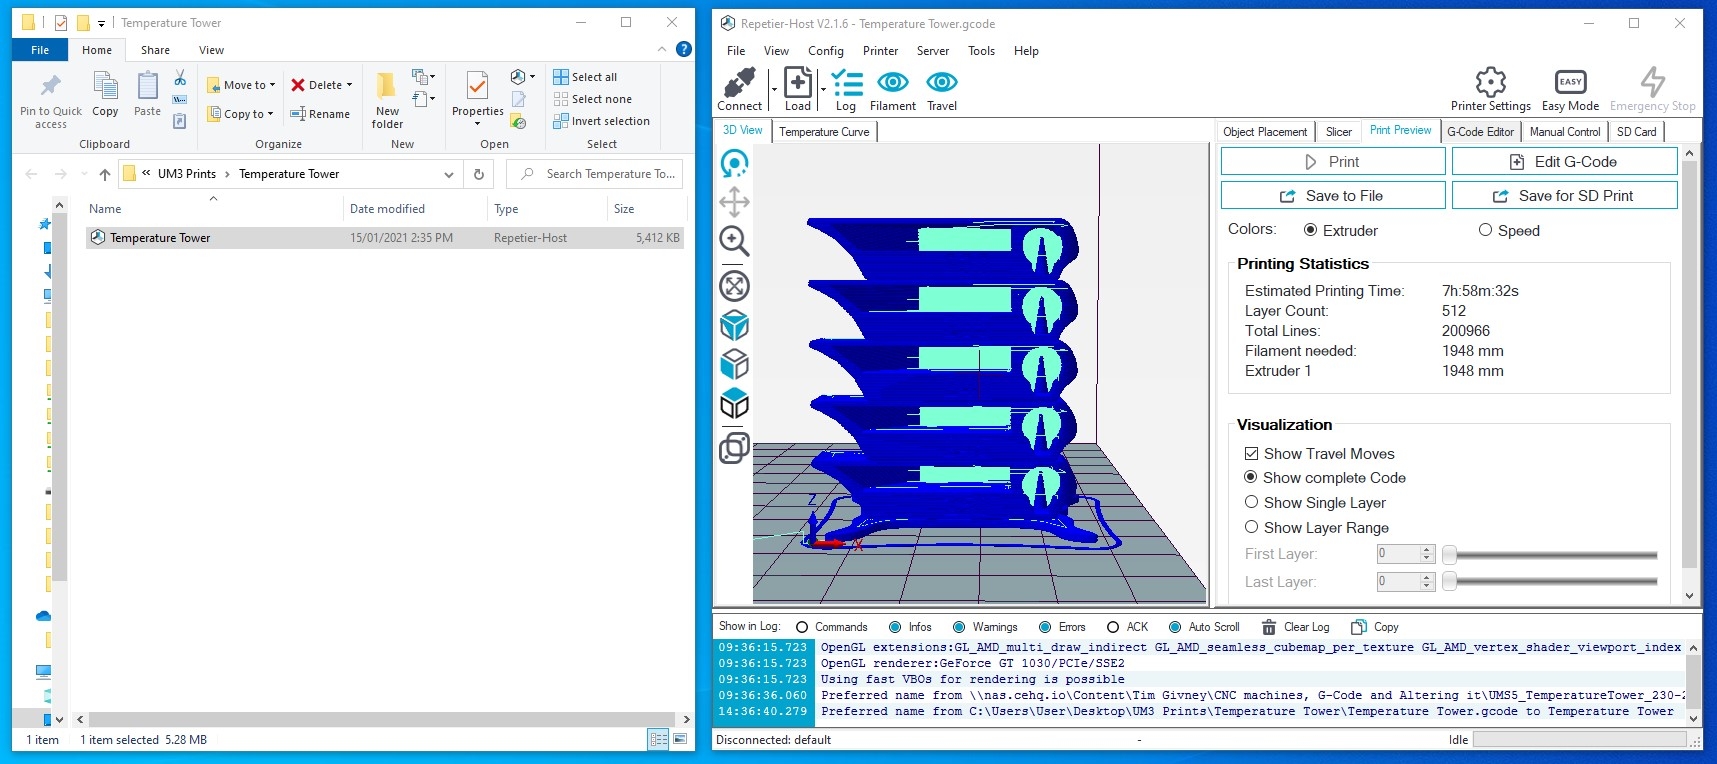
Once the file is saved and Repetier-Host is installed you can then open up the Repetier-Host software, click on the File option in the top-down menu and select Load. Then find that G-Code and open it up into Repetier-Host. And just like that by clicking on the G-Code Editor you can see all the G-Code that will create your particular loaded model.
Altering G-Code in Repetier-Host For Temperature Tower
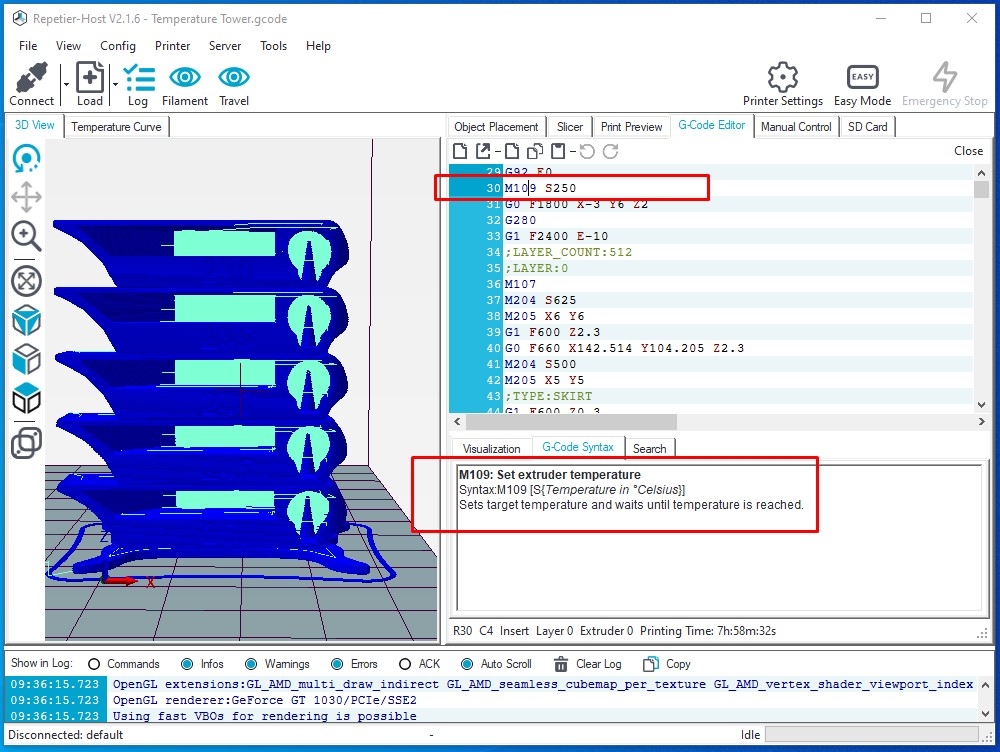
Altering the temperature is a simple starting point to altering G-Code which is relatively safe. It is worth noting before diving too deep that whatever command you give to the printer it will do everything it can (unless it hits a failsafe) to follow through the command. So if you tell the machine to try to get the nozzle to a temperature where things can break, it will do just that, so take the time to double-check all of the commands you have altered to make sure they are exactly what you want. So Ultimaker Cura does not let you alter the temperatures of the printer midway unless you manually adjust it from the printer as it is printing. So if you want temperature changes that occur exactly at a certain layer height you can either download add-ons to Cura which will adjust the G-Code or you can Manually adjust the G-Code. So below is an image of the very first and only nozzle temperature decision that occurs right at the start of the G-Code which is defined by the command M109 S250. As you can see in the syntax explanation tab M109 Sets the extruder Temperature, S tells the machine the following number will be a temperature value in degrees celsius. So this command tells the nozzle to get to 250°C and then go to the next line in the G-Code.
So what we will do here is add more M109 commands with the temperatures we desire. This temperature test tower has labelled on the front 250°C all the way to 230°C in 5°C increments. So below you will see me adding the first command M109 S245 to right underneath where it has been commented in the G-Code Layer:114. You can see this highlighted in blue. This is done at this layer because layer 114 is the very first layer of the new temperature section. This was determined by using the visualisation tab. This process was repeated for each layer.
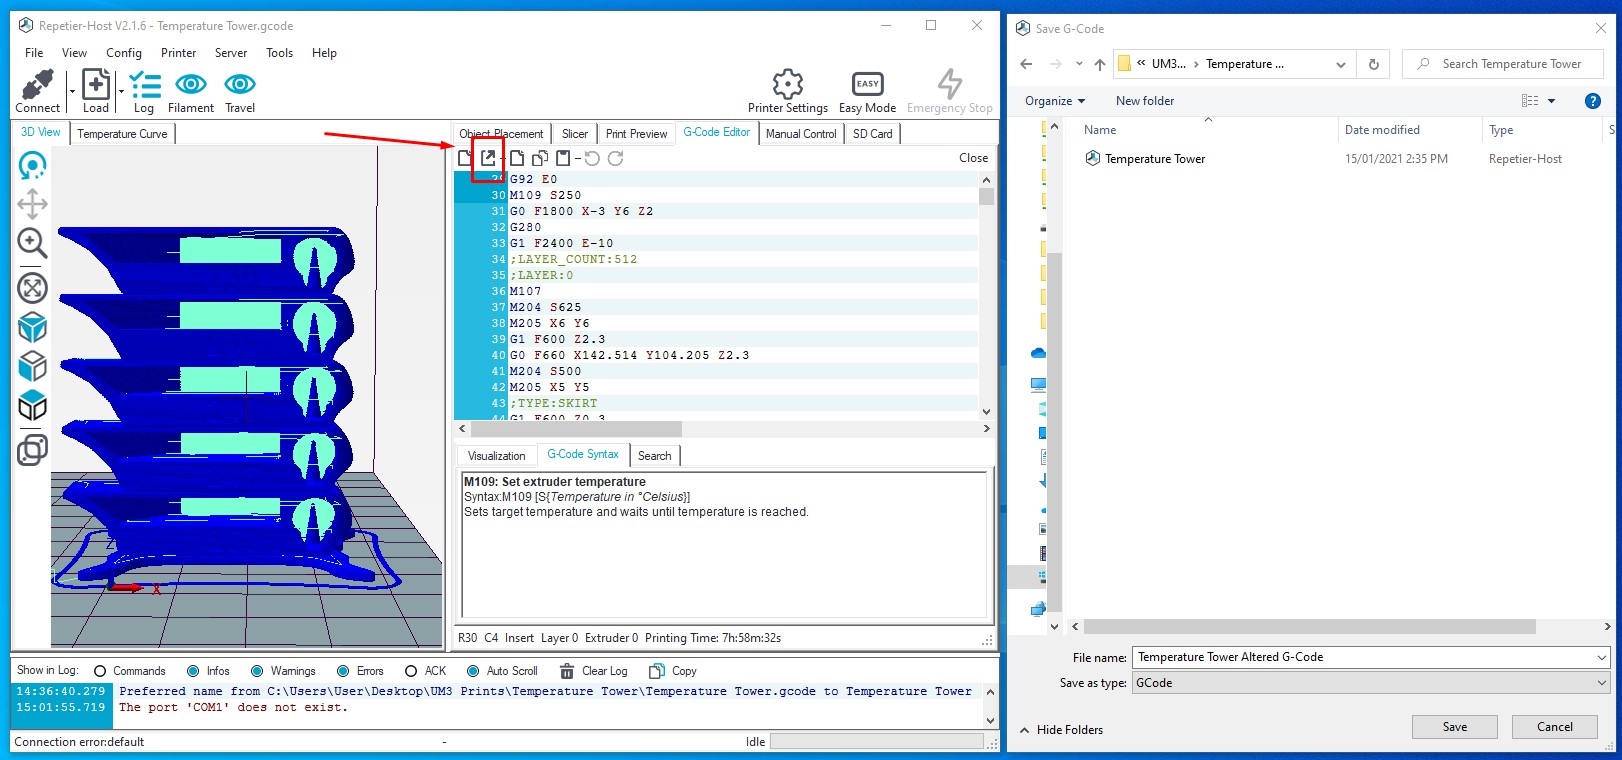
Having completed this for each section of temperature change you can then save the G-code using the icon highlighted in the image below and using a USB stick or Network connection send that file to your 3D printer.
And with that get your 3D printed right into printing. Below you can see the temperature lower by a 5°C increment at layer 114 following my added G-Code Command exactly as I had wanted it to do so.
And below is an image of the final model. You can see when using CPE to get the least amount of stringing a temperature of 235°C gives a better result and strings less than 250°C. Bridging the CPE seems to struggle at all tested temperatures. CPE, however, does not like to stick to the build plate when less than 250°C so perhaps starting a print at the higher temperature to improve initial sticking followed by lower the temperature as higher layer levels are reached is a good way to print CPE. This can be easily done by altering G-Code and demonstrates how much control you gain by having an understanding of the backend, freeing yourself from any of the limitations of slicing software.


