Introduction
This guide will help you read distance data from your PiicoDev® Distance Sensor and a Raspberry Pi single-board computer
To follow along, it's best to have:
- A Raspberry Pi (model 3, 4, Zero W) This tutorial will use a Raspberry Pi 4, Model B
- A PiicoDev Distance Sensor VL53L1X
- A PiicoDev Adapter for Raspberry Pi
- A PiicoDev Cable (100mm or longer is best for Raspberry Pi)
In the video we use a PiicoDev Platform to keep everything safe and secure.
For this tutorial, we'll assume you're familiar using a Raspberry Pi like a desktop computer - connected to a keyboard, mouse, monitor and with an internet connection. If you need help getting started, have a look at Chapter 1 of the Raspberry Pi Workshop for Beginners.
If you prefer not to use the Expansion Board for Raspberry Pi, there are other connection options in our PiicoDev Connection Guide.
Connect the PiicoDev sensor to your Pi
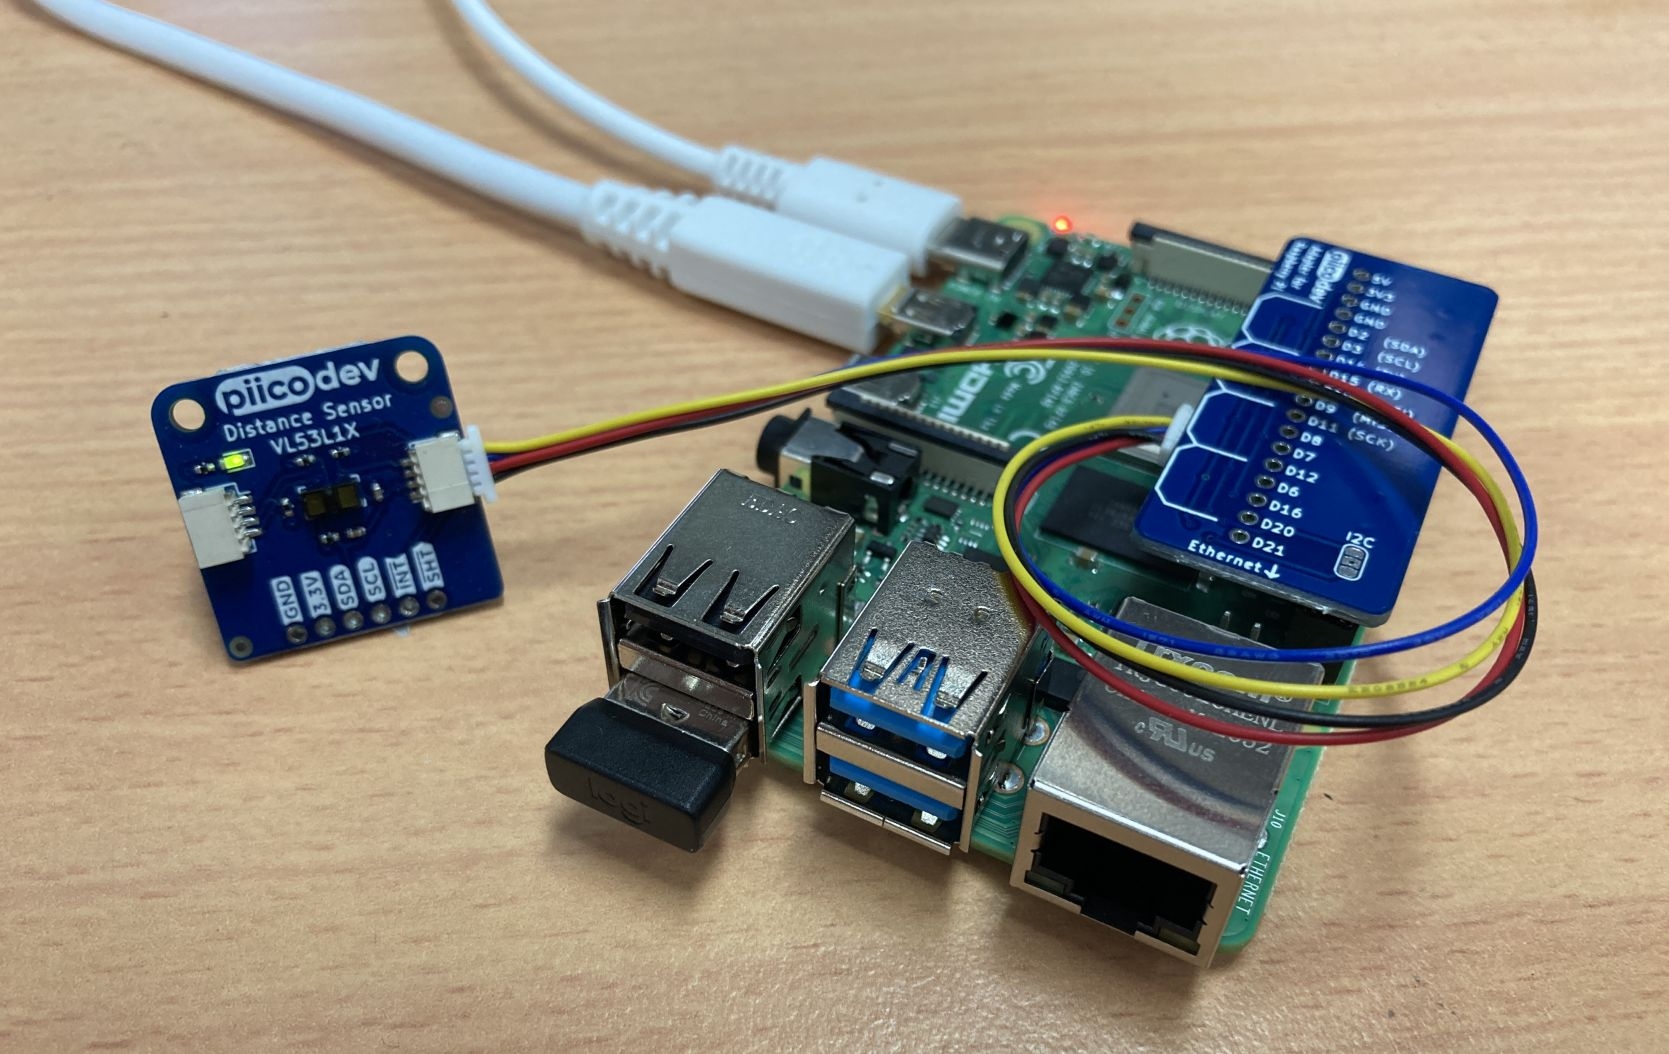
Mount the PiicoDev® Adapter on your Raspberry Pi and plug connect your Distance Sensor to the Adapter via the PiicoDev cable.
The adapter connects to the 40-pin GPIO header on the Raspberry Pi - ensure the header is mounted correctly, with the "Ethernet" label on the same side as the Pi's ethernet adapter.
If you're unfamiliar with connecting PiicoDev modules, read the PiicoDev Connection Guide before proceeding.
Pictured above: A Raspberry Pi 4 Model B with USB Power and HDMI (two white leads). The PiicoDev Adapter is placed on the 40-pin header, and connects to the temperature sensor with a PiicoDev Cable.
Enable I2C
Power on your Raspberry Pi. Open the Raspberry Pi Configuration Menu, select the Interfaces tab and ensure I2C is enabled.
You only need to do this step for your first PiicoDev project - from here on you probably won't have to repeat this step when using PiicoDev hardware.
Install PiicoDev
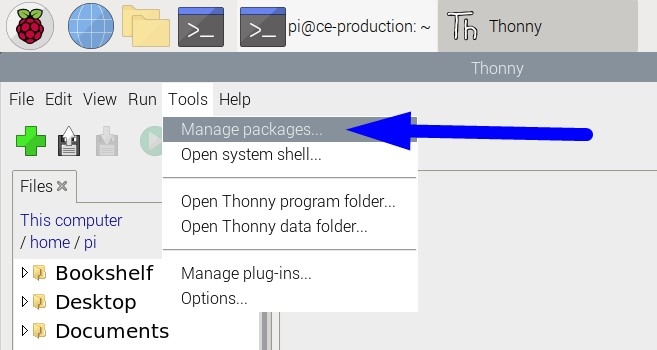
Open Thonny (Pi Start Menu > Programming > Thonny IDE) and open the Manage Packages menu (Tools > Manage Packages)
 |  |
|---|
Search for 'piicodev' and install or upgrade if necessary.
 |  |
|---|
Download Example Code
Download the Example Code (right-click, "save link as"). Save this somewhere that makes sense - I saved mine to a PiicoDev directory in my home-directory.Run the Example
Double click main.py to open in Thonny, then click the green "Run Current Script" button.
Pictured above: The distance data streams up the Shell and graphs in the Plotter (View > Show Plotter). The measured distance increases and decreases as I move my hand back and forth in front of the sensor.
All going well, distance data will begin streaming up the Shell window.
If you receive an error, it may be because the sensor is not connected properly - reconnect the sensor and try again.
Tip: Open the Plotter (View > Plotter) to see a nice plot of your distance data
If you have any questions or uncertainty, start the discussion below. We're full-time makers and here to help!


