So you have a 3D CAD (Computer-Aided Design) file and you want to 3D print it with a resin printer. Then look no further, you have come to the right place. So before you can print your CAD model we are going to need a sliced file of that model which the resin 3D printer can understand. Basically, we are creating a recipe that a 3D printer can follow. Nailing the recipe for a 3D print will let you get the greatest possible model out of a 3D printer. This recipe is always created using slicing software.
So this is going to provide an overview of what is the current best slicing software to use with Resin 3D printing, Lychee Slicer, and go through the workflow to create a recipe from a CAD model by using it. Lychee Slicer is a completely free software and is a great and intuitive software to get yourself up and running create custom resin prints. Everyone knows about Chitubox slicer (and for good reason, it is a good slicer) but the Lychee Slicer has provided me with better tolerances, size accuracy, mesh repair features, a more modern UI and many more options so this will be the focus of this guide. Also of consideration is that both these slicers have premium paid options, and the Lychee Slicer is cheaper, however I have not used or had a need to use either paid options. Lychee Slicer even allows me to compare my future 3D print with a banana!
See below for the contents of this guide.
- Compatibility Knowledge, What Printers and Files will this work with?
- Navigation of Build Area
- Main Desktop Views and Rundown
- Simple Workflow
- Tips when Supporting Your Models
All the slicers talked about here are for resin 3D printers like the Creality LD-002H UV 3D Printer. When it comes to creating sliced files for resin 3D prints the most obvious visual difference from filament 3D printing comes from the shape of the supports. Due to the way the object is ‘pulled’ out of a tank hanging upside-down and due to the light being able to cure a layer all at once, you can create very long thin supports. In FFF (fused filament fabrication) printing, each layer needs to explicitly tell the nozzle extrusion locations and travel paths for each layer whereas that is not necessary for Resin 3D printing. FFF Slicing software like Ultimaker Cura will not create sliced software for resin 3D printing and vice versa (well, unless you are using Prusa Slicer but that’s an anomaly).
What is really happening when we use these resin slicing softwares is they produce a file for us that has contained within it many hundreds (potentially thousands) of black and white pictures which when stacked on top of each other will represent the desired 3D model. See below for an example of three of these black and white images that make up a Majoras Mask model.

If you want just get right in, not worry about all this and just print something right away How To Complete Your First Resin 3D Print is the guide for you. Also if you are just starting your journey with resin 3D printers a great place to get an overview of this technology and the process to calibrate print platforms can be found here.
The next guide worth checking out is Finding Optimal Layer Exposure Time for Perfect Resin Prints which will teach you how to get the very best results out of your Resin/Printer combo. As always if you have any questions, queries, or things to add please let us know your thoughts!
Compatibility Knowledge, What Printers and Files will this work with?
Literally, every single resin 3D printer has specifications already set up on Lychee Slicer. At least every Resin 3D printer that I can think which makes it perfect for us makers.
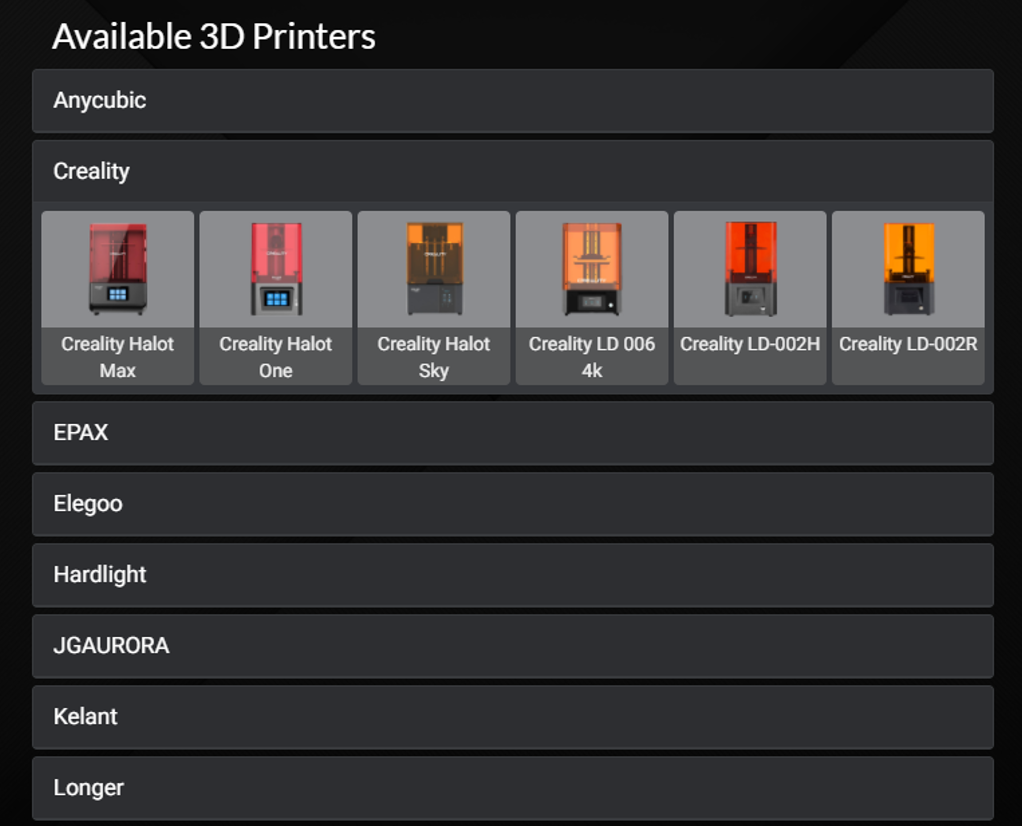
From the get-go, it asks what printer you are running the show with and presents a long list. Then it is a simple matter of choosing the one you have. Then it will have the specification like the print platform and layer height all sized up and done in the software. It will also use to accurately create a simulation mode where you can observe the print come out of your resin 3D printer tank. Also if your printer is not listed there it will be a simple wizard process to add it. See below for an image of some of the available 3D resin printers that will work with this software.

3D File formats that Lychee Slicer (and most slicers) will be compatible and work with are as follows: STL, OBJ, 3MF, BMP, GIF, JPG, PNG. Once you have a file on hand use the top-down menus on the top left of the screen and click import 3D file or simply click and drag it onto the window to get your desired file into the centre of the virtual build platform.
Navigation of Build Area
With a model now in the build space, the navigation controls worth knowing right away are as follows.
- Mouse right click and hold while moving the mouse - rotates build area view
- Mouse wheel click and hold while moving the mouse - scrubs view across
- Mouse wheel scroll - zooms in and out of build area
With these controls you will be able to see your model from all angles in the 3D virtual space.
Main Desktop Views and Rundown
Lychee and most slicers software can be broken down into three distinct sections which are as follows: Arranging the Model, Preparing the Supports, and Producing/Exporting the Sliced File. In Lychee the stages are situated prominently in the top middle section of the window, can be accessed between at any time, and are labelled Layout, Prepare, and Export.
All software worth its salt will go through these common stages. Below are a series of screencaps from this software. Below is the arranging stage which will allow you to select your model and then place it wherever you want in the virtual build space. Keep in mind parts outside of this virtual build area will not be printed so keep your model inside this area. That is not the only thing you can do at this stage. You are also able to scale, copy and mirror your selected model. You can also add multiple objects to a single print. By clicking on a particular model it will focus the menu options on the left of the screen to apply to that selected model and allow you to do all these changes to it. When you are in the software, have imported a model and selected it below is exactly what you will be able to see (albeit your desired model instead of my mask model).

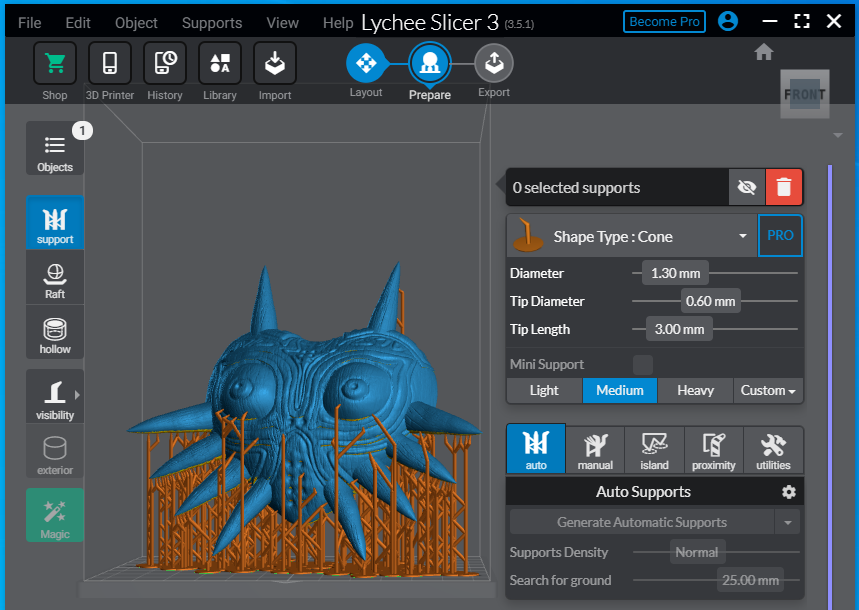
Once happy with the arrangement the next step is the preparation stage. Get to this stage by clicking on prepare. You will be able to do a number of different processes at this point but really it boils down to supporting the model with supports and rafts. Both of these are used to provide good adhesion to the build platform. If you want to create a hollow object/add holes (which is a great way to save on resin) you have that choice as well. This stage also lets you decide exactly how to place your supports. The auto support option is great but sometimes it will miss out on supports on what seems obvious to a human. Below you can see a model being supported. This model I printed without a Raft and I wish I had used one.
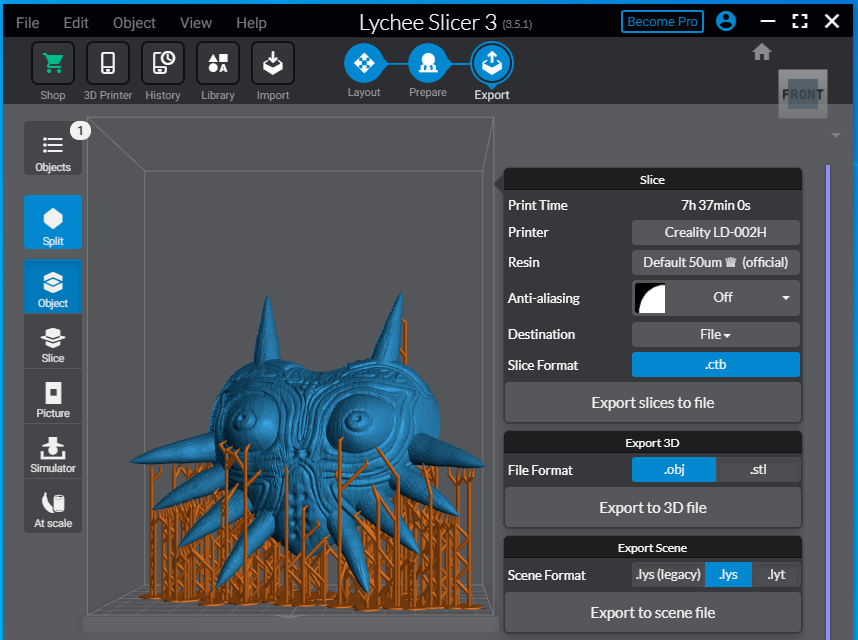
The final step is slicing and exporting the final model which you get to by clicking on the export button. This stage will also let you simulate the printing process, showing it come out of your resin tank, and provide a size comparison for you to see what your model will look like next to a can and a banana. Both are surprisingly useful tools. You are also able to observe what each sliced layer looks like.
Simple Workflow
For understanding purposes, I will run through a simple workflow using Lychee (which is generally applicable no matter what slicer you choose to use) which you can see below.
1. Import the CAD file using the import button, top menu, or by drag and drop method. It can be a file you have made or one you have downloaded.
2. Orientate the model so that the edges that you want the best final surfaces on facing away from the build platform. You can also scale the component or add more models at this stage.
3. Support your models overhanging and floating island sections. This process can become art but to start off easy by selecting the Heavy support option and using the Generate Automatic supports. This will ensure the great adhesion of your model. See the next section in this guide for more details on how to support models successfully without them falling off the build plate and leaving minor surface marks from the supports.
4. Use a Raft. This will hugely increase stiction to the build platform. My preference in the Lychee slicer software is called Shape Wall.
5. Consider Hollowing the Object. This will save overall material in exchange for a weaker final component. Make sure to create relief holes so that a vacuum does not build up inside your model. This can cause print failure or even worse FEP sheet failures as the vacuum tears the plastic sheet.
6. Jump to the Export page and export slices to your removable USB drive as a | .ctb | file. This should take less than a minute to do. Each time you change the model arrangement you will need to re-do this.
7. Then with your desired arrangement saved to a removable USB drive, you can then stick it into a 3D printer, find it using the printer's UI and start your 3D print!
Below is an image of the above-sliced file printed off on a Creality LD-002H 3D resin printer. You'll notice I rotated the model on the side which was done to increase the size of the model. This I did by scaling it. I then rotated it slightly so that the face leaned backward away from the build platform. This was done so that very few supports ended up on the face of the model. Once printed I took it off the build plate and completed it using the process described in this guide. Later on, I gave it a quick prime, a couple of licks of paint, and a gloss finish.
Tips When Supporting Your Models
The main goal here is to support overhangs and floating islands so that the model sticks to the build platform. The art comes from minimising the marring from those supports which you will see on the final component after they are removed.
The auto support is brilliant in the Lychee software but you will come across situations where it places support in a peculiar location or on an area that you do not want to be marked by support. Now supports can be removed without much marring on the surface of the model, particularly when care is taken to remove them. So a couple of stray supports on the pretty side of your model is not the end of the world.
When you are starting off, I would recommend using Heavy supports. As you do dive deeper into resin printing you will gain a better feel for how much supports are required for certain overhangs and material mass. Then you can start thinning the support connection point to the model leaving smaller marks and minimising the overall diameter of the supports. You can then also start lowering the density of the supports.
Support controls hotkeys in Lychee Slicer really worth knowing are the following:
- Click on a single support and pressing the | DELETE | key to remove a single support
- Click and Drag on a single support whilst holding the | ALT | key to drag supports around, both the connecting location and how it attaches to the build plate
- Click and Drag on a single support whilst holding the | CTRL | and | ALT | key to create superfine supports
With these controls, you will be able to move/create/delete supports all over your model. Below shows what supports look like zoomed in close. It also shows different ways to alter them and the superfine supports.


