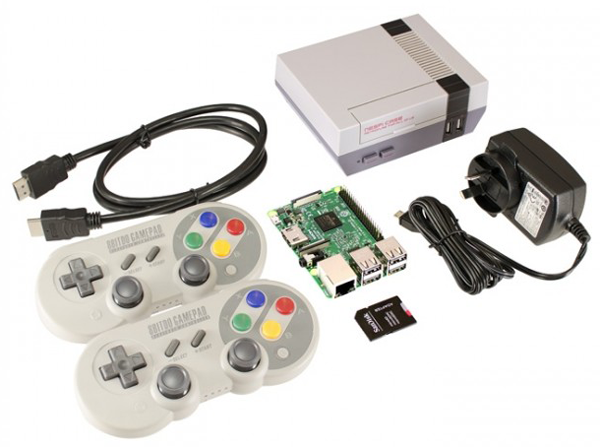
Amid all the new controllers that 8Bitdo have brought out and the mountain of Raspberry Pi cases and accessories that are available, we’ve bundled everything together to create the ultimate RetroPie gaming console. If you’ve been around Raspberry Pi for a while, then you’ll be familiar with how to set it up. But, if this is your first time working with a Raspberry Pi, there are a few learning hurdles which we’ll cover today.
I’ve talked about what is RetroPie and the various 8Bitdo controllers at length in other tutorials, so today, we’re just going to be going through a step-by-step assembly of the Ultimate Retro Gaming Console. So, without further ado, let’s begin.
 What You’ll Need
 What You’ll Need
This tutorial is designed to specifically cover our Ultimate Retro Gaming Console bundle, however, you can also follow along if you’ve got a Raspberry Pi and the other bits and pieces separately. You’ll also need a computer to download ROMs for your emulator and transfer them to your Raspberry Pi, a USB keyboard (wired or wireless), a USB drive, and an HDMI display.
Creating RetroPie Card – Optional
We ship out pre-flashed RetroPie cards with our gaming kits so that you can get up and running as quickly as possible. But if you didn’t get everything in a bundle, then you’ll either need to buy one of our cards separately or make one yourself. Fortunately, it’s not difficult to flash your own, and I’ll walk you through how to do it.
You’ll need to download Win32Disk Imager if you’re using Windows or an alternative program if you’re using a different operating system.
- Download the latest version of RetroPie here. Be sure to get the Raspberry Pi 2/3 version.
- Unzip the .gz file using a tool like 7zip.
- If you've used your SD card for previous Pi projects, you may need to fully clean and format it by following this tutorial. If it's just a fresh, blank card, just ensure it's in a FAT32 format using your file browser and it should be ready to go.
- Insert your microSD card into your computer, open Win32Disk and open your newly unzipped RetroPie .img file.
- Double check you’ve got the correct drive (your microSD card) selected, and then hit ‘Write’.

That’s all you need to do, and now you have all the tools you need to easily flash images to your own cards.
Assembly
Now it’s time to put it all together. Go ahead and open up your NESPi case and mount your Raspberry Pi board into the case without anything connected to it (including an SD card). The easiest way to do this is to insert it at an angle and get the HDMI and 3.5mm jack lined up, then slide the rest of the board into the case. Make sure that the mounting holes line up with those on your Pi. You can take two of the black screws that came in the plastic bag and screw the two innermost holes on the Pi into the case to secure it.

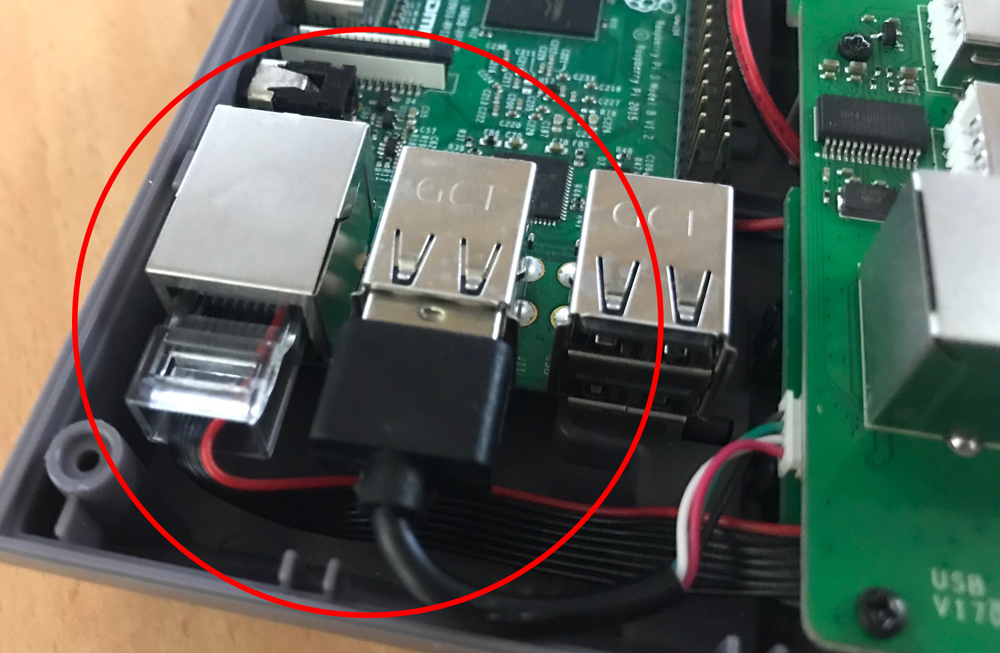
Insert the Ethernet and USB connectors inside the case into your Raspberry Pi (it doesn’t matter what USB port you use). Finally, connect the 2x5 female header to the GPIO pins on your Pi as shown below:

That’s all there is to the inside of the case so, take the 6x long, silver screws provided and fasten the case together. Then insert your microSD card into the side slot, connect an HDMI lead from your case to your display, and then plug the micro USB power supply into the rear port. Don’t worry if it doesn’t turn on, we’ll be doing that in the next section.

Now your case is ready to rumble with the best of them. On the front of the NESPi case are two power buttons. One is a momentary reset button, and the other a latching power button. To turn your machine on, press the power button, and the red LED on the front will light up.
Configuring RetroPie and Connecting Controllers
Your Raspberry Pi will now go through the boot process and land on a screen asking you to map a controller:

We’ll connect the SF30 Pro controllers in a moment, but first, we need a keyboard to navigate with. So go ahead and map the D-pad directional controls, as well as A, B, Start, and Select. You can map them to any key you like, just make sure you remember what they are. To skip past un-used controllers, simply hold a button that you've already mapped, and it will skip to the next button. I recommend mapping the direction arrows for the D-pad, the matching letters for A and B, and Enter and Backspace for Start and Select. Once that is completed, you’ll be taken to the main RetroPie screen.
To get Bluetooth devices up and running with RetroPie, we need to dive into the RetroPie config menu by clicking on the RetroPie option at the main screen. Navigate to Bluetooth and press ‘a’ to enter the Bluetooth configuration. You can navigate the menu here using the arrow keys on your keyboard/gamepad and using ‘enter’ to select. Now that we’re in the Bluetooth settings, follow the steps below to setup your 8Bitdo controller:

- There are different modes you can use for your 8Bitdo controller depending on what you’re connecting to, however, for the RetroPie, mode 1 is what you want. To use the controller in mode 1, simply power the controller on by holding the ‘Start’ button (different modes are accessed by holding different buttons combinations when powering on).
- Go to ‘Register and Connect to Bluetooth Device’, after searching for devices for a few seconds it will display all available Bluetooth devices. The 8Bitdo controller will either show up labeled as 8Bitdo*model*, however in our tests, it can take a few times for it to appear, so if it doesn’t show in the listed devices, press cancel, and then select ‘Register and Connect…’ again until it appears. Once visible, select the controller and hit enter, after a few seconds it will let you know if it was successfully connected.
- Now we need to go down to ‘Set up udev rule for Joypad’, select your 8Bitdo controller and press enter. This is required for your controller to work correctly.
- Go to ‘Configure Bluetooth connect mode’ which should be set to ‘default’ and change it to ‘background’. This will ensure that our controller is always connected to the Pi, even after a restart, otherwise we’d have to go back and connect it every time we turn the Pi on.
- The last step is to toggle the ‘8Bitdo mapping hack’ to ‘OFF’. This was required for a previous firmware version of the 8Bitdo controllers, but all new controllers come with updated firmware so we need to set it to OFF.


Repeat that process as required for each individual Bluetooth controller, and then exit back to the RetroPie main settings screen. All that’s left is to map each controller in RetroPie the same way we did for the keyboard (although we’ll be mapping all the controls). Press Enter on your keyboard (or whatever key you assigned it as), go down to ‘Configure Input’, and map each controller. You’ll be utilising almost every mapping option available because of the joysticks, so don’t worry if you make a mistake, you can always map it again.
Now that you’re controllers are connected and configured, let’s look at loading some ROMs (games) onto your Pi.
Loading and Launching ROMs
 Loading and Launching ROMs
RetroPie comes with all of the emulators already loaded, so you don’t need to worry about installing the emulators. By default, if the system can’t find a ROM for an emulator, it hides the emulator from being visible to avoid clutter. Loading emulators on your RetroPie system can be a bit of a grey area for some people, so we run with a simple rule. If we want to play the game on our RetroPie system, we need to first own the physical game. If you need help finding ROMs for your games, try googling what you're after, or take a look at some Youtube guides.
A word of caution here; if you're downloading ROMs, make sure you don't download anything that is a .exe file extension. The accepted file extensions for popular emulators are as follows:
- NES: .7z .fds .fig .mgd .nes .sfc .smc .swc .zip
- SNES: .7z .bin .fig .mgd .sfc .smc .swc .zip
- N64: .z64 .n64 .v64
- GBA: .7z .gba .zip
- Mega Drive: .7z .bin .gen .md .sg .smd .zip
- PS1: .cue .cbn .img .iso .m3u .mdf .pbp .toc .z .znx
You can find more info on the various emulators and systems on the RetroPie Github page which is a fantastic resource.
To transfer ROMs via USB to your Raspberry Pi:
- Insert your USB into your computer and make sure it is formatted to FAT32.
- Create a folder in the top level of the USB called ‘retropie’.
- Plug your USB into the Raspberry Pi and wait a few seconds until the green LED on the Pi stops steadily blinking.
- Unplug the USB and plug it back into the computer. The Raspberry Pi has now created the file structures necessary to copy ROMs from the USB.
- On your computer, navigate to retropie -> roms -> snes (or whatever system you downloaded ROMs for), and copy your ROMs into the folder
- Unplug the USB and plug it back into the Raspberry Pi, wait a few seconds again.
- Reboot your Raspberry Pi, and you should now see the appropriate emulator in RetroPie, and all the ROMs you downloaded for it. You can now unplug the USB, and set it aside for when you want to copy more ROMs across.
*Note that some ROMs may appear in the top level of that emulator folder, others may be in another folder*
And that’s all there is to setting up your Ultimate Retro Gaming Console. If you have any questions or would like to know more, then just comment on this tutorial and we can get the conversation started. Happy gaming!

