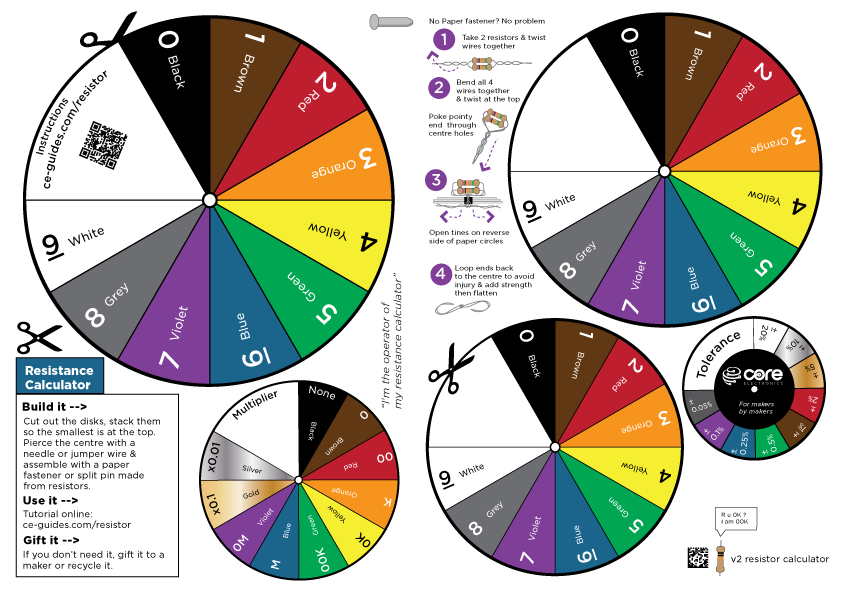
Assembly
To assemble the colour wheel
- Cut out each disk
- Carefully poke a hole in the centre of each disk. A pen, paperclip or other safe but pointy instrument ought to work.
- Create a split-pin by twisting the leads of two resistors together
- Poke the split pin through the hole and fan the leads out
- Dress the leads by bending them inwards, to make sure the pointy ends are tucked in.
Usage
To use this Resistor Colour Wheel calculator, we need to set the values from outermost to innermost, from left to right on your resistor. We can see that the bands are grouped more heavily towards the left-hand side, starting with yellow in the example.
Example 470-Ohm Resistor
The example resistor is yellow, purple, black, black, brown. This is a very common resistor pattern. This is used with a lot of LEDs at popular voltages and other small passive components.
So if we have yellow, purple, black, black, brown, we can see that this is a 470-ohm resistor. Again, very common, with a tolerance value of plus or minus 1%, meaning that the value of this should be within roughly 1% above or below of 470.
Using the multimeter, a Fluke 117 on the left-hand side, these IC clips to connect to this resistor. Because it's a resistor, it doesn't matter about polarity. We can hook this up in either direction. We've got 465 (give-or-take) ohms on our multimeter on the left here, which is roughly within the 1% tolerance that we were expecting on this resistor.