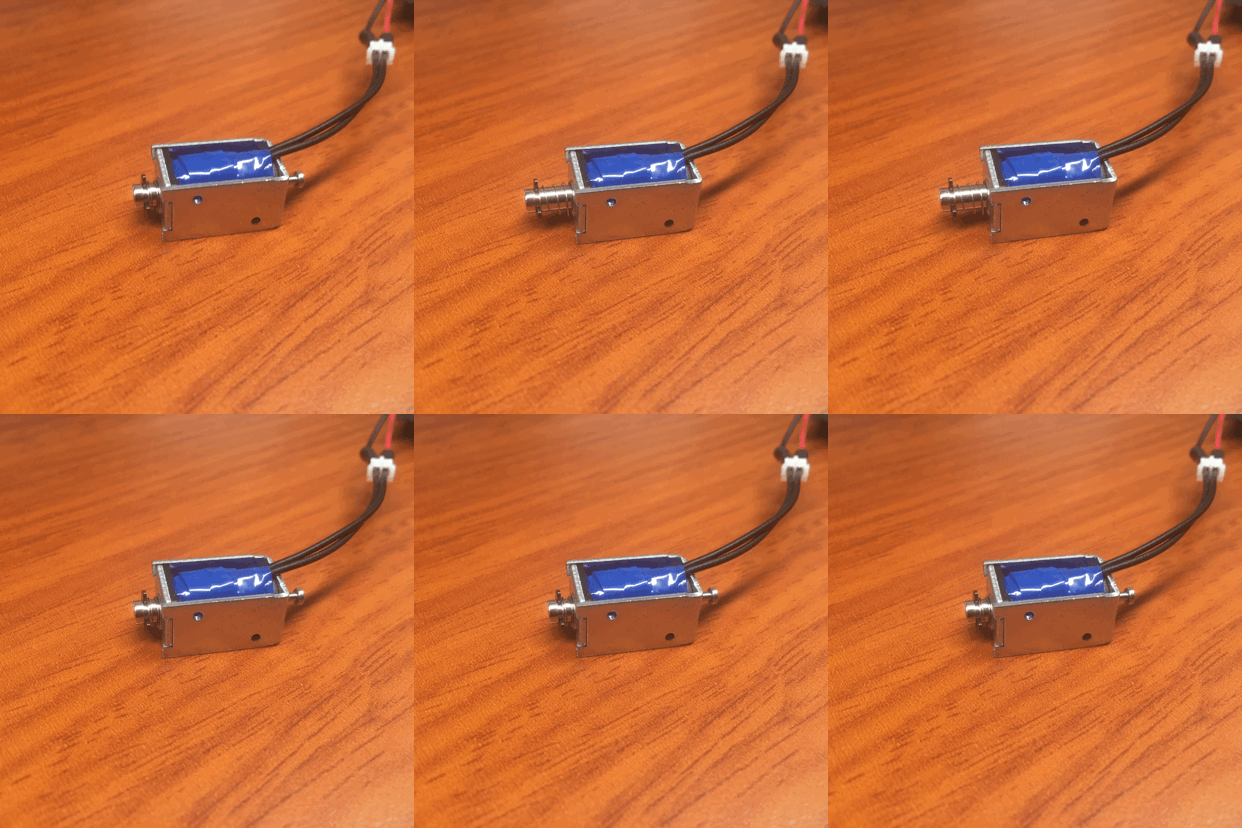
In this tutorial, we will look at the basics of Solenoids and how they work. Then we will design a small circuit that can drive a Solenoid from the input/output pins on your Arduino board.
We covered a whole bunch of rotational motion concepts when we looked at DC motors and how they are used with Arduino. It’s only fair to give linear motion the same treatment.
Electric solenoids work on similar electromagnetic principles to those of DC motors, however, solenoids can use the magnetic energy to push or pull something rather than turn it. Solenoids are found in paintball guns, pinball machines, printers, valves and even automobiles.
A Solenoid is a coil that when energised, produces a controlled magnetic field down through its centre. By placing a magnetic armature inside that field, the armature can move in or out of the coil. Team this with our Arduino and we open up a number of interesting applications.
The solenoid's strength (the force it can push or pull) is directly proportional to windings of the coil and the current applied. This means that more coils equal greater magnetic fields and greater force. A small design specification for this type of coil is that it must be longer than it is wide, ensuring the magnetic field runs through the centre and allows the in/out movement discussed above.
Common Specifications
Throw – This refers to the length of the armature that will be moving in and out of the solenoid.
Mounting options – Most solenoids have mounting holes in the case so that your armature can actually push and/or pull its load. Otherwise, the solenoid would likely push itself around instead of the load!
Duty cycle – This is expressed as a percentage of time the solenoid is switched on for. For example, if a solenoid is energised for 30 seconds before switching off for 30 seconds, its duty cycle is 50%.
Operating Voltage – Similarly to DC motors, this refers to the ideal voltage needed for the solenoid to run optimally. If you apply a lesser voltage you can expect a slower and weaker throw.
Starting Force – Measured in Newtons, this is the force the solenoid will have at the beginning of its movement.
Actuation Time – The time taken from switch-on to completion of the stroke.
The Project
We are going to switch a small 5v Solenoid on and off in intervals of 1 second, similar to the LED Blink we created earlier on. You will need the following components for this project:
- 1 x Arduino Uno
- 1 x Solderless breadboard
- 5 x Jumper Wires
- 1 x 220 Ω Resistor
- 1 x Diode
- 1 x Power Transistor
- 1 x 5v Solenoid
The Setup
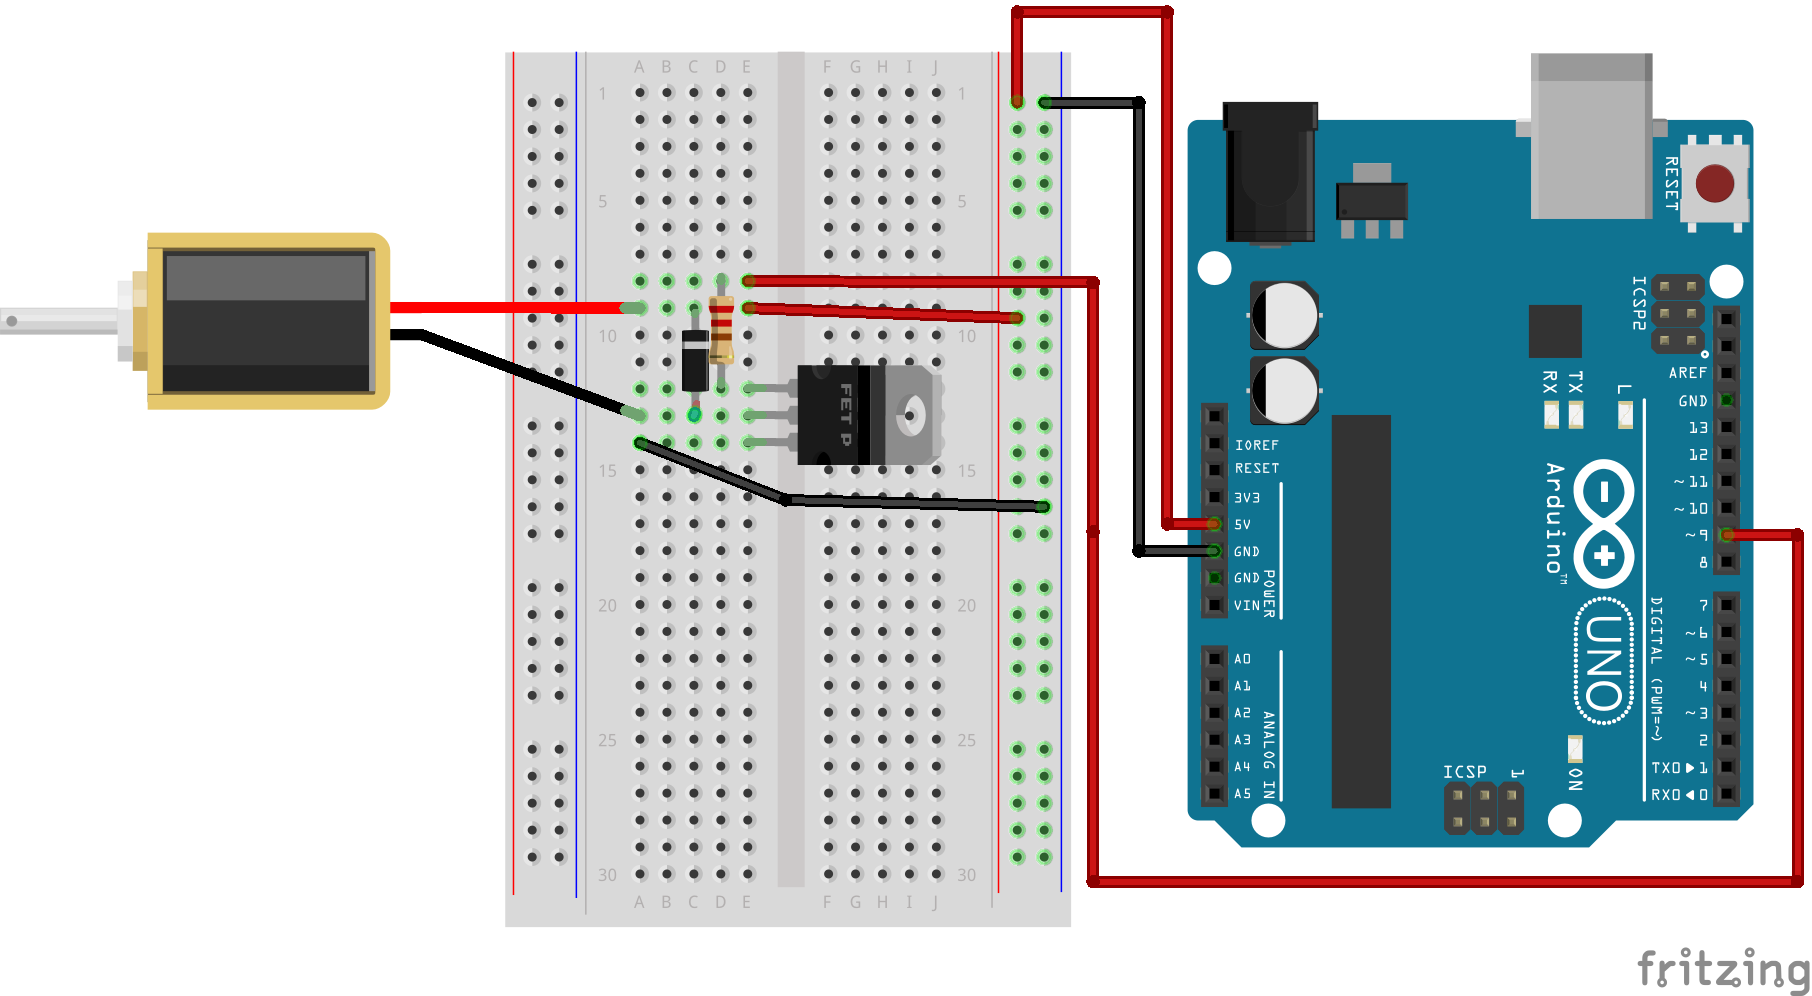
- Connect 5v Power and Ground from your Arduino to your power and ground rails on your breadboard
- Connect your solenoid to separate lines on your breadboard, one to the 5v power from step 2, the other needs to connect to the collector (middle) of the transistor.
- Connect your Diode between the two solenoid cables, this will prevent current discharging back through the circuit when the solenoid coil discharges.
- Insert your power transistor on three separate lines of your breadboard, with the flat side facing toward the outside. Ensure the collector's leg is connected to the solenoid and diode line.
- Connect a 220-ohm Resistor from the base leg of the transistor to a separate line
- Connect the emitter leg to the ground rail.
- Connect the other side of the resistor from step 6 to digital pin 9, that's our control pin.
The Code
int solenoidPin = 9;                    //This is the output pin on the Arduino

void setup()
{
  pinMode(solenoidPin, OUTPUT);          //Sets that pin as an output
}

void loop()
{
  digitalWrite(solenoidPin, HIGH);      //Switch Solenoid ON
  delay(1000);                          //Wait 1 Second
  digitalWrite(solenoidPin, LOW);       //Switch Solenoid OFF
  delay(1000);                          //Wait 1 Second
}
Upload the code to your board, if you want a more thorough understanding of the coding process read through the comments within the code, by this point though I’m sure it's straightforward enough.
CLICK! CLICK! CLICK! CLICK! Your solenoid should be toggling on and off much alike the LED blink we created. This was a pretty straightforward tutorial, but you should now have knowledge of what a solenoid is, the theory behind their operation and how to use the Arduino to control one!


