[Update – Until there is correct compatibility of OPEN-CV with the new Raspberry Pi ‘Bullseye’ OS I highly recommend at this stage flashing and using the previous Raspberry Pi ‘Buster’ OS onto your Micro-SD for use with this guide – Official 'Buster' Image Download Link Here]
Here we are going to control a Pan and Tilt system with a Raspberry Pi Single Board Computer so that it keeps your face in the centre of the frame. The intention here is to not only create an easy-to-use face-tracking system with a Pan-Tilt Hat but also do so in a way that can be readily expanded upon no matter what systems or code additions you choose to use. I will also demonstrate how to control the speed of rotation either making it very smooth or very fast.
After achieving the above the next step is to code a patrol phase for the Pan-Tilt system. So when it doesn't see any faces it moves around its degrees of freedom logically to search for one. Then to aid this patrol phase further we can add in the code the ability to automatically turn towards any moving objects that it identifies.
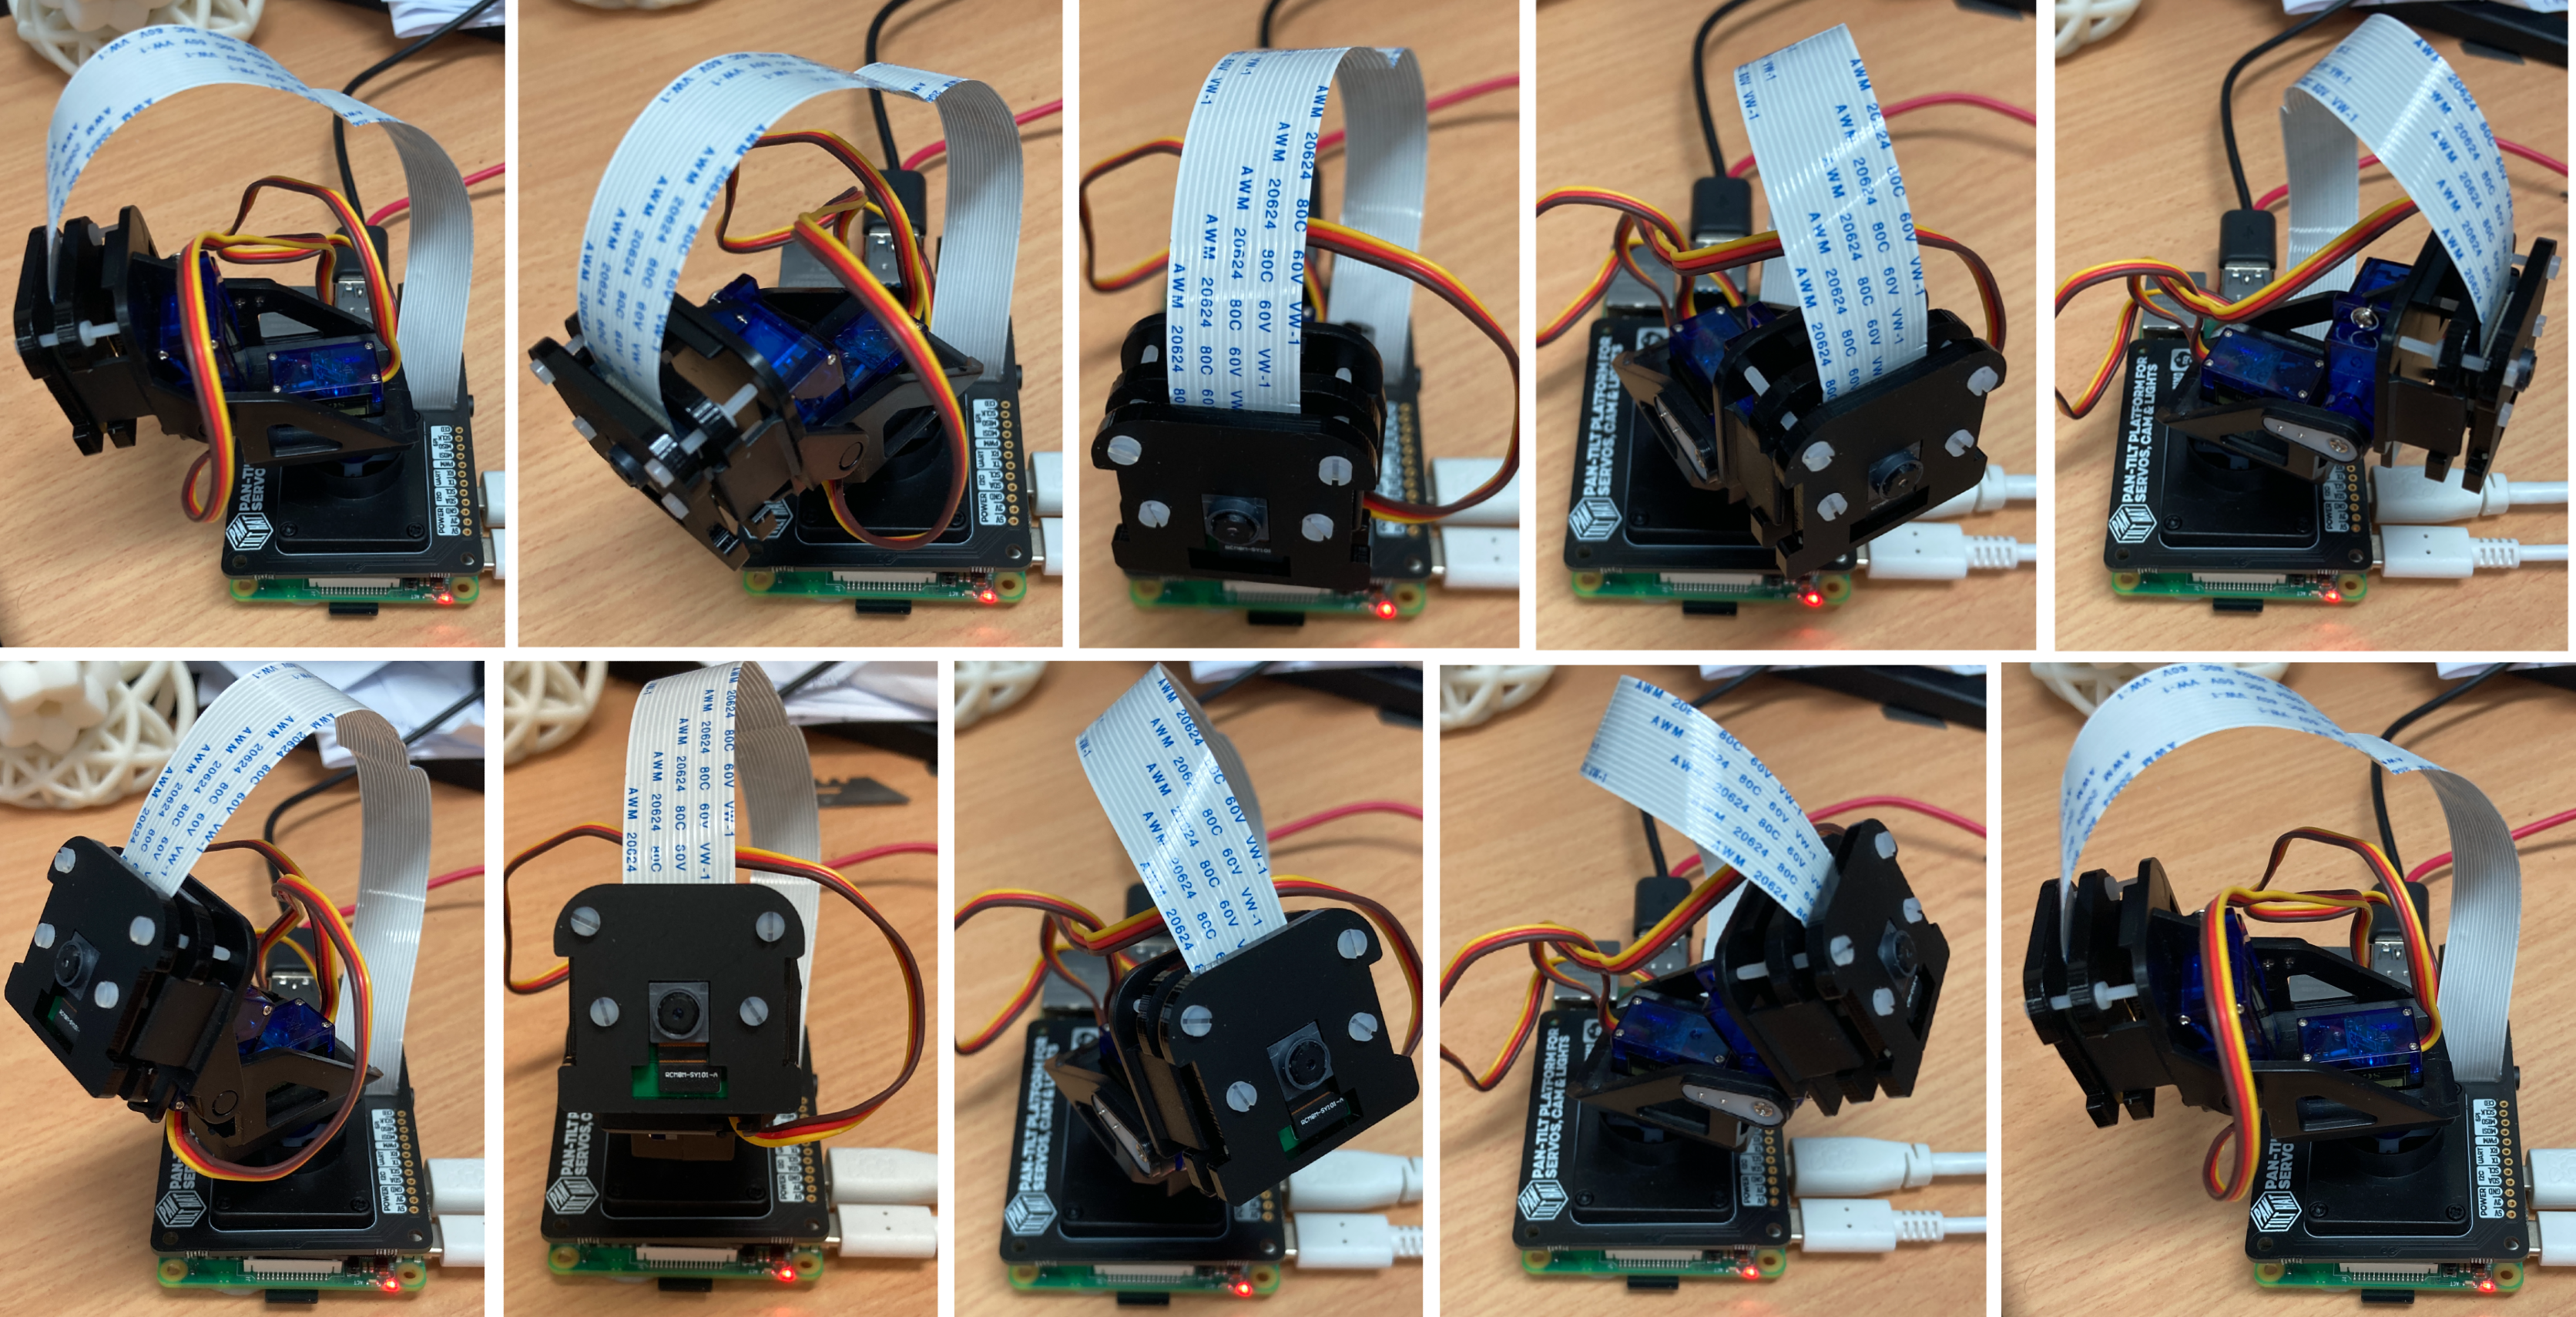
This page makes extensive use of the Pimironi Picade Pan-Tilt Hat which lets you mount and control a Pan-Tilt module right on top of your Raspberry Pi palm-sized computer. Read all about setting it up and preliminary control codes here. The goal today is to create a system that panning and tilting with a Raspberry Pi camera so that it keeps the camera centred on a human face.
- What You Need
- Open-CV and Other Required Packages
- Functional Face Tracking Code
- Patrolling into Motion Tracking into Face Tracking
- Where to Now
- Setting Up Open-CV on Raspberry Pi 'Buster' OS
- Downloads
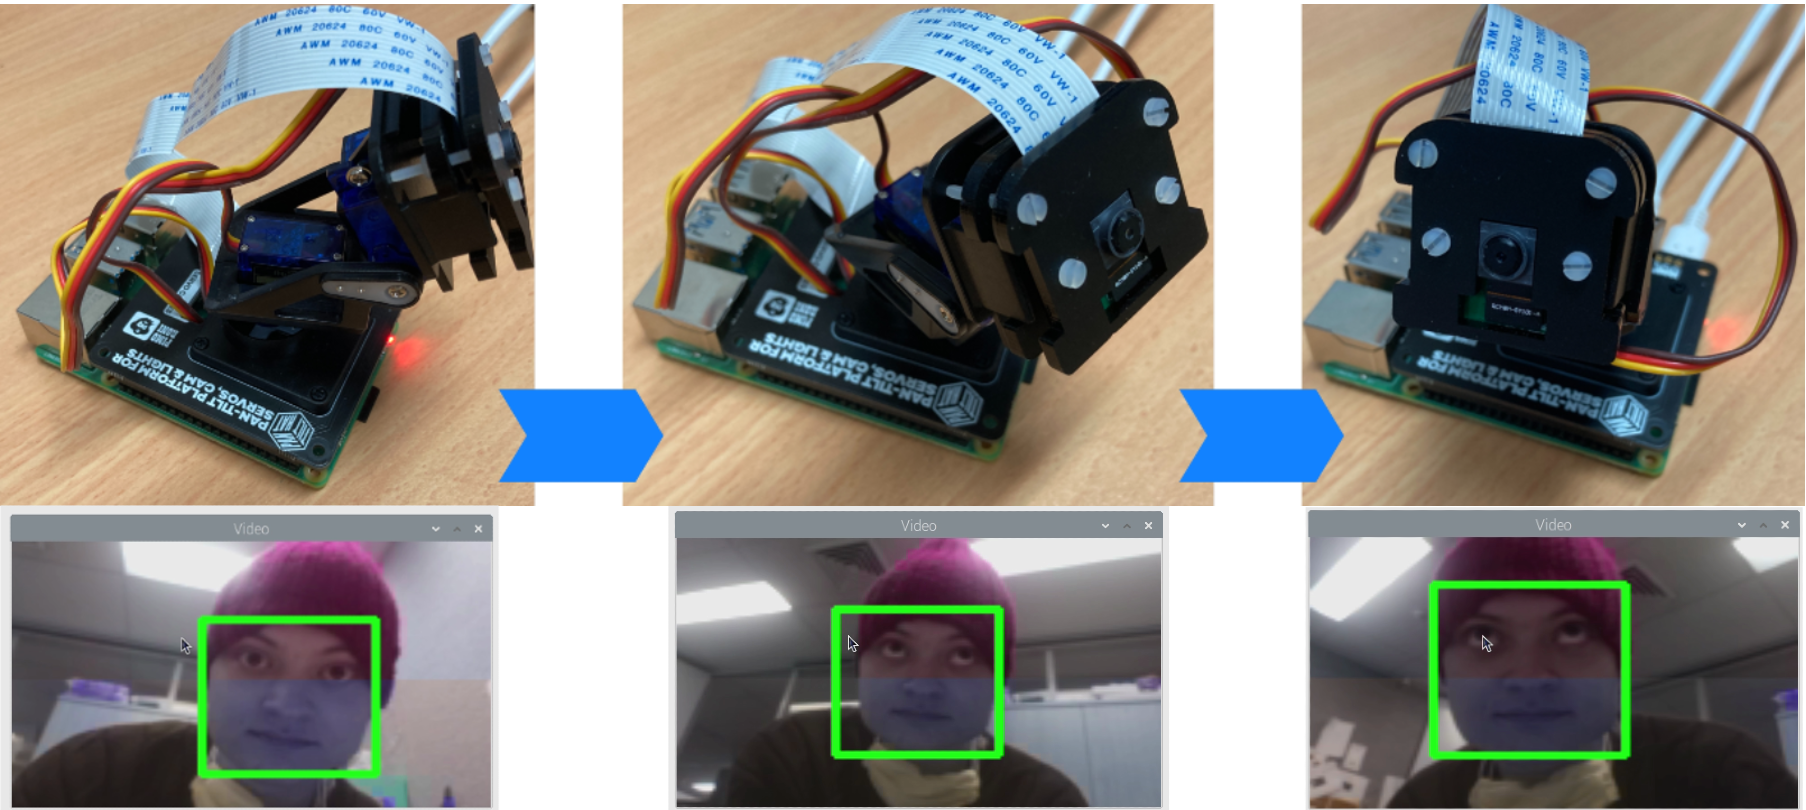
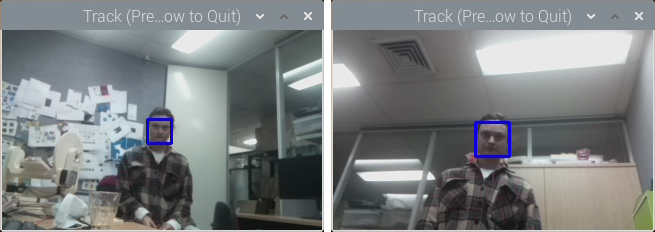
This setup will use Open-CV to identify faces and movements. This is a huge resource that helps solve real-time computer vision and image processing problems. This will be the fourth foray into the Open-CV landscape with Raspberry Pi and Facial Recognition being the first, Object and Animal Recognition with Raspberry Pi being the second, Speed Camera With Raspberry Pi being the third, and QR codes with Raspberry Pi the fourth. Also, if you dig this, definitely check out my Hand Recognition Finger Identification or Pose Estimation/Face Masking with Raspberry Pi computer vision Open-CV guides. Below is an image of the camera tracking my face as it should.
We're always keeping the action in frame now! The code to run this system can be downloaded from the link found at the bottom of this page. As always if you have got any questions, queries, or things you'd like to see added please let us know your thoughts!
What You Need
Below is a list of the components you will need to get this system up and running real fast. The hardware build process can be found in my previous Pimoroni Picade Pan-Tilt HAT guide, which will provide you with all knowledge to assemble this HAT and Raspberry Pi.
- Raspberry Pi 4 Model B (Having the extra computing power that this Pi provides is very helpful for this task)
- Raspberry Pi Official Camera Module V2 (but can work with any camera with a similar form factor, the wide-angle camera module works well here)
- Pimoroni Pan and Tilt HAT
- Micro SD Card (which has Raspberry PI OS that is connected to the internet and has the camera-enabled in the Configuration settings)
- Power Supply
- Monitor
- HDMI Cord
- Mouse and Keyboard
Open-CV and Other Required Packages
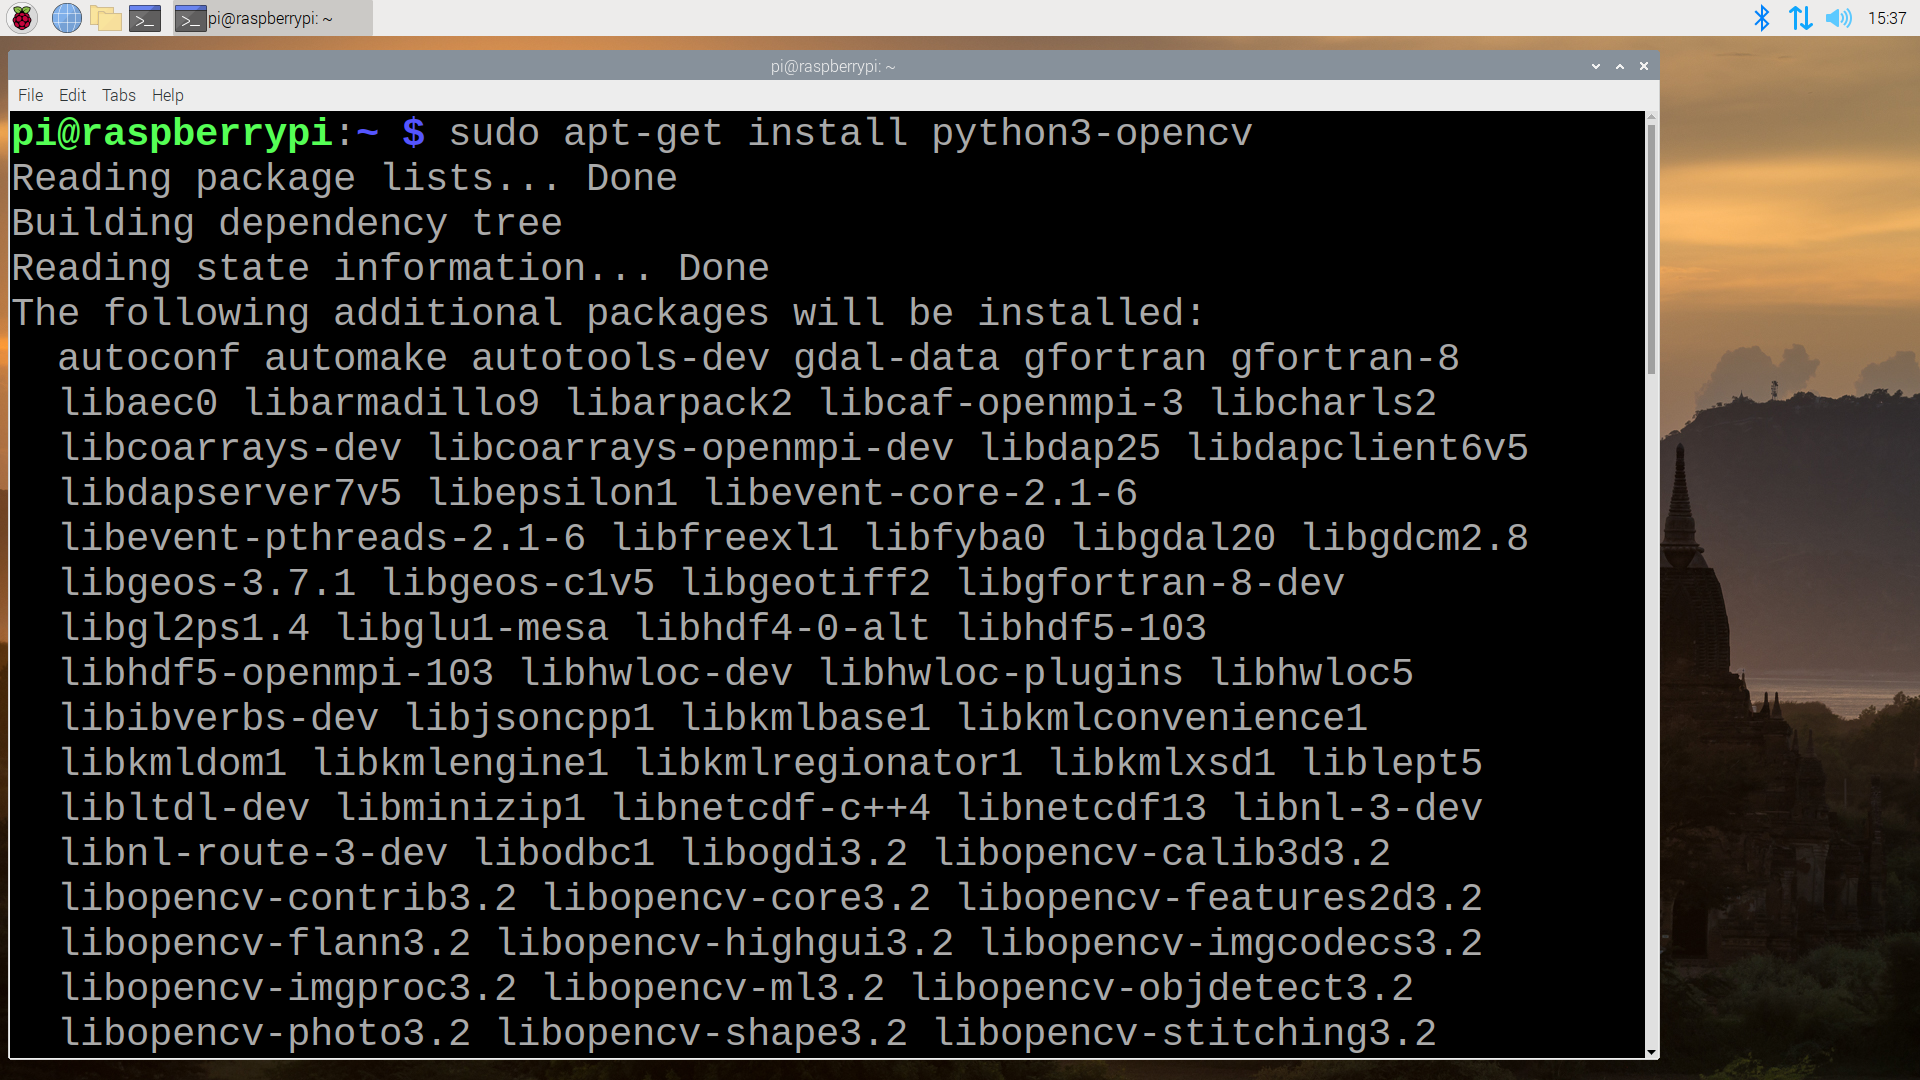
To have this system up and running correctly you will need a couple of packages. Importantly, for this to work, we will incorporate the incredible functionalities from the Open-CV packages to create significantly simpler code for our face tracking system. To install it we will type and enter the lines into the terminal that are found in the section Setting Up Open-CV on Raspberry Pi OS. Open up a new terminal using the black button on the top left of the screen. Below you can see what it looks like when you open a terminal on the Raspberry Pi 'Buster' Desktop and in that image there is a big arrow pointing to the icon which was clicked with the mouse to open it.
If prompted type | Y | and press enter to continue the install process. Installing each of the packages can take some time. See further below an image of the second line being downloaded. Most lines here are being used here to update and install all the current packages to the current setup and start with the command | sudo |. Each line starting with | sudo | will be run with admin privileges.
You will also need to type and enter the below two lines into the terminal just like before. These will get the packages to make our Pimoroni Picade Pan-Tilt HAT work with our Raspberry Pi efficiently. Check here for more information on this software package. Once completed that is all the packages you will need for this application to work. Run a quick reboot on your system to lock in all these changes.
sudo apt-get update && sudo apt-get upgrade
curl https://get.pimoroni.com/pantilthat | bash
sudo apt-get install python-opencv python3-opencv opencv-data
Functional Face Tracking Code
So below is the code we will use to get our Pimoroni Picade Hat system running Face Tracking. It will identify faces and attempt to keep the face in the centre of the capture video by panning and tilting via the servos. It is fully annotated so you can understand what each section is doing and the purpose for it.
#!/usr/bin/env python
#Below we are importing functionality to our Code, OPEN-CV, Time, and Pimoroni Pan Tilt Hat Package of particular note.
import cv2, sys, time, os
from pantilthat import *

# Load the BCM V4l2 driver for /dev/video0. This driver has been installed from earlier terminal commands.
#This is really just to ensure everything is as it should be.
os.system('sudo modprobe bcm2835-v4l2')
# Set the framerate (not sure this does anything! But you can change the number after | -p | to allegedly increase or decrease the framerate).
os.system('v4l2-ctl -p 40')

# Frame Size. Smaller is faster, but less accurate.
# Wide and short is better, since moving your head up and down is harder to do.
# W = 160 and H = 100 are good settings if you are using and earlier Raspberry Pi Version.
FRAME_W = 320
FRAME_H = 200

# Default Pan/Tilt for the camera in degrees. I have set it up to roughly point at my face location when it starts the code.
# Camera range is from 0 to 180. Alter the values below to determine the starting point for your pan and tilt.
cam_pan = 40
cam_tilt = 20

# Set up the Cascade Classifier for face tracking. This is using the Haar Cascade face recognition method with LBP = Local Binary Patterns.
# Seen below is commented out the slower method to get face tracking done using only the HAAR method.
# cascPath = 'haarcascade_frontalface_default.xml' # sys.argv[1]
cascPath = '/usr/share/opencv/lbpcascades/lbpcascade_frontalface.xml'
faceCascade = cv2.CascadeClassifier(cascPath)

# Start and set up the video capture with our selected frame size. Make sure these values match the same width and height values that you choose at the start.
cap = cv2.VideoCapture(0)
cap.set(cv2.CAP_PROP_FRAME_WIDTH,  320);
cap.set(cv2.CAP_PROP_FRAME_HEIGHT, 200);
time.sleep(2)

# Turn the camera to the Start position (the data that pan() and tilt() functions expect to see are any numbers between -90 to 90 degrees).
pan(cam_pan-90)
tilt(cam_tilt-90)
light_mode(WS2812)

# Light control down here. If you have a LED stick wired up to the Pimoroni HAT it will light up when it has located a face.
def lights(r,g,b,w):
    for x in range(18):
        set_pixel_rgbw(x,r if x in [3,4] else 0,g if x in [3,4] else 0,b,w if x in [0,1,6,7] else 0)
    show()

lights(0,0,0,50)

#Below we are creating an infinite loop, the system will run forever or until we manually tell it to stop (or use the "q" button on our keyboard)
while True:

    # Capture frame-by-frame
    ret, frame = cap.read()
    # This line lets you mount the camera the "right" way up, with neopixels above
    frame = cv2.flip(frame, -1)

    if ret == False:
      print("Error getting image")
      continue

    # Convert to greyscale for easier faster accurate face detection
    gray = cv2.cvtColor(frame, cv2.COLOR_BGR2GRAY)
    gray = cv2.equalizeHist( gray )

    # Do face detection to search for faces from these captures frames
    faces = faceCascade.detectMultiScale(frame, 1.1, 3, 0, (10, 10))

    # Slower method (this gets used only if the slower HAAR method was uncommented above.
    '''faces = faceCascade.detectMultiScale(
        gray,
        scaleFactor=1.1,
        minNeighbors=4,
        minSize=(20, 20),
        flags=cv2.cv.CV_HAAR_SCALE_IMAGE | cv2.cv.CV_HAAR_FIND_BIGGEST_OBJECT | cv2.cv.CV_HAAR_DO_ROUGH_SEARCH
    )'''

    lights(50 if len(faces) == 0 else 0, 50 if len(faces) > 0 else 0,0,50)

    #Below draws the rectangle onto the screen then determines how to move the camera module so that the face can always be in the centre of screen.

    for (x, y, w, h) in faces:
        # Draw a green rectangle around the face (There is a lot of control to be had here, for example If you want a bigger border change 4 to 8)
        cv2.rectangle(frame, (x, y), (x w, y h), (0, 255, 0), 4)

        # Track face with the square around it

        # Get the centre of the face
        x = x   (w/2)
        y = y   (h/2)

        # Correct relative to centre of image
        turn_x  = float(x - (FRAME_W/2))
        turn_y  = float(y - (FRAME_H/2))

        # Convert to percentage offset
        turn_x  /= float(FRAME_W/2)
        turn_y  /= float(FRAME_H/2)

        # Scale offset to degrees (that 2.5 value below acts like the Proportional factor in PID)
        turn_x   *= 2.5 # VFOV
        turn_y   *= 2.5 # HFOV
        cam_pan   = -turn_x
        cam_tilt  = turn_y

        print(cam_pan-90, cam_tilt-90)

        # Clamp Pan/Tilt to 0 to 180 degrees
        cam_pan = max(0,min(180,cam_pan))
        cam_tilt = max(0,min(180,cam_tilt))

        # Update the servos
        pan(int(cam_pan-90))
        tilt(int(cam_tilt-90))

        break

    #Orientate the frame so you can see it.
    frame = cv2.resize(frame, (540,300))
    frame = cv2.flip(frame, 1)

    # Display the video captured, with rectangles overlayed
    # onto the Pi desktop
    cv2.imshow('Video', frame)

    #If you type q at any point this will end the loop and thus end the code.
    if cv2.waitKey(1) & 0xFF == ord('q'):
        break

# When everything is done, release the capture information and stop everything
video_capture.release()
cv2.destroyAllWindows()
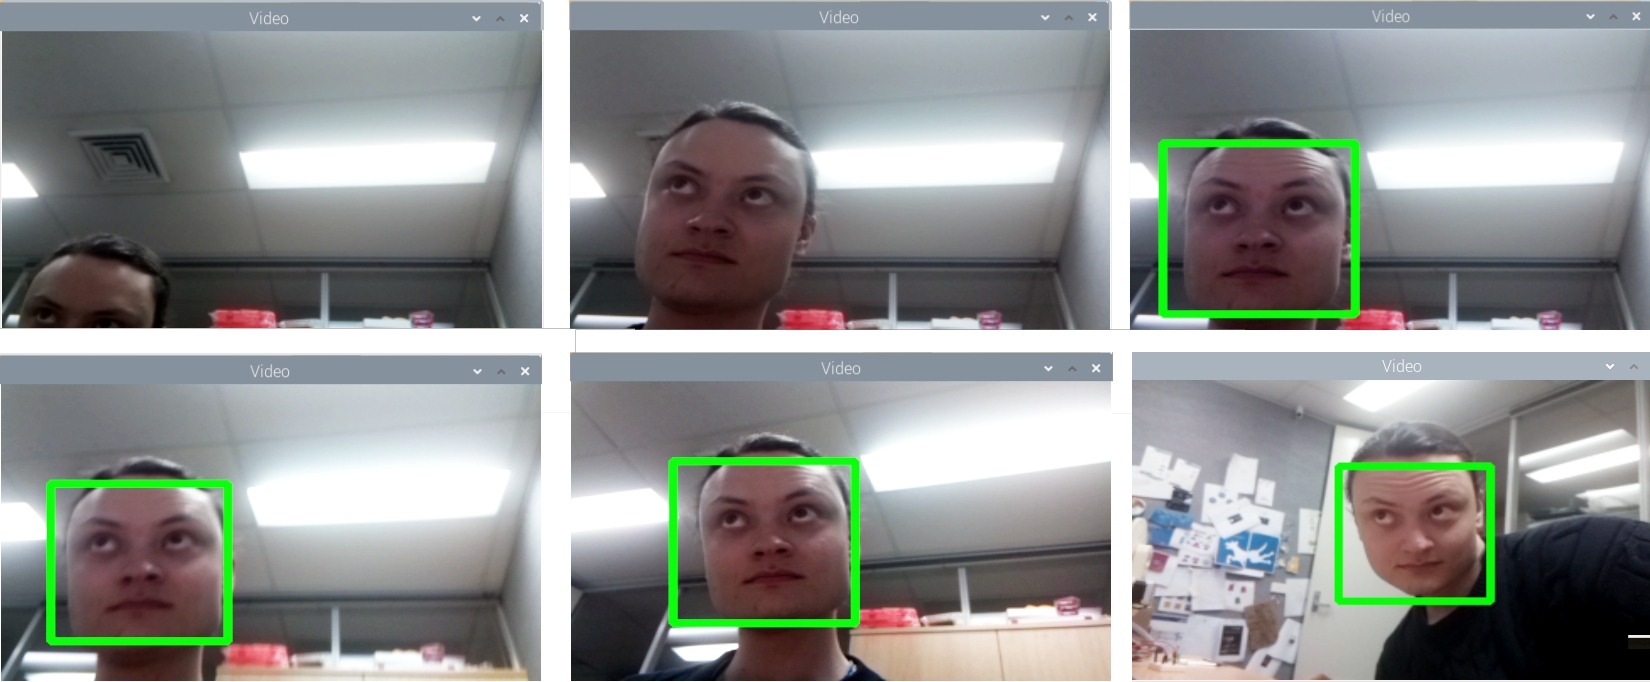
So let's now open this above code in Thonny IDE. Do this either by copying, pasting, and saving the above into Thonny IDE or downloading the code from the link below and then right-clicking the | facetracker.py | Python Code and opening it with Thonny IDE. Then as soon as you run it (by pressing that large green run button) it will initiate face tracking. It will stay still until a face is found, and then it will attempt to keep that face in the centre of the frame even when you try to get it out of the frame. See below for this occurring.
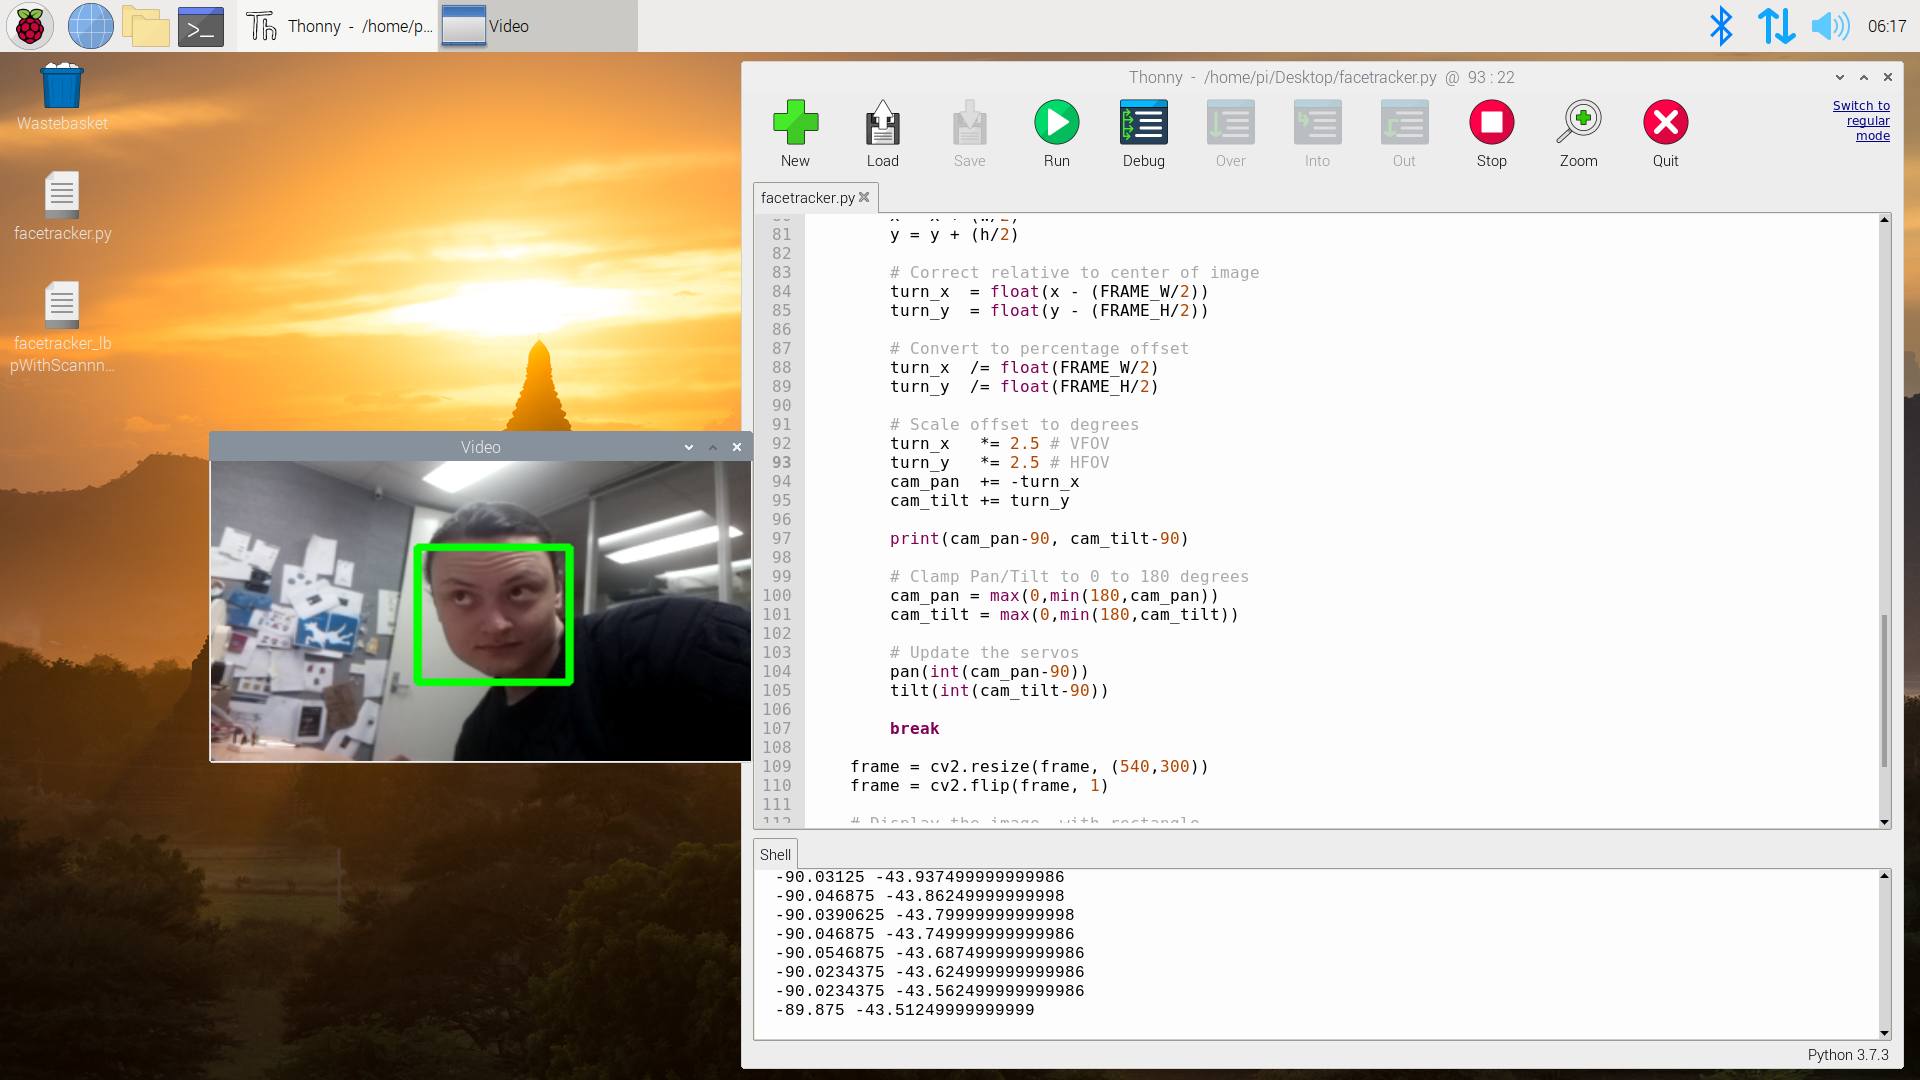
Of interest to those who have seen the guide Facial Recognition with the Raspberry Pi, you will notice this system used to identify faces is different from the one used in that guide. The Face detection here is using a system called Haar Cascade. Haar Cascade Detection is one of the oldest yet powerful face detection algorithms invented. First published by Viola and Jones in 2001 it has been around long before Deep Learning gained serious traction. This system won't be able to identify different faces but in exchange, it is much faster at finding human faces. This uses a slight variation of Haar Cascades called LBP (Local Binary Patterns) which is faster but slightly less accurate than the raw Haar Cascade method. For that speed reason, it is used here on our single board face tracking system to great effect. Below shows what you would see on your Desktop as you run the above code.
Places worthwhile to edit the code. In the code, you will find a section named Scale Offset to Degrees (you can also see this section in the above image). The Default Scale Offset Value is 2.5 but here you can either lower the value to smooth out the servo operation or increase the value to make the camera adjust further. Small changes here can make a big difference. In this same section, you could also alter the positive and negative signs of the | turn_x | and | turn_y | values. This would make for a very shy camera that would never stare at a human. This code also has a lot of LED stick controls which you can easily take advantage of and edit to your heart's pleasure.
Patrolling and Movement Sense
Another addition worth adding to the system is a patrol setting for when it doesn't see any faces. The next level from that would be if you see any movement swivel the camera towards the movement. And then if you see a face lock onto the face and disregard the other two stages. Well in the downloads below is exactly the code to do just that. Big thanks to Claude Pageau as I based a lot of the below code on his previous work (particularly the face-track-demo). There are a lot of settings you can adjust, worth checking out the | config.py | file for a sample of what you can change. So download and run the | Face-Track-Pan-Tilt-HAT-Pimoroni.py | code in the same way as before. See below for what the default positions the servos will do in Sentry mode. At each position, it will pause for a second, before progressing to the next. This is fully customisable and will occur whenever it is unable to see a person or movement.
Then when movement is identified it will move the camera using the pan and tilt to place the centre of the camera frame on top of the movement. You can see this occurring below as I am sidestepping across (without showing the camera my face) and it keeps me in the frame. Whenever it sees movement, it will place a green circle on the video feed to where it approximates the centre of the movement is occurring. This uses a similar method as the Measure Speed with a Camera and Raspberry Pi to determine movement.
Then when it finds a face it will snap to it, paints a blue box around the face on the video stream, and does everything it can to stick to that face like glue, keeping your face in the centre of the action. See this in the image below. As soon as it can't find a face it will return to sentry mode. This code operates much like the Sentry Turrets in Portal (minus the danger and voice).
Where to Now
There are a number of excellent places to go with this. For instance, what to do when you see multiple faces? Putting preferences to one face over the other based on particular parameters would be a worthy code addition. Picture the scenario where the people you are interested in are wearing masks. In that case perhaps instead of running facial detection, we would be better off running an object detection layer and searching just for people.
There are many types of Pan-Tilt methods and I have attempted to make it so that these can be incorporated successfully into the code. Many Pan-Tilt systems use slow-moving brushless DC motors and some use stepper motors. A little tinkering with the code and you'll be off to the races running any Pan-Tilt systems successfully.
Another point worth mentioning is PID (proportional integral derivative) control. We have this system running at full blast, so as soon as it identifies a face, it will draw a box around it, and straight away determine an angle to move. There is no programmed PID controller layer to the code currently (but I would argue there is a naturally propagating PID created from the combination of hardware, software, and their limitations). There is some PID control here already, for example, if you increase the Scale Offset Value in the first code you are increasing the P-value. However, it is definitely possible to create smooth arcs and sweeps with the Pan-Tilt hat by incorporating a specific PID layer into your code. Adding this extra complexity will make the system run slower however I have seen it done on a Raspberry Pi, check out here.
Setting Up Open-CV on Raspberry Pi 'Buster' OS
This is an in-depth procedure to follow to get your Raspberry Pi to install Open-CV that will work with Computer Vision for Object Identification. Soon I will create either a script/a separate tutorial to streamline this process. Turn on a Raspberry Pi 4 Model B running a fresh version of Raspberry Pi 'Buster' OS and connect it to the Internet.
Open up the Terminal by pressing the Terminal Button found on the top left of the button. Copy and paste each command into your Pi’s terminal, press Enter, and allow it to finish before moving onto the next command. If ever prompted, “Do you want to continue? (y/n)” press Y and then the Enter key to continue the process.
sudo apt-get update && sudo apt-get upgrade
We must now expand the swapfile before running the next set of commands. To do this type into terminal this line.
sudo nano /etc/dphys-swapfile
The change the number on CONF_SWAPSIZE = 100 to CONF_SWAPSIZE=2048. Having done this press Ctrl-X, Y, and then Enter Key to save these changes. This change is only temporary and you should change it back after completing this. To have these changes affect anything we must restart the swapfile by entering the following command to the terminal. Then we will resume Terminal Commands as normal.
sudo apt-get install build-essential cmake pkg-config
sudo apt-get install libjpeg-dev libtiff5-dev libjasper-dev libpng12-dev
sudo apt-get install libavcodec-dev libavformat-dev libswscale-dev libv4l-dev
sudo apt-get install libxvidcore-dev libx264-dev
sudo apt-get install libgtk2.0-dev libgtk-3-dev
sudo apt-get install libatlas-base-dev gfortran
sudo pip3 install numpy
wget -O opencv.zip https://github.com/opencv/opencv/archive/4.4.0.zip
wget -O opencv_contrib.zip https://github.com/opencv/opencv_contrib/archive/4.4.0.zip
unzip opencv.zip
unzip opencv_contrib.zip
cd ~/opencv-4.4.0/
mkdir build
cd build
cmake -D CMAKE_BUILD_TYPE=RELEASE \
-D CMAKE_INSTALL_PREFIX=/usr/local \
-D INSTALL_PYTHON_EXAMPLES=ON \
-D OPENCV_EXTRA_MODULES_PATH=~/opencv_contrib-4.4.0/modules \
-D BUILD_EXAMPLES=ON ..
make -j $(nproc)
This | make | Command will take over an hour to install and there will be no indication of how much longer it will take. It may also freeze the monitor display. Be ultra patient and it will work. Once complete you are most of the way done. If it fails at any point and you recieve a message like | make: *** [Makefile:163: all] Error 2 | just re-type and enter the above line | make -j $(nproc) |. Do not fear it will remember all the work it has already done and continue from where it left off. Once complete we will resume terminal commands.
sudo make install && sudo ldconfig
sudo reboot
Downloads
Below is all the code you need to get up and running with these examples above. They have been fully commented so you can easily understand and alter them to do exactly what you want for your purposes.

