By now, you’ve probably seen the fancy new Raspberry Pi cases we’ve got available; the NESPi case by Retroflag. Designed and styled specifically for retro gaming systems such as RetroPie, it offers everything you need to turn your Pi board into a fully-fledged nostalgia factory. A common modification when running emulators is to add a fan and heatsink to cool your Pi as some emulators can stretch your board’s resources, causing it to get hot (resulting with an overheat warning depicted as a red thermometer). If you’d like to know more about cooling your Raspberry Pi, take a look at our dedicated tutorial.
Installing the Fan
This is a fairly easy process to follow your case, so don’t worry if you’re only just starting out with Raspberry Pi. The heatsink and fan combo that I recommend is:
Powering Fan Using Power Header
There are actually two different methods that I'd recommend for power the fan. The first one is to simply connect the fan to the provided fan header. This means that the fan will be constantly on whenever the power switch is pressed.

This is fine if you just want it to be constantly on, however, you can also use the spare GPIO pins on the 2x5 pin connector that provides power to the Pi. This is a good idea if you want to explore the option of controlling the fan with an adjustable speed control based on the Pi's performance and load. Implementing that control is beyond the scope of this tutorial, however, I'll show you how to use the 2x5 header, just with the power pins, so you can modify it as needed.
Powering Fan Using GPIO Headers
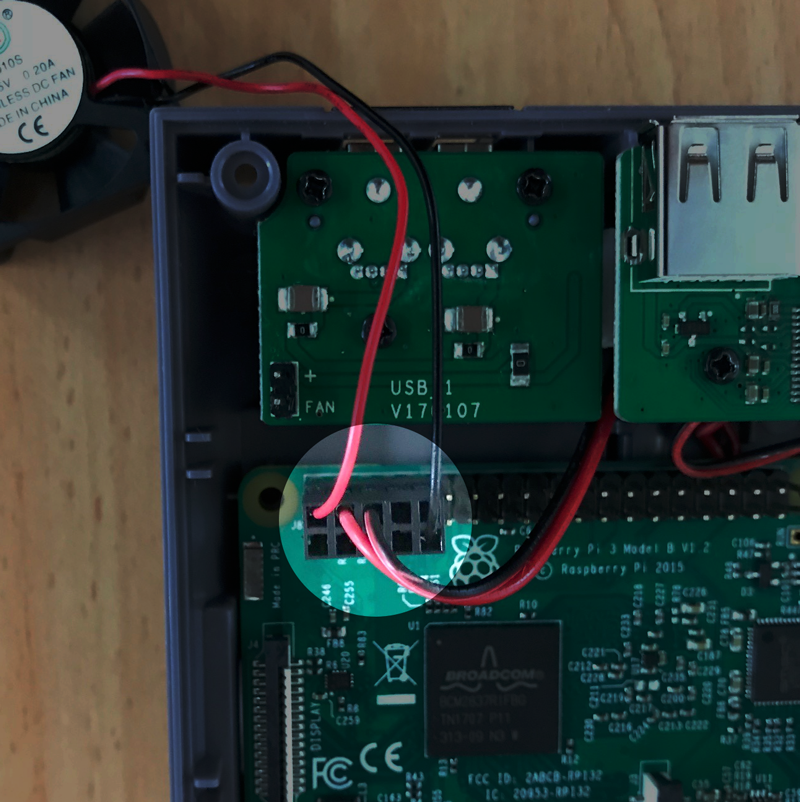
The first thing to do is install the fan as it’s the trickiest part. It can be powered from the 5V pin on the GPIO header, however, the case uses a 2x5 header to power the Pi. Fortunately, there’s a spare 5V and ground pin on those 10 pins so we can connect our fan up to those, and with a bit of maker intuition, use the existing crimp connectors.
To do this, we need to remove the crimped connectors from the header housing. You’ll need a small, thin flat-head screwdriver to do this. Your fan may have a different connector on it, but the process is the same. You’ll see an open side with a little metal tab being held in by a plastic tab. Use the screwdriver to lever them up and you should be able to pull the wire out with the crimp connector on it.

The crimp connectors used on different housings may be a little different, but both of the examples here work, however, the Red connector requires a bit more force to insert into the black header. As long as you’re careful, you shouldn’t have too much difficulty. Once the wires are free of the old housings, insert them into the black header as shown:
If your fan had a different type of crimp connector on it other than the black type shown above, then you may have difficulty getting it to mate with the 2x5 header. You’ll need to either get some female crimp connectors and re-do it, or it might just be a tight fit, in which case, carefully push it in until you hear a click.
**Note that on most small fans, you can’t simply reverse the polarity to change the direction of air-flow. They have hidden, onboard controllers, so you’ll need to physically flip them if required**
With that done, insert the 2x5 header on to the Raspberry Pi GPIO pins as shown above, and double check your connections according to the GPIO pinout:

Once you’ve satisfied everything is connected up properly, connect a micro USB power supply up to the case, press the power switch at the front of the case and your Pi should power up and the fan should spin. Check the air-flow direction and make a note of which way it blows. Unplug the power supply, and we’re ready to attach the fan to the case.
If you’re using the fan I linked to above, this is extremely easy. It just clips in and you don’t have to screw it. If you’re using a different fan, you might need to screw it in/figure out the best way to mount it. You want to mount it so that the fan acts as an exhaust, blowing the hot air out, and circulating cool air inside the case.

Clipping the fan to the case is a pretty tight fit, but if you insert it on an angle, with one edge inside the clip, then you can press it into the other clip with a bit of prodding and poking.
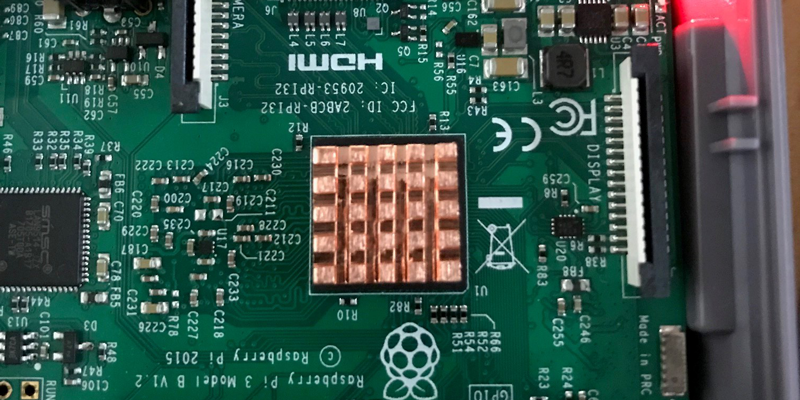
Installing the Heatsink
If that was an effort, you’ll be glad to know that mounting the heatsink is way easier. If you’re using the copper heatsink linked above, all you need to do is wipe the main SoC down with some Isopropyl, or a damp cloth at a pinch, wait for it to dry, then mount the heatsink using the thermal tape.
Boxing it Up
And that’s it! You can now put the case together, screw it together using the silver screws, and get gaming!


