The FEP film is a layer of transparent thin plastic (that is double layered) that is installed on the bottom of a resin tank (or Vat) in all resin 3D printers. This film creates a way for the UV light or laser light to cure the liquid resin during the printing process without the resin seeping through and damaging the LCD Screen or laser source.
A new FEP often has transparent protective coverings on either side of it that can be very hard to see. Make sure to peel the protective surfaces off before installing.
After owning a resin printer for some time at a certain point you will need to replace the original FEP Release Film that comes installed from the factory on a DLP or SLA machine with a new one. These are wearable components and if left on too long will result in less sharp and less reliable prints. A good FEP is one that is clean, devoid of most scratches and taut. So taut that you can lightly tap it and it'll sound like a drum. A FEP that needs replacing is one that has a hole, one that has too many scratches so it is no longer easy to see through or one that has too much flex. Too much flex would be a deviation of 5mm up and down at the centre.
See the image below to get a good idea of where a FEP is situated on a resin printer, in this case, a Creality LD-002R LCD Resin 3D Printer. DLP Resin Printers use FEP and also SLA 3D Printers too so this procedure will be useful for both.
Installing a new FEP to a tank can be tricky in regards to getting the right tautness and having it slip on you but by using a little cardboard you can make the process a breeze.
So once you have unscrewed the tank from the printer, removed the old FEP by unscrewing the bolts and metal spacer, and cleaned everything using Isopropyl alcohol you will be good to install a new FEP.
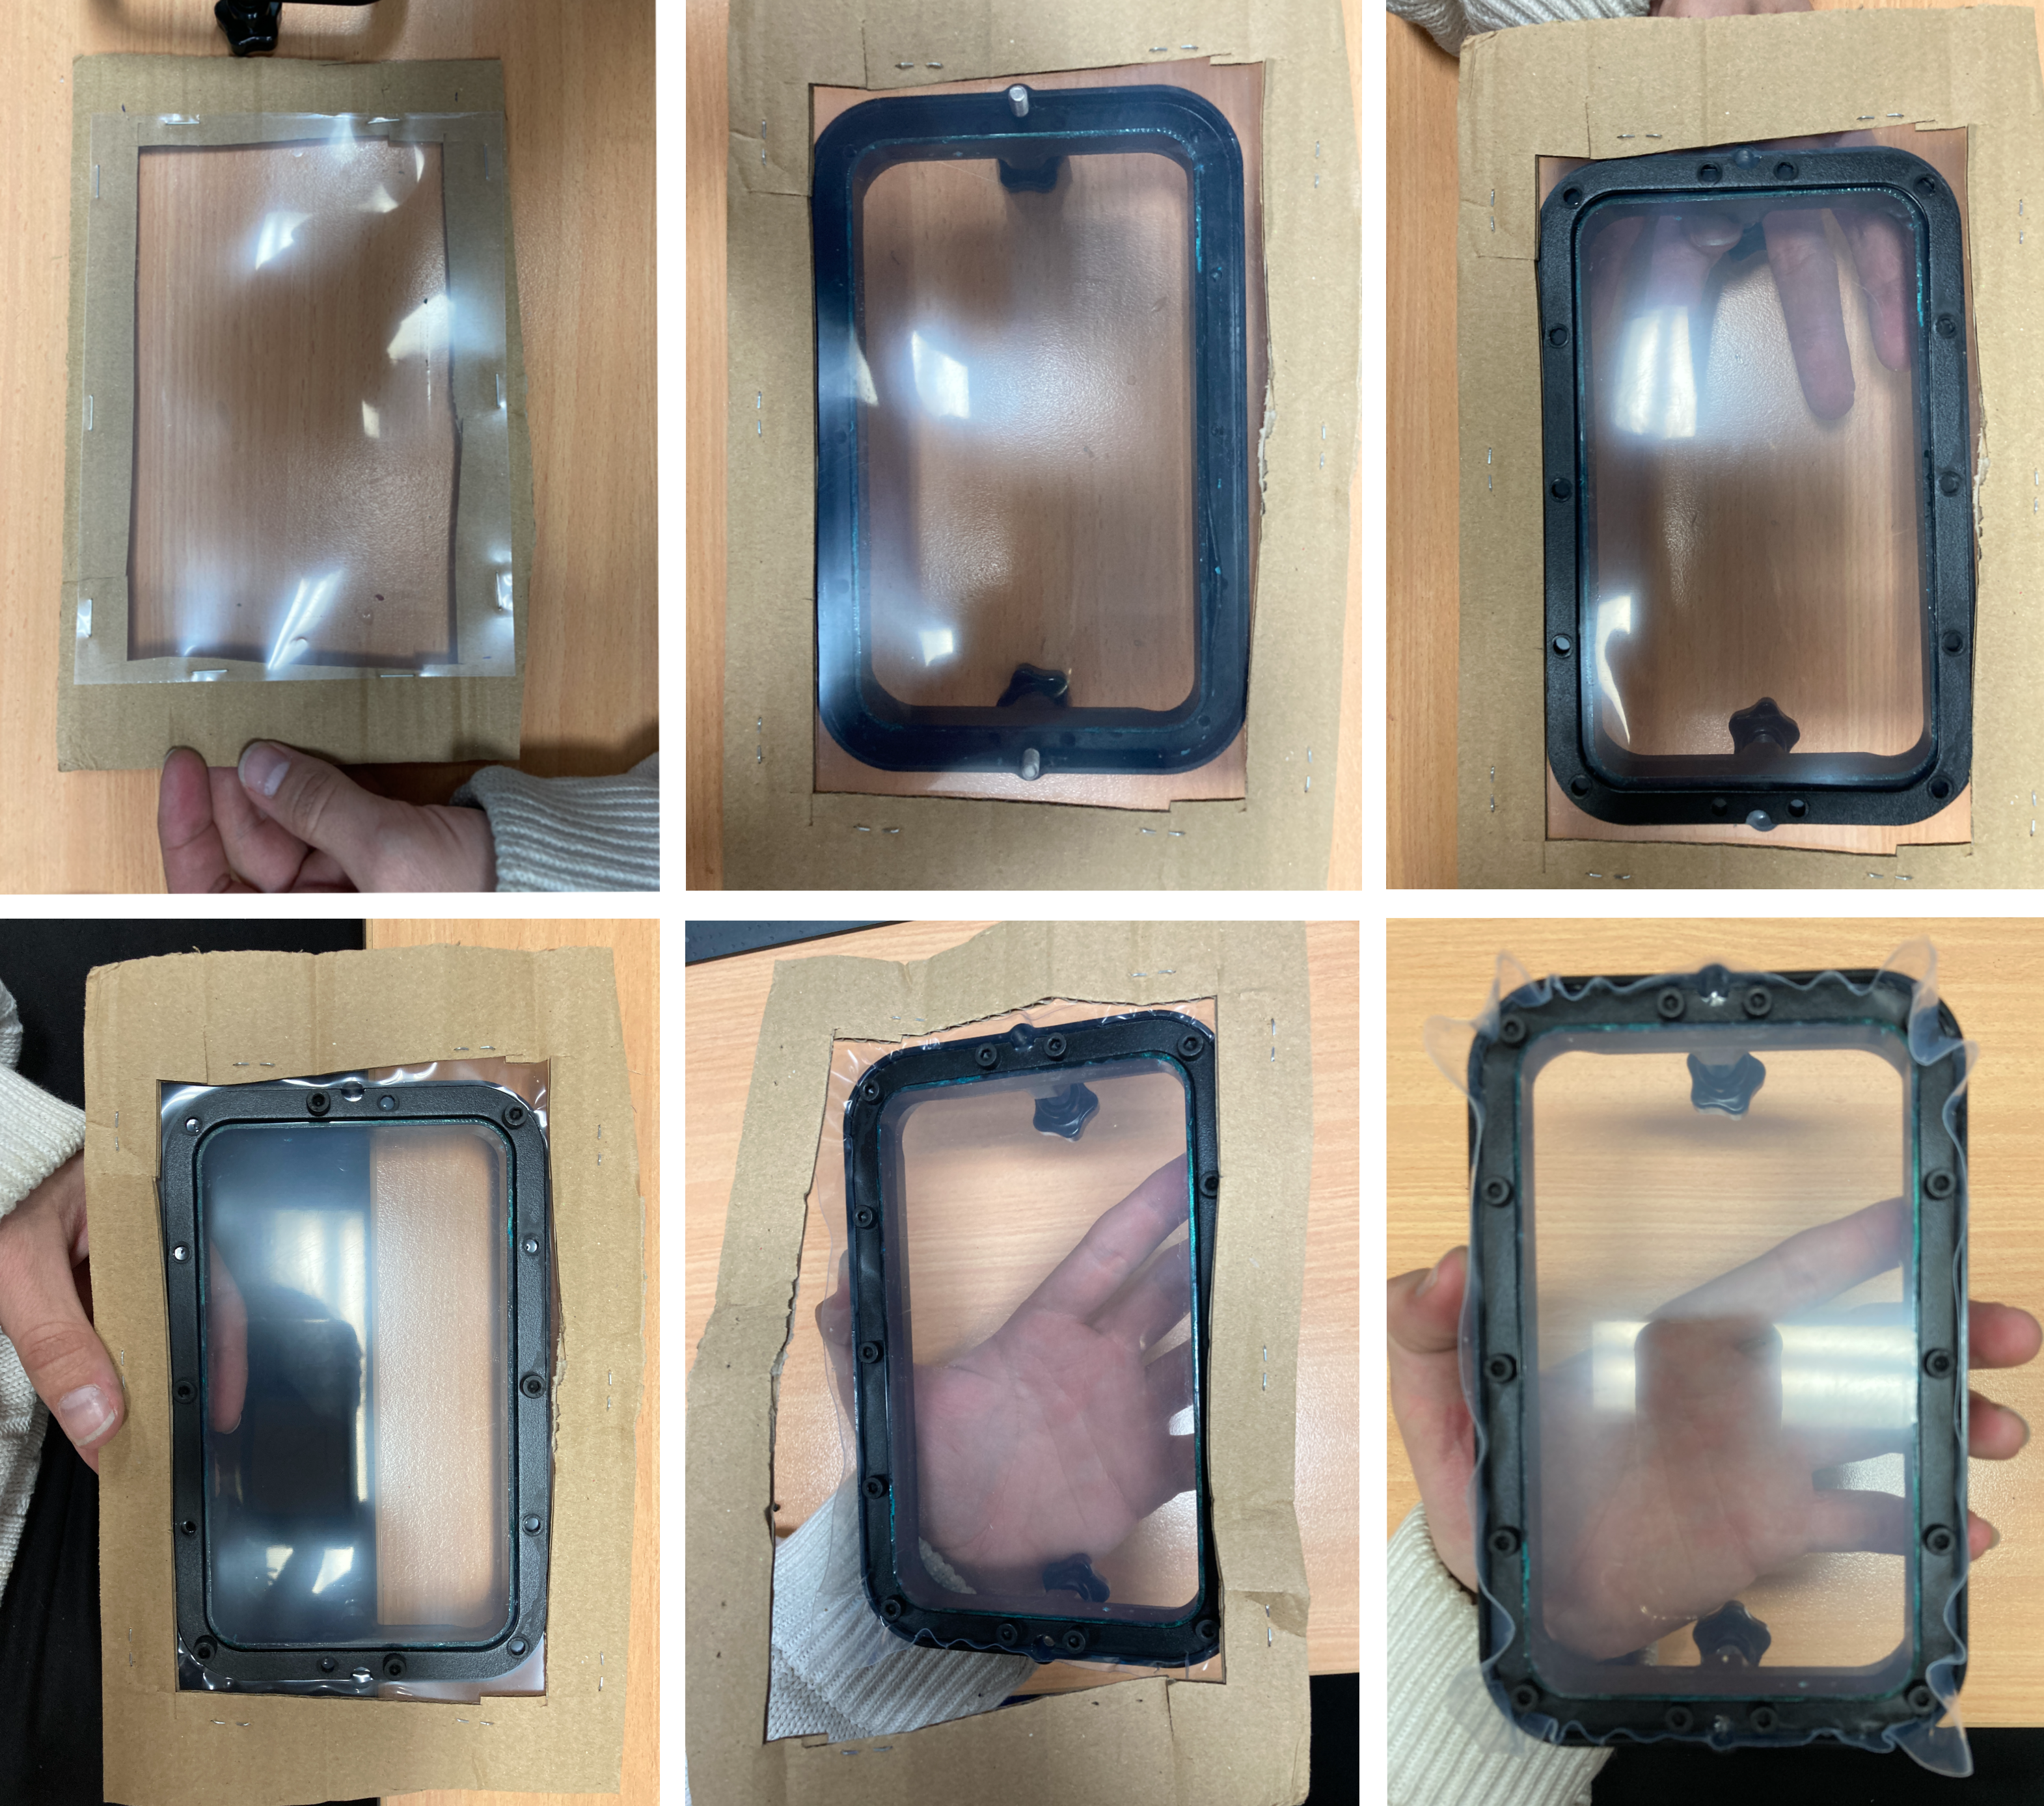
The process that I use can be seen in stages below. Start by cutting out a piece of cardboard with a hole the size of the printer's tank. Then take the FEP and staple it multiple times to secure it to the cardboard. Making sure to square the FEP to the hole in the cardboard. Then overlay the FEP and cardboard onto the tank making sure the FEP side is facing the tank. Once you are happy with how it has lined up, place the metal spacer on top and press down lightly, take out a sharp knife or razor blade and poke a little hole through the FEP at every point that there will be bolts.
Then push one bolt through the hole and lightly screw it in a third of the way. Do the same with the opposite side and repeat. Continue slowly adding bolts on opposites sides to each other and tighten them down bit by bit. The cardboard at this stage is incredibly useful at preventing the FEP from slipping and maintaining an even tautness. At a certain point, the carboard will stop being useful as the FEP gets pulled up. At this point remove the cardboard by undoing the staples. Then continue screwing all the bolts down until they are all fully tightened. You will have some excess FEP around the edges which should be carefully removed using a razor blade. Please be careful and cut away from your body.

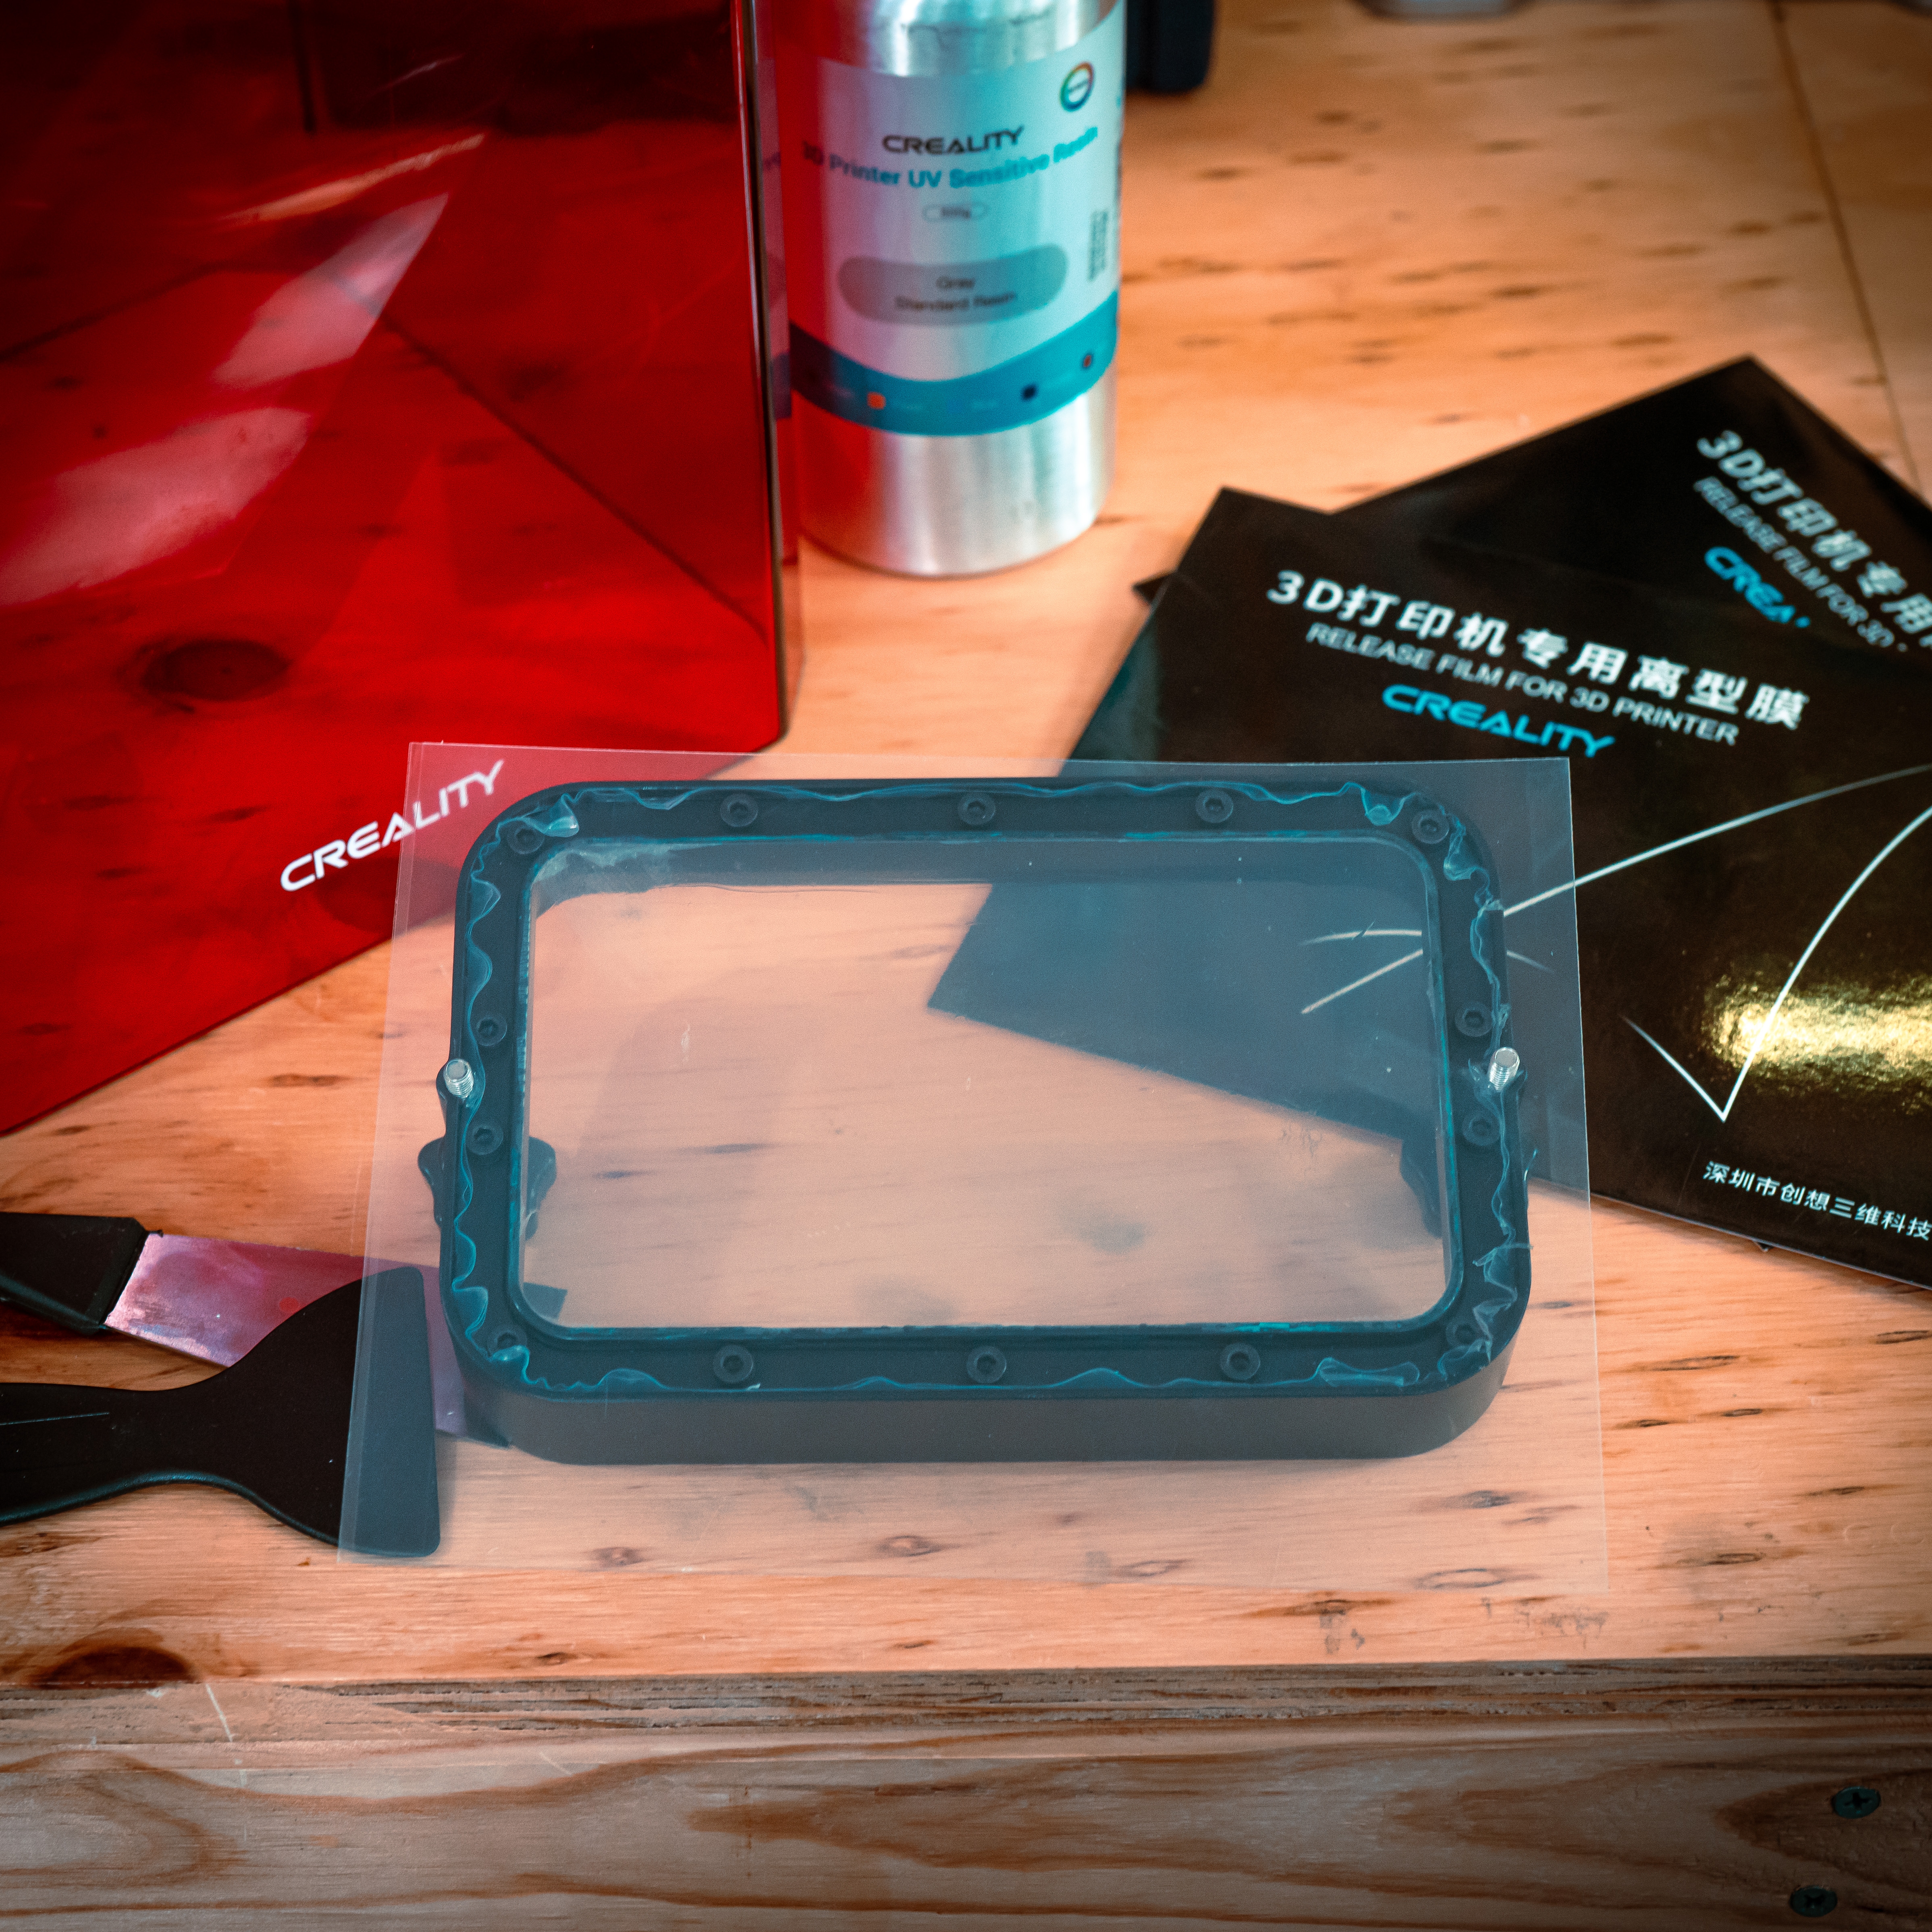
Having completed this process your FEP will look like below, absolutely store-bought. To the right in the below image is the Tank installed to the printer using the two thumbscrews on the edges. You will have to cut a small hole for these screws to go down into the printer.
For Clarification, below is a close-up of stapling the FEP to the resin tank. Make sure to staple on the very edges of the FEP. These holes left over by the staples will be cut off by the razor at the end of the installation.

Having attached the FEP successfully to the Tank it is very easy then to screw it down into the Printer. Reset and home your printer's Z-axis so it knows exactly where to go and you are back in action. Fill it with your favorite resin and print away letting it create your wildest dreams.


