Pulling the power to your Raspberry Pi can cause image corruptions & other issues that can damage your Pi! In this article, we will create a small push button that will work as a ‘Safe-Shutdown’ option. We’ll connect it to our Raspberry Pi using the GPIO pins and some jumper wires, and with a few lines of code, we will have our own power switch!
First, we are going to look at a simple way to wire a button to the Pi GPIO connector. We will then write a python script that will shut down the Pi safely. The final step will be to setup the Pi so that the button will work all the time. Let’s Get started!
What you will need:
- Raspberry Pi B+ (Any Pi will work Just make sure you check the GPIO pins)
- Tactile Switches
- Female/Male Extension Jumper Wire Packs
- Solderless Breadboards
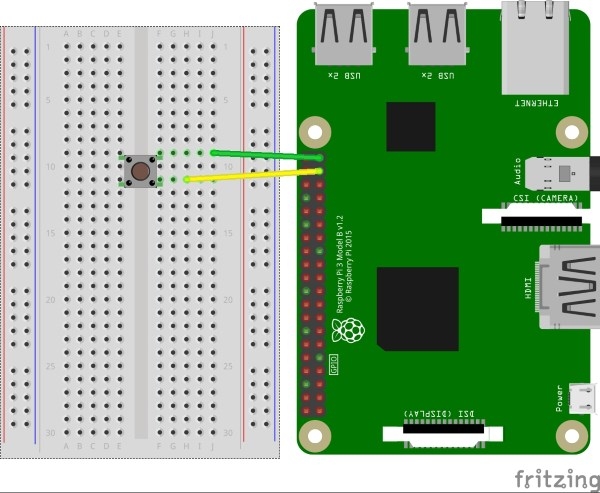
The Circuit
To do this we will wire the button to GPIO Pin 26(Yellow wire) and to ground (Green wire). This configuration is called an Active Low button, this means that when the button is pushed it will have no voltage or be logic low. The Pi has pull-up resistors on its GPIO pins so wiring active low mean we do not need to add an external resistor.
Make sure you are extremely careful with the wiring here as shorting the wrong pins together can kill your Pi. Which is why I now have a Pi-shaped coaster.
The Script
from gpiozero import Button #import button from the Pi GPIO library
import time # import time functions
import os #imports OS library for Shutdown control

stopButton = Button(26) # defines the button as an object and chooses GPIO 26

while True: #infinite loop
     if stopButton.is_pressed: #Check to see if button is pressed
        time.sleep(1) # wait for the hold time we want.
        if stopButton.is_pressed: #check if the user let go of the button
            os.system("shutdown now -h") #shut down the Pi -h is or -r will reset
    time.sleep(1) # wait to loop again so we don’t use the processor too much.
We are going to use three external libraries:
- The button module from the gpiozero library, this library gives easy access to programming the GPIO on the Pi.
- The time library, so we can wait in human time.
- The os library gives us the ability to shut down the Pi (You can also use this library to run any terminal commands!).
We first create a button object that lets us interact with the button. We will give this function the input of GPIO number we attached the button to 26 in our case. By default, this function assumes active low buttons so we do not need to change anything else.
We want this program to be running all the time so that when we press the button after a week-long retro gaming session it will still work. To do this we create while True loop that will keep running forever.
Inside the loop, we have two if statements the first will detect a button press then trigger the code to wait for a second then check and see if the button is still held down.
The last line tells the loop to wait 1 second before checking the button again, we are not in a hurry, so we can wait for presses. Make sure you include this wait without it python will run this script as fast as it can and that will put unnecessary load on the CPU.
You can now run this program and test it because we are using the os command we need to run this script as sudo as well.
sudo python /home/pi/piShutdown.py
though make sure you save all your work first!
Making It Work
So that our button will work we need to tell the Pi to run the script on start-up. To do this we modify the rc.local file, In essence, rc.local is a to-do list the Pi follows as it starts up. In order to add more items to this list, we need to edit it. rc.local is protected by the operating system so we need to open, or do, it as a Super User (sudo). I am going to use leafpad to edit rc.local because I am not hacker enough to use nano.
sudo leafpad /etc/rc.local
Into rc.local we are going to add a command to run our shutdown script we will add this on the line before exit 0 as shown.
sudo python /home/pi/piShutdown.py &
exit 0
It is very important to remember the ‘&’ at the end this tells the Pi to run this program in the background. If you do not do this it will wait for the infinite loop to finish before moving to the next item on its to-do list. Save the file and exit if you are using leafpad you can use the menus. This last step can also be done with crontab a built-in scheduler for the Pi(and all Linux distributions! ).
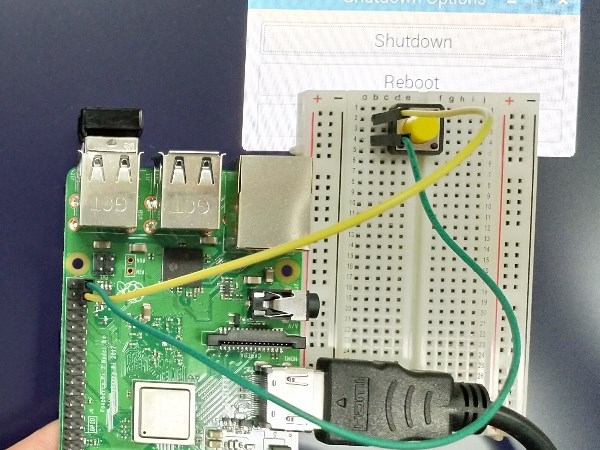
All done! Reboot your Pi and you should have a Safe Shutdown button that works! If something didn’t work quite as you expected or you want to investigate using alternate logic for your switch, get in touch with us and ask the questions. We’re here to help!

