Being productive and efficient on a computer has become synonymous with dual-screens. Being able to run two application and have both take up a whole screen or run four text documents each taking up an A4 sized half screen really improves efficiency. Then when it comes to playing being able to run a full-sized game on one side and a video/stream/twitch playing on the other (along with music controls) is epic fun. Dual-screens allows you to go for gold in both work and in play. So let's get some dual-screen action going with a Raspberry Pi 4 Model B, below is the contents of this guide.
- Required Connections and Peripherals
- Connecting All Plugs
- Dual Monitors Operational
- Custom Settings for Dual Monitors
If you happen to be holding a Raspberry Pi board and not quite sure what it is? Then check out this guide Raspberry Pi Generations to identify it.
Worth noting when you are using two monitors the Video out quality maxes out at 4K 30FPS for both the monitors. When you are using one monitor the video out quality maxes out at 4k 60FPS. This is for all versions and revisions of Raspberry Pi 4 Model B.
As always if you have any questions, queries or things to add please let us know your thoughts!
Required Connections and Peripherals
Below is a list of all the connectors and peripherals you will need to get dual monitor action up and running the easiest with your Raspberry Pi 4 Model B.
- Raspberry Pi 4 Model B or Raspberry Pi 400
- 2 x Monitors with HDMI input
- Power Plugs for Monitors
- 2 x Micro-HDMI to HDMI Cord
- USB Mouse and optional Keyboard (No keyboard needed for Raspberry Pi 400)
- USB-C Charger for power delivery to the Raspberry Pi
Connecting All Plugs
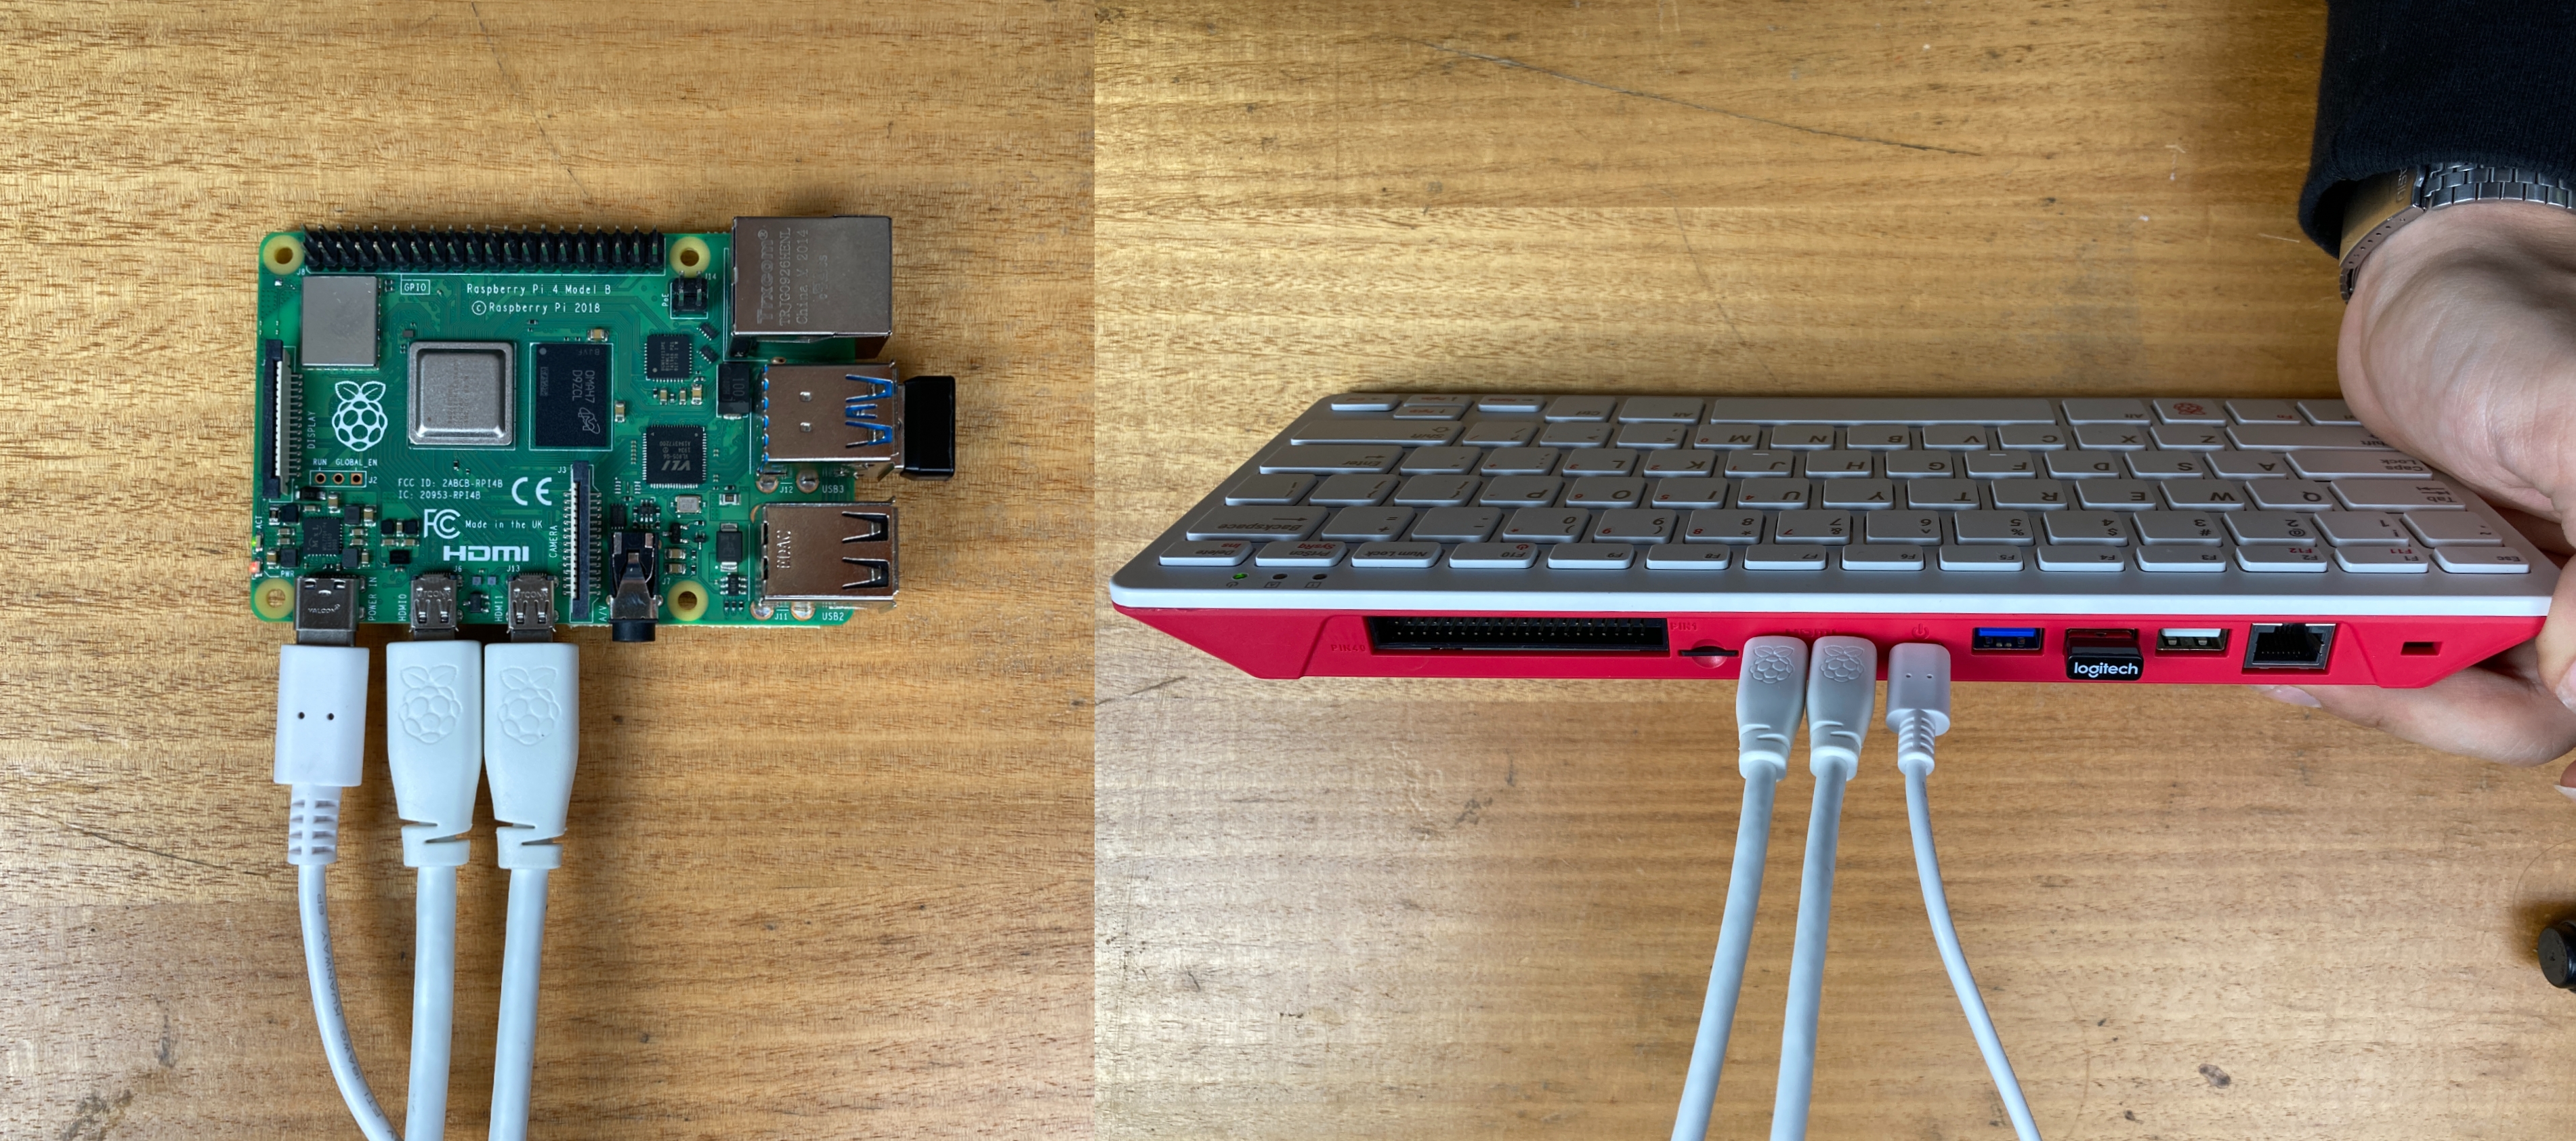
The last plug you want to put in is the USB-C as this is the power in for the Raspberry Pi Model 4, so do not connect this until you are sure everything else is sorted. Below is a schematic of what connectors will be used and where they fit for the Raspberry Pi Model B. A Micro-HDMI plugs will go to Monitor 1 and the other Micro-HDMI plug will go to Monitor 2. Also, make sure both monitors have a power supply plugged in and are receiving power. Also, make sure the HDMI cords are plugged into the back of the Monitors. Below to the left is an image of all the connections required plugged into a Raspberry Pi 4 Model B and below to the right is an image of all the connections required plugged into a Raspberry Pi 400.
Also, make sure your SD card has Noobs downloaded. A great tutorial on how to freshly download and set up Noobs to an SD card can be found here.
Now Take a second to be sure that they are all securely plugged in. With all of that out of the way when you insert the USB-C to give juice to the system the Raspbian OS will greet you. So long as you have all of these plugged in and a fresh download of Noobs on the SD card when you insert the USB-C to give juice to the system the Raspbian OS will greet you.
Dual Monitors Operational
Once the Raspberry Pi 4 Model B with Noobs installed to the SD it will power up. So long as everything is done correctly dual monitors should be a go! Below is an image of the dual-screen monitors running Raspbian OS with the terminal situated in the middle of the image. You can see the terminal takes up a portion of both screens.
Custom Settings for Dual Monitors
You have several different ways to customise a dual monitor Raspberry Pi set-up in the Raspberry Pi OS. Below is a series of images with multiple different windows in which you can alter and adjust the display being fed out of the Raspberry Pi 4.
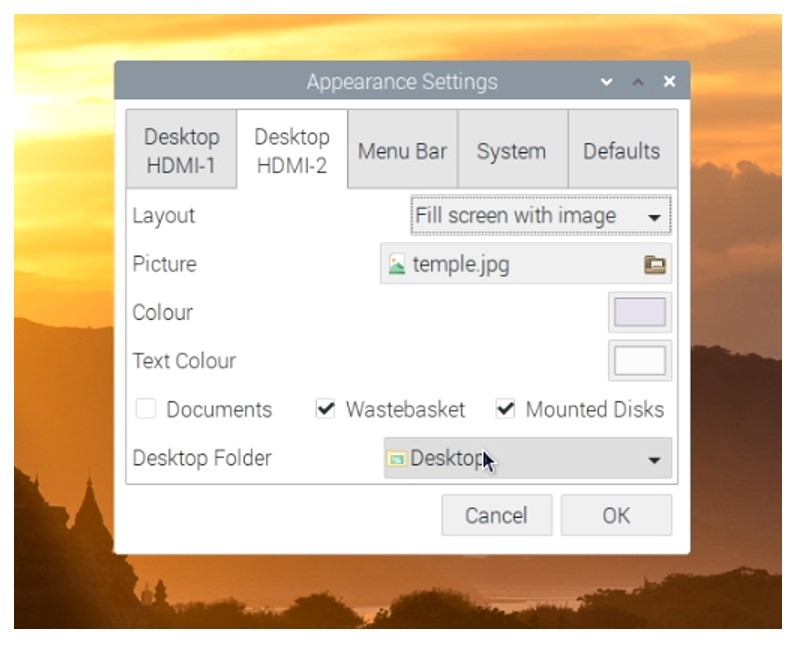
The first window worth looking at is the Appearance Settings which is seen below. This window can be found by right-clicking anywhere on the desktop and then click on Desktop Preferences in the menu toolbar that opens up right next to curser. There are two tabs that let you alter the settings for each monitor. Taskbar tab lets you decide which monitor will have the taskbar on it.
The checkboxes can be used on the bottom of the desktop tab to automatically show all the application icons within that folder of your Raspberry Pi to the specific desktop.
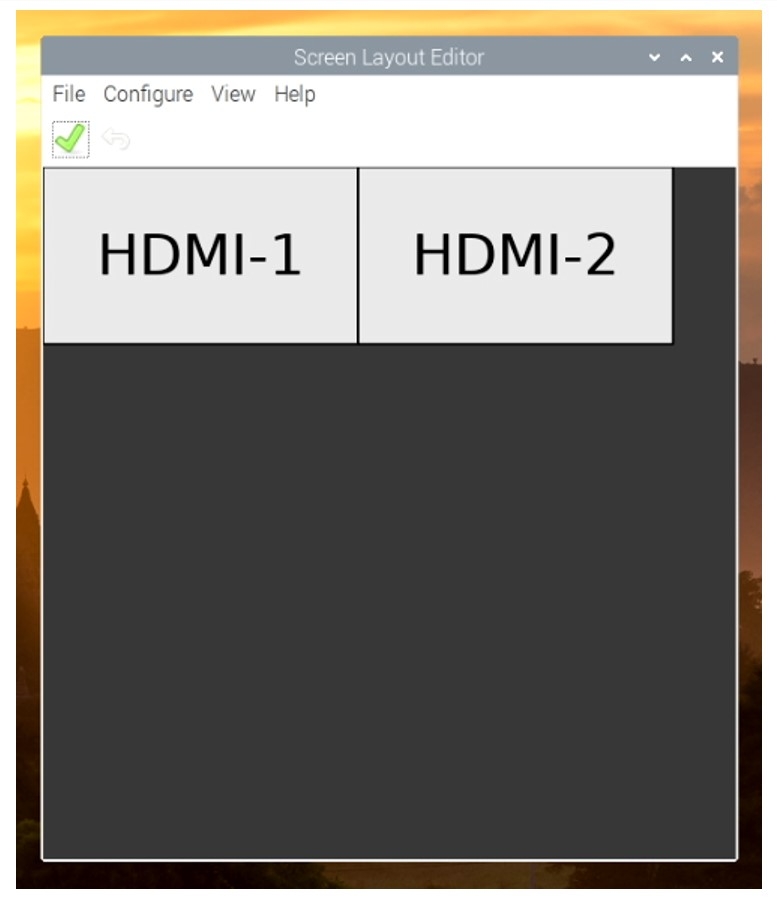
Another window that lets you customise the dual monitor set up is the Screen Layout Editor which is seen below. This program will allow you to decide how these two monitors will be positioned relative to each other and from the top or the bottom. This will enable you to line up the pixels so when you drag a window from one monitor to another it will be seamless.
This window can be found in the start menu (The raspberry symbol found in the top left corner and accessed by clicking on it). Then keeping the cursor hovering over the menu going down the Preferences, click on that then click on-screen configuration.
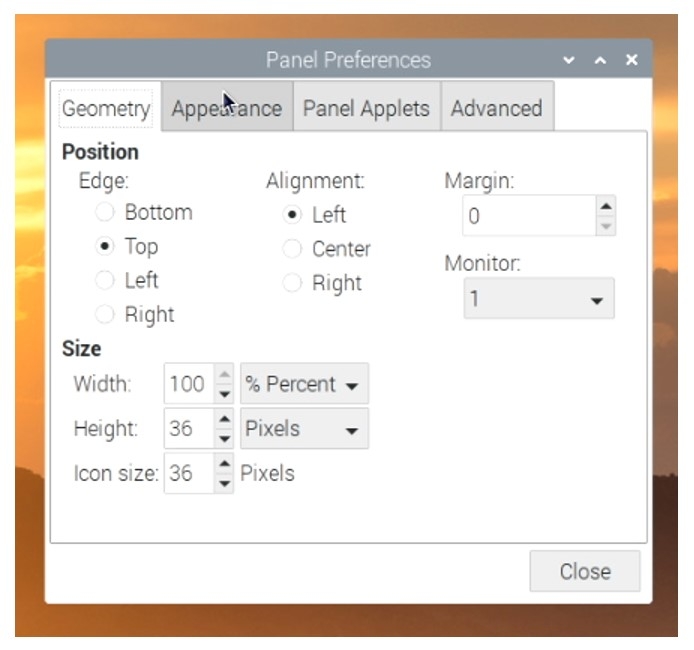
The final customisable window you can access is Panel Settings which is seen below. Now if you go to the top taskbar and right-click on it and hover your mouse inside the menu bar down to the options panel preference. Clicking on this opens up the program to the right called panel preferences.
Going to the Monitor tab and clicking on that will allow you to decide whether the top toolbar exists on only one monitor or if it stretches all the way along the length by selecting All.
And that's that!


