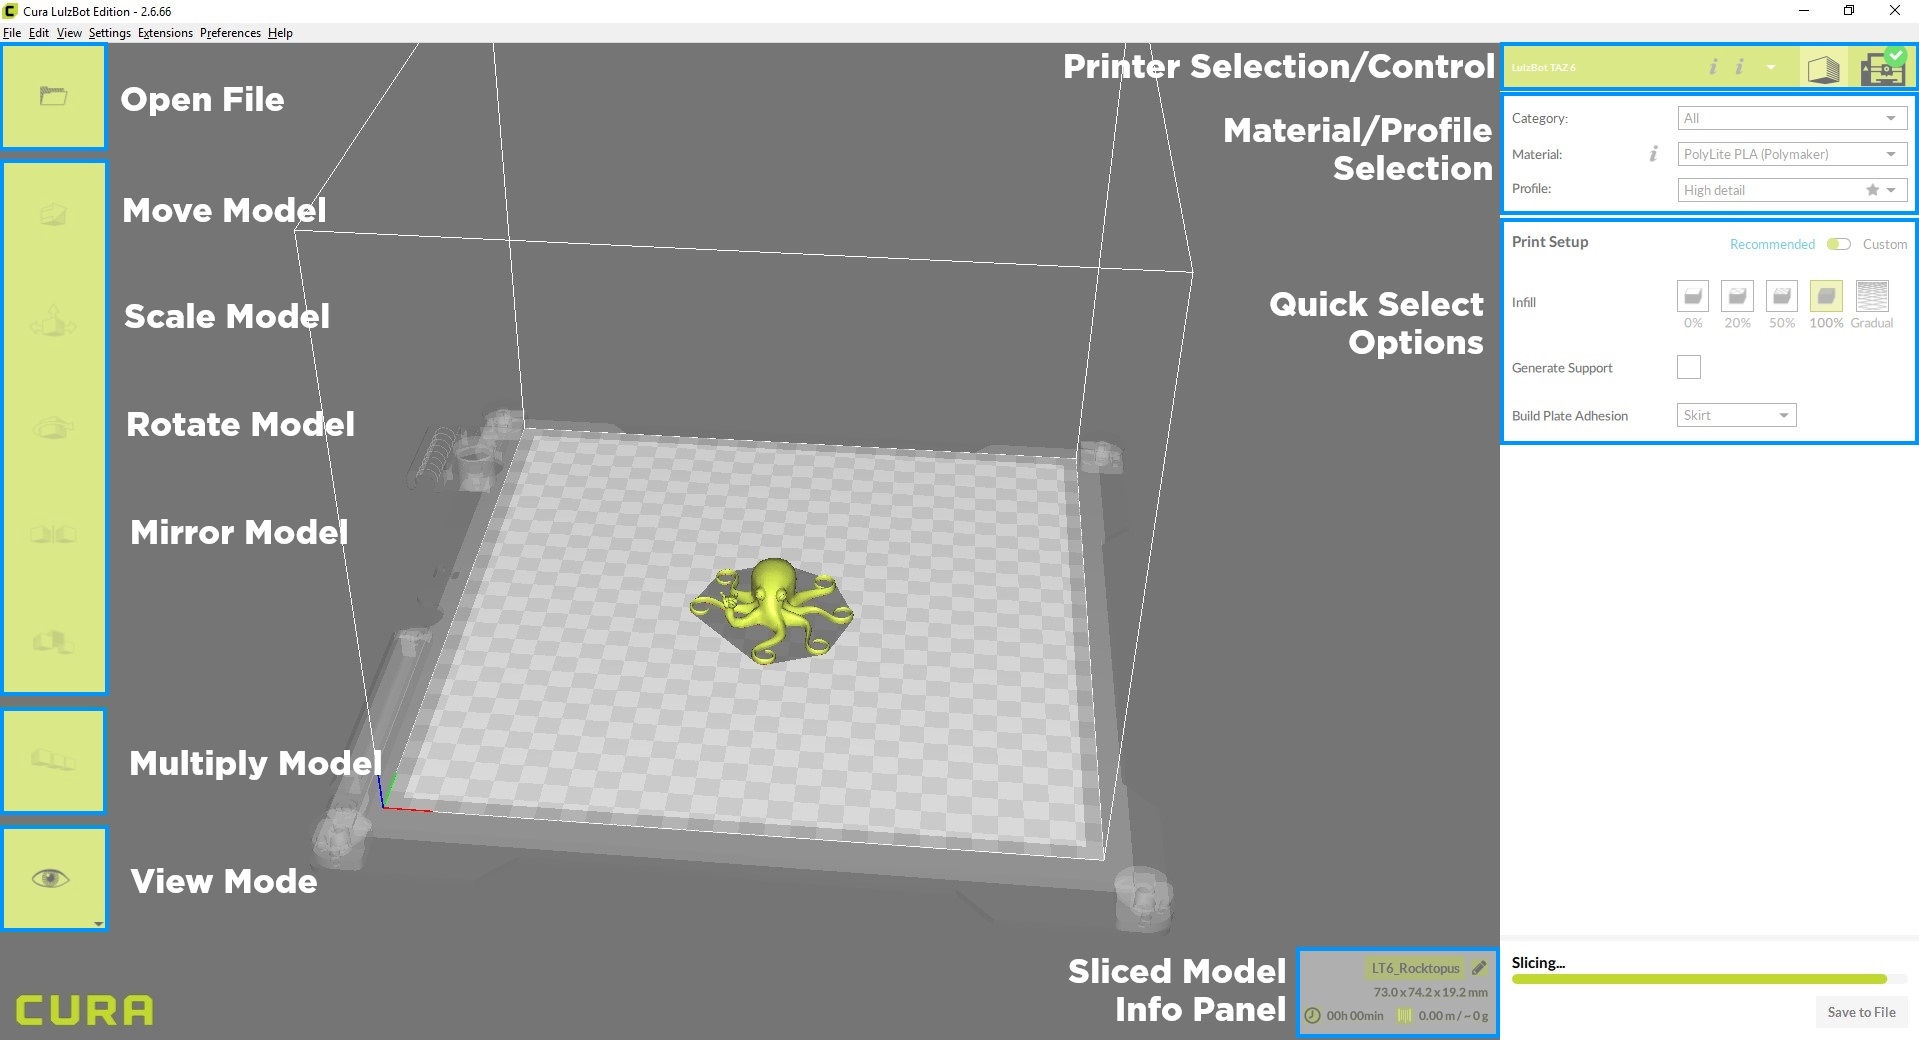
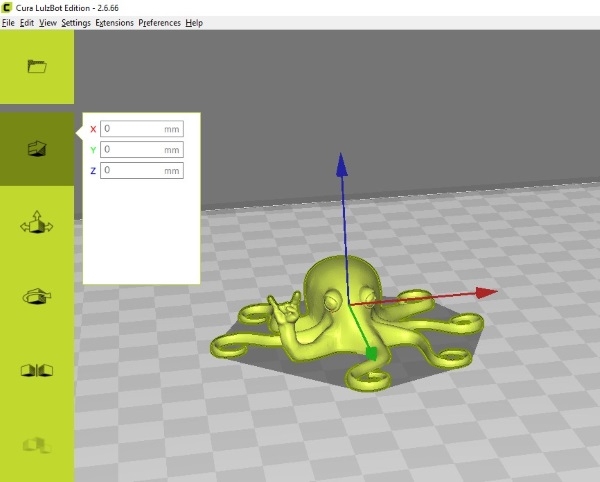
Now that we are all on track with our Slicer software, having just installed Cura 2 and upgraded our printer firmware, let's work on turning some 3D Model files into G-Code for our 3D Printer to create. We're going to be using our LulzBot Mini to slice and print our models with (mainly because it's awesome, but also because it fits nicely on the desk beside me). I've included this labeled screenshot of the User interface in Cura 2 that we will use as a reference to this tutorial, so have a quick look at it now (or you could go one better and just load up Cura 2 and follow along).
Loading your 3D Model into Cura
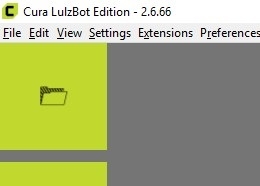
When you first load up Cura 2 LulzBot Edition, all you will see is an empty virtual print bed with most of the options in the interface greyed out. Don't worry though, we just need to load a model file onto our virtual print bed to be able to use them. Go ahead and click the "Open Model" icon on the top left of the visible workspace (it's a green folder icon on the top left of the workspace).
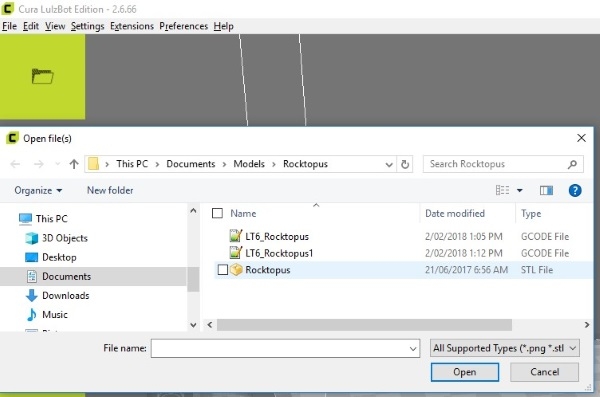
This will bring up a regular open file dialogue box, where you can navigate to where your files are saved and open them. Note that the only files you will be able to see in this dialogue box are the supported 3D Model files, so if you have downloaded your files as a .zip/.rar file you will need to extract them before you can access them here. Once you find your model, either double-click the file or select it and click open.
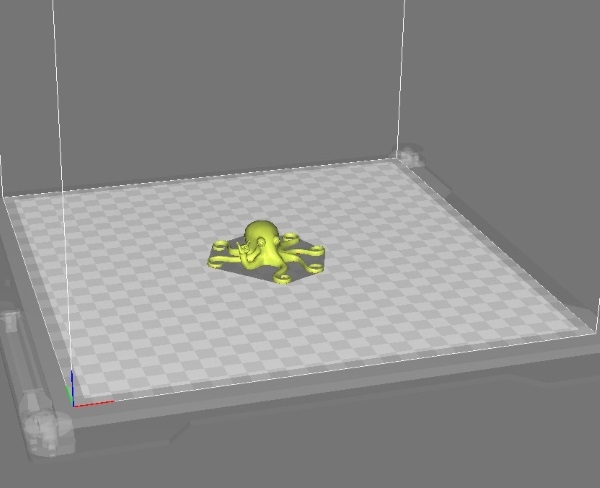
The Cura engine will now import your 3D Model file into your workspace, dead centre on the virtual print bed.
Move Model Mode
To gain access to all of the model manipulation options we can see on the left-hand side of the workspace, we need to have a model selected. To do so, simply left click the model (noticed the outlined model file when selected). By default, we have the Move Model mode pop open. You can see the X (left to right), Y (front to back) and Z (up and down) coordinates that the model is currently located at. By default, these should be 0,0,0 (which just means it is at the origin of that workspace).
If we want to move our model around the print bed, we can simply left click and drag the model around and release it where we want it to stay and be sliced. Note that if you try to put any part of your 3D model outside of the printable area it will simply not slice and show the following error.

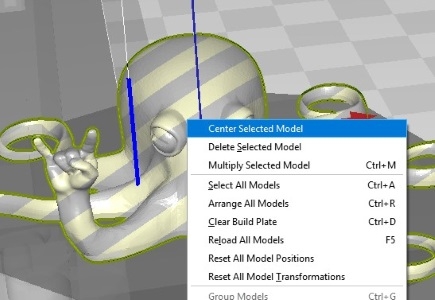
If you get carried away with moving the model and would like it to go back to the origin, you can simply right-click it and select the option "Center Selected Model".
Swapping to Scale Model Mode
To swap between the model manipulation modes, for example, from the move to scale modes, we can simply select the one we want from the left-hand menu and it will activate that 'mode'. If we select the Scale mode, you can't move the model anymore, and vice versa, so try to be aware of what mode you are in.
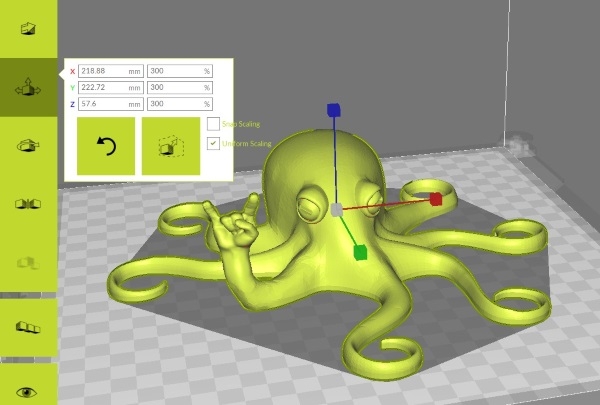
In the Scale mode, the left click and drag of the mouse that previously moved the model will now scale our model as we drag the mouse! This usually isn't the best way to scale model files, as usually, you want a rather specific scaling factor. To scale precisely, you can enter values into the different Axis scale boxes and scale your model according to size, percentage, or simply make the model file as big as it can possibly be on your print bed (using the 'Max' option). Note that changing one dimension will scale the others to match unless you deselect 'Uniform Scaling' in this pop-up window. Interestingly, the Max Scale option only maximises according to your current model orientation. That means that you can possibly rotate/move your model to get it a little bigger than you would expect. Speaking of rotation, let's move to that menu and take a look at how it works.
Rotate Model Mode
In this mode, left click and drag the model in any direction will do 1 of 3 things, depending on which of the 3 axes are selected on your model. Essentially, you can rotate the 3D model around its centre in any of the 3 axes (X, Y, Z). This is handy if you need to change the orientation of a model so that it prints with strength in a certain direction or to minimize support material. By default, the rotation will take place in increments of 15 degrees on each axis, however, if you hold the shift button it will change to increments of 1 degree. As always, there is a reset option so if you get carried away you can revert back to the original settings. If you just want to flip your model in a particular direction, without click-dragging it 180 degrees on an axis, you can simply use the Mirror mode.

Mirror Model Mode
In this mode, it's quite simple compared to the rest, you simply select the axis in which you want to mirror your model. In the above image, the Rocktopus is just mirrored in the X-axis which causes the arm of the Rocktopus to be on the other side. This works the same for the Y and Z axis mirrors too!

Multiply Model Function
Sometimes, you may want to print multiples of the same object. Of course, you can use the Open Model option repeatedly to achieve this, or alternatively select the 'Multiply Object' icon, whilst having the model you want to multiply selected. This will prompt you for a number of copies dialogue box (this value represents how many models you wish to generate which does not include the one selected). If you opt to have too many models that can fit on your print bed (in the model's current orientation), Cura 2 will still generate all of the models you ask for, however, it will place additional models outside the print area (see image below)

All of these options are simply used to manipulate a 3D Model (STL file) around the virtual print bed so that you can print it exactly how you'd like to. Once you're happy with the Size, Orientation and Quantity of your model file, you will need to select the material and quality profile you want the model to be printed with.
Filament & Print Profile Selection
First, we select the filament type, then the profile that belongs to that filament type.
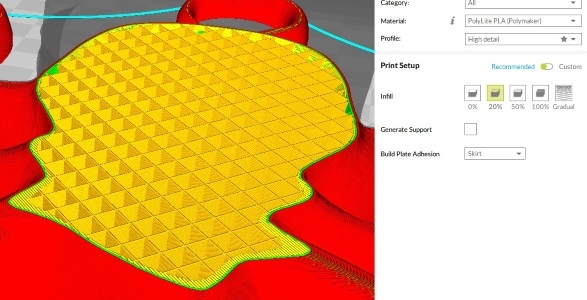
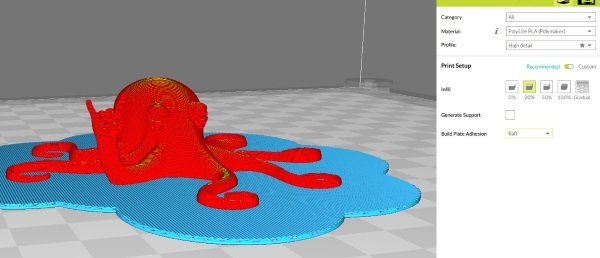
In order to select your material, you will need to know what kind of filament you will be printing with. This is usually labelled on the Filament spool, alongside some other information. Luckily for LulzBot 3D Printer users, the technical team over at LulzBot have already evaluated the optimal settings for a wide-range of filaments that are available. Simply select the "All" option from the Category drop-down menu in the Material/Profile Selection window to enable all preset filament options to be displayed. To access the wide range of filament types, you can simply click the Filament option and a drop-down menu with all available, preset filament options will appear. If your filament is not present in this menu, get in touch with us and we can help you pick the right profile for your filament. I'll be using PolyLite PLA, which is a really high-quality, affordable PLA option from PolyMaker.

Once you know what filament type you will be printing with, and have selected it in the above menu you can pick the preset Speed/Quality profile for your filament. They are named exactly as they perform, so if you are going for the absolute best quality print you can get, select High Quality. If you are prototyping a model you've created, it's probably more appropriate to use the High-Speed profile. These essentially manipulate the thickness of the layers that your model will be printed with (among other things). In short, the thicker the layer, the fewer layers will be required to print a model and so it will print faster. Additionally, the faster a model file is printed, the less quality it will have in its details.
Print Setup Options
Once you've oriented your model as best you can, selected your filament type and chosen the appropriate quality profile, you're very nearly ready to print your model. There are just a few more options you need to consider. Below the Filament/Profile Selection box on the right of the workspace, you can see the print setup box and its various options. Let's look at the main ones that are available to us.
Infill Percentage:
When slicing the model file, the slicer software will opt to fill the 'holes' in each layer with a percentage of a solid layer. These parts of the model are not visible to you, they are the parts hidden away. For example, if you print a cube, you could have it be almost hollow and still look just like a cube or completely solid. Obviously, model strength is the determining factor for this choice. If you don't know what you should print with, leave it at 20% (the default selection) and see how your model performs.
Support materials:
3D Printing works by building a model file up from a base layer, this means if parts of the model hang out away from previously printed layers, the printer will fail to print them. A quick analysis of your print from a low angle in Cura 2 will let you know if you need to print it with supports (the red areas represent parts that might need supports), however, if you aren't sure just send us a screenshot and we can help you out. To enable support for a particular model file, simply tick the box and wait for the model to reslice.

Build Plate Adhesion:
Finally, we have build plate adhesion options. By default, LulzBot 3D Printers come with a Heated Glass Bed covered in PEI which helps filament adhere to the bed. However, some plastics are tough to print with so you can enable some additional options to help you out. We'll take a quick look at the three options here:
Skirt
This is an outline of the model's first layer, separated by a set distance that helps to prime the extruder with plastic before printing the first layer. This is enabled by default and for most beginner filaments, it's all you need.

Brim
Brims are additional outlines that spread from the outside shell of your model on the first layer. This help increases the surface area of your models first layer and such, how well it can adhere to the bed.

Rafts
Rafts are additional layers printed underneath your print that peel away at the end of the print. These can help with tricky filaments that peel up and away from the bed over time.
Select the skirt option for now if you're printing the Rocktopus 3D Model file, as it doesn't require Brims/Rafts to print.
A quick check and you're ready to print!
That's all the configuration we need to do to set up a basic 3D Model in Cura 2! In the bottom right of the workspace, you will see a small details panel with some information on your Model's G-code file as it currently stands. You can see the Name, Bounding Box volume, Time Estimation to print and filament length/weight required.

Now all you need to do is save your G-code file and send it through to your printer to print!
That's our Beginner's Guide to using Cura 2.6+ LulzBot Edition! You've now got all the tools required to slice models to print on your LulzBot 3D printer. If anything we discussed in this video needs further explanation, please get in touch by leaving a comment here or on our Forum and we will do our best to help you out. In the next tutorial on Cura 2.6: LulzBot Edition we will dive a bit deeper into the options and settings in Cura 2 that really set it apart from the old version of Cura.

