We've built a mass SD card writer using a Raspberry Pi 3 Model B, some USB hubs and SD card readers. This beast has enough ports to write 49 SD cards at once!
At Core Electronics, sometimes logistics hang-ups mean that suppliers cannot meet our demand for pre-flashed SD cards. During these periods we have to pick up the slack by manually imaging blank SD cards we source ourselves. Of course, this is a super-tedious process, and commercially available solutions are incredibly expensive for the number of cards they can process simultaneously.
This project is maintaned on our Github - you can find the project files there.

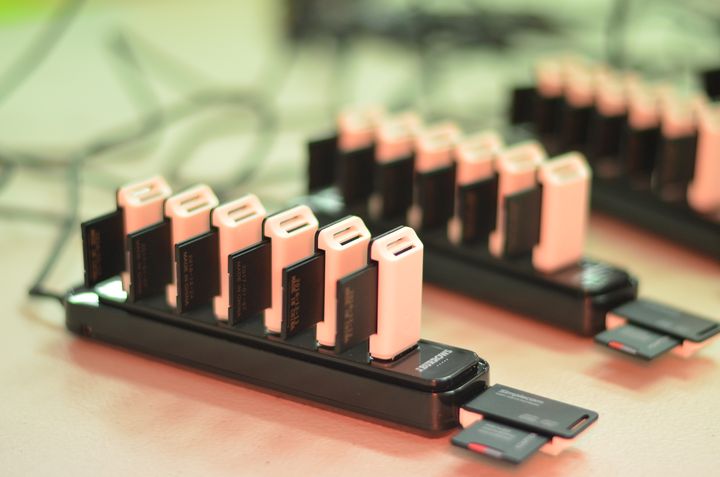
The mothership: a Raspberry Pi plugged into a 14 port, powered USB hub. This hub is the backbone for a further 7, 7-port hubs.
During testing we discovered some problems: sometimes cards would not be detected, or the image writing process would be interrupted.
We broke out the USB charger doctor and measured the current draw that a single 7-port hub loaded with SD cards represents: 800mA!
That means we'd need a power supply capable of more than 5 Amps to handle 49 cards. Our current 3 Amp supply sets our practical maximum closer to about 25 cards. That's ok - we can just deploy a second Raspberry Pi image writer and operate two in parallel!

Summary - How did we build it?
- Create a fresh installation of ARCH Linux
- Expand the filesystem.
- Install git, i2c-tools, samba, pv and python2
- clone the git repository and check that the i2c bus selection is correct
- setup the Samba shared directory, so the image files can be maintained over your network.
- Set the Pi's hostname to something sensible. We've stuck with `sd-writer#` convention so we can deploy several if we want to.
- Set the image writer script to run at startup.
Detailed Build Instructions
On a fresh install of ARCH Linux, login as root. If you logged in as alarm, execute su root to switch users. Password is `root`
Download and install packages:
pacman -Syu python2 i2c-tools samba pv git
If an error occurs, remove the offending file eg: I had to `rm /etc/ssl/certs/ca-certificates.crt` and reattempt installing the packages.
Enable i2c: (source)
Use nano, append /boot/config.txt with dtparam=i2c_arm=on
Configure the i2c-dev and i2c-bcm2708 modules to be loaded at boot:
Append /etc/modules-load.d/raspberrypi.conf with:
i2c-dev
i2c-bcm2708
Clone the repo
git clone https://github.com/michaelruppe/rpi-mass-image-writer.git
I2C configuration
In Adafruit_I2C.py, I've uncommented line 35 and comment line 36 to hard-code the i2c bus to use i2c bus #1 (raspberry pi 3 B)
ie: self.bus = smbus.SMBus(1); Selects to use bus \#1
Run the app to make sure all is well:
cd rpi-mass-image-writer
python2 writer.py
The LCD should turn on.
Setting up samba
The network shared directory to store images.
There is already a default conf file, so executing the following command creates a new conf file – ie don’t be concerned if you are writing a completely new file.
nano /etc/samba/smb.conf
Add/Modify the following blocks to your smb.conf file
[global]
workgroup = WORKGROUP
server string = SD Writer
security = user
log file = /var/log/samba/%m.log
max log size = 50
dns proxy = no
[images]
path = /root/rpi-mass-image-writer/images
writable = yes
Create a user for samba
smbpasswd -a root
systemctl enable smbd
Change the hostname
hostnamectl set-hostname newHostName
Starting at boot
cp /root/rpi-mass-image-writer/writer.service /etc/systemd/system/
systemctl enable writer.service
reboot
Expanding the filesystem
From the command line or a terminal window enter the following
sudo fdisk /dev/mmcblk0
then type p to list the partition table
you should see two/three partitions. if you look in the last column labeled System you should have
- W95 FAT32
- Linux
- Linux Swap (You may or may not have this, that’s ok)
Make a note of the start number for Linux partiton (in this case, partition 2), you will need this later. Though it will likely still be on the screen (just in case).
next type d to delete a partition.
You will then be prompted for the number of the partition you want to delete. In the case above you want to delete both the Linux and Linux swap (if it exists) partitions.
So I typed 2
then type d again and then type 3 to delete the swap partition.
Now we will resize the main partition
type n to create a new partition.
This new partition needs to be a primary partition so type p.
Next enter 2 when prompted for a partition number.
You will now be prompted for the first sector for the new partition. Enter the start number from the earlier step (the Linux partition)
Next you will be prompted for the last sector you can just hit enter to accept the default which will utilize the remaining disk space.
If a warning appears about removing the signature, select Yes.
Type w to save the changes you have made.
reboot the system.
Once the system has rebooted and you are back at the commandline enter the following command:
sudo resize2fs /dev/mmcblk0p2
Note: this can take a long time (depending on the card size and speed) be patient and let it finish so you do not mess up the file system and have to start from scratch.
Once complete reboot the system again.
You can now verify that the system is using the full capacity of the SD Card by entering the following command: df -h

