So, my wife wanted to have some small plants in the house. I didn’t, so we compromised, and got some plants. The only thing is that neither of us remembers to water them, so I wanted to build a sensor array to monitor the moisture content of the soil, and notify us when they needed watering.
We’ve got 3 plants, all fairly close to each other, and I wanted to create an IoT project so that it could send an email notification, as well as a visual ID when each individual plant required some TLC. Having worked with Particle.io before, I knew that a Particle Photon would be the best way to set it up.
Components Used
- Power Boost 500
- 2400mAh LiPo battery
- 3x Soil moisture sensors
- Particle Photon
- Proto-board
- 2x 12-pin female headers
- LEDs
- Resistors
Other Tools/Materials Required
- Soldering iron
- Solid core or stranded wire
- Standoffs (I use this kit for lots of stuff)
Wire Boards and Test
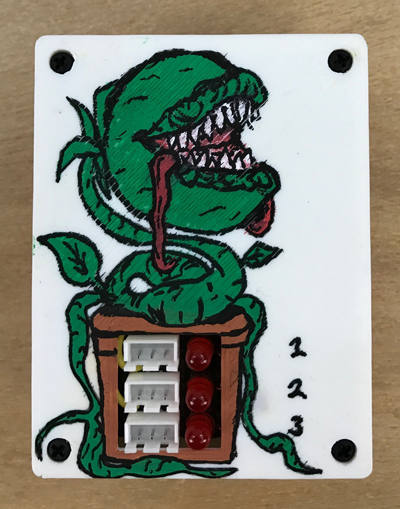
This first step was to wire up all of the components and build the board. I wanted it to be a nice, self-contained project in an enclosure, so I built a board with 3 JST female sockets, and an LED for each, spaced so they can sit flush with cut-outs of the enclosure. This means that the whole thing can be sealed up, and sensors can be connected at any time. The rest of the circuit is pretty straight forward, with an Adafruit Power Boost handling the LiPo to deliver 5V to the Particle Photon, and some off-board wiring to connect the LEDs and JST connectors. Take a look at the wiring diagram below:

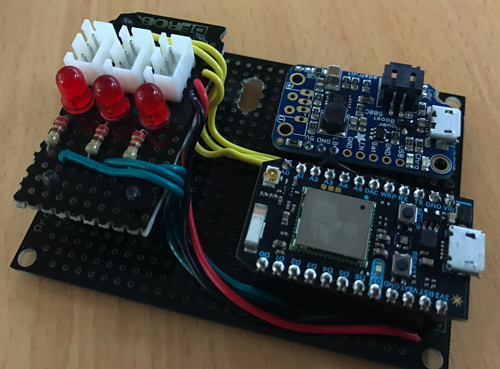
This is the board that I wired everything up to. You can see the standoffs I’ve used to elevate the JST/LED board, and some simple wiring connects the Power Boost, and everything else up.
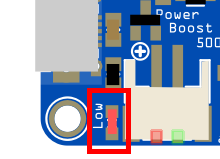
I also desoldered the LOW battery LED which lights up when the battery is almost empty. I wanted the project to be as simple as possible, and whilst the Particle shuts down when the battery is low, the LED is a constant drain. Adding a hardware off switch could h also solve the problem, but it's one extra thing to have to think about when using it. I also removed the regular power LED on the Power Boost to further lower the battery consumption. Again, simpler is better.

Design and Print Enclosure
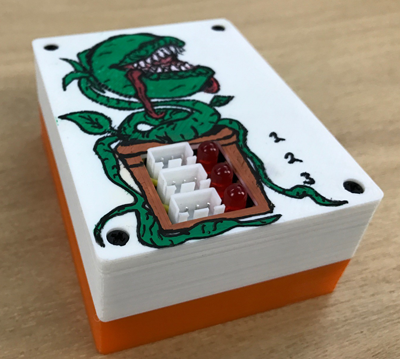
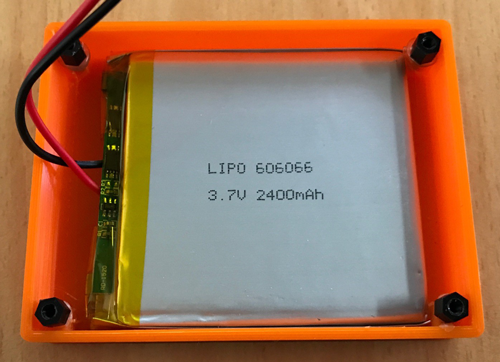
Now with the board finished, it was time to design the enclosure. It only needed to be a simple design, with holes to mount the board and cut-outs for the JST connectors and LEDs. I printed it in two parts so that I could test the fit of the bottom, and then print the top separately. There’s room for a LiPo to fit snuggly underneath, but I didn’t include a cutout for the micro USB on the power boost to make things simpler.
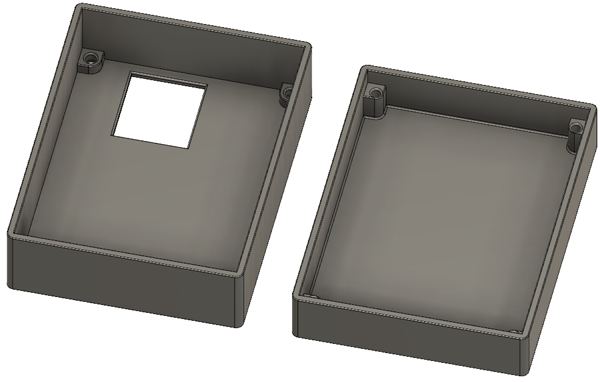
I planned on adjusting the code to make it super power efficient, so ideally, it won’t need to be recharged very often. The STL files are included in the project download if you want to print them, and the holes are designed to match the hole spacing on the proto-board I linked to above.

Make JST Cables
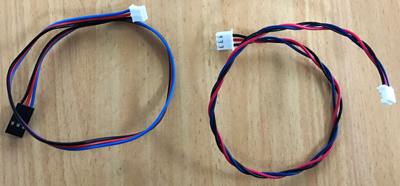
The Soil Moisture sensors by default use a JST-female header cable which is great, however, header pins are easier to accidental damage if they are bent, and also don't lock in at all. Whilst it's only an indoors project, connectors that have a tighter fit are a much better option. I just modified the connectors of the cables to match the 2.54mm JST sockets on the board. Also, if need be, it's easy to extend them.
Particle Code
This is where the magic happens. You can copy this code into your own program without needing any additional libraries. It’s a pretty simple program, all it does is run each of the sensor reading functions, which are exposed as cloud functions to allow for IFTTT integration. This compares each sensor value against a pre-defined value to determine if the soil is too dry. If it is, then it turns on that LED, and waits for a few seconds, before going to sleep for a given amount of time (this can be tailored to change the frequency vs. battery life).
Before it does this though, it checks the state of the LBO pin (from the power boost). If it is low, it indicates that the battery is flat, which puts the Photon in the deepest sleep possible, only to be woken up once the battery is charged again.
#define SOIL_THRESHOLD 512
#define SLEEP_TIMER 60
#define LED_ONTIME 5000

//GLOBAL VARIABLES//
int sensor1 = A0;
int sensor2 = A1;
int sensor3 = A2;

int led1 = 0;
int led2 = 1;
int led3 = 2;

int LBO = A4;

int dummyPin = D6;

int delayFlag;

void setup() {
    pinMode(sensor1, INPUT);
    pinMode(sensor2, INPUT);
    pinMode(sensor3, INPUT);

    pinMode(led1, OUTPUT);
    pinMode(led2, OUTPUT);
    pinMode(led3, OUTPUT);

    pinMode(LBO, INPUT_PULLUP);

    //SETUP CLOUD FUNCTIONS//
    Particle.function("reading1", readSensor1);
    Particle.function("readgin2", readSensor2);
    Particle.function("reading3", readSensor3);
    Particle.function("lowBattery", lboTrigger);
}

void loop()
{
    //IF BATTERY IS LOW, GO TO SLEEP AND ALERT THE CLOUD//
    if(digitalRead(LBO) == 0)
    {
        lboTrigger("dummy");
        System.sleep(LBO, RISING);
    }

    //RUN EACH FUNCTION, AND TURN THE LED ON//
    if(readSensor1("dummy"))
    {
        digitalWrite(led1, HIGH);
        delayFlag = 1;
    }
    if(readSensor2("dummy"))
    {
        digitalWrite(led2, HIGH);
        delayFlag = 1;
    }
    if(readSensor3("dummy"))
    {
        digitalWrite(led3, HIGH);
        delayFlag = 1;
    }

    //DELAY SO THAT LEDS CAN BE SEEN//
    if(delayFlag)
    {
        delay(LED_ONTIME);
        delayFlag = 0;
    }

    //TURN OFF THE LEDS AND GO TO SLEEP//
    digitalWrite(led1, LOW);
    digitalWrite(led2, LOW);
    digitalWrite(led3, LOW);

    System.sleep(dummyPin, RISING, SLEEP_TIMER);
}

//LOW BATTERY TRIGGER FUNCTION//
int lboTrigger(String null)
{
    return 1;
}

//SENSOR CHECK FUNCTIONS//
int readSensor1(String null)
{
    int rawVal = analogRead(sensor1);
    if(rawVal <= SOIL_THRESHOLD)
    {
        return 1;
    }
    else
    {
        return 0;
    }
}

int readSensor2(String null)
{
    int rawVal = analogRead(sensor2);
    if(rawVal <= SOIL_THRESHOLD)
    {
        return 1;
    }
    else
    {
        return 0;
    }
}

int readSensor3(String null)
{
    int rawVal = analogRead(sensor3);
    if(rawVal <= SOIL_THRESHOLD)
    {
        return 1;
    }
    else
    {
        return 0;
    }
}
Configuring IFTTT Email Notification
This is how email notifications are enabled. The cloud functions are exposed so that platforms like IFTTT can integrate with them. It’s the exact same process as the Put the Internet to Work with IFTTT & Particle tutorial, so take a look at that for the specifics of using IFTTT. However, it just checks the returned value of a cloud function, and depending on the outcome, send an email to a chosen email address. In this case, it tells us that the plants are dying, and they desperately need our help (a little exaggeration, but still…).
I also set up a second IFTTT recipe to monitor a special function which triggers if the battery runs out. This just sends an email notification saying that the battery needs to be charged, which can be done with a micro USB cable, thanks to the Adafruit Power Boost.
Boxing it Up
A quick test run and everything was good to go, it’s a power efficient soil moisture monitor sensing that can monitor the state of any plant, and let you know when it needs watering. Some last minute touches from my wife who is a wiz with paint pens (3D prints are hard to paint because the paint bleeds into the layer gaps):