The motivation behind this project came from a robotics and engineering club that I've been going to. I've been saving my money and building up an understanding of raspberry pi and electronics. The reason I chose this project was to get used to using motors and controlling different speeds. I am self taught as I am home schooled and my mum and dad (who are my teachers) don't understand how to use the raspberry pi!
The project is a movable/programmable buggy that can move forwards, backwards, left and right.
The fun part of this project was adding a camera to it and filming the movements that it was making and crashing it into things! I also loved experimenting with different motor drivers and components. I chose the explorer hat because it was easy to use and program.
- Raspberry Pi
- The Explorer Hat Pro
- 2 x Motors (Make sure that they don’t take more than 220ma from the pi)
- 2 x Wheels that fit the motors
- Caster Wheel
- Premade Chassis / Ply Wood (to make one, or have one laser cut)
- Power Bank with an output of 2,000ma (or some way of powering the pi, Explorer Hat and the Motors)
- Cable Ties (Bunnings are good for this one)
- Jumper Wires (About 5)
- Soldering Iron and Solder
Directions
Note: Skip step 1 and 4 if using premade chassis
- First take the ply wood and cut out a rectangle measuring 22 (L) x 12 (W)cm and mount the castor wheel on the front of the wood.
- Take the motors and solder two jumper wires to the pads on the motors.
- Mount the two motors to the chassis using cable ties. Add the Wheels.
- Drill two holes for the jumper wires to go through.
- Mount the power bank on the chassis wherever you like – I mounted mine on the underside of the chassis in front of the motors using cable ties.
Installing the Pi and the Hat
- Disconnect all the cables from the Pi and attach the Explorer HAT
- Attach the Pi and HAT to the chassis
- Insert jumper leads (from the two motors) into the two motor ports on the Explorer Hat.
The Code
Write the following code into a Python 3 window:
import explorerhat as eh
from guizero import App, Text, Box, PushButton
from time import sleep


def backwards():
    eh.motor.one.forward(100)
    eh.motor.two.forward(100)
    sleep(1.5)
    eh.motor.one.stop()
    eh.motor.two.stop()


def forwards():
    eh.motor.one.backward(100)
    eh.motor.two.backward(100)
    sleep(1.5)
    eh.motor.one.stop()
    eh.motor.two.stop()


def right():
    eh.motor.one.forward(100)
    eh.motor.two.backward(0)
    sleep(0.5)
    eh.motor.one.stop()
    eh.motor.two.stop()


def left():
    eh.motor.one.backward(0)
    eh.motor.two.forward(100)
    sleep(0.5)
    eh.motor.one.stop()
    eh.motor.two.stop()
app = App(title="Buggy Controler", height=125, width=245, layout="grid")
box = Box(app, layout="grid", grid=[5,5])
forward = PushButton(box, forwards, text="  Forward  ", grid=[1,0])
reverse = PushButton(box, backwards, text="  Backwards  ", grid=[1,2])
right = PushButton(box, right, text="  right  ", grid=[2,1])
left = PushButton(box, left, text="  left  ", grid=[0,1])
app.display()
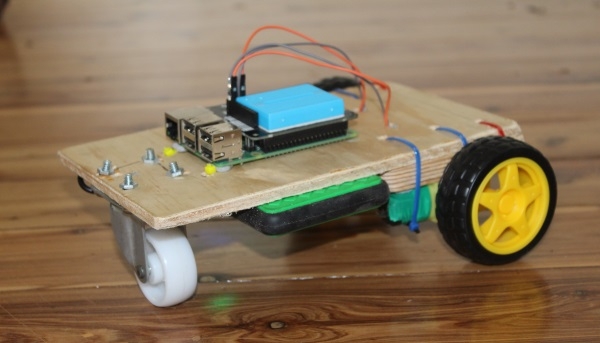
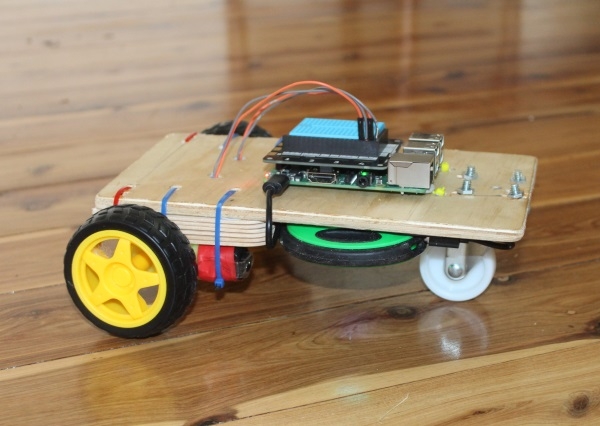
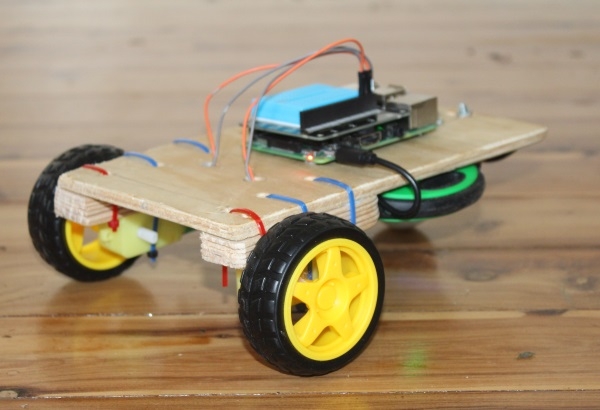
The Finished Buggy
Now that it's all assembled and coded, you can use VNC to remotely control the buggy! Cool!