Feel restricted by your connectivity? Want to send data from a remote node 10km away from civilization? Or ~3km when you are in a built-up civilization. Feel the urge for Liberation? Then I have the solution for you! Using only hardware built in-house and a Raspberry Pi Pico we are going to free you!
This will demonstrate how to connect a Lora E5 Module to a Raspberry Pi Pico. Then we will set up Thonny IDE. Then create an Account with The Things Network. We will then Register our Device with The Things Network and send a simple Hello World Message to it. The Where To Now will be a Weather and Air Quality IoT Station set up in a 3D printed Case that sends Human Readable Weather Data to The Things Network that Runs on Boot. All wrapped up in a package that can fit into the palm of your hand and is fully ready to be Battery Powered or Wall powered.
See the contents of this project below:
· What You Need
· Hardware Set Up
· Software Set Up (Thonny IDE)
· Software Set Up (The Things Network)
· Downloads
· Where To Now
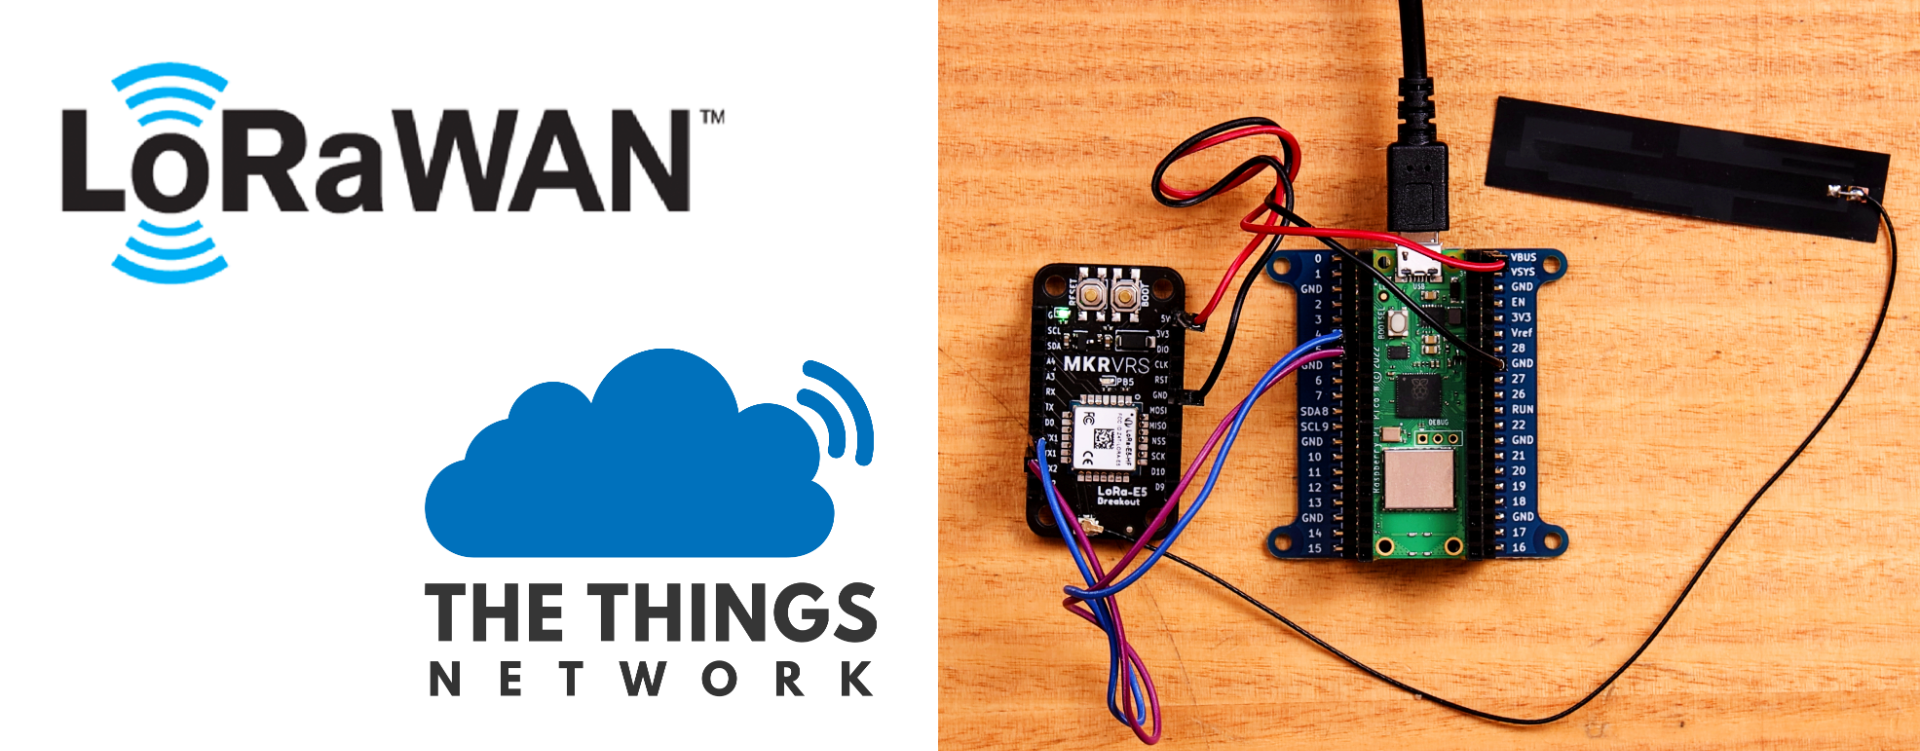
The world of LoRaWAN is beautiful, offering a huge range (thanks to it encoding data inside a Chirp Radio Signal), and it is finally reaching that point of simplicity for the end-user to set up. This will be a very detailed step-by-step process on exactly how to connect up a LoRa Raspberry Pi Pico System so that nobody is left in the dark. No longer will LoRaWAN be the dominion of heavily breathing bourgeoises and their gaggle of IT driver-installing experts. This will make it easy for the everyday person to set up and truly flex their connectivity might. Rugged, Responsive, Reliable, and Remarkable LoRa is no longer a pipe dream of the future. There is no better time than the present to take the plunge. See the Hardware and LoRaWAN and TTN Logos below.
Come check out the weather-proof project that expanded on this hardware - Raspberry Pi Pico Long Range Radio (LoRa) Weather and Air Quality Station - Full Dashboard (DataCake + TTN), Rain-Proof, and 10Km Range.
The phenomenal capability of LoRa to parcel information inside a chirp signal and the worldwide coverage of The Things Network has earned huge respect from me. You can listen to the original creators talk right here and here. As always if you have any questions, queries, or things you'd like me to do with this system, please let me know your thoughts!
What You Need
Below is everything you need to build a Raspberry Pi Pico LoRaWAN Weather and Air Quality IoT Station.
- Raspberry Pi Pico (in my case I have used a Raspberry Pi Pico W but this can be done perfectly with a Normal Raspberry Pi Pico)
- Makerverse LoRa-E5 Breakout Module (Doesn't Include an Antenna) or Any Generic LoRaWan Module (Like the LoRa-E5 Mini)
- LoRa Capable Antenna (another great option is this RP-SMA Connector and a Larger Antenna)
- PiicoDev LiPo Expansion Board for Raspberry Pi Pico
- A Desktop Computer to Program the Raspberry Pi Pico (Mouse and Keyboard too!)
- DuPont Male to Male Jumper Cables
- MicroUSB to USB Cable (Must be able to transfer Data!)
Hardware Set Up
The first step is to connect the hardware as you can see in the images below. Start by seating the Raspberry Pi Pico onto the PiicoDev LiPo Expansion Board. This will provide LiPo charging for our LoRa device and make it really easy for us to break out the extra pins we need. Next, connect the antenna to the Makerverse LoRaWAN module. Be careful when clipping the U.FL connector that the external antenna has to the Makerverse board as it can break easily! It will be seated level with the PCB board and make a click when connected right. Finally, we will connect up wires to the Makerverse LoRaWan Module and the PiicoDev LiPo Expansion Board. Use a Red Wire to the 5V Power Pin to the VBUS (Voltage Bus = 5V). Use a Black Wire to connect to the Ground Pin to Ground Pin. Connect a Blue Wire to the RX Pin on the LoRa Module to GPIO Pin 4 on the Raspberry Pi Pico. Connect a Purple Wire to the TX Pin on the LoRa Module to GPIO Pin 5 on the Raspberry Pi Pico. 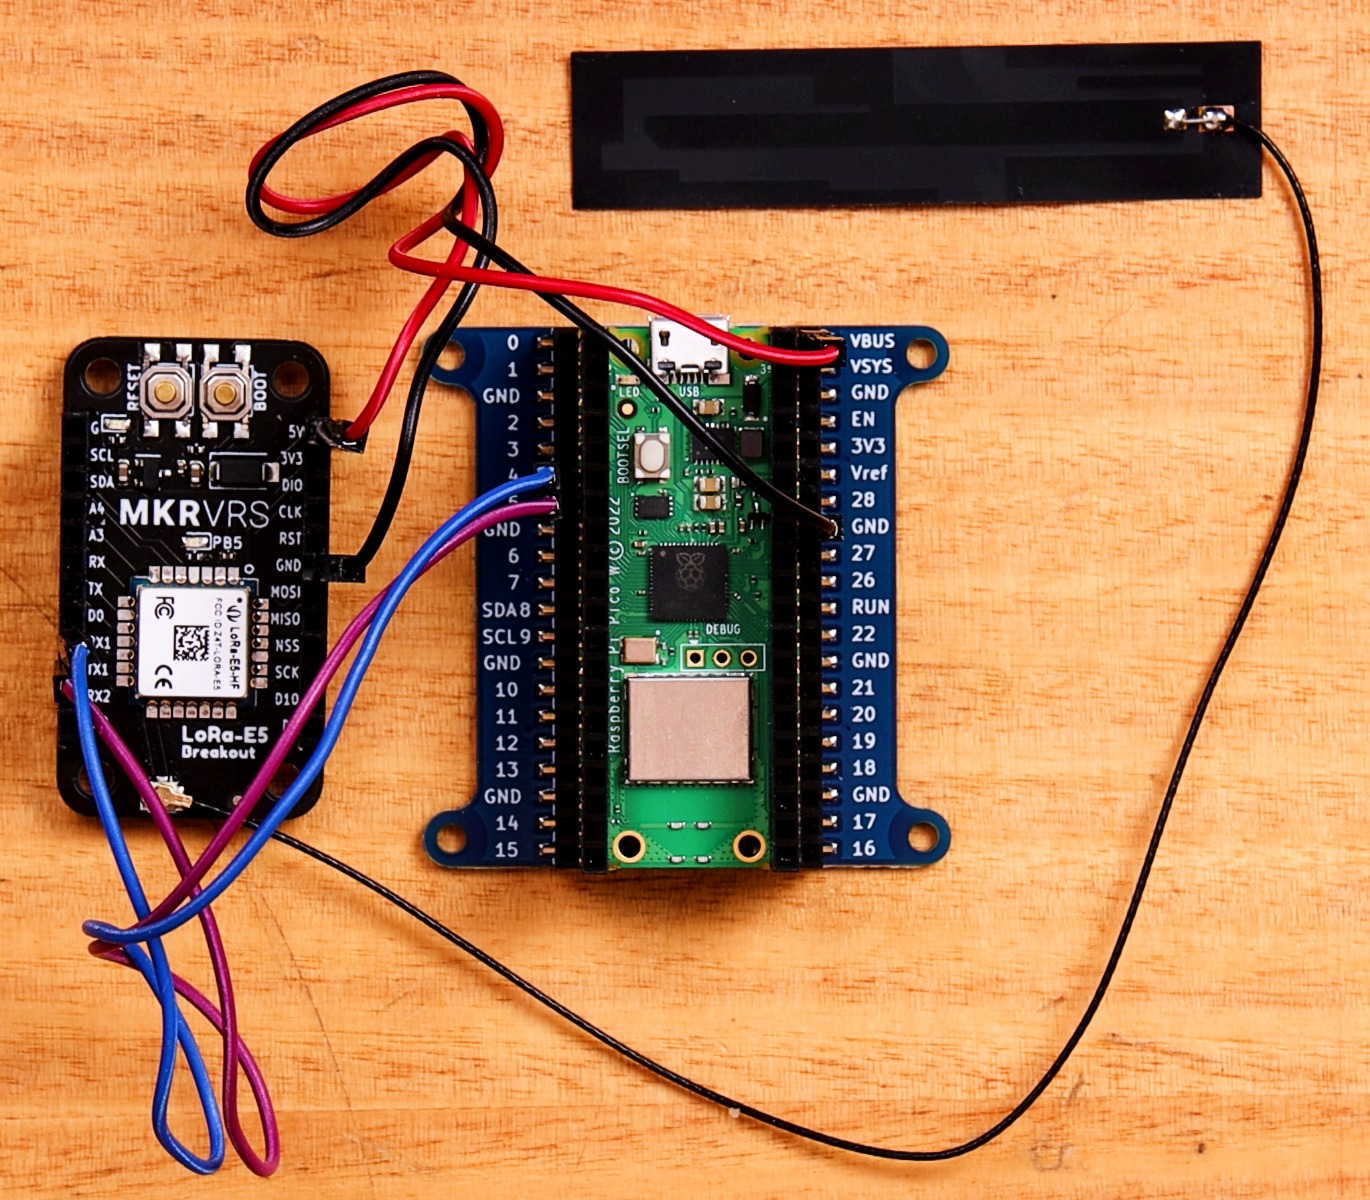
Note: Due to a hardware change, the above image is incorrect. Use the TX and RX pins on the LoRa E5 module, rather than TX1 and RX1 respectively
Note Here - If you plan to use this as a portable device, powered by a 3.3V LiPo Battery, connect the Red Wire instead to the 3V3 Pin on the PiicoDev LiPo Expansion Board and a 3V3 Pin on the LoRa Module.
With that complete, all electrical connectors are sorted. Double-check all your connections and then feel free to plug in the Raspberry Pi Pico to a USB Port of your computer using a Data Capable USB-Micro to USB Connector. See this in the image below.

Software Set Up (Thonny IDE)
As soon as you plug your fresh Raspberry Pi Pico into your computer it will open up as though it was a flash drive (USB Stick) with its folder directory opening up in a | File Explorer Window | on your computer. This informs us that we will need to update the firmware of the Raspberry Pi Pico. As we want to use MicroPython and are using a Raspberry Pi Pico W you will find this firmware here. MicroPython is a lean and efficient implementation of the Python Programming Language. Download the most recent file you can find on that webpage which has a file type of | .uf2 | onto your computer. Once downloaded drag and drop that file into your | RPI-RP2 | Folder. Doing this instantly closes the folder directory and makes it so that it is no longer able to be found. This folder auto-disappearing is a good sign! See below for what the folder directory looks like as well as myself dropping the newest | .uf2 | file into it.
![]()
Now let's get the exact code we want to run onto our Raspberry Pi Pico Microcontroller. To start we will want to use Python Interpreter Software. Today we will utilise Thonny IDE. Find and install the latest version here. Download it and open it up as you would any normal application. See it opened in the image below.

Next, we want to be able to communicate with our MicroPython-enabled Raspberry Pi Pico through Thonny IDE. Do this by focusing attention on the Top Tool Bar, then click on | Run |, scroll down and click on | Configure Interpreter |. With the Thonny Options Window now open navigate to the Interpreter Tab. Choose | MicroPython (Raspberry Pi Pico) | in the first drop-down menu. You will also want to select in the next drop-down window the USB Serial Device | Port | that you have connected to your Raspberry Pi Pico to, in my case | USB Serial Device (COM8) |. You may need to restart Thonny IDE a couple of times for it to correctly pop up, however, it worked straight away for me. See this happening in the image below. With that complete click on | OK |.

With that completed turn your eyes to the top left section of the screen. Download all the data you can find here or in the Zip File in the Download section below. Then unzip the file in an appropriate location (the desktop is perfectly fine). Using the top left of Thonny IDE navigate/direct Thonny IDE to focus on the location where you unzipped the files. It will then look something like the image below with your exact directory address correlating to where you have saved it (instead of my one).

Software Set Up (The Things Network)
With that fully operational it is time to set up our LoRa device to correctly connect to the LoRaWAN Network and The Things Network. Keep in mind you need to be within range of a LoRaWAN Gateway Device for this step to work correctly. Check This Coverage Map here (provided by The Things Network) to confirm this. See me confirming this in the image below.

Now it is time to create an account with The Things Network. This will facilitate our data gathering into the IoT space. With it correctly set up any device (that we allow) which is connected to the internet will be able to read our data from anywhere in the world! As an individual or student, this service is totally free (brilliant)! Start the process from the main website linked here - The Things Network. See the process to go through in the image below to create an account on The Things Network.

With your account sorted and signed in we can now access the | Console | of The Things Network. From here click on Overview and select | Create an Application |. Fill out a unique | Application ID | for your LoRa Pico System, an easy-to-understand | Application name | and fill out an appropriate | Description |. Then click | Create Application |. When your screen looks like mine (as you can see below) we are going to click the | Register end device | button. See this happening in the image below.

Now we have reached this point we are going to open up Thonny IDE just like before. Select the script named | LoRa_transmit_data.py | and run it by pressing the | Green Run | button like before. This is going to provide us confirmation that the system can connect to a LoRaWAN Gateway and, furthermore, this script will provide us with two special numbers. These numbers we will use to fill out the following | The Things Network | form.

See these two numbers (that have been printed to the Shell section of Thonny IDE) and | The Things Network | form getting filled out. These are the settings for Australia and my specific | JoinEUI | and | DevEUI | numbers. Depending on where you are these numbers and values will be different. It is not important to understand what these numbers are, just understand that they are required so we can get information from our specific device in a safe and scalable manner. Before pressing the | Register End Device | button copy and paste the AppKey Value. Be aware that you should keep all these numbers private but for tutorial use here I have decided to show you exactly all the values so you can follow through. See them in the image below. With that complete click the | Register End Device | Button.

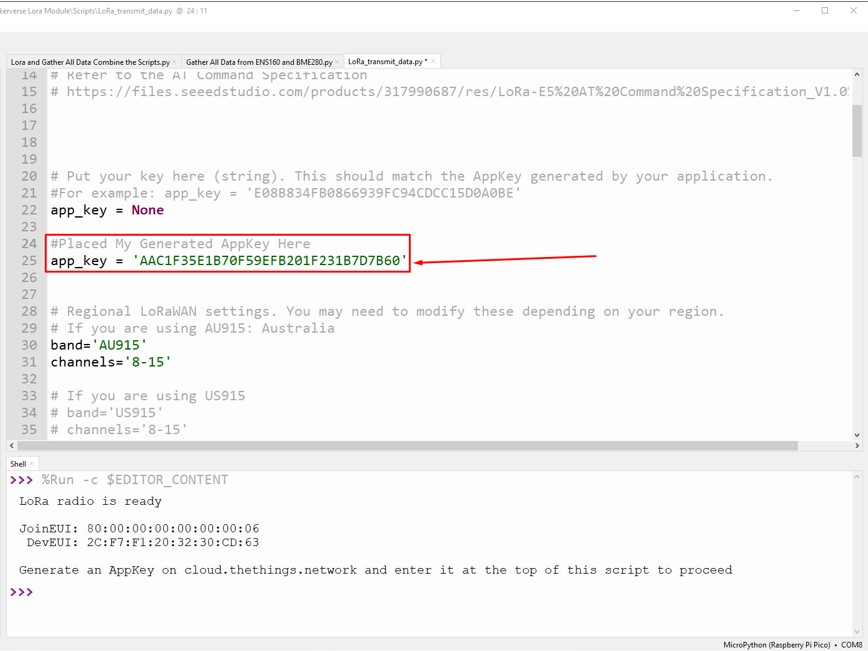
Now jump into your Thonny IDE instance once again. Take that unique | AppKey | and copy and paste it into the | LoRa_transmit_data.py | script as you can see me doing in the image below. Completing that will enable the script, when saved and run again, to completely Register our End Device. This means it will always send data to the correct place, securely, to | The Things Network |.
Save the script and then click the | Register end device | button (if you haven't already) to register the device in | The Things Network |. With that completed run the exact same updated script again, | LoRa_transmit_data.py |, by pressing the | Green Run | button. As soon as you run the code the shell will spit out some data and you will receive some data to your | Applications | set up in | The Things Network |. See this in the image below and a close-up of the shell output and activation data sent through slightly further below that occurs during this process.


If you have made it this far know that this is HUGE! You have transmitted data from an edge device, through the LoRaWAN (as a chirp radio wave signal) that has been received by a LoRaWan Gateway, which is then pumped and decoded into the internet (facilitated by The Things Network. Likely the data has been sent all the way to Amsterdam and back, a worldwide trip! All that results in us now seeing this data displayed on our | The Things Network Applications Dashboard |. All within seconds, extraordinary! And even better it is free! If you click on Live Data you can see it in all its glory. See that in the image below

So let's see what the two Payloads state that gets sent from our | LoRa_transmit_data.py | script. See the full data from these two payloads below.
Payload 1 = 48656C6C6F2C20576F726C6421
Payload 2 = 00112233445566778899AABBCCDDEEFF
Analysing these we can see Payload 2 are the values 0 to 9 followed by A through to F. Payload 1 on the other hand is an interesting one. It is a hidden message that has been encoded with a HEX (hexadecimal) value. Hexadecimal is a numbering system with base 16. It can be used to represent large numbers with fewer digits. With LoRaWAN systems we are limited to sending single data signals of around 50 bytes. This is a big reason why hexadecimal is often used when transmitting information as we can store significantly more information in fewer bytes. So let us jump to an Online Hexadecimal to String Converter like the one linked here to decode this message. See the result below. If you don't know what a String is come check this guide here.

Nice, when decoded we can see that this hexadecimal data is a Hello World message! Tubular! If you see that message know that you are well on track and all systems are a go.
Where to Now
To push this hardware up to the next level I present to you the following Raspberry Pi Pico with LoRaWAN - Weather and Air Quality IoT Station. See it below.

As soon as this system is powered it will accurately measure temperature, humidity, and air pressure, provide an air quality Index number and measure the Volatile Organic Compounds and Carbon Dioxide amounts in its direct environment (that's a lot of and). It does this thanks to the BME280 and ENS160 Sensors on the Piicodev Modules. Then in a blink of an eye, it will transmit that data up to 10 km away to a LoRaWAN (Long Range Wide Area Network) Gateway. This data gets intercepted by The (Mighty) Things Network and uploaded to the internet to be easily observed by any internet-connected device. For the amount of remarkable radness on offer, this system runs on a remarkably low amount of power. The following will be a step-by-step guide expanding on the tutorial. See an annotated image of the plug-and-play system as well as the message received by The Things Network whenever this device is turned on below!

I hooked up a PiicoDev Atmospheric Sensor BME280 and PiicoDev Air Quality Sensor ENS160 to the PiicoDev LiPo Expansion board by utilising PiicoDev Connectors. Check this guide if you need a hand assembling that hardware. Below shows the electrical hardware being assembled into the 3D printed case. The case has two laser-cut acrylic sheets (so all the hardware can be seen functioning) and two 3D-printed components (to keep the components safe). One of the laser-cut sheets has gaps in it so that accurate air measurements can be made. Note that the antenna lead threads around the case with just enough tail to get outside of the case. All assembly can be done by threading M2.5 screws directly into the 3D-printed components. Download all the CAD you can find here or in the Zip File in the Download section.

See an Isometric View of the completed assembly below.

To make this all work we will need to adjust the scripts. Plug in the Raspberry Pi Pico to a USB Port of your computer using a Data Capable USB-Micro to USB Connector. Using the top left of Thonny IDE navigate/direct Thonny IDE to focus on the location where you unzipped the files. It will then look something like the image below with your exact directory address correlating to where you have saved it (instead of my one).
Now as it is currently set up we can go right ahead and right-click with our mouse some of these folders and upload them to our Raspberry Pi Pico System. Do so for the | lib | folder. Lib stands for library and inside are packages that extend the capability of MicoPython on our Raspberry Pi Pico. Most importantly it will allow us to gather weather data using the ENS160 and BME280 sensors.

Now to test the weather devices attached to the Raspberry Pi Pico. I want you to click on the script named | Gather All Data from ENS160 and BME280.py |. Then press the | Green Run | button in Thonny IDE. You should then see all the data constantly being uploaded to the shell as you can see in the image below. Know that to gain the best possible information you will want to run this script for 24 hours straight. That will enable the best data to be emitted from the device (particularly in regard to the PiccoDev Atmospheric Sensor).

Then to Sending Human Readable Weather Data to The Things Network. Weather Data to our system. First, we will set up a system to decode our weather data into a human-readable method. We don't want to pump our data into an Online Hexadecimal to String Editor every time we want to see what the temperature is where our device is. The solution is to set up an | Inbuilt Decoder | that The Things Network will run and provide for us. Below shows how to navigate to the | Payload Formatter | for our Specific Application. Right-click the below image and select | Open image in new tab | to see it in full size if you need.


This payloader has to be written in JavaScript (a common and great programming language). I have already written one for us so fear not if this is your first foray into this new programming language. The script is fully annotated so you can follow through if you so desire. To proceed copy the below script.
function decodeUplink(input) {
  // Initialize the data object
  var data = {};

  // Parse the temperature sign
  data.Temperature_Sign = parseInt(input.bytes[0]-48);

  // Parse the temperature in Celsius
  data.Temperature_Celsius = (
    10*(input.bytes[1]-48) +
    1*(input.bytes[2]-48) +
    0.1*(input.bytes[3]-48) +
    0.01 *(input.bytes[4]-48)
  );

  // Parse the pressure in hPa
  data.Pressure_hPa = (
    1000*(input.bytes[5]-48) +
    100*(input.bytes[6]-48) +
    10 *(input.bytes[7]-48) +
    1* (input.bytes[8]-48) +
    0.1* (input.bytes[9]-48)
    + 0.01 *(input.bytes[10] -48)
  );

  // Parse the relative humidity percentage
  data.Relative_Humidity_Percentage = (
    100*(input.bytes[11]-48) +
    10*(input.bytes[12]-48) +
    1 *(input.bytes[13]-48) +
    0.1*(input.bytes[14]-48) +
    0.01*(input.bytes[15]-48)
  );

  // Parse the air quality index
  data.AirQualityIndex = 1 *(input.bytes[16]-48);

  // Parse the volatile organic compounds in ppb
  data.VolatileOrganicCompounds_ppb = (
    10000*(input.bytes[17]-48) +
    1000*(input.bytes[18]-48) +
    100 *(input.bytes[19]-48) +
    10*(input.bytes[20]-48) +
    1*(input.bytes[21]-48)
  );

  // Parse the environmental CO2 level
  data.EnviromentalCO2_ppb = (
    1000*(input.bytes[22]-48) +
    100*(input.bytes[23]-48) +
    100 *(input.bytes[24]-48) +
    10*(input.bytes[25]-48) +
    1*(input.bytes[26]-48)
  );

  // If the temperature sign is 2, make the temperature negative
  if (data.Temperature_Sign == 2) {
    data.True_Temperature_Celsius = data.Temperature_Celsius * -1;
  }

  // Return the data object
  return {
    data: data,
  };
}
Then paste it into the Formatter code, once you have changed the | Formatter type | to be selected as | Custom Javascript formatter |, exactly like you can see in the image below. Then select | Save changes |. See the image below for what that looks like.

Now open up Thonny IDE and select/open the script named | Lora and Gather All Data Combine the Scripts.py |. Before running it make sure to add your particular | App Key | to this script as well. You will see it on line 185 of the script. See this happening in the image below.

Then save the script and press the | Green Run | button. All going well your device will spit this information to the Shell and a readily human-readable message will appear on The Things Network! It will take less than 10 seconds. See this happening in the images below as well as a close-up of the exact data sent. Super swell! We can now transfer our weather details from our LoRaWAN Pico System straight into the glorious land of IoT. Know that this script will work even if you are experiencing negative temperatures, very low pressures, or very high VOCs/CO2 levels (its bulletproof).


The final step in this Where to Now is to Run the Script On Boot. Simply save the script | Lora and Gather All Data Combine the Scripts.py | as | main.py |. Then right-click it and upload it into the Raspberry Pi Pico as you did before for the | lib | folder. Then whenever this system is powered up it will analyse the Weather and Atmosphere details twice, set up a LoRaWAN connection, and then transmit the data through LoRa to be readily accessed on | The Things Network |. Whether it is connected just to a USB port or a LiPo Battery or a Computer or a wall socket it will work the instant it powers up. Truly the beauty of microcontroller technology.

So go ahead and install this system into your summer retreat, your boat, your secret campsite, inside your car, or anywhere you want to have accurate weather data! The world is your oyster and your LoRa system is the pearl. Hope you enjoyed this extensive Where to Now section.
Downloads
Download the Project Resources to access the code and CAD/SVG files.
Come check out the weather-proof project that expanded on this hardware - Raspberry Pi Pico Long Range Radio (LoRa) Weather and Air Quality Station - Full Dashboard (DataCake + TTN), Rain-Proof, and 10Km Range.
If you want to learn more about how LoRaWan Technology actually sends data using long-range Chirp signals come check this video here.

