Introduction
This article will compare the Raspberry Pi Pico, and Pico W. Aside from the obvious difference (the Pico W has wireless connectivity), there are a few smaller and more subtle differences that are worth considering.
Physical Comparison
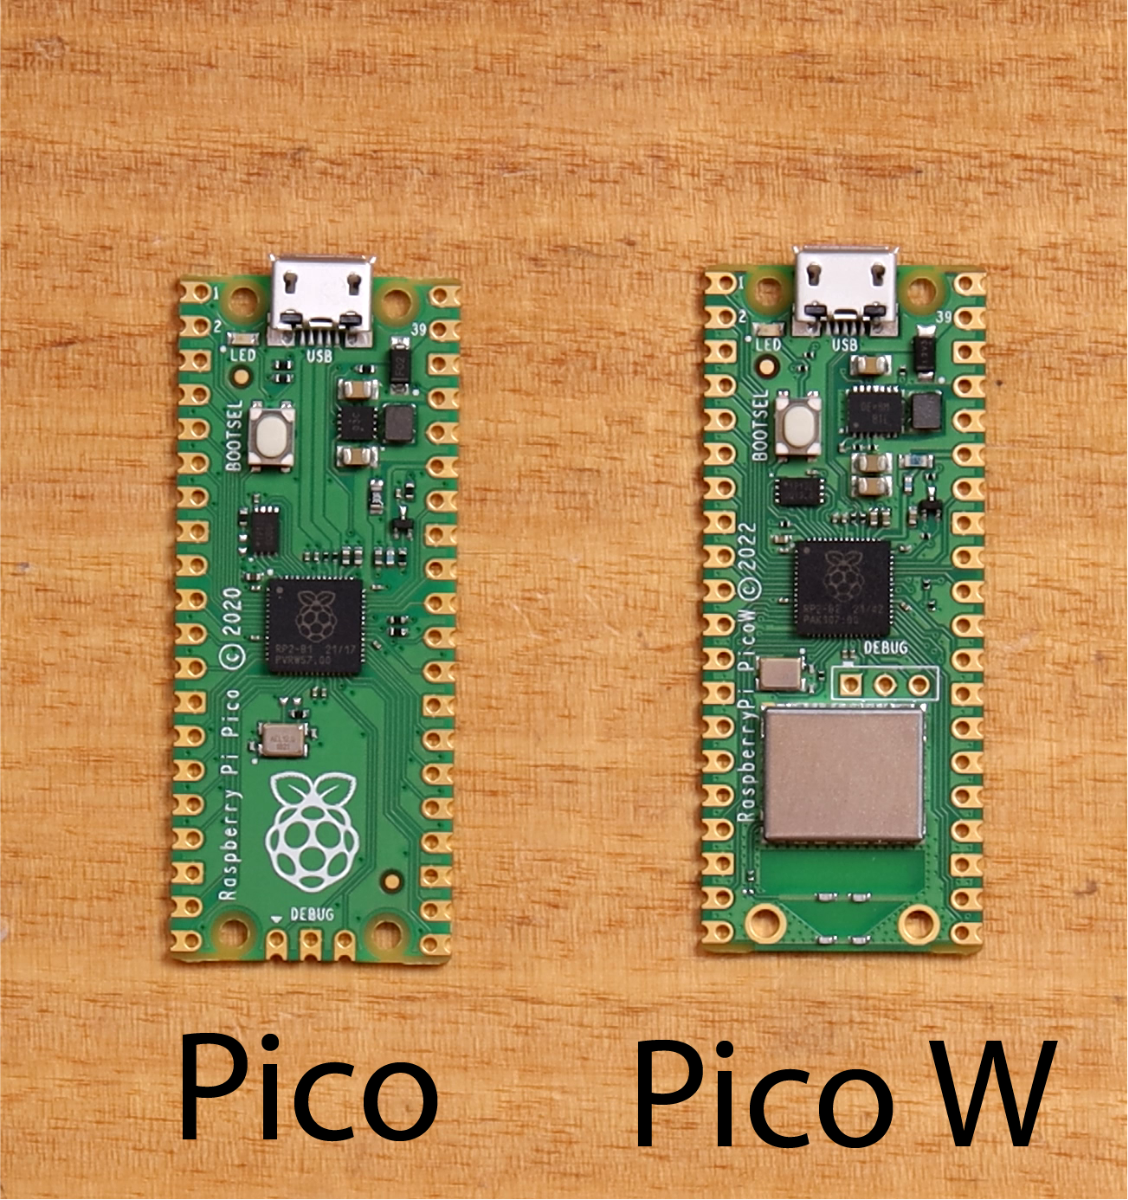
The Pico W is dominated by the new Infineon wireless interface. The antenna (integrated on the circuit board) has pushed the debug header up to the middle of the board. Power is still delivered via micro-USB, though the power supplies appear different. Another notable physical difference is that the M2 mounting holes on the bottom edge of the Pico W are plated through - presumably to protect the signal integrity of the wireless interface.
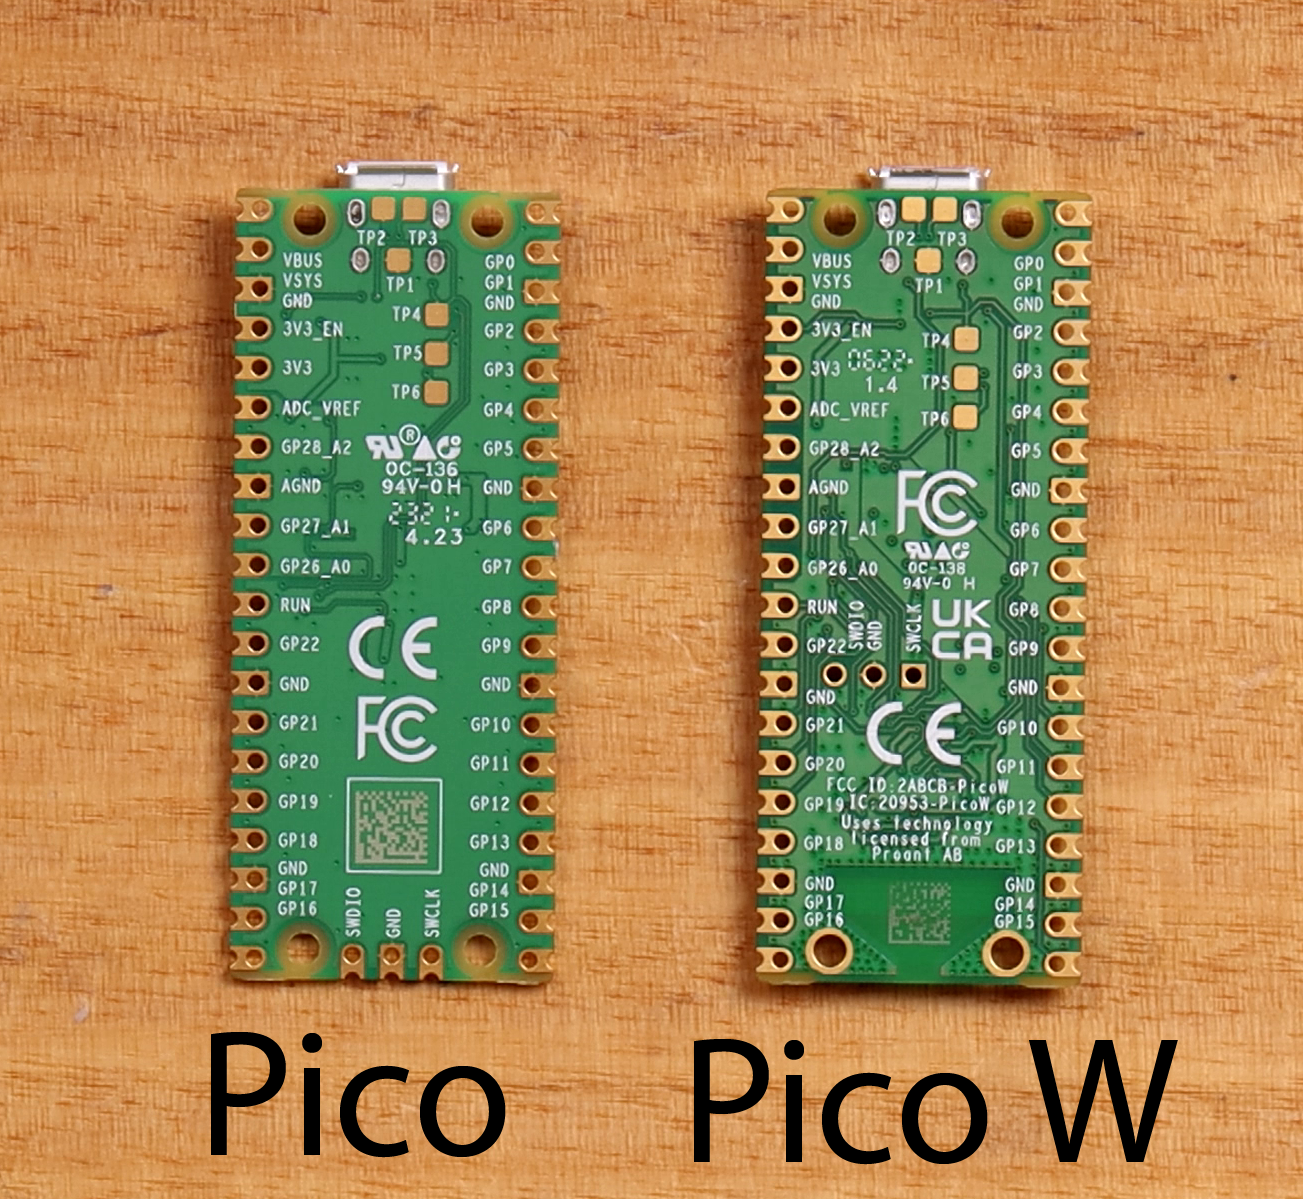
The layout on the back side is much the same - all broken-out pins and test points remain the same.
Specifications
Looking at the table below, we can see that the basic specs and peripherals are identical between the Pico and the Pico W - unsurprising since the Pico W uses the same microcontroller and form factor.
| Pico | Pico W | |
| Microcontroller | RP2040 @ 133MHz, 256kB RAM | RP2040 @ 133MHz, 256kB RAM |
| Flash memory | 2MB | 2MB |
| Exposed GPIO | 26 | 26 |
| ADC | 3 ch | 3 ch |
| I2C | 2 | 2 |
| SPI | 2 | 2 |
| UART | 2 | 2 |
| PWM | 16 ch |
16 ch |
External GPIO
Luckily, the 40 pins broken out on the GPIO headers are identical - meaning code can be copied from a Pico to a Pico W without the need for reprogramming these pins.
Wireless
Of course, this is the big one. The major upgrade in the Pico W is support for wireless connectivity (2.4GHz wireless LAN b/g/n). The wireless interface (Infineon CYW43439) is driven by pins internal to the Pico W (not broken out to the headers). These are:
- GPIO29 (Input/Output) wireless SPI CLK/ADC mode (ADC3) measures VSYS/3
- GPIO25 SPI CS (Output) when high also enables GPIO29 ADC pin to read VSYS
- GPIO24 (Input/Output) wireless SPI data / IRQ
- GPIO23 (Output) wireless power-on signal
The wireless interface also brings a few new user-controllable pins to the mix:
- WL_GPIO2 – (Input) VBUS sense. HIGH when VBUS is present
- WL_GPIO1 – (Output) Controls onboard SMPS Power Save pin
- WL_GPIO0 – (Output) Controls user LED
This means that some internal pins on the Pico W are now repurposed for communication with the CYW43439, and have been replaced by GPIO present on the CY43439.
In summary, internal functions that have changed between models are:
| Function | Pico | Pico W |
| User LED | GPIO25 | WL_GPIO0 |
| Power Supply PS | GPIO20 | WL_GPIO1 |
| VBUS sense | GPIO24 | WL_GPIO2 |
On-board LED
Looking closer at the Wireless section, we can see that the user-LED is now controlled by the wireless module on pin WL_GPIO0. On the original Pico this was GPIO25, which is now reserved for SPI communication with the wireless module. This difference will probably affect the most users, because the onboard LED is a convenient debugging tool / status indicator.
Conclusion
The Raspberry Pi Pico and Pico W are functionally very similar. Aside from some minor quirks with internal GPIO configuration, for the vast majority of projects there will be no difference - except for the wonderful addition of wireless in the case of the Pico W.
Happy Making!

