This will be a quick 101 on how to use the Raspberry Pi Imager so that you can Flash a new Micro-SD Card. Everything you need to use this Software will be found in this article. The contents of this guide can be seen below.
- Download Location of Raspberry Pi Imager
- Connecting Micro-SD to Computer’s USB Port
- Using Raspberry Pi Imager to Flash Micro-SD with Raspberry Pi OS
- Installing Micro-SD to Raspberry Pi
- Other Raspberry Pi Images
Flashing Micro-SD cards is a very normal and common process when working with single board computers like the Raspberry Pi. Keep in mind when you flash a Micro-SD card it will start by deleting everything that is on that Micro-SD card. Make sure to use an empty Micro-SD so you do not lose any important data.
There is a first boot wizard now. It will enable you to set your country, language, and timezone, change the default password, make sure the screen is set up correctly, make sure you are connected to a WIFI network, and fully update the software. It is very intuitive and once complete your Raspberry Pi system will reboot itself. If you are an OG and creating a set up that will be used headlessly and are used to supplying Wifi details through the | wpa_supplicant.conf | file you can get caught out. The first boot wizard will start and won't function normally until the wizard is complete (this wizard that you won't be able to see as your running the system headlessly). In that situation even if you connect an internet-connected ethernet cord to the Raspberry Pi it will not connect to the internet. When running a headless system I highly recommend providing the Wifi and other start-up details using the Raspberry Pi Imager by pressing the Cog button before flashing the card.
As always if you have any questions, queries, or things to add please let us know your thoughts!
Download location of Raspberry Pi Imager
You will need to use a separate computer to easily flash a Micro-SD card using Raspberry Pi Imager Software. This can be done on Windows, MacOS or Ubuntu depending on what OS your computer is. This will also assume that your computer has a USB port available.
To install the Raspberry Pi Imager into your computer go here and select the appropriate download and installation link.
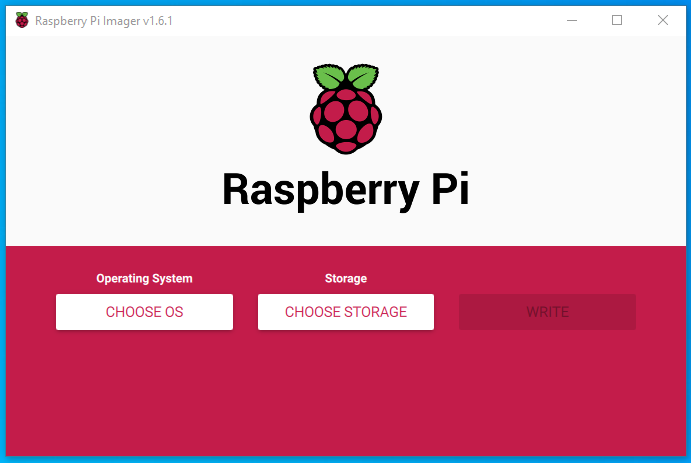
Once installed and opened it will look like the image below.
Connecting Micro-SD to Computer’s USB Port
To connect the Micro SD card to the USB on the computer you will need to do the following;
Connect the Micro-SD to the SD-Card Adapter. Make sure the switch on the edge of the SD-Card Adapter is pushed away from the Micro-SD. If this is pushed in the direction of the Micro-SD card you will not be able to write/flash the Micro-SD. Then connect the SD-Card Adapter to a USB to SD Card reader. Connect this to any available USB port on your computer. See this all occurring in the image below.

Using Raspberry Pi Imager to Flash Micro-SD with Raspberry Pi OS
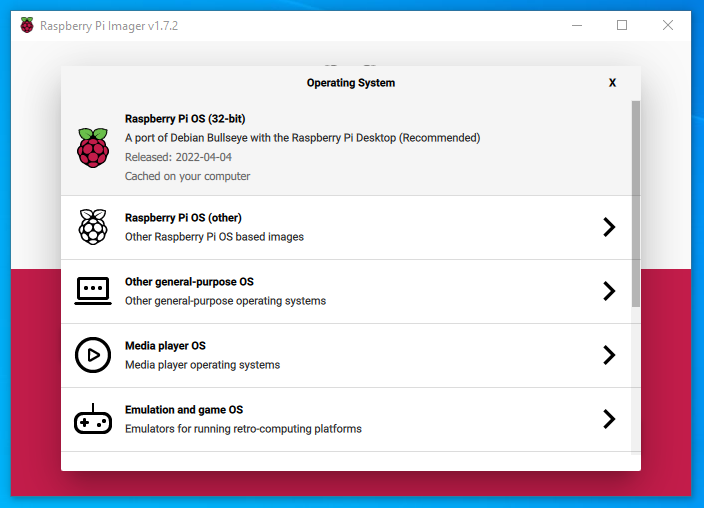
This will be best explained using as many image as possible. Thus that is exactly what this section will look like. Start by selecting the Raspberry Pi OS as your desired Operating System (OS). Click the |CHOOSE OS| to do just this. See this in the image below.
Having done this you now need to select what will be flashed. As you have the desired Micro-SD card plugged into the computer this should appear automatically when you click the |CHOOSE STORAGE| button. Keep in mind when you flash a Micro-SD card it will start by deleting everything that is on that Micro-SD card. Make sure to use an empty Micro-SD so you do not lose any important data. See this in the image below.

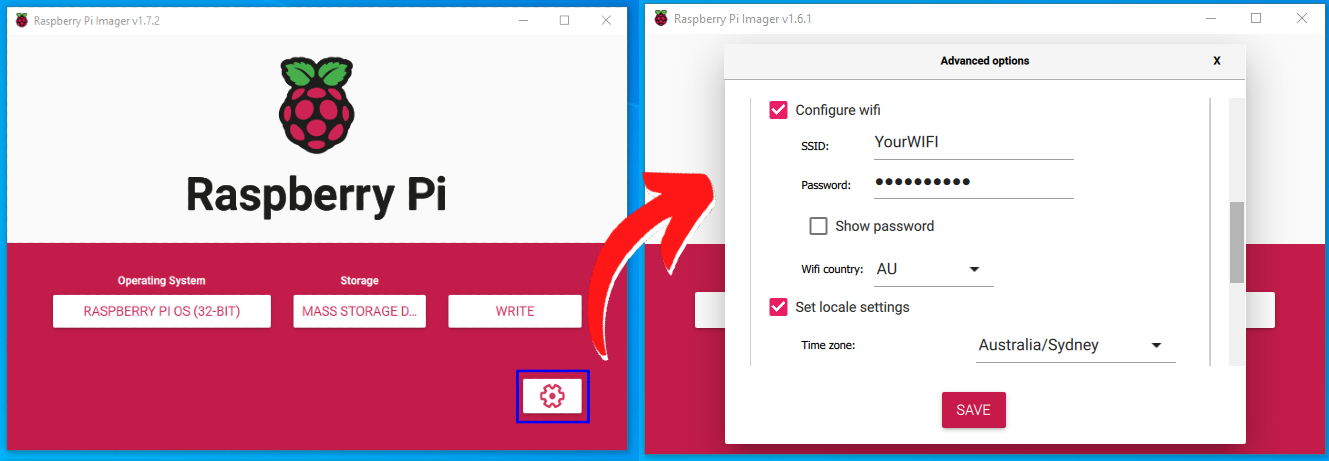
Then from here you are all ready to Write…but wait! Let me show you a secret. If you press the cog in the bottom right of the screen (or hold | CTRL | and | SHIFT | then press | X | at any point on your keyboard) it will open up the secret menu. Here you can set up your Pi before even turning it on (particularly useful if you are going to utilise your Raspberry Pi headless/without a monitor). See some of these settings being altered in the image below.
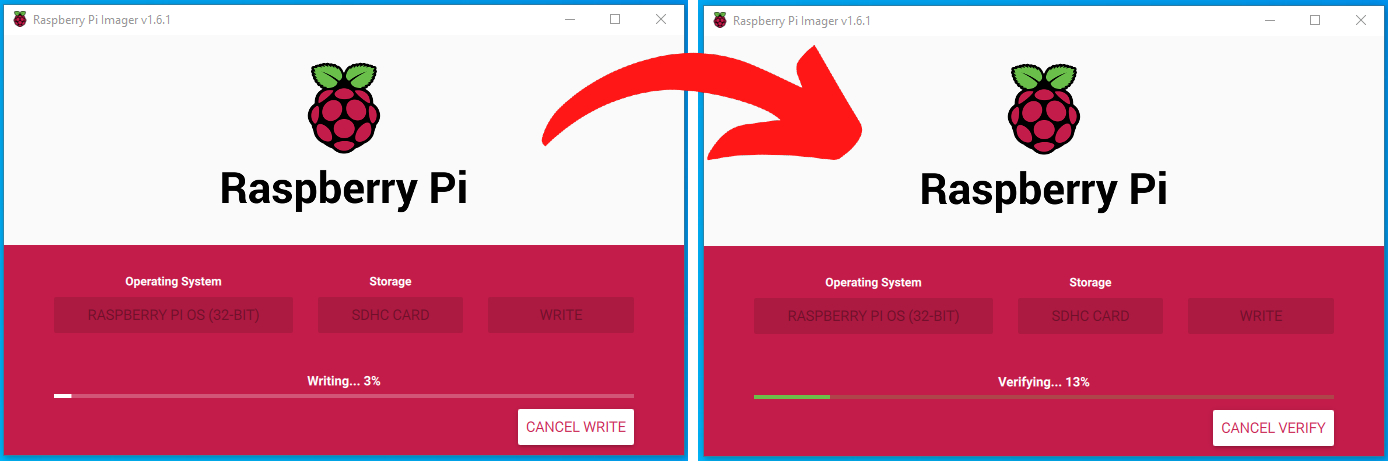
And then let's go to the races and press the | WRITE | button. Much like a horse race it only takes a couple of minutes to Write and Verify. The Verification stage is automatic and is there just to make sure it has been flashed correctly. If you are short on time you press | CANCEL VERIFY | to get your hands on the Micro-SD card faster. See this occurring in the image below.
Installing Micro-SD to Raspberry Pi
When the card has completed flashing it will automatically disconnect from your computer. Then it is a simple process of taking out the Micro-SD card from the Adapter and putting it into your Raspberry Pi Single Board Computer. Push it lightly until it fully seats, see this happening in the image below with a Flashed Micro-SD card being attached to a Raspberry Pi 4 Model B. From here just connect up your Raspberry Pi as a Desktop computer, check the linked guide if you need a hand, and you’ll be crushing!

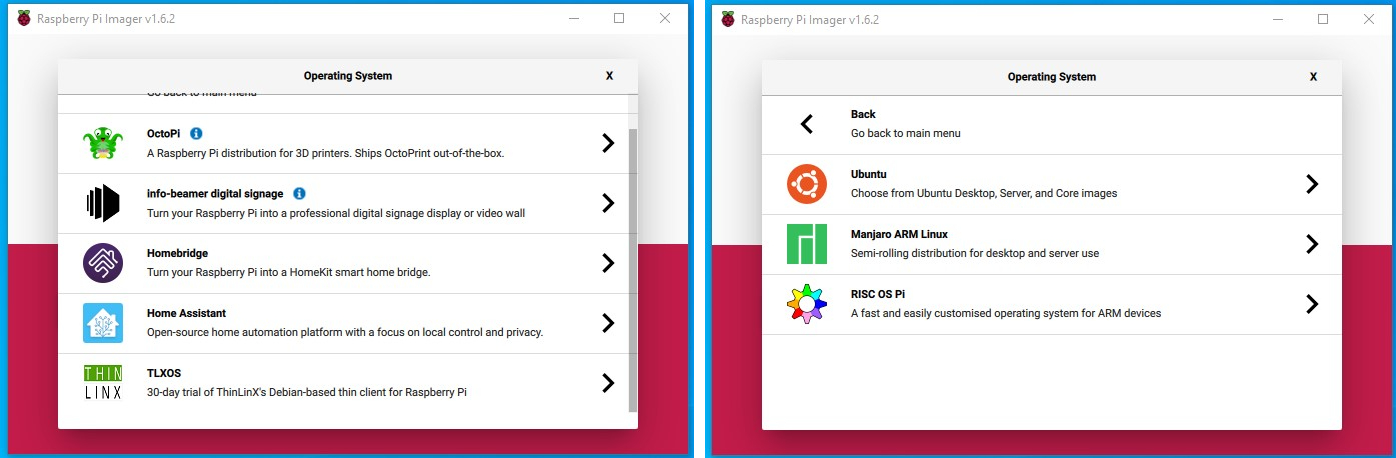
Other Raspberry Pi Images You can Flash With
Raspberry Pi OS is without a doubt the best introductory to single-board computing operating systems. There are, however, almost endless choices when it comes to Operating Systems that Raspberry Pi Single Board computer can run effectively. A number of Raspberry Pi Officially Supported OS are available to flash and utilise within the Raspberry Pi Imager. Check the below image for a selection of these potential choices that you can see by selecting | CHOOSE OS | button.