So, you have your NVIDIA DGX Spark and wanna get going with its massive 128GB of RAM? Well, in this guide, we are going to deploy a few different Large Language Models (LLMs) running locally on our Spark all at the same time using NVIDIA’s enterprise-level NIM inference engine. This is also going to double as a practical crash course in the world of local AI, as we will be breaking down some of the common buzzwords and technical jargon you’re bound to encounter.
Now we are assuming that you already have some baseline experience interacting with LLMs. If you use ChatGPT or Claude on the regular, you have more than enough knowledge to jump straight in.
Let’s get into it!
What You Will Need
To follow along with this guide, you will need:
- An NVIDIA DGX Spark. It will come with the required power adapter.
- Another computer. We will be remotely setting up and using our DGX Spark from a separate PC.
- (Optional) Mouse, keyboard, HDMI Cable, and monitor. These will be required for the first-time setup, or if you want to use the DGX Spark itself as a dev PC.
DGX Spark Set-Up and Nvidia Sync
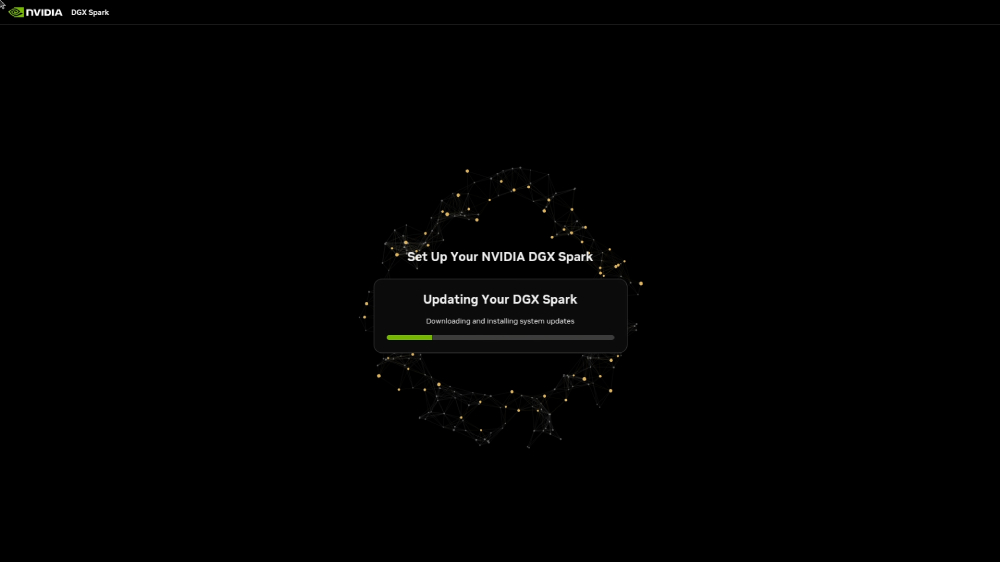
Before we can start spinning up models, we need to ensure our hardware is ready and completely up to date. When it comes to the initial configuration of your DGX Spark, you have two main pathways. If you want to handle things remotely right out of the box, you can connect directly to the Spark's built-in wireless hotspot using the configuration details printed on the quick start card included in your packaging. However, for our setup, we went the more standard route and plugged a monitor, keyboard, and mouse straight into the Spark to boot and set it up like a regular PC.
Make sure you update your Spark when prompted along the way as well. When you get to your desktop, you are ready to go. From now on, we will be remotely using our DGX Spark, but if you find it convenient to develop on the machine itself, feel free to do so!
Another handy tip: this thing unfortunately does not have a power LED. The best way we found to tell if it's on when a monitor isn't plugged into it, is to feel for the airflow on the rear of the machine.
With the Spark up and running, our next objective is to set up our primary remote management tool. To do this, we need to install an application called NVIDIA Sync on the separate computer you plan to develop from.
NVIDIA Sync is a dedicated desktop application designed to act as a bridge between your workstation and your hardware. It gives you a clean interface to monitor live hardware metrics over your local network and, most importantly, it handles the underlying complexity of establishing a Secure Shell (SSH) connection into the Spark.
Go ahead and download NVIDIA Sync onto your development machine and run through the setup wizard. When you launch the application for the first time, you will be prompted to link your hardware by filling out a few critical fields:
- Device Name: A friendly nickname of your choice to identify this specific unit.
- Hostname: The unique network address assigned to your unit, which can be found explicitly listed on the card inside your Spark's original box. It will look something like: spark-abc3.
- Username and Password: The specific account credentials you created on the Spark during its first-time boot sequence.
Note: Immediately after establishing this initial connection, there is a very good chance NVIDIA Sync will detect a secondary firmware or software update specifically meant for your Spark. Go ahead and let that update download and install completely before moving forward.

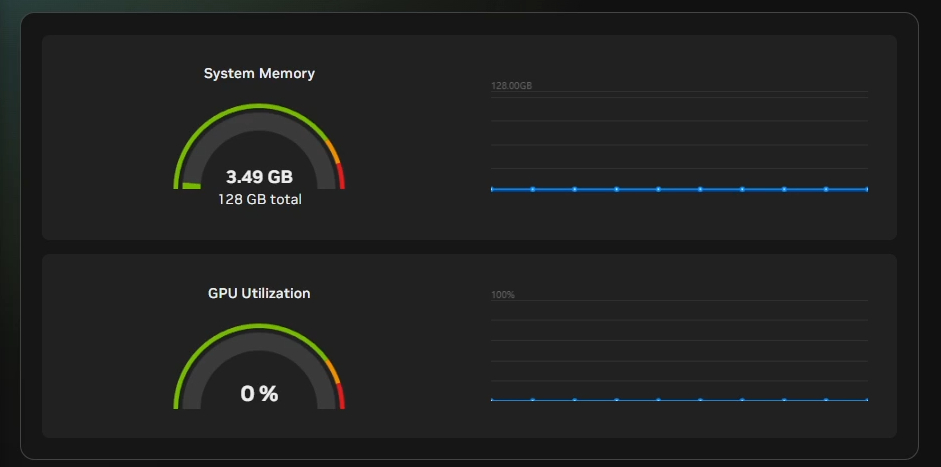
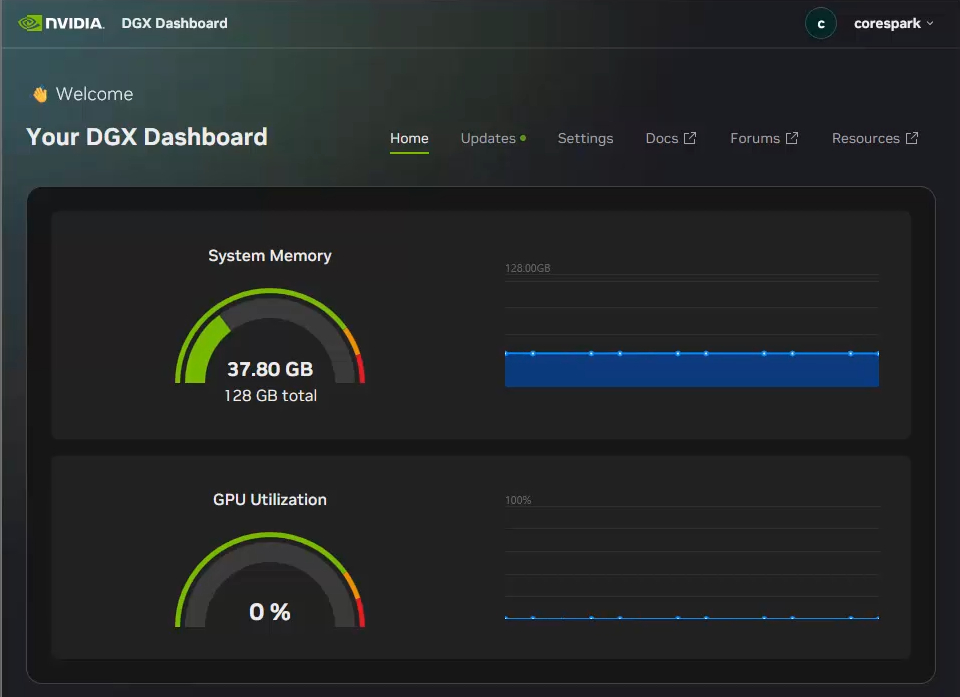
Once it has finished setting up, check your system's icon tray for the NVIDIA Sync app running in the background. You should see the option to open a nice little dashboard showing uRAM usage and GPU usage, as well the option to open a new terminal SSH'd into your Spark.
From this point onward, this remote SSH terminal window is exactly how we will be interacting with our Spark to configure software, manage file systems, and deploy our AI models.
Running Qwen3-32b with NIM
To actually run an LLM on our hardware, we need an inference engine. This is just a fancy technical term for the software that actually runs the AI model, processes your prompts, and spits out the answers. Now, you have likely heard of Ollama, which is currently the biggest and most popular engine out there. We will definitely be setting up Ollama in a very near-future guide, but for this project, we are going to spool up NIM (NVIDIA Inference Microservice).
NIM is NVIDIA’s enterprise-level inference engine built on top of the more-enterprise-level vLLM architecture. We will talk more about when to use which engine later, but for now, let's get NIM set up as our first local AI demo.
Starting off, you will need to create a free account for NVIDIA NGC. This is essentially NVIDIA's enterprise machine learning and developer platform. We need this account because it will allow us access to download their specially trained, highly optimized NIM models.
Once you’ve created your account and logged in, head over to the NGC catalogue page and search for the model you wish to use. For this demo, we are going to use the 32b Qwen3 model.
When you click on "Get Container," the site will likely prompt you with a few extra terms or requirements to accept before you can start downloading. Once you have cleared those, NGC will generate an API Key for you.
Important: Save this API key somewhere secure and private immediately! Do not lose it, as it is difficult to recover once you navigate away.
If you have that API key safely copied and you can click "Get Container" and see an image path, your account is set up with the right permissions to continue.

Now we can go ahead and install NIM, which utilises Docker. Docker is a platform that bundles bits of software together into nice, isolated little self-contained boxes called containers. These containers don't have to worry about compatibility issues or software conflicts with the rest of your system as they run in isolation. So, when we say we are "installing NIM," what we really mean is that we are downloading and deploying a Docker container that has a specific LLM, NIM, and all the required background machinery pre-installed inside it.
(If you aren’t familiar with Docker, it's highly worth doing a bit of outside research, as you will be using it a lot in the AI space!)
First, let's add Docker to our user group. This simply means we won't be forced to type sudo (granting administrator privileges) every single time we want to run a Docker command.
Pop this command into your terminal:
sudo usermod -aG docker $USER
newgrp docker
Next, we need to authenticate Docker with our NGC account so it has permission to download the NVIDIA containers. You will do this by punching in the next two lines.
Note: In the first line, you will need to replace the placeholder with the API key you generated earlier:
export NGC_API_KEY=REPLACETHISWITHYOURLONGAPIKEYHERE
echo "$NGC_API_KEY" | docker login nvcr.io --username '$oauthtoken' --password-stdin
With our authentication sorted, let's go ahead and actually download and deploy our Qwen3 Docker container. As we mentioned, we are deploying a 32B model. That "32B" means it has 32 billion parameters. You can think of parameters as the digital synapses of the model, and it's essentially a measure of the size of its "brain."
Throw this big wall of text into your terminal to start the deployment:
export CONTAINER_NAME="nim-qwen-32b"
export IMG_NAME="nvcr.io/nim/qwen/qwen3-32b-dgx-spark:1.1.0-variant"
export LOCAL_NIM_CACHE=~/.cache/nim
export LOCAL_NIM_WORKSPACE=~/.local/share/nim/workspace_qwen
mkdir -p "$LOCAL_NIM_CACHE"
chmod -R a+w "$LOCAL_NIM_CACHE"
mkdir -p "$LOCAL_NIM_WORKSPACE"
chmod -R a+w "$LOCAL_NIM_WORKSPACE"
docker run --rm --name=$CONTAINER_NAME \
--gpus all \
--shm-size=16GB \
-e NGC_API_KEY=$NGC_API_KEY \
-v "$LOCAL_NIM_CACHE:/opt/nim/.cache" \
-v "$LOCAL_NIM_WORKSPACE:/opt/nim/workspace" \
-p 8000:8000 \
$IMG_NAME
Depending on your internet speed, this download can take anywhere from 10 to 30 minutes, so now is the perfect time to go grab a cup of tea.
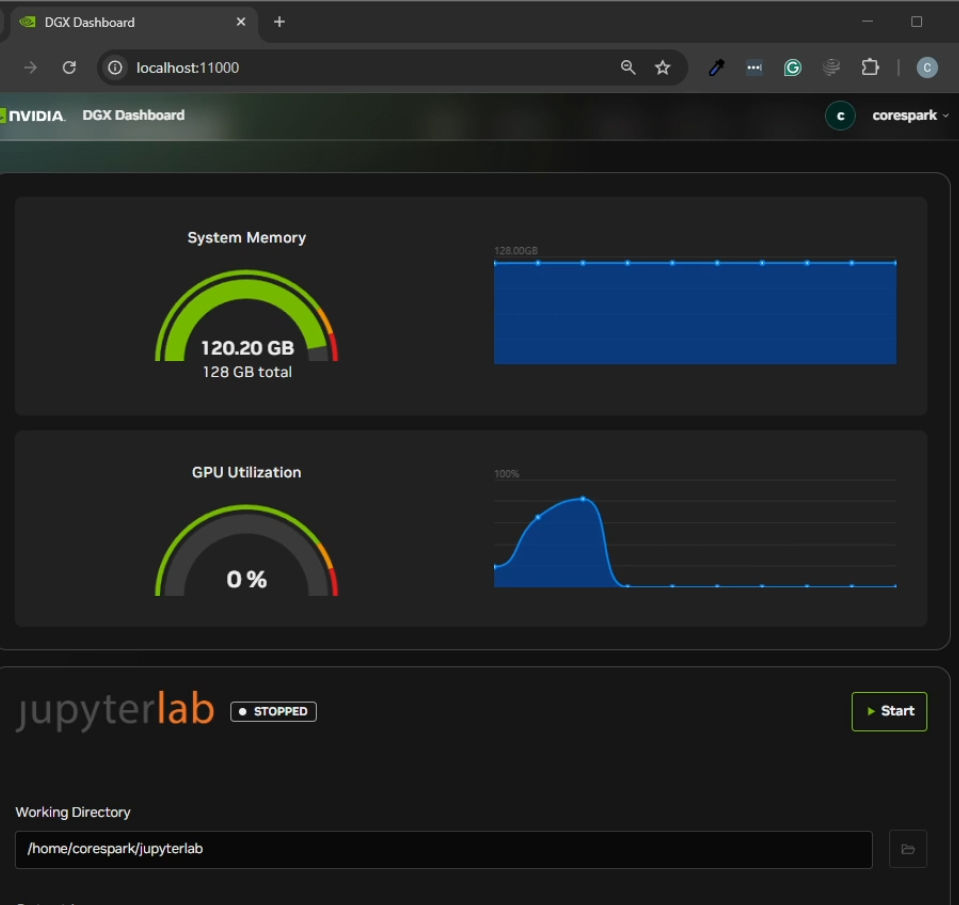
Once that download finishes, our Qwen model should be up, running, and ready to go! If you check your NVIDIA Sync dashboard, you will probably notice that you are using an enormous amount of RAM. Don't panic, we will fix that excessive memory hoarding shortly.
First, let's prove that it works. Open up a new terminal window and punch in the following curl command. This will send a prompt asking Qwen to list 10 red fruits:
curl -s -X 'POST' \
'http://localhost:8000/v1/chat/completions' \
-H 'accept: application/json' \
-H 'Content-Type: application/json' \
-d '{
"model": "Qwen/Qwen3-32B",
{
"role": "user",
"content": "List 10 red fruits."
}
],
"chat_template_kwargs": {
"enable_thinking": false
},
"top_p": 1,
"n": 1,
"max_tokens": 300,
"frequency_penalty": 0.0
}'
Hit enter, and boom - there are our answers, generated completely locally, offline, and privately on your own hardware! How darn cool and quick was that whole set-up?
The curl command we just used is a standardised JSON string format specifically structured for sending inference requests to an AI model (specifically, it mimics the industry-standard OpenAI API format). You will see this format crop up a lot in the AI world. You don’t need to memorise how to write these from scratch aseventually, you'll have other LLMs or Python scripts generating them for you, but it's important to understand the building blocks:
At the very top of the command, we specify the local network address and port where our Docker container is listening for requests, as well as the model we are looking to use.
curl -s -X 'POST' \
'http://localhost:8000/v1/chat/completions' \
-H 'accept: application/json' \
-H 'Content-Type: application/json' \
-d '{
"model": "Qwen/Qwen3-32B",
Then we get to our messages section, starting with the system prompt. This is a set of hidden instructions we give the model to change its fundamental nature. Think of it as the "thinking hat" the model puts on before it even reads your actual question. For example, you could set the system prompt to: "Use Australian spelling", or "Be verbose and over-explanative".
"messages": [
{
"role": "system",
"content": "You are a helpful assistant."
},
In this message, we also have the user prompt. This is the actual question or instruction you are feeding it (in our case, listing red fruits).
"role": "user",
"content": "List 10 red fruits."
}
],
Next we have the keyword arguments (kwargs). These are under-the-hood settings we can tweak to alter the model’s deeper behaviour. These change from model to model. In our example, we are specifically turning off "thinking" or "reasoning" steps, because we don’t need the model to ponder deeply about what colour a strawberry is. If however, you wish to turn it on, definitely do so! Just ensure you increase your token limit as reasoning will sap up all the allowed tokens unless you do so.
"chat_template_kwargs": {
"enable_thinking": false
},
And finally we have our parameters. Located at the bottom of the request, these are the final knobs we can turn to shape the output. For example, setting the max_tokens limit. If the model hits that exact number of words/tokens, it will immediately stop generating its answer, regardless of whether it finished its sentence. There are also things like frequency penalty, which penalises the LLM for repeating words. While this will make the response less repetitive, if set too high, it will eventually stop trying to say words like "the", "a" and "if", leading it to derail halfway through a response. Most of these can be left on their defaults, but its handy knowing that these can be tweaked if needed.
"top_p": 1,
"n": 1,
"max_tokens": 300,
"frequency_penalty": 0.0
}'
And that is the summit of our guide! We now have a model, running locally, offline, and privately, that we can prompt with this curl command here. If you are already in the know, you can take this exact setup and start integrating it into your agentic AI systems or whatever system you are making. For the rest of this guide, we are going to dissect a bit of what's going on here, fix that excessive uRAM issue, and get some other models running at the same time.
Limiting and Calculating Needed RAM
Let's tackle a big problem that you probably noticed during our first run: that crazy, ungodly amount of RAM usage. It might look like our QWEN3 model is completely hoarding nearly every gigabyte of memory it can get its hands on, but this is actually just NIM's (or technically vLLM's) default behaviour in this container. But we can change this to only allocate the RAM it actually needs!
Well, that really depends on your specific system setup and your application's goals. Let's break down the actual memory math under the hood so you can size your resources properly:
- Model Weights: Our 32B QWEN3 model itself (thanks to the NVFP4 quantisation we will discuss later) takes up about 16-ish GB of RAM.
- Engine Overhead: NIM, vLLM, and all the underlying framework machinery required to keep the system running efficiently consume about 5 GB of RAM.
- The Context Window: This is the LLM’s active working memory, or the space it uses to hold your current prompt, system instructions, and the history of the conversation. By default, NIM spins up with a context length of about 8,000 tokens. For QWEN3, an 8k context window requires roughly 2 GB of RAM.
But there is more to this. First of all, let's talk about allocating RAM for context windows. To throw in a common buzzword here, we are going to be "allocating RAM for the KV Cache".
An 8k context window is usually more than enough for the vast majority of AI agent applications. However, you can turn this knob up or down depending on what you are designing:
- Downsizing: If you are limiting your bot to handling short, rapid prompts and only need it to output single-paragraph answers, you don't need a massive working memory. You could comfortably drop the context length down to 4k tokens (maybe even lower), which will only need about 1 GB of RAM.
- Upsizing: On the flip side, let's say you want QWEN to ingest and analyse a dense, 40-page corporate financial report all at once. To do that, you would need to push it up to a 32k context length to hold that large report, and also all the tokens it will reply with. It is worth considering that models have a maximum context window, and 32k tokens happens to be QWEN’s maximum native context window. Because 32k is four times larger than 8k, it will demand four times the RAM, soaring up to about 8 GB of memory just for the context window alone.
Let's stick with our standard 8k token window for a moment. That is 2 GB for context, plus the 16 GB for the model weights, and let's throw in about 7 GB for our NIM engine, overhead, and safe breathing room. That brings us to roughly 25 GB of RAM.
Can we just lock the container to 25 GB and call it a day?
Not quite. There is one critical factor you must account for: simultaneous requests. What happens if three different people or background applications try to send this QWEN container a prompt at the exact same millisecond? The engine will attempt to process all three requests concurrently. To do that without falling over, it needs a dedicated 8k context window for each individual user. Suddenly, your context RAM requirement jumps from 2 GB to 6 GB.
How many simultaneous requests you choose to plan for completely depends on what you are building, but you always want to ensure you allocate enough padding so that your model doesn't crash mid-sentence. While we won't be covering it in this guide, keep in mind that there are software production strategies to queue up, throttle, and organise this kind of "prompt traffic."
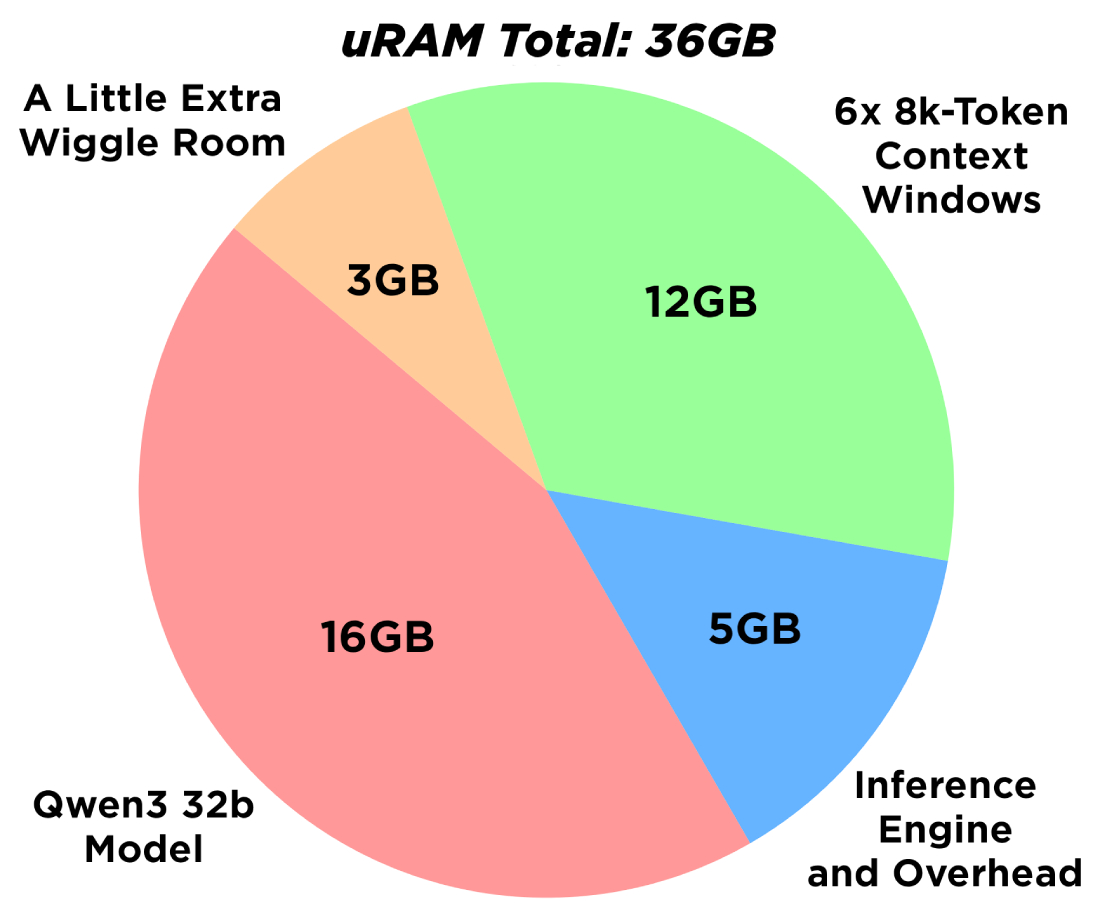
For our baseline setup, we are going to stick with the standard 8k context length, but we want to prepare our system to handle up to 6 simultaneous requests at once. This means we need (6 x 2 GB) 12 GB of RAM. Adding our 16 GB for the model weights and 5 GB for NIM and operating headroom brings our ideal target memory footprint to 33 GB. We will round that up to 36 GB just to be perfectly safe.
To apply these optimised resource limits, we first need to shut down our currently running, memory-hogging QWEN container.
Here is a super helpful Docker command to run:
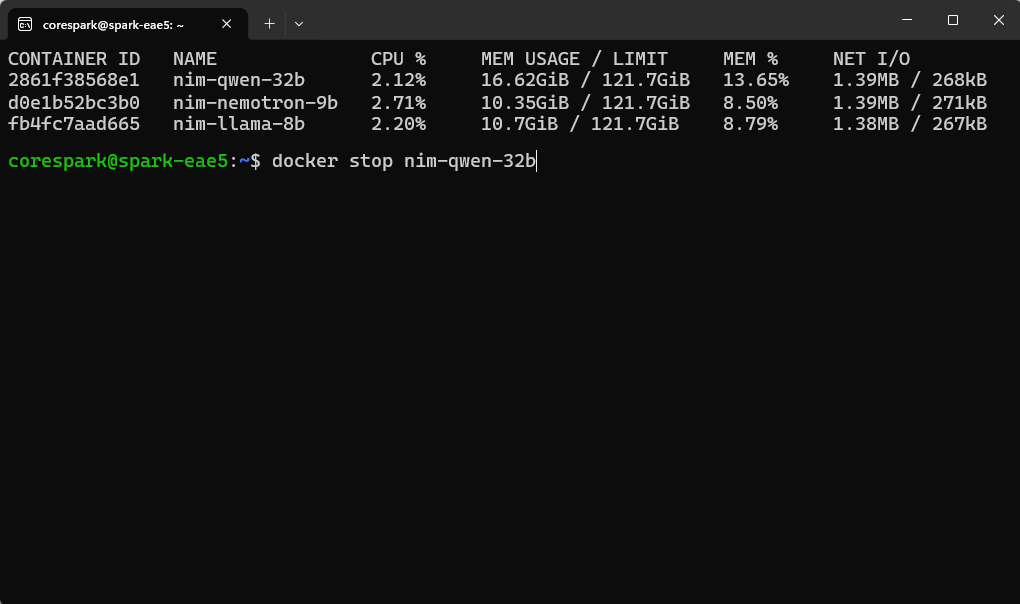
docker stats
If you run this in your terminal, it will bring up a live, lightweight dashboard showing all active containers and what they are doing / the system resources they are using. The image on the right shows a few containers running at once (yours should look like this at the end of this guide).
You should see our nim-qwen-32b container sitting right at the top of the list. To close out of this live view, hit Ctrl + C to exit back to your regular command prompt. Now, let's cleanly shut down the container by entering:
docker stop nim-qwen-32b
If you look back over at your primary NVIDIA Sync hardware dashboard, you should see your system's RAM usage instantly drop back down to its clean, idle state.
Now we are ready to fire the model back up using our newly calculated, resource-constrained command. Take a look at the optimised command block below:
export CONTAINER_NAME="nim-qwen-32b"
export IMG_NAME="nvcr.io/nim/qwen/qwen3-32b-dgx-spark:1.1.0-variant"
export LOCAL_NIM_CACHE=~/.cache/nim
export LOCAL_NIM_WORKSPACE=~/.local/share/nim/workspace_qwen
docker run --rm --name=$CONTAINER_NAME \
--gpus all \
--shm-size=16GB \
-e NGC_API_KEY=$NGC_API_KEY \
-e NIM_GPU_MEM_FRACTION=0.28 \
-e NIM_MAX_MODEL_LEN=8192 \
-v "$LOCAL_NIM_CACHE:/opt/nim/.cache" \
-v "$LOCAL_NIM_WORKSPACE:/opt/nim/workspace" \
-p 8000:8000 \
$IMG_NAME
Looking closely at this new string, you will see we are explicitly doing a couple of new things. First, we are manually setting our maximum allowed context window with -e NIM_MAX_MODEL_LEN=8192 \. You can change this integer to match whatever token length you settled on.
Second, we are configuring our exact RAM allocation via a system resource fraction with -e NIM_GPU_MEM_FRACTION=0.28 \. Because the system calculates this limit as a percentage of the total available memory, and our Spark has 128 GB of total onboard RAM, setting this allocation argument to 28% roughly lands us right at our safe, targeted 36 GB threshold.
Something else worth noting: you will notice we completely dropped the directory creation (mkdir) commands from this block. Those folders already exist on our file system from our first boot, so we don't need to pass them to the engine again. This refined string is the exact command you should save and use moving forward whenever you want to boot this QWEN model back up.
Hit enter to execute the command. It should only take a few short minutes for the container to safely spool back up. Once it has fully initialised, double-check your NVIDIA Sync dashboard. You will see it is drawing significantly less memory than before, yet if you run your curl request again, everything is still running just fine!
Running Llama3.1 and Nemotron Nano
Now that we have reined in our memory usage, let’s boot up another model. Because we restricted QWEN to only use what it actually needs, you can leave that container running happily in the background as long as it's not hogging all your system RAM.
We are going to set up and deploy a Meta Llama 3.1 container to run right alongside it using this command here:
export CONTAINER_NAME="nim-llama-8b"
export IMG_NAME="nvcr.io/nim/meta/llama-3.1-8b-instruct-dgx-spark:latest"
export LOCAL_NIM_CACHE=~/.cache/nim
export LOCAL_NIM_WORKSPACE=~/.local/share/nim/workspace_llama
mkdir -p "$LOCAL_NIM_WORKSPACE"
chmod -R a+w "$LOCAL_NIM_WORKSPACE"
mkdir -p "$LOCAL_NIM_CACHE"
chmod -R a+w "$LOCAL_NIM_CACHE"
docker run -it --rm --name=$CONTAINER_NAME \
--gpus all \
--shm-size=16GB \
-e NGC_API_KEY=$NGC_API_KEY \
-e NIM_GPU_MEM_FRACTION=0.15 \
-e NIM_MAX_MODEL_LEN=8192 \
-v "$LOCAL_NIM_CACHE:/opt/nim/.cache" \
-v "$LOCAL_NIM_WORKSPACE:/opt/nim/workspace" \
-p 8001:8000 \
$IMG_NAME
If you happen to get an authentication or permissions error when you run this, just punch in your NGC API key login line from earlier to refresh your credentials.
Take a close look at that command block, and you will notice it is pretty much the exact same setup structure we used for QWEN, but with a few key differences. First, we are pointing it to download the Llama 3.1 model, and we are giving it a much smaller 15% RAM allocation limit. Because we are using an 8b (8 billion parameter) Llama3.1 model, it has a significantly smaller "brain" than our 32B QWEN model and simply needs less memory to operate.
Secondly, we are setting it up to broadcast on port 8001 instead of 8000. This is crucial: every single instance of a model needs its own dedicated port so they don't talk over each other.
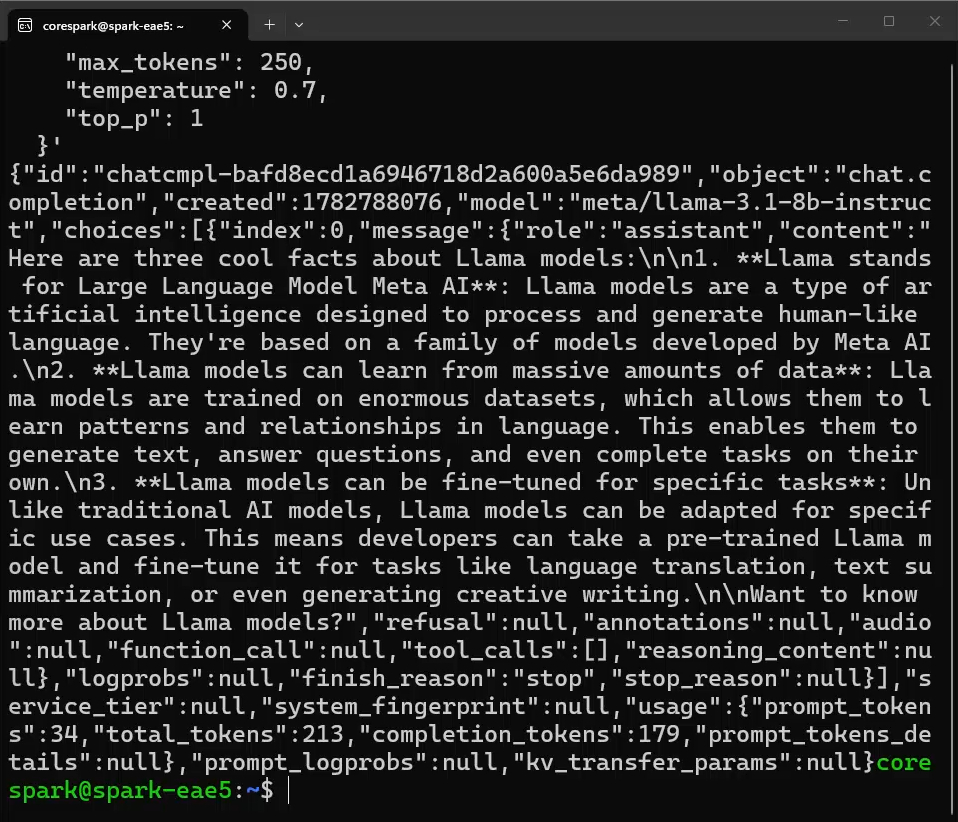
Once that container finishes downloading and spooling up, we can ask it a question! The curl request for this one is going to be slightly different:
curl -X 'POST' \
'http://localhost:8001/v1/chat/completions' \
-H 'accept: application/json' \
-H 'Content-Type: application/json' \
-d '{
"model": "meta/llama-3.1-8b-instruct",
"messages": [
{
"role": "system",
"content": "You are a helpful and concise AI assistant."
},
{
"role": "user",
"content": "Give me three cool facts about Llama models."
}
],
"max_tokens": 250,
"temperature": 0.7,
"top_p": 1
}'
Notice that we explicitly changed the address to look for the model on the new 8001 port, and we also didn't need to specify any reasoning or thinking rules in our parameters, because our Llama 3.1 8B model isn't a dedicated reasoning model.
Just to round this off, let's boot up a third concurrent model: NVIDIA's Nemotron Nano V2 9B model.
Fire up the container with this command:
export CONTAINER_NAME="nim-nemotron-9b"
export IMG_NAME="nvcr.io/nim/nvidia/nvidia-nemotron-nano-9b-v2-dgx-spark:1.0.0-variant"
export LOCAL_NIM_CACHE=~/.cache/nim
export LOCAL_NIM_WORKSPACE=~/.local/share/nim/workspace_nemotron
mkdir -p "$LOCAL_NIM_WORKSPACE"
chmod -R a+w "$LOCAL_NIM_WORKSPACE"
mkdir -p "$LOCAL_NIM_CACHE"
chmod -R a+w "$LOCAL_NIM_CACHE"
docker run -it --rm --name=$CONTAINER_NAME \
--gpus all \
--shm-size=16GB \
-e NGC_API_KEY=$NGC_API_KEY \
-e NIM_GPU_MEM_FRACTION=0.15 \
-e NIM_MAX_MODEL_LEN=8192 \
-v "$LOCAL_NIM_CACHE:/opt/nim/.cache" \
-v "$LOCAL_NIM_WORKSPACE:/opt/nim/workspace" \
-p 8002:8000 \
$IMG_NAM
And once that is done downloading and running, we can send it a curl request using the following block:
curl -s -X 'POST' \
'http://localhost:8002/v1/chat/completions' \
-H 'accept: application/json' \
-H 'Content-Type: application/json' \
-d '{
"model": "nvidia/nemotron-nano-9b-v2",
"messages": [
{
"role": "system",
"content": "/no_think You are a highly efficient technical assistant."
},
{
"role": "user",
"content": "Write a brief, but technically deep summary of what quantisation is in reference to LLMs."
}
],
"max_tokens": 500,
"temperature": 0.6,
"top_p": 0.95
}'
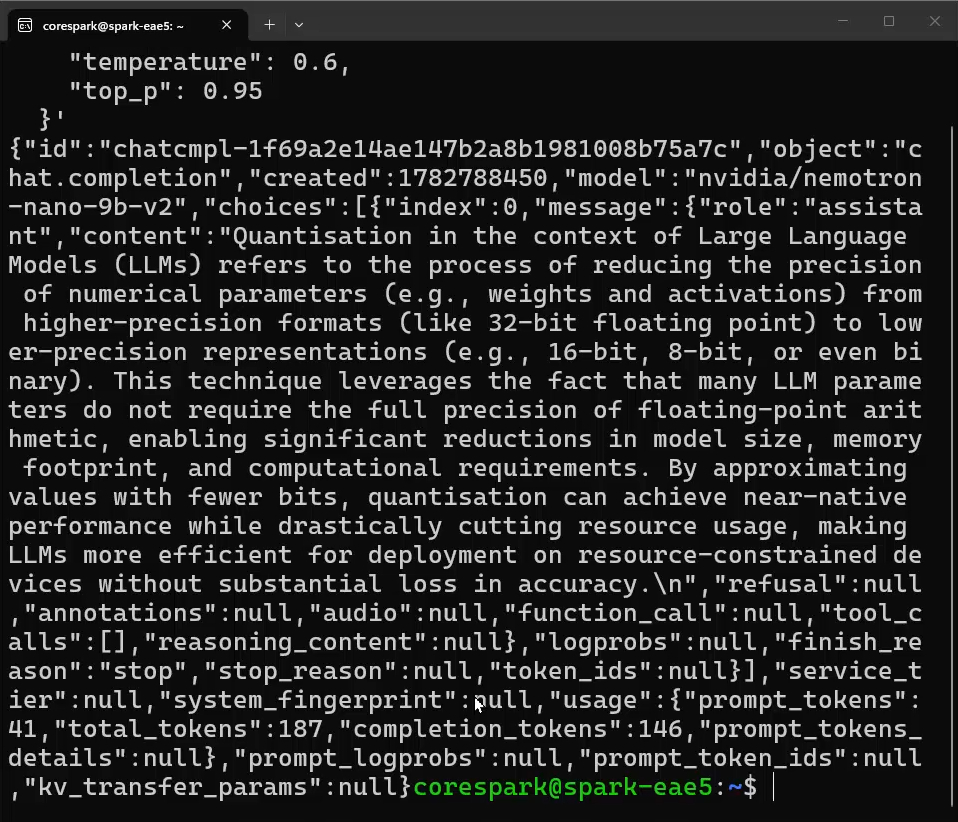
Nemotron is a pretty capable model that does include internal reasoning traces. However, in this specific curl command, if you look at the system role, we are actually turning that feature off by feeding it a /no_think tag. That is a great feature to play around with; try removing that tag and watch how the model changes its output behaviour!
One more incredibly important thing to note about Nemotron: this model supports a massive maximum context window of up to 128,000 tokens. You can definitely play around with pushing the context window that high if you want to feed it entire books of data. Nemotron is also incredibly efficient on RAM usage for its context window. You can expect to only need 3-ish GB for a full 128k-token window!
I know we just absolutely flew through the process of spooling up those last two models, but it really is that easy. Once you have Docker configured and your NGC account linked, deploying local AI is basically just copying and pasting a single terminal command. The structure of Docker commands can be used to install other model containers as long as you can find the relevant container image on the NGC catalogue page. Just ensure they are compatible with the DGX Spark!
Model Quantisation and You
There is one more crucial concept we need to talk about before we wrap up this guide, and that is quantization. All the models we have been running today have been quantized, which is just a highly technical way of saying that they have been compressed.
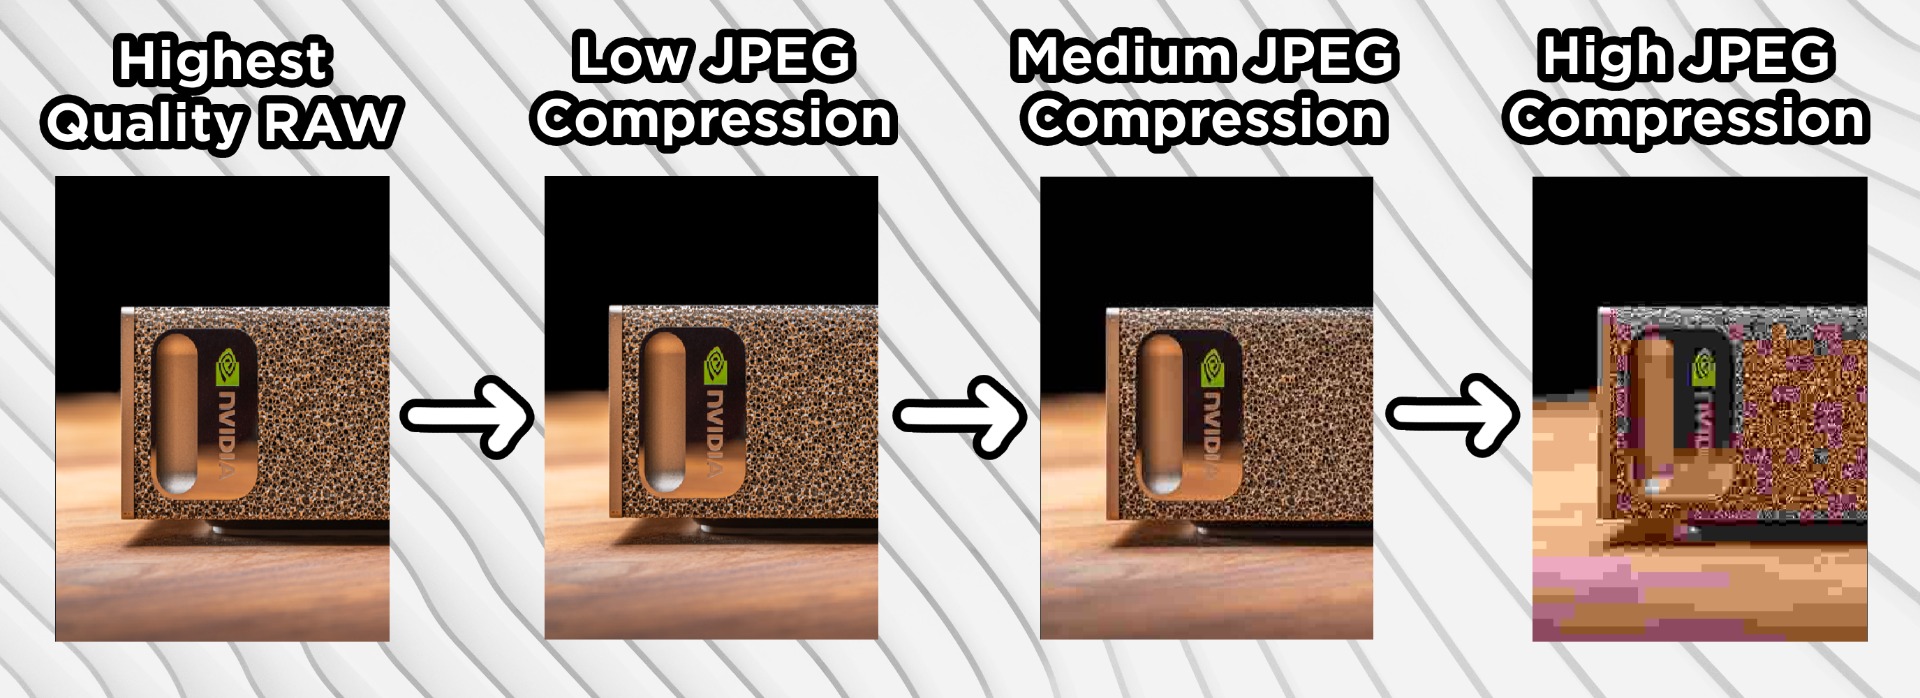
A great way to wrap your head around this is by using a photography analogy. If you have a fancy digital camera and take a photo, it will likely be saved in a RAW file format. This is the absolute highest-quality version of the photo, containing every single piece of original data the sensor captured.
But if you go online, you will find that almost all images are JPEGs, not RAWs. Why? Well, if you look at a RAW photo and a high-quality JPEG side-by-side, the JPEG is about 4 times smaller in file size, uses 4 times less RAM to open, and requires less processor power to view—yet it looks almost exactly the same to the human eye.
We could take that JPEG and compress it even further to make the file 4 times smaller again. At this point, the photo might look noticeably slightly worse, but it is still entirely usable for a thumbnail or a quick text message. However, we have a hard limit here: if we compress our JPEG too much, it turns into a blocky, pixelated, unusable mess. The image below shows this progression.
The exact same principles hold true for AI models. Let's take Qwen3 as an example. The original, base model was trained at FP16 (Floating Point 16). This is our high-quality RAW photo that holds all the uncompressed, high-fidelity data. But FP16 is incredibly RAM-hungry and processing-intensive to run locally.
So instead, the model is quantised (compressed) down to FP8 (8-bit). This instantly halves the amount of RAM the model needs to run and makes the inference speed significantly faster. Yes, there is a technical drop in model "intelligence" or performance going from FP16 to FP8, but it is often so small that you won't notice it.
If we tried going from FP8 down to FP4 (4-bit), we would again halve the amount of RAM required and get even faster processing speeds. However, historically, there would be a massive drop in performance and model intelligence, often rendering the model too "dumb" for needed tasks. That risk of over-compression is why FP8 has long been the standard for local deployments.
However, the landscape is rapidly changing as very smart people figure out ways to get more out of less. There are a lot of different ways this is being done (some we will look at when we get into Ollama), but one of these is NVFP4.
NVFP4 is a proprietary NVIDIA quantisation format designed specifically to leverage the modern Blackwell architecture inside your DGX Spark. Using a clever technique called "micro-block scaling," NVFP4 manages to give us the incredibly small RAM footprints of an FP4 model, while mostly keeping the high-level intelligence and performance of an FP8 model! One of the reasons we went through the process of setting up NIM is that it is the easiest way to get going with NVFP4 models, with both our Qwen3 and Nemotron models using it.
To help you plan your future AI projects, here is a fantastic rule of thumb to keep in mind regarding model parameters, quantisation, and RAM:
Take our QWEN3 model. It is a 32B (32 billion parameter) model. Because it is quantised at NVFP4, it uses roughly 16 GB of RAM to hold its weights. Notice the math?
- FP4 (or NVFP4): The required RAM is exactly half the parameter count (32 / 2 = 16 GB).
- FP8: The RAM matches the parameter count, requiring 32 GB.
- FP16: The RAM is double the parameter count, meaning it needs 64 GB.
It's also worth knowing that there are a lot of other different quantisation methods and labelling systems - some of which we will explore in future guides.
Where to From Here?
And that is a fantastic place to end for today! We now have a method to send inference requests to AI models running completely locally, offline, and privately on your machine. More importantly, we now understand the levers we can pull to alter how those models run and behave.
This setup is essentially a foundational building block. You can now take this NIM infrastructure and integrate it into a larger agentic system or AI-powered project that you might be building. This was a great way to get our toes wet in the world of locally hosted AI, and in future guides, we will keep expanding on these concepts, so keep an eye out.
If you are itching to explore more of what your DGX Spark can do, head on over to NVIDIA's page of playbooks. These playbooks are great little tutorials teaching you how to deploy AI-related things to your Spark. They are such a fantastic series of guides; so check them out!
As always, if you made anything cool with this setup, or if you need a hand troubleshooting something from this tutorial, head on over to our community forums and post about it. We are always happy to help.
Until next time, happy making!

