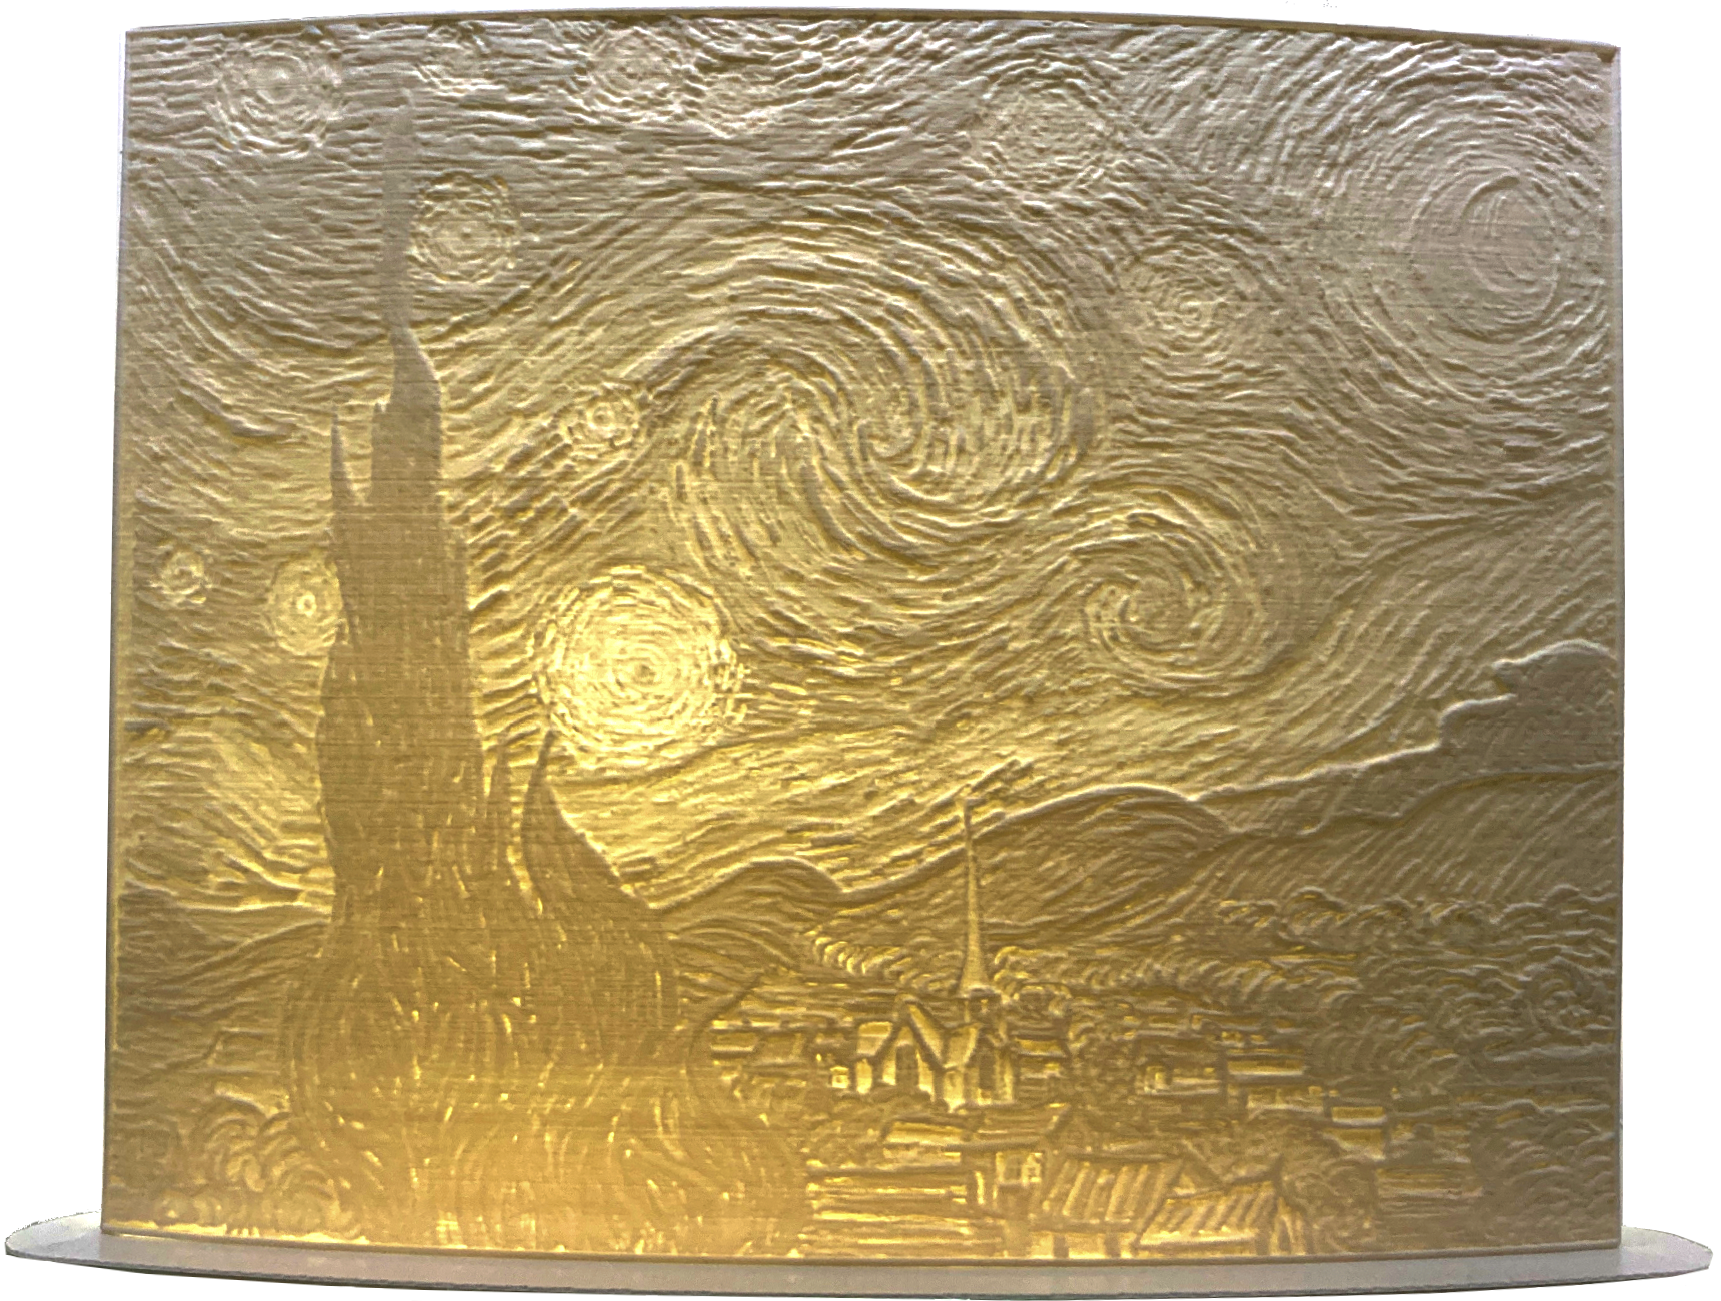
Of the many great objects you can create using any 3D printer lithophanes are definitely up there. Traditionally lithophanes were an etched or moulded artwork created on a very thin translucent porcelain that can been seen clearly only when backlit with a light source. Nowadays thanks to the emergence of 3D printing and CNC machinery you can now create lithophanes from many different materials. A lithophane presents a three-dimensional image. The image changes characteristics depending on the light source behind them and this brings a lot of the interest to lithophanes.
Simplifying all of this, lithophanes created in this tutorial are essentially embossed photos generated by a 3D printer. The print results do not show much at first, but once you shine some light through one and you will be amazed by the amount of detail captured. The way it works is that light passes through the thin parts while being blocked by the thick parts. In this way, the differences in light bring out the details of the image. The contents of the guide are seen below.
- History of Lithophanes
- What can become Lithophanes
- Software to Create Lithophane from Digital Images
- Best way to 3D print Lithophanes with Ultimaker Cura
- Getting More Colours into your Lithophanes
- Download Computer Files
All the lithophanes you can see printed here were done so on an Ultimaker S5 3D Printer using Ultimaker White Tough PLA. Ultimaker Cura will be talked about in this tutorial. There is an Ultimaker Cura Overview Guide which is a great reference point if this is your first time encountering Cura and you want to hit the ground running. It is completely free software available online with a great track record, used by over a million users worldwide and handles around 1.4 million prints per week.
Some of these settings talked about will be hidden settings in Cura. To be able to make them visible in the Print Settings Menu go to |Top Tool Bar > Settings > Configure Setting Visibility| then find the particular setting in the list and click on its Checkbox. As always if you have any questions, queries or things to add to this topic please let us know your thoughts!
History of Lithophanes
Lithophanes were first produced nearly simultaneously in France, Germany, Prussia and England around the 1820s. Lithophanes originally were made by specialized European craftspeople with the foundations of the craft as an image carved in warm wax on a glass plate. This was then backlit and carved. Often the carving table was near a window and had a mirror below the table to provide constant light for accurate carvings. These were highly coveted objects for generations. Below is an image demonstrating a number of these now antique lithophanes in various levels of light. This give you a good idea of what lithophanes look like depending on light sources.
What can become Lithophanes
Any two-dimensional image can become a lithophane! Turning photos into 3D objects gives them more feeling and literally adds a new dimension. There are many ways to turn two dimensional images into three dimensions but lithophanes take the cake. They are both a simple and mesmerising method to enhance your favourite photos.
The final image will appear in shades so if there are important details of similar colours it may not be a good fit. Furthermore because of this, photos with a high contrast ratio are an excellent fit. It is honestly extraordinary how much detail can be reproduced.
So many objects can also become great potential lithophanes. Above is a lithophane lamp I made which rotates with the heat from the light bulb. It has a pretty wallpaper background and has multiple frames of a horse running. This image comes from 1878 and was one of the first examples of making images become motion. These photos were taken by an English photographer, Eadweard Muybridge, to settle a bet between California businessman Leland Stanford and his colleagues. Stanford contended that at some point in a horse's stride, all four hooves were off the ground. He enlisted Muybridge to take photographs of the positions of a horse's hooves in rapid succession. You can see from above just who won that bet.
Software to Create Lithophane from Digital Images
For all the lithophanes created in this tutorial the completely free online software by Nested Cube called 3dp.rocks for creating lithophanes was used. There are many other tools for turning your photo into a lithophane model but virtually all of them work the same way. First, they guess the primary object of the photo and emboss it. Then they give it a nice border and provide you with the final file in a 3D format like an STL (Standard Triangle Language) file.
Another great and free Lithophane creation tool is ItsLitho. This is another great lithophane maker, with even more features than 3dp.rocks, where you can convert images to 3D model lithophanes which can be then sliced and 3D printed.
In the Nested Cube software, the shades of a photograph are used to generate a heightmap surface. This can then be used in a slicing software to allow a 3D printer to create solid lithophane representations from semi-translucent material. A heightmap is a rectangular grid of values like a digital photograph however, every pixel has a known value for the elevation instead of a colour. Simplified, this software takes your image, converts it to monochrome, inverts it and then uses the brightness of each pixel as the height of the output model.
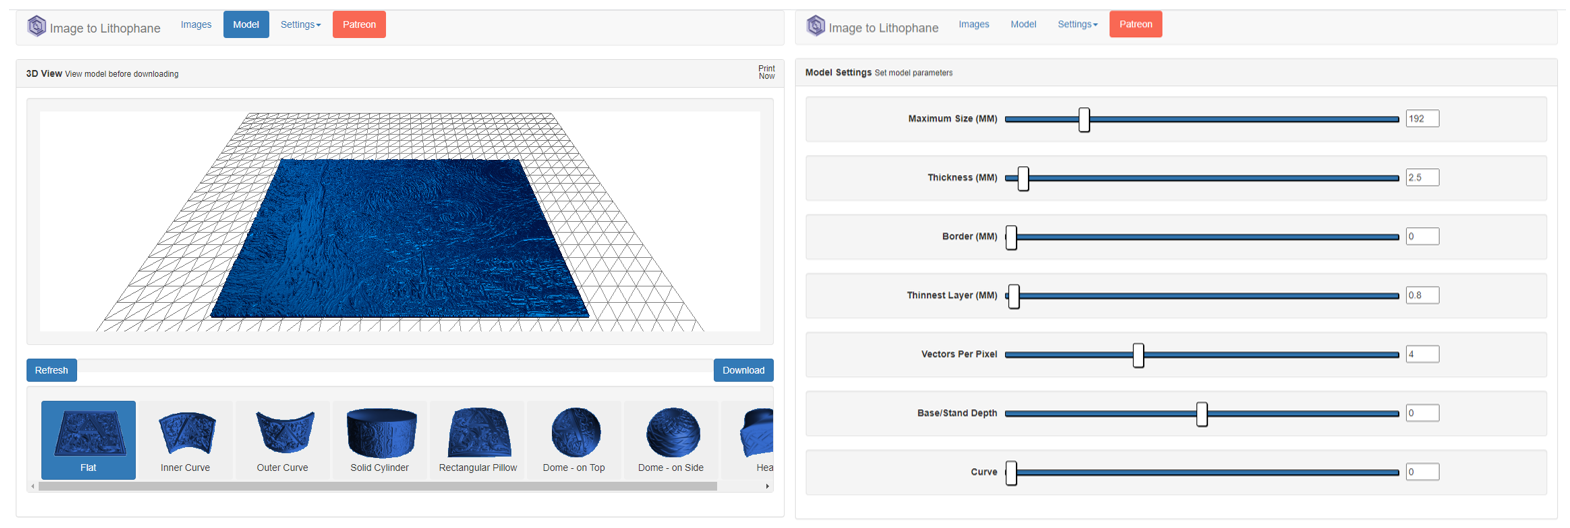
Below show screen grabs of the Nested Cube software being used to create a lithophane of 'The Starry Night' a painting by Vincent Van Gogh created in June of 1889. This software is brilliant, you can drag and drop your image file directly into the program or you can upload it from a saved location. The software will then automatically start to create a lithophane out of the image you have placed. You can alter the size, thickness, borders, thinnest layers (maximising the range of shades available), vectors per pixel (increases the detail of the final lithophane), base depth and even create a curved lithophane so it can stand on its own. You can also experiment with a number of different shapes, from flat to domes to cylindrical shapes. You can even decide on which side of the object the heightmap occurs on. The image once turned into a lithophane can be download for free as an STL file. This file type is perfect for all 3D printing slicing softwares.
Best way to 3D print Lithophanes with Ultimaker Cura
There are a number of settings inside Ultimaker Cura and material choices that will give the best-looking results when 3D printing lithophanes. These are listed below.
- Print Speed, Slow Speeds of 20mm/s-35mm/s. This will ensure no detail is lost and the printer takes the time it needs to get good inter-layer adhesion
- Wall Thickness, 10 (Ergo Max Out Value). This will ensure the insides of the lithophane (which will have light shone through it) will have the same density throughout. This is because all internal lines will effectively be perimeter lines. This allows the image to come out looking sharper.
- Infill (%), 100%. This is a double measure (which you should not need to do so long as wall thickness is set correctly) to ensure the insides of the lithophane will have the same density throughout.
- Build Plate Adhesion Type, Brim. This is to maximise the stability of the lithophane when it is being printed. Often the actual lithophane is only 2-3mm thick.
- Minimise Layer Height. This allows the maximum amount of detail to be captured in the lithophane
- Print the Lithophane Standing Upwards. Due to the mechanics of FFF (Fused Filament Fabrication) printing a better result will occur when the lithophane is printed standing upright.
- PETG. This would be an excellent material to use as it is heat resistant. Lights and LEDs can give off a lot of heat when used for a long time and utilising PETG will prevent any deformation. White and opaque materials present the best results. Would not recommend using clear materials as the lithophane effect will be lost.
Getting More Colours into your Lithophanes
So, you dig the lithophanes but you want more colour! And I definitely agree, more colours the better. There are several different solutions to approach this problem which I will go through below.
- Transfer Colour from Laser Printed Paper using Acetate. I have successfully done this. You can get colour that perfectly matches the image you have printed however it requires a fair amount of effort. To get colour onto the back of the PLA Vincent Van Gogh painting I used 4 separate A4 sheets of laser-printed paper and a small container worth of acetate. I then laid the paper and rubbed the colour onto the back of the PLA after moistening both sides with acetate. Gloves and mask essential. The results of this process can be seen below.
- Transfer Paper. There are some awesome ways to get laser printed designs onto plastic using transfer papers, just a quick look on YouTube demonstrates this. This is a method I will pursue further to try to get more colour into these 3D printed lithophanes.
- Laser Printed Sheet on the Back. A simple solution that gives a good result even if it blocks some of the light getting through the lithophane. It is also important not to let the sheet get too hot as it would be liable to melting or catching fire given enough time. You can also do colour adjustments to the paper print as the opacity levels of your particular lithophane can alter colours when light travels through it.
- LED Lights with different colour choices. If you want to alter the whole hue or feeling of the picture by altering the background lighting you can end up with some excellent looking vibrant results. Particularly good when most of the image is a single colour.
- Painting the inside or outside. For those particularly artistically gifted you can go through the process of either painting the inside or outside with paint. This will block some of the light but traditional lithophanes were often painted and the results look gorgeous.
Download Computer Files
All STL files of the various models that have been 3D printed in this guide can be downloaded below.


