Introduction
This guide will help you read temperature data from your PiicoDev® Precision Temperature Sensor and a Raspberry Pi Pico
To follow along, it's best to have:
- A Raspberry Pi Pico with pins soldered (pointing down)
- A PiicoDev Precision Temperature Sensor TMP117
- A PiicoDev Expansion Board for Raspberry Pi Pico
- A PiicoDev Cable
In the video we use a PiicoDev Platform to keep everything safe and secure.
If you prefer not to use the Expansion Board for Raspberry Pi Pico, there are other connection options in our PiicoDev Connection Guide.
Connect the PiicoDev sensor to your Pico
Ensure the default address is set
For temperature sensors with an address switch labelled "ASW" (hardware versions v12 and above), make sure the first switch is ON and the rest are OFF.


For earlier revisions of the temperature sensor, the address was set by a solder jumper on the back. In this case, make sure that address 0x48 is selected.
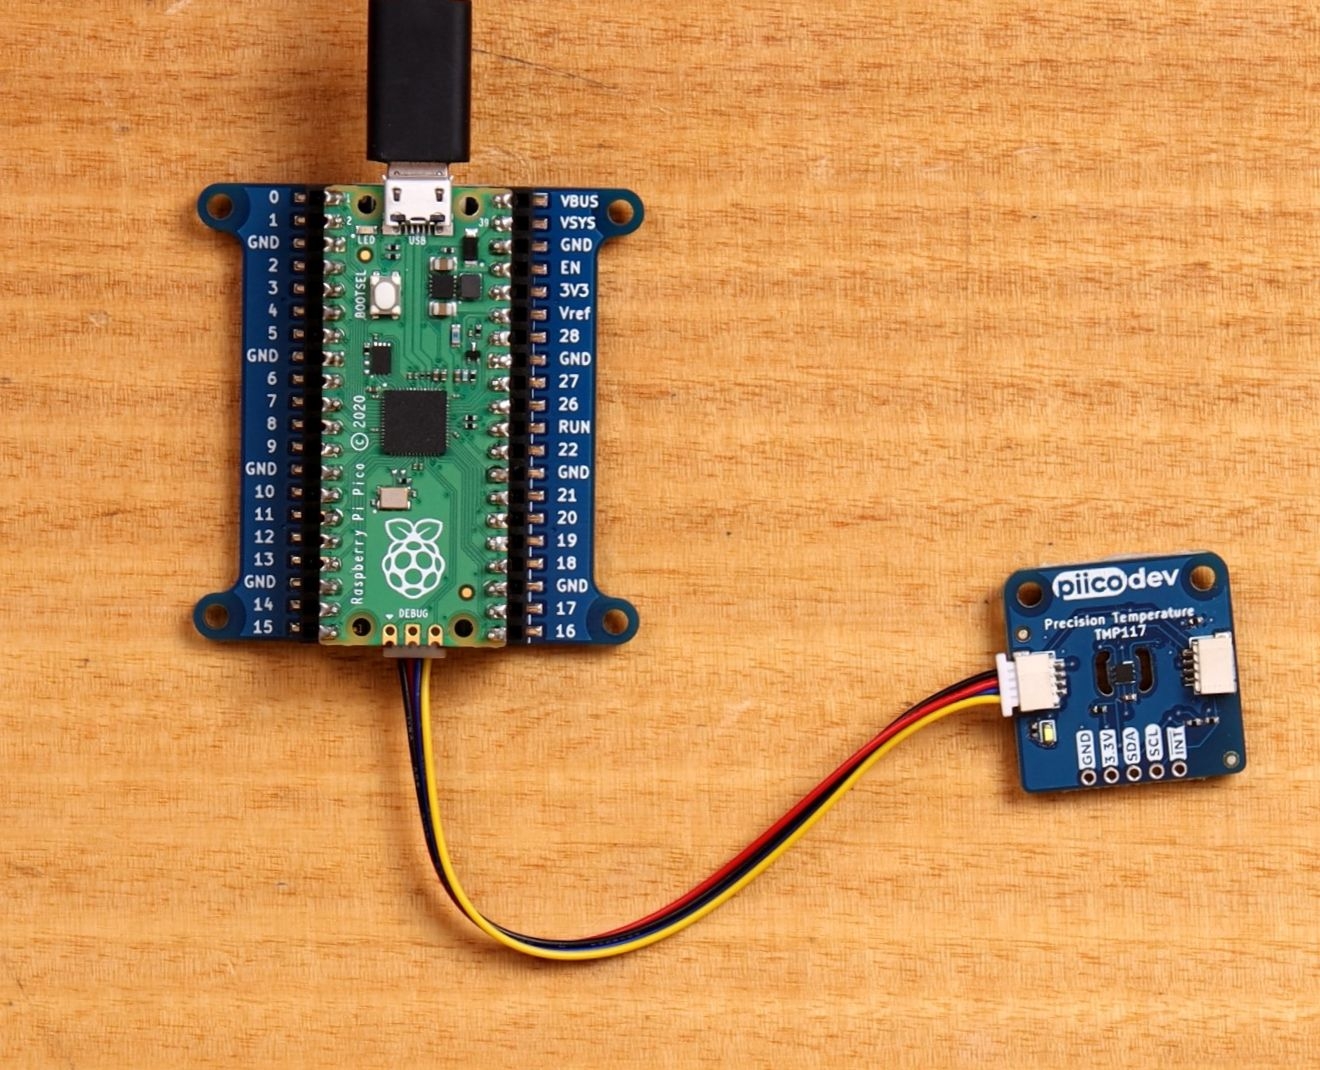
Plug your Pico into the Expansion Board, connect your temperature sensor to the Expansion Board via the PiicoDev cable and connect your Pico to your computer with a USB lead.
If you're unfamiliar with connecting PiicoDev modules, read the PiicoDev Connection Guide before proceeding.
Download the PiicoDev Modules and Example Code
Download the following files and save them to your working directory (Right Click > "Save Link As")
- PiicoDev_Unified.py - The PiicoDev Unified Libraries: Drives I2C communications for PiicoDev modules
- PiicoDev_TMP117.py - The device driver.
- main.py - an example script for the PiicoDev Temperature Sensor
It will be best to keep this file wherever you like to keep your coding projects eg. make a directory Documents > PiicoDev
Example Code
Open Thonny, connect to your Pico and upload the three files from the previous step.
Press Ctrl D to restart your Pico and run the main script - temperature data should begin streaming up the shell
If you're unfamiliar with Thonny, read our setup guide.
Above: Plotted data starts at room temperature (23degC) and climbs sharply when I warm the sensor with my hands. When I remove my hands, the temperature falls gradually.
The example also reads temperature in Farenheit and Kelvin - Modify the print statement to call the appropriate variable as you like.
eg.
print("It's " tempStringF "°F")
Now we can easily read temperature in Celsius, Farenheit and Kelvin.
Tip: Open the Plotter (View > Plotter) to see a nice plot of your temperature data
Connecting Multiple Sensors
It's possible to connect up to four temperature sensors to the same PiicoDev bus and read them independently - they each require a unique address. In the connect section, we set our sensor to the default address (0x48): where only the first ASW switch is ON. To read from more sensors, they need to be configured with unique addresses. For example, the second sensor should have the ASW2 switch ON, and the rest off. The third should have the ASW3:ON and the rest off - and similarly a fourth sensor.


The following example will read two sensors independently. This example looks similar to the first example in this tutorial, except now the initialisation functions are passed the asw argument. This is a list of four numbers that represent the positions of the ASW switches. sensorA has the first switch set, so asw=[1,0,0,0]. Likewise, sensorB has the second switch set, so the second element is 1 and the rest are 0: asw=[0,1,0,0]. This logic can be expanded to a maximum of four sensors.
# PiicoDev TMP117 - reading multiple sensors
# This program independently reads the temperature from two PiicoDev TMP117 precision temperature sensors
# Each sensor should have its ASW switches configured to match the asw argument during initialisaiton, eg.
# sensorA: asw=[1,0,0,0] so the first switch should be ON and the rest OFF
# sensorB: asw=[0,1,0,0] so the second switch should be ON and the rest OFF
# this logic expands to a maximum of four sensors

from PiicoDev_TMP117 import PiicoDev_TMP117
from PiicoDev_Unified import sleep_ms # cross-platform compatible sleep function

sensorA = PiicoDev_TMP117(asw=[1,0,0,0]) # initialise the sensor
sensorB = PiicoDev_TMP117(asw=[0,1,0,0]) # initialise the sensor

# Advanced users may prefer to set the address explicitly, instead:
# sensorA = PiicoDev_TMP117(address=0x48) # initialise the sensor
# sensorB = PiicoDev_TMP117(address=0x49) # initialise the sensor

while True:
    # Read and print the temperature in various units
    tempA = sensorA.readTempC() # read from sensor A
    tempB = sensorB.readTempC() # read from sensor B

    # print both results
    print("A:" + str(tempA) + "    " "B:" + str(tempB))

    sleep_ms(1000) # delay 1 second
If you have any questions or uncertainty, start the discussion below. We're full-time makers and here to help!


