Welcome to our beginners tutorial on analog electronics. Living in the digital age that we do, it’s easy to disregard the world of discrete analog components, however these concepts form the basis for everything from your mobile phone, to space satellites.
You don’t need to be a maths whiz, or know anything about electronics, we’ll go through everything in a way that’s easy to understand, and by the end of this tutorial you’ll be building circuits like a seasoned pro! Don’t worry if you read something and it doesn’t make sense at first.
Check out the Beginner Parts Kit, which contains a good selection of many common components as listed in this article, plus it has a sweet case!

The TL;DR
This tutorial has a lot of content in it, but never fear! Our TL;DR guide below sums up the various sections.
- What is electricity
- Ohms law
- Difference between components
- Resistors
- Capacitors
- Diodes
- Transistors
What is Electricity?
Before we get anywhere, we need to understand what electricity actually is. We’ll be simplifying things quite a bit, however it’s a good starting point.
To understand how an electrical circuit works, we’re going to create an analogy, and a set of rules which govern how the analogy works.
Imagine a pipe that is on a slant (one end is higher than the other). At the high end there is a big pile of marbles, and there is an empty container at the low end. The pipe is filled with marbles with no gaps, however the marbles can’t roll down the pipe by themselves, you have to push a marble in from the top, and then a marble will (almost) instantaneously come out at the bottom. And the marbles can only travel down from the top end to the bottom, they can’t travel from the bottom up.
That’s the basic analog, now let’s tie in electrical concepts with our pipe dream.
The high end represents the positive terminal on our battery/power supply and the low end represents the negative terminal. The amount of marbles that are stored at the top of the pipe is like our battery/power supply. A battery can run out of charge when the marbles at the top are depleted.
The gradient of the slope of the pipe (the difference in height between the top and bottom) represents the Voltage, which is measured in Volts. Voltage is the potential work that can be done. It is like the potential energy that our marbles have. The greater the height, the greater the potential energy they have. The higher the voltage, the more potential we have to perform work.
The diameter of the pipe is our load, or resistance, which is measured in Ohms. The higher the resistance, the smaller the pipe is, and less marbles can pass through it at a time. The wider the pipe, the lower the resistive load.
As we alluded to above, current is the amount of marbles that can pass through a circuit at any given time, and is measured in Amps. Therefore, the greater the resistance is in a circuit, less current can flow, the lower the resistance, the greater the current.
Ohm’s Law: V = IR

The relationship between Voltage, Current, and Resistance is expressed quite simply in Ohm’s Law: V = I x R. That is Voltage (V) is equal the Current (I) multiplied by the Resistance (R). Some simple algebra shows that we can wprl out any of those values in a circuit, providing we know the other two.
Let’s use this knowledge to work out the current flowing through the circuit to our left. We are using a 9V battery as our power supply, and a resistor symbol to simulate a circuit load of 100 Ohms. We have 9 volts of electrical potential energy which will be used by the time it gets back to the negative terminal (short line on the right of our battery is the negative terminal, the taller line on the left is the positive terminal). That means that there will be a voltage drop of 9V across the resistor (load). We need to rearrange V = IR to become I =V/R. Let’s put our values in to make I = 9/100.
We therefor have 0.09 Amps (A) of current flowing through our circuit, or 90 millliamps (mA). **We use the letter ‘I’ in equations to refer to current**
Going back to our pipe analogy, because wire has such a low resistance (for most schematics we pretend it doesn’t have a resistance) putting that resistor in our circuit is like we’ve put a narrow section of pipe in between the top and the bottom, and it has reduced the amount of marbles that can be pushed through at a time.
So now we have a basic understanding of how electrical energy works, let’s take a look some of the common components we can use in a circuit to change the way that the electrcity (marbles) flows.
Components
Electronic components are the building blocks of circuits. Even the fanciest code would be useless without a circuit for it to run on. Whilst there are thousands of different categories of components, we’ll be focusing on the main ones that are useful to the DIY electronics hobbyist. Read through the whole article, then come back to the parts you didn’t understand the first time, and it should start to make some sense.
Resistors

Resistors are the unappreciated working class of electronics components. The job of a resistor is fairly self-explanatory, it resists the flow of current in a circuit. We measure resistor values in Ohms. An Ohm is a very small unit, most resistors are measured from several hundred Ohms, to millions of Ohms. Every part of a circuit will have a resistance; the copper wires we use to connect our components have a resistance (it is so small we ignore it usually) because whilst copper (or other conductive materials) is a great conductor, it is not 100% perfect. Resistors are non-polarised components, which means that it doesn’t matter which end you connect to what, it will still function exactly the same.
The schematic symbol for a resistor:
Capacitors

A capacitor can be thought of as a battery that can charge and discharge extremely quickly. Its construction is a bit like a sandwich; there are two conductive plates, separated by an insulator. Capacitors are measured in Farads (F). A Farad is quite a large unit of measurement and most capacitors that you will find in everyday circuits are measured in picoFarads (pF), nanoFarads (nF), and microFarads (uF). Capacitors can be used for many different reasons such as power supply filtering, timing, frequency responsive filters, and decoupling (blocking Direct Current). Capacitors come in two flavours, polarised and non-polarised. They are generally named after the dielectric used in them (the conductive material). Some examples of non-polarised capacitors include Film, and Silver Mica capacitors, whilst Tantalum and Aluminium Electrolytic capacitors are polarised. They usually have a grey stripe or marking to denote the negative lead.
The schematic symbol for a polarized (left) and un polarized capacitor (right): 
Diodes

There are a few important things to note when choosing a diode to use:A diode acts as a one way valve for an electrical current to flow. A diode has two leads, one that is called the ‘anode’ and the other the ‘cathode’. The modern day silicon diode looks nothing like the original vacuum tube diodes, however the concept is the same. There are different types of diodes such a general signal, Schottky, Zener, Rectifier, LED, however they are mostly just spec variations of a general diode, designed to fulfill specific applications (with a few functional twists thrown in). Allowing current to flow through the diode is known as forward biasing (ON) and occurs when the voltage at the anode is higher than the cathode. This will allow current to flow from the anode to the cathode. Reverse biasing (OFF) is the state where the diode is blocking current flow.
The forward (ON) voltage that is required for the diode to start conducting, this is usually around 0.7V, however Schottky diodes are designed especially to have low (0.2V – 0.3V) forward voltage.
Current and Voltage ratings are important to note, as if exceeded, you can blow the diode. Small signal diodes are generally only rated for 200-300mA, whereas rectifier diodes are designed to handle larger amounts of current for power supply purposes.
Likewise, diodes will have a breakdown voltage which they are rated for, so if you reverse bias a diode with a greater voltage than this, it will conduct in reverse bias, however it will usually permanently damage the diode. Zener diodes are special diodes which have low breakdown voltages and are designed to be reverse biased as well as forward biased.
Diodes will also exhibit a forward voltage drop which is dependent on the forward current, however for most diodes it is around 0.7V.
LEDs are a special type of diode which emit light when there forward is met.
The schematic symbol for a general purpose diode: 
Transistors
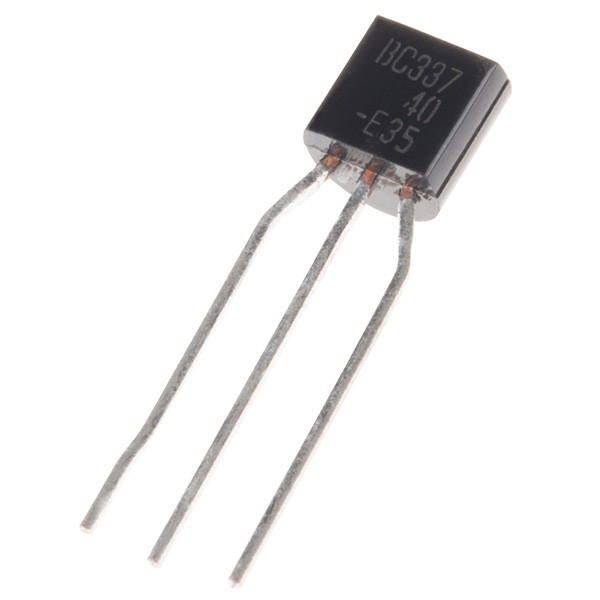
Rounding off our basic components is the humble transistor. The invention of this little device is what opened the floodgates for modern electronics. Everything from your car radio, to your cellphone, to a space satellite has transistors in it. Even the most advanced computer processor consists of billions of tiny transistors packed onto a single chip.
There are two main transistor technologies, however we’ll be focusing on the most commonly used one, the Bipolar-Junction Transistor (BJT).
A transistors function is to control the flow of current, from another source. You can control a very large current/voltage from a very small control signal. Instead of power a motor directly from a small microcontroller (which will most likely draw more current than the microcontroller can handle, and fry it), you can control the transistor using a small logic level signal, and use the transistor as a switch to drive a larger power supply for the motor.
Bipolar-Junction Transistors come in two varieties: NPN and PNP.
An NPN transistor symbol has the arrow pointing away from the body (left), and a PNP transistor symbol has the arrow pointing towards the body (right) indicating the flow of conventional current relative to the device.


The difference is in the semiconductor construction and while operating in the same manner, the control method for them is slightly different. The most commonly used type is the NPN BJT so let’s have a look at how it works.

When using an NPN transistor as a switch, we place our load between the positive supply and the Collector pin, and use the transistor as a switch from the load (Connector) to ground at the Emitter pin. A BJT transistor has 3 pins; Base, Collector, and Emitter. The base is the control pin, and the current flows the Emitter and Collector. This will give us nice simple, stable operation.
 Awesome, Let's Build Something
 Awesome, Let's Build Something
Now that we’ve looked at what each basic component does, we’re going to take everything we’ve learnt so far and integrate it all in one circuit.
Let’s take a commonly used transistor like the BC547 (the datasheet can be found here). The BC547 is a good all-rounder NPN transistor that is suitable for small signal switching, and low power audio amplification.
Let’s have a look at the circuit on the right. Our goal is to turn on the LED using a transistor as a switch. You might be wondering why we’d bother using a transistor in this schematic, and it’s a fair question. For this particular application of switching an LED there isn’t really much point, however we can use the transistor to drive bigger loads, or replace the switch with a microcontroller.
Anyway, we’re going to break the circuit down component by component. We have a 5V power source at the top, and we’re using the schematic shorthand for our ground connections. Now what do all these extra components do?
- Switch: When the switch is open, the transistor base is left unconnected which won’t allow any current to flow through it. When we close the switch, we connect the base to our 5V supply via a resistor in series (R1) to limit the current to the transistor. This will turn the transistor ‘on’ and allow current to flow.
- T1: This is our BC547 transistor which will act as a switch to turn our LED on.
- R1: This is a current limiting resistor to make sure that we don’t destroy our transistor by allowing it to draw too much current (it’s only designed for small signals). 1K Ohm is a good value for this.
- R2: This is another current limiting resistor, this time for our LED. We’ll use Ohm’s law to work out the value below.
- C1: This capacitor is going to act a bit like a backup reservoir which will continue to power our circuit for a short time after disconnecting the power supply. When we connect 5V to our circuit, it will charge the capacitor, but having nowhere to go, it will simply remain charged until there is a load to drain it. Because our power supply is powering our circuit, it is constantly topping up C1, however when we disconnect our power supply, C1 will briefly provide a small amount of power while we are drawing current with our circuit. Calculating the exact capacitance needed is slightly more complicated than using Ohm’s law, so we’ll just use a standard large(ish) 100uF capacitor.
Now we know all of the component values by using standard values, however for R2 we need to work out an exact value to make sure that we don’t destroy our LED by dropping 5V across it and allowing it to draw too much current. LEDs can have different specifications depending on the colour, brightness, and efficiency. The 5mm LED 6 pack is a good started pack and lists the max current draw at 20mA and a forward voltage drop of approx. 2V.
We know that from the 5V supply point to ground (0V) we will use up 5V of energy. If we only have an LED there, then the laws of physics dictate that the LED will use all of that, and they are only rated for 2V. So our resistor needs to use up 3V out of our 5V, and also limit the current through that section of the circuit to 20mA.
 Using ohms law we can work out the value of R2 by changing V=IR to R=V/I. I = 20mA (0.02A), V = 3V so we substitute those values in to get R = 3/0.02 = 150.
This means that the smallest value resistor we can use is 150 Ohms. We can of course use a larger value resistor as it will simply reduce the current further (decreasing brightness), however a smaller value resistor will allow too much current to flow. Fortunately 150 Ohms (150R) is a standard value. If we had gotten a result like 149.3 we would simply round up to the nearest standard resistor value.
Voila! Our finished schematic complete with all required component values. Theoretical knowledge is all well and good, but let’s actually build the circuit on a breadboard to see what’s happening.
This is what your breadboard should look like with all of the connection. Make sure that the flat side of your BC547 is the side with the ‘N’ in the picture. Connect a 5V supply to your board and try pushing the button. What happens when you disconnect the power supply while holding the button? The LED should stay on for a little while.
You can use a higher voltage power supply, however you will need to alter the value of R2 to account for it. Simply redo the calculation using Ohm’s law as such:
R = V(x – 2)/0.02 where 'x' is the voltage of your power supply.
Hopefully the weird and wonderful world of electronics has started to make some sense, but don’t worry if you didn’t quite understand everything that was going on. The very best way to learn is by building things yourself, finding out what happens when you change a component, or something goes wrong. Pair this knowledge with the microcontroller platform of your choice, and you’ve got all the tools to build your first robotics project.

