It was a dark and stormy night, and Pix was bumbling around with nonsense again.
I was thinking of building a patchbay for simple but configurable home networking (something I may still pursue). I figured that I could use jumper wires to connect ports using my GPIOs as a network map. It was a cute idea.
I can’t remember how or when I reached this creative insight, but at some point building this interface, I realised I shouldn’t be carving a sequence of network ports; instead, I should be carving a sequence of music samples.
The Brief
We allow a user to connect the demultiplexors and multiplexors, however they like, with jumper wires. Our task is to capture these connections in code and use them to infer an analogous path through the samples of a WAV file.
Step 1
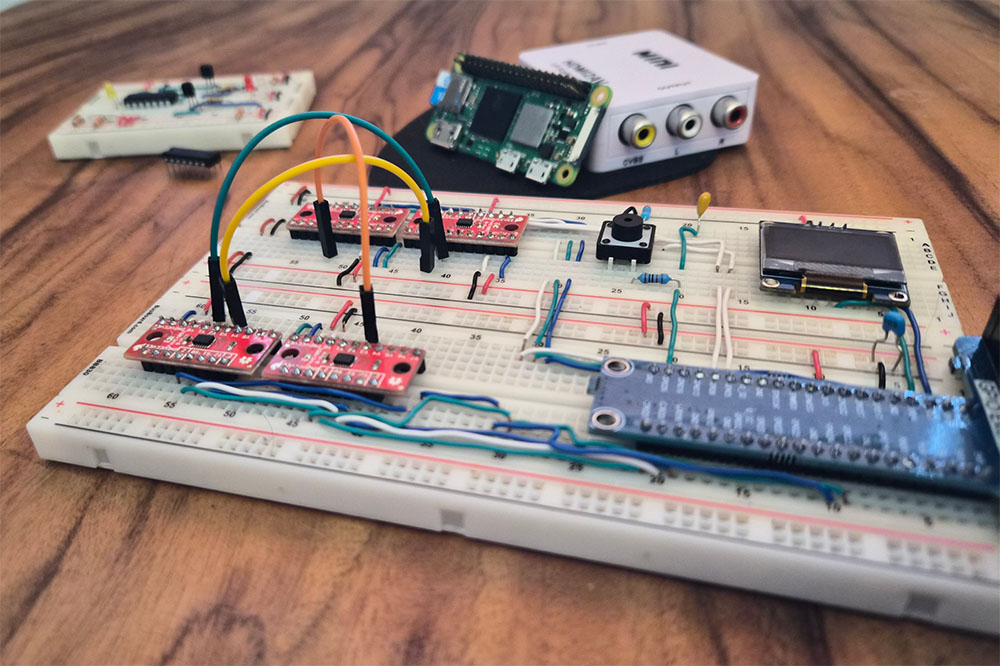
Build a breadboard where:
- Rows correspond to a different channel of a multiplexor.
- Multiplexor channels correspond to a sample (ms) in a music file (.wav)
- Jumper wires can link two samples together, meaning the music skips across that connection.
Step 2
Connect that breadboard to any Raspberry Pi and write some code to turn our abstraction into a real musical interface.
Step 3
Do something cool with it.
Hardware
Board BOM
| Name | # | SKU | Required |
|
Any Raspberry Pi Board |
1 | CE06974 | True |
| RPi GPIO Breakout for Breadboard | 1 | CE04441 | False |
|
Sparkfun Multiplexor Breakout |
4(+) | BOB-13906 | True |
| SSD1306 OLED Display | 1 | CEO9437 | False |
| Solid Core Wire | ~ | PRT-11367 | True |
| Large Breadboard | 2(+) | CE00304 | True |
| Male to Male Jumper Wire | ~ | CE09607 | True |
| Button | 1 | PRT-14460 | True |
| Resistors | ~ | CE07199 | True |
| Capacitors | 2 | COM-08375 | True |
| LEDs | ~ | CE08576 | False |
| JK Flipflop IC (74HC73) | 1 | 74HC73 | False |
| PNP transistor (or sub for P100) |
1(+) | CE07792 | False |
Getting Audio Out
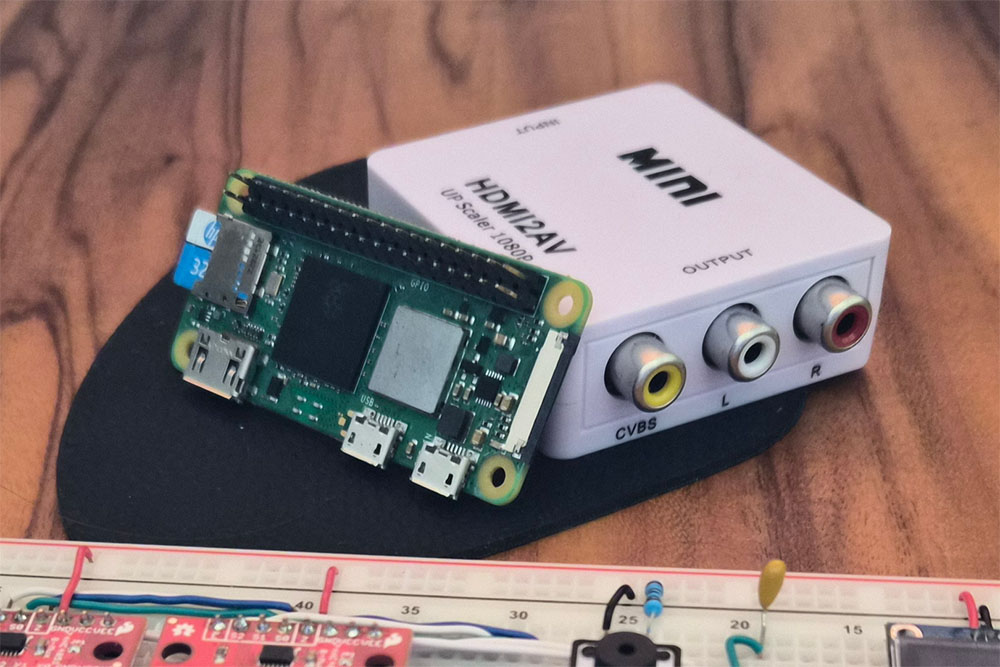
We should probably figure out speakers before we get ahead of ourselves. The default audio playback device on a Raspberry Pi is usually the HDMI.
If you’re plugging in a monitor, then it may have built-in speakers. Maybe your monitor has an audio jack for an external speaker. If HDMI is not an option, there is also this USB card, which I bought and tested. Some setup, quiet, but it works.
If you're driving this Pi headless, then you can do what I did and steal the audio from the HDMI with this adapter (worked well). Something I've done before is just use one of my commercial Audio DACs… a bit extra for this, but whatever.
Design
What is a multiplexor and how does it help us?
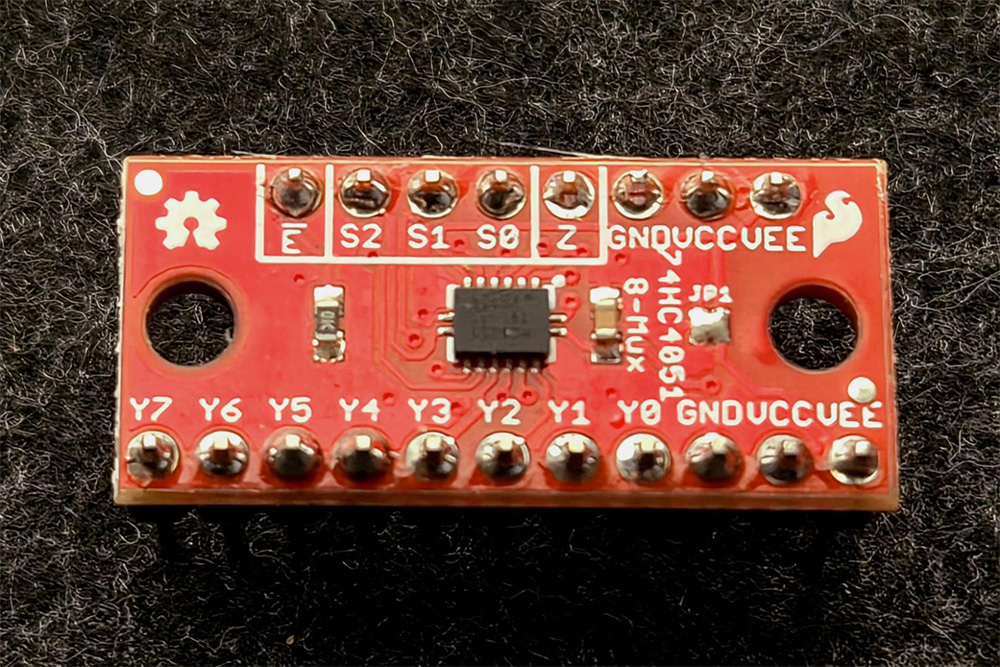
Our 74HC4051 multiplexor, often shortened to “Mux”, takes one IO and funnels it to eight IO. It has channels, each with an address. You tell the multiplexor the address you want, and it assigns the relevant channel to your single GPIO.
This makes our code easy, because we don’t need to wire lots of RPi GPIOs. It’s also very scalable. Although I’ve started with 2 Mux, 16 in & 16 out, you could easily add up to 16 Mux, which would allow you to reduce your source music into finer samples.
Multiplexors take many channels and connect them to one input on our Pi. Demultiplexor takes one output from our Pi, and will route it to many channels.
Each multiplexor wants:
- An IO to connect to, could be input or output. -> Z
- An address, in our case, 3 bits. -> S
- An enable (active low). -> E
Multiplexor behaviour
For our project, we have demultiplexors talk to multiplexors. Let’s start with the behaviour of an input mux.
Our goal for the mux is just to scan every channel and read it. We’re just trying to figure out which of our channels has a connection. Let’s define a connection as a HIGH logic level.
For example, let’s assume we are listening on the 4th channel, i.e. the mux’s select lines (S) are 0b011. We read a HIGH, so we now know something (not sure what) is connected to CH4.
If a connection is classified as HIGH, that means our default state should be LOW. To make channels LOW by default, we need some pull-down resistors. The Raspberry Pi can summon an internal pull-down resistor through software. By pulling down Z, we effectively pull down all channels of the multiplexor (since all routes lead to Z).
So, our input mux just walks through every address, pausing on each just long enough for the Pi to read and record a logic level. If it reads HIGH, something is connected. Easy.
Demultiplexor behaviour
What about our demultiplexors? The address of our demux is going to represent our location in our music loop. We can only be at one point in the song at any time, and that means that only one channel of our multiplexor will be High at any time.
All the channels that are not selected by our address will be floating, but in this case, we don’t need to worry about it. When you connect any of the unselected floating channels to an input mux, it’s just going to be pulled LOW and, of course, ignored.
So, to encode our location and not be ignored, we need the channel we have selected to be HIGH, thus distinguishing it from all the floating outputs being pulled low.
So our output demux is just throwing out HIGH on a single channel long enough to be scanned in by the inputs. Then we move on to the next position in the song, jumping only if required.
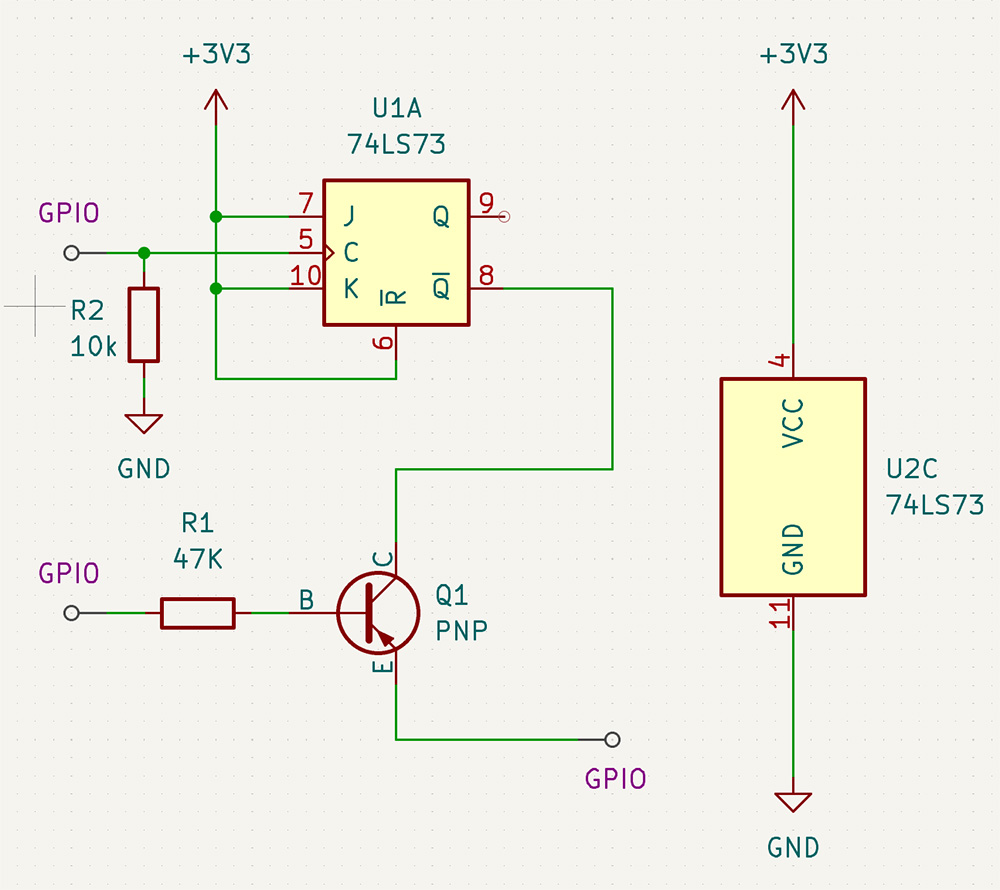
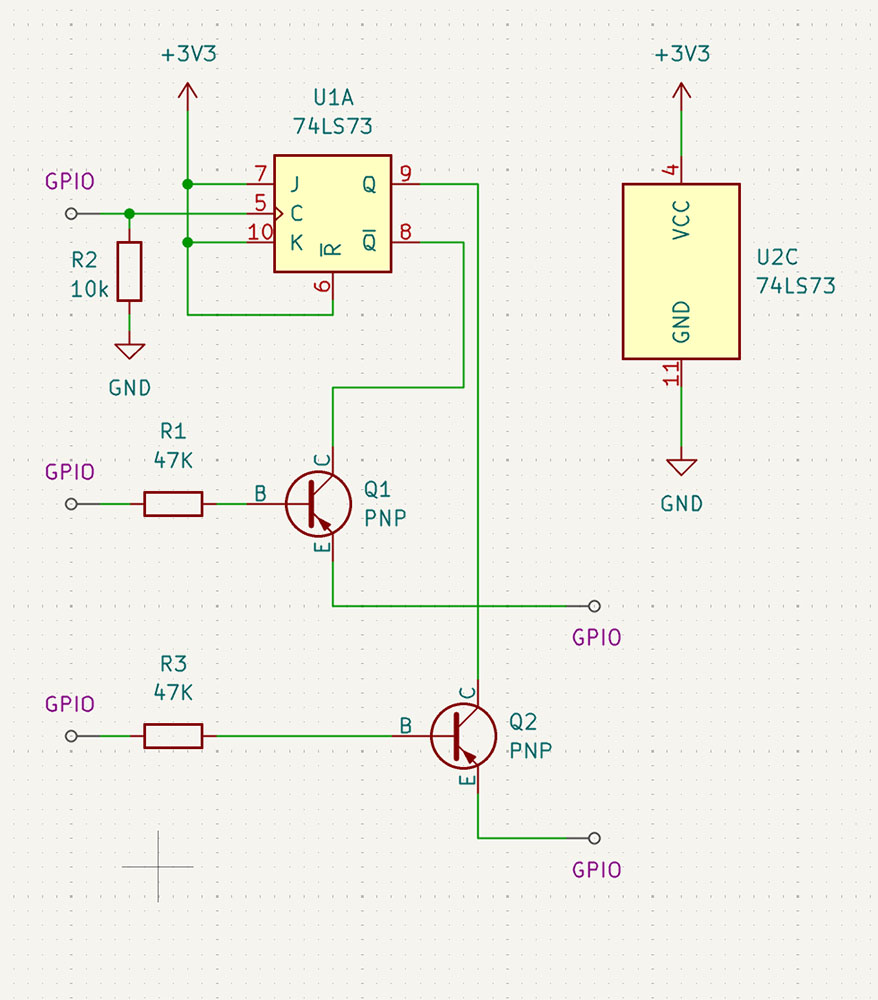
Schematics
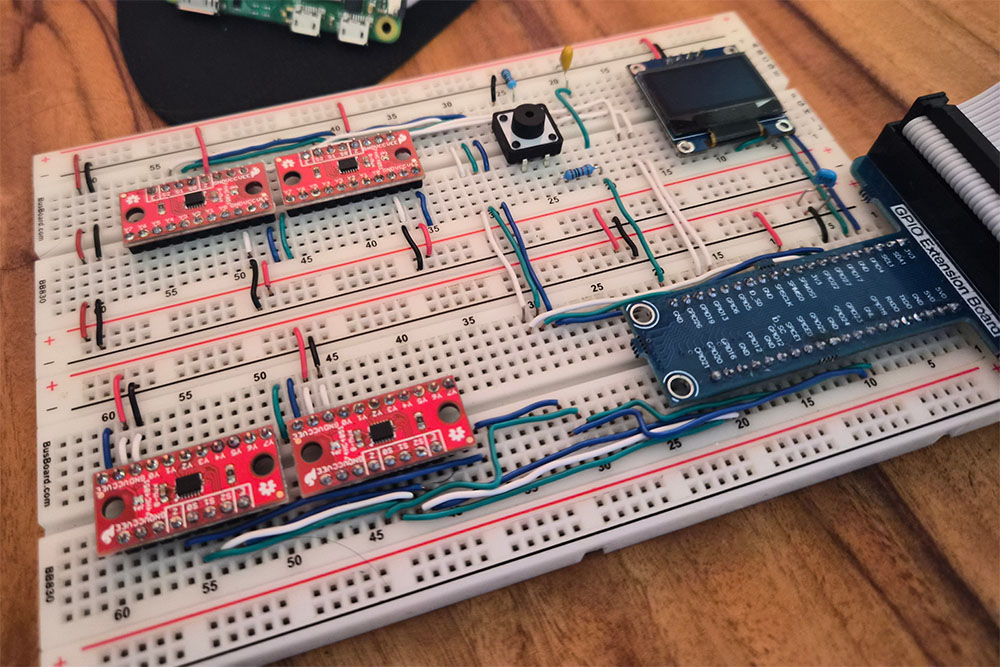
First, and most important, observation: I’ve tied the S0, S1, & S2 address pins of U1 and U2 together. Likewise for U3 and U4. That means that we only need 3 pins to control the select lines of an arbitrary number of multiplexors.
To expand your input multiplexors, you just need more GPIOs: one for each.
What about expanding your demultiplexors?
It needs to be the case that, no matter how many demultiplexors you have, one channel, and only one channel, is high at any point. To solve this, I suggest taking advantage of the enable pins. When E is HIGH, it will disconnect ALL channels. Ensure that only one demux is enabled at a time.
Second, Spackfun’s breakout of the 74HC4051 ties the enable pin low, meaning it’s enabled by default. If you, like me, are using the breakout, you can leave the enables on U1 and U2 disconnected.
Third, we never need the demux Z to be anything other than HIGH… so let’s forget about connecting it to the Raspberry Pi and just tie Z to 3.3 volts.
Fourth, we have a simple button that we will use to change songs. It’s active low. Because each loop in the code is measured in milliseconds, the button needs minimal debouncing.
Lastly, let’s add an OLED to give us some feedback. It’s already a pretty alien design, which is great because it will force us to experiment and maybe discover something. Nevertheless, we want the Pi to visually confirm that it’s doing what we think it’s doing.

Schematics
First, and most important, observation: I’ve tied the S0, S1, & S2 address pins of U1 and U2 together. Likewise for U3 and U4. That means that we only need 3 pins to control the select lines of an arbitrary number of multiplexors.
To expand your input multiplexors, you just need more GPIOs: one for each.
What about expanding your demultiplexors?
It needs to be the case that, no matter how many demultiplexors you have, one channel, and only one channel, is high at any point. To solve this, I suggest taking advantage of the enable pins. When E is HIGH, it will disconnect ALL channels. Ensure that only one demux is enabled at a time.
Second, Spackfun’s breakout of the 74HC4051 ties the enable pin low, meaning it’s enabled by default. If you, like me, are using the breakout, you can leave the enables on U1 and U2 disconnected.
Third, we never need the demux Z to be anything other than HIGH… so let’s forget about connecting it to the Raspberry Pi and just tie Z to 3.3 volts.
Fourth, we have a simple button that we will use to change songs. It’s active low. Because each loop in the code is measured in milliseconds, the button needs minimal debouncing.
Lastly, let’s add an OLED to give us some feedback. It’s already a pretty alien design, which is great because it will force us to experiment and maybe discover something. Nevertheless, we want the Pi to visually confirm that it’s doing what we think it’s doing.
Software
We actually only have two requirements here:
- Some way to control the Raspberry Pi GPIO.
- Some way to play and skip around some music files.
Here is the catch: We need to manipulate our GPIO while the music is playing; the two tasks need to happen in “parallel”.
Computers can do things in parallel by assigning the different tasks, called threads, to different cores in your CPUs. If you’re familiar with CPU architecture, then please skip the next sentence. If you don’t know anything about CPUs, then ‘cores’ are just thinky things that take our code and do stuff… like playing music.
Rodio
Rodio is a beautiful audio playback crate built on top of Cpal. Rodio demands your respect because it is going to handle all the parallelisation we need for this project.
When you pass Rodio a decoded music file, it throws the playback to a separate thread of your CPU, meaning all we have to do is keep the main thread alive. Usually, you just let the main thread sleep while the music plays.
Instead of dozing off, maybe our main thread can use that time to listen to multiplexors, draw pretty pictures, and prepare for a possible jump. We can’t get too fancy, though, because whatever calculations we attempt, better be done before the end of the music sample. Main needs to be ready to catch the end of the life of the sample and spin up a new one. If we are too slow, we will get choppy music.
Now, Rodio is built in Rust, and I get the impression that Rust isn’t super common in the maker community, which is fine. So from here we’re going to just focus on installation and running the code. I’ll assume you know no Rust and dabbled a little in Linux.
However, if you are in the mood to get into the weeds of the code (perhaps you want to remix the project, or maybe just learn something), then later there will be an optional video where I’ll do an unscripted code walkthrough.
Installing the Software
Let’s start assuming you have a fresh Raspberry Pi OS on your SBC. If you’re not sure how to install Linux on your Pi, Core Electronics has you covered.
Prerequisites
- Let’s open up a terminal (Ctrl + Alt + T).
Start by updating our package manager. Just good practice.
Then let’s install git, which we will need to download the code from my public repository.
```bash
sudo apt update
sudo apt install git
 ```
- Next, let’s install Rust. Best practice is to go to the official Rust website and follow the instructions. Usually, that’s a curl command that installs Rustup. Rustup manages your Rust toolchain.

- Next, we’re going to need some libraries that help us with sound.
I predict you’ll already have most of these, but it depends on which version of the OS you chose (e.g., RpiOS Lite does not ship with ALSA). This is a good opportunity to upgrade and reboot your Pi, which should clean up any audio messiness.
```
sudo apt install libasound2-dev pulseaudio pulseaudio-utils alsa-utils
sudo apt upgrade
sudo reboot
```
Next, let’s install Rust. Best practice is to go to the official Rust website and follow the instructions. Usually, that’s a curl command that installs Rustup. Rustup manages your Rust toolchain.

- Great, let’s make a new folder called Rust, which can contain this project. You can put it anywhere; this is just an example.
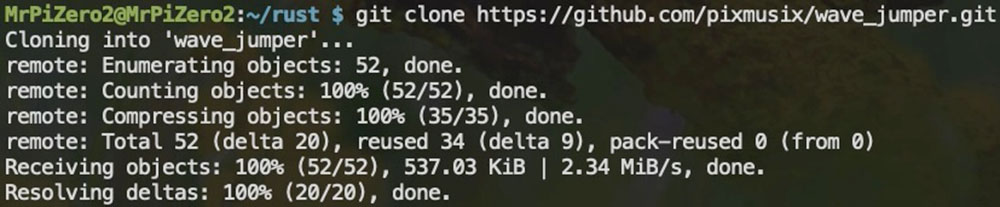
After that, let’s clone my code into your Pi.
```
cd ~ && Mkdir rust && cd rust/
git clone https://github.com/pixmusix/wave_jumper.git
cd wave_jumper
```
Running the code
Nearly there! Rustup has installed a new command on your Pi: Cargo! Cargo is what will compile the code and run the binaries.
Before it can run the code, it’s going to need to install all the Crates (libraries) and other dependencies you need. I’ve told Cargo what packages you need to install by maintaining a cargo.toml file, so this will be automatic for you.
Because this is the first time you’re compiling, it’s going to take a long time, maybe 10 mins. Rust is notorious for “runs fast; compiles slow”.
You only need to do this once.
- To compile:
```
Cargo build -- jobs 2 #we are on an SBC so max 2 tasks in parallel
```

- Finally, you can run your code with.
```
Cargo run
```
- To exit, use a keyboard interrupt: Ctrl+C.
If you have any compilation or runtime errors, feel free to pump them into the comments, and I’m happy to assist. ????

Music
What comes with the project?
This project downloads with 5 tracks to get you started. You’ll find them all in the assets directory of the repository.
- Arp - Creative Commons, LevelClearer
- Synth - Attribution 4.0, ImaTaco
- Home - Attribution 3.0, GrowingUp
- Jungle - Creative Commons (can’t find source ????)
- Bass - GPL 3.0, Pixmusix
I whipped up Bass just to demo the project, and you can find that demo later in the write-up. I don’t need the sample anymore, so I’m happy to release it into the wild under the same GPL licence as the code.
Adding your own music
To add your own music, you just have to add it to the wave_jumper/assets directory. Any wave file (.wav) in the assets folder will be read into the program on launch. I’d recommend keeping your tapes under ten seconds and very simple orchestration, maybe 1 or 2 instruments.
Publishing, sharing, or distributing.
Keep in mind intellectual property law. If you use this project to remix the sound and you want to share or use it in a public endeavor, you may have to get permission from the owner of the IP. This is sometimes true even if you don’t release it commercially. I’m not a lawyer.
Find a song in the Public domain, Creative Commons, or licensed to the public.
If you want to download some sounds that you're free to distribute, here are a few websites where you can find music you can use.
Let’s make this more interesting.
Let’s make this even more interesting.
Code Walkthrough
You don’t need to watch this video to get this project up and running. It’s a long, unscripted overview for the tinkerer and the curious.
Last Thoughts.
Remix ideas I didn’t pursue
- I think 8 multiplexors, 4 in 4 out, would really elevate the project because you can afford longer music files.
- Rodio can speed up and slow down playback, and it would be so easy to add a dial to this project and take advantage of that. Rodio has a few simple audio effects, like reverb, if you're interested.
- The Wave Jumper benefits from custom tracks, so create your own and get creative.
- Make two and use logic gates to allow cross-talk between the two samples. One pi can influence the other; one track changes how the other jumps! So cool (seriously, if you're an educator, splitting your class up to make 8 of these and then bringing them all together for an end-of-term jam session is the coolest lesson plan).
- There is a key software optimisation I’ve missed when scanning the multiplexes for connections. In the main loop, I read each multiplexor one after the other. I had my reason at the time, but, regardless of my cope self-justifications, it's silly code. I should be reading off all my multiplexors in parallel.
Using a Raspberry Pi Zero 2.
This is your warning.
I did get it working on the Raspberry Pi Zero 2… but getting there is proper fiddly. If you're choosing a low RAM Pi like the zero, you’ll want to know Debian and Rust really well.
I got it working on RPOS Lite. I didn’t try the full version, and I don’t want to, not even for you. Expect to have to play around in the ALSA config files, where you’ll be expanding and shrinking buffers. Kill anything Pipewire doesn’t need to know about. Be specific about your audio playback sink and alias it. Think about Mem Swap. I didn’t need it, but you might.
You’ve got 512mb to play with, and that has to cope with ALSA, Pipewire, our multithreaded code, Linux, all peripheral listeners and, if you’re running headless, your SSH session. Htop is your friend.
Signing off.
This took me a month, but it’s only gonna take you a weekend. It’s a creativity tool rather than an instrument, but then again, it’s easy to make, so it’s still bang for buck. If you have a Pi gathering dust, it has a future here.
Pix.
Resources
Download all the project resources here.

