In this guide, we are going to walk through the first-time setup for your xTool F2 Ultra so you can get cutting and engraving quickly!
A quick but important note: consult your included instruction manual alongside this guide. The packaging layout and shipping materials on these machines can change a little from time to time, so there might be a minor extra step in a future revision. Most of these steps are going to remain very much the same, though.
Let's get right into it!
F2 Ultra and AP2 Setup
Before we even open the box, this entire package weighs about 30kg. Definitely lift with your knees, not your back, and grab a friend to help. Even once the machine is completely unpacked, the F2 Ultra itself weighs a little over 20kg, so be mindful of where and how you are moving it.
Inside the main box, you will find a few things sitting on top:
- Unboxing instructions (on that sheet of cardboard).
- Instruction manuals.
- A materials pack.
- An accessories box.
- And of course, the xTool F2 Ultra itself.
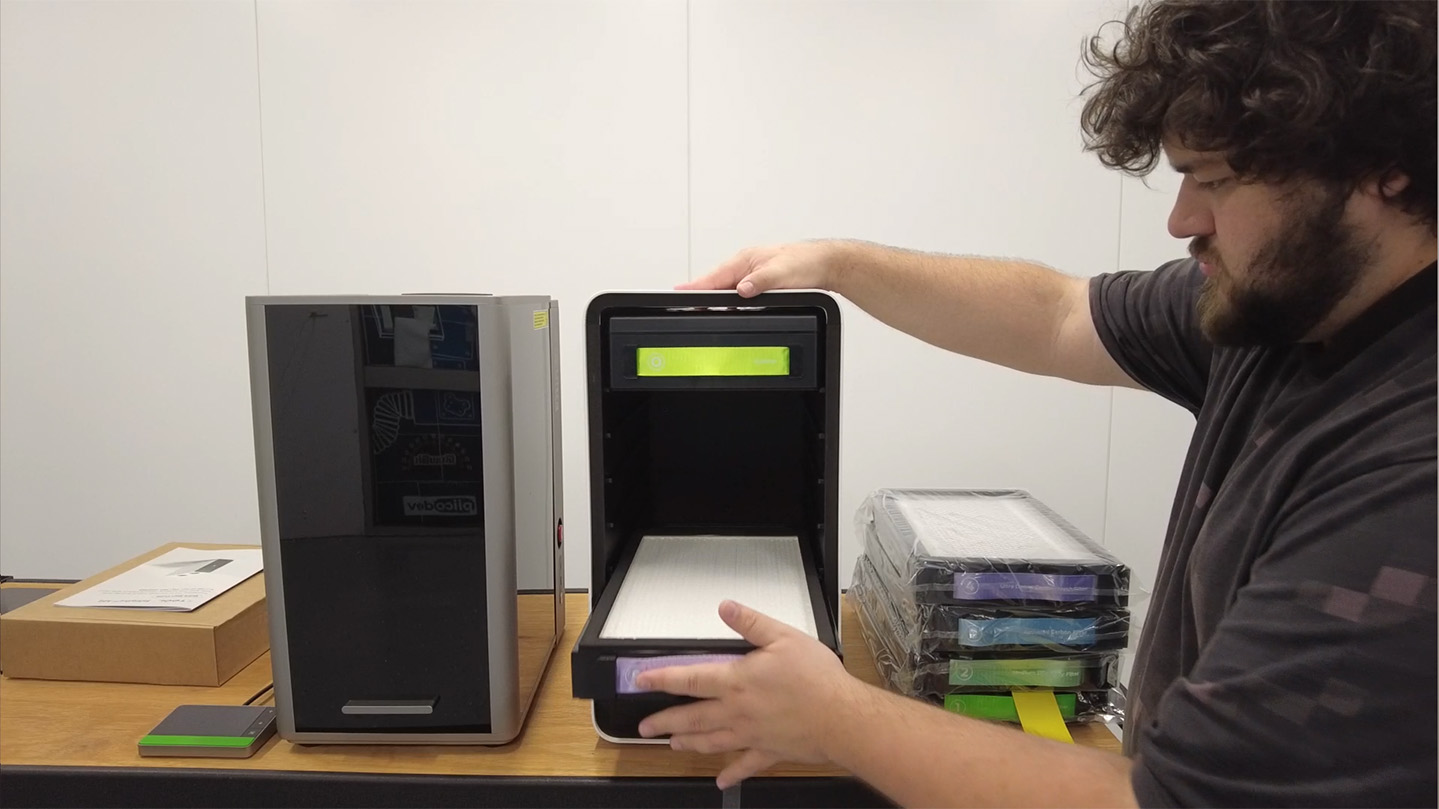
To get the machine out of the box, grab it by the black lifting straps. Remember that you are lifting a heavy laser housing with precisely aligned optical mirrors inside. Grabbing a second person to help lift it onto your workbench will give you a lot of peace of mind.
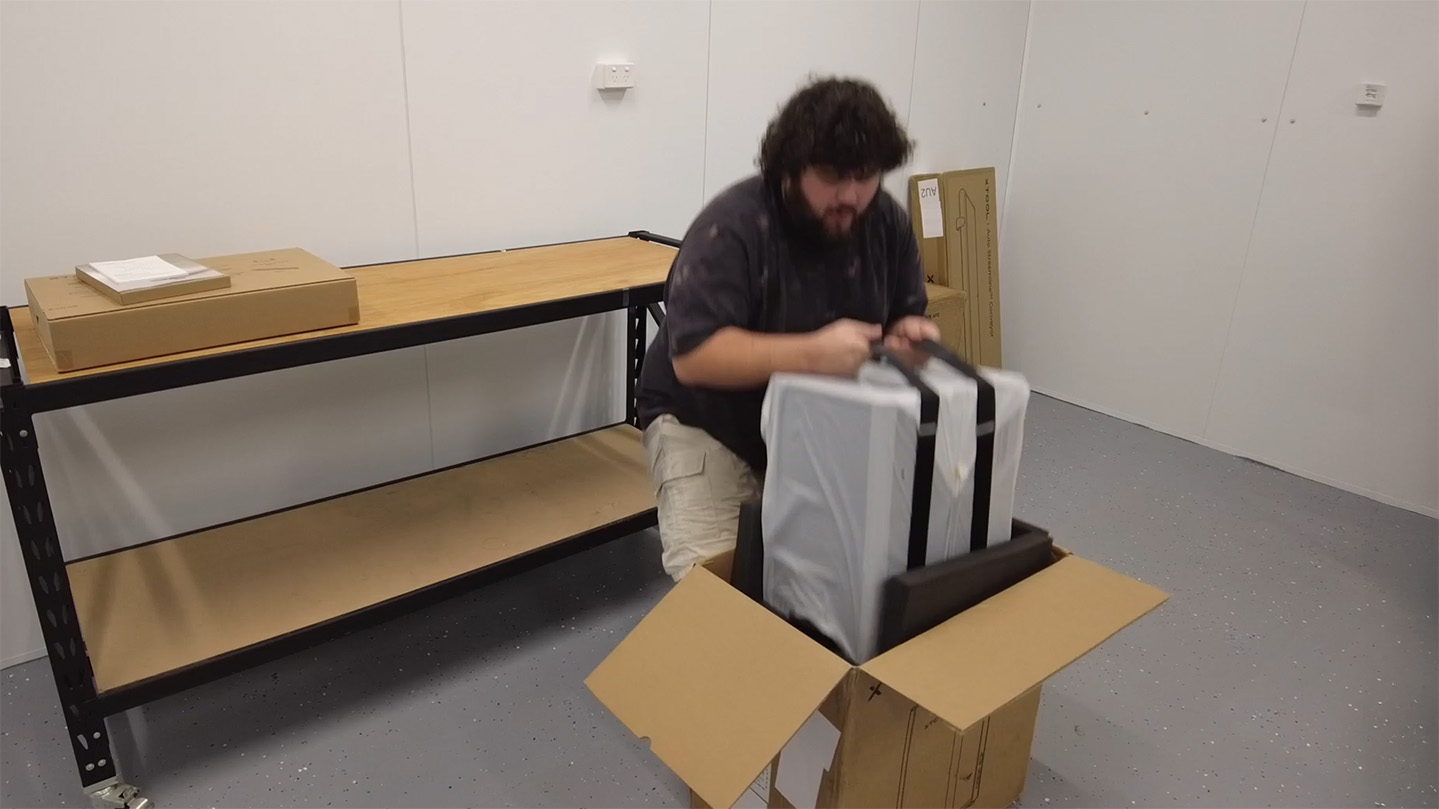
Once it is safely on your desk, undo those lifting straps and remove the plastic covering.
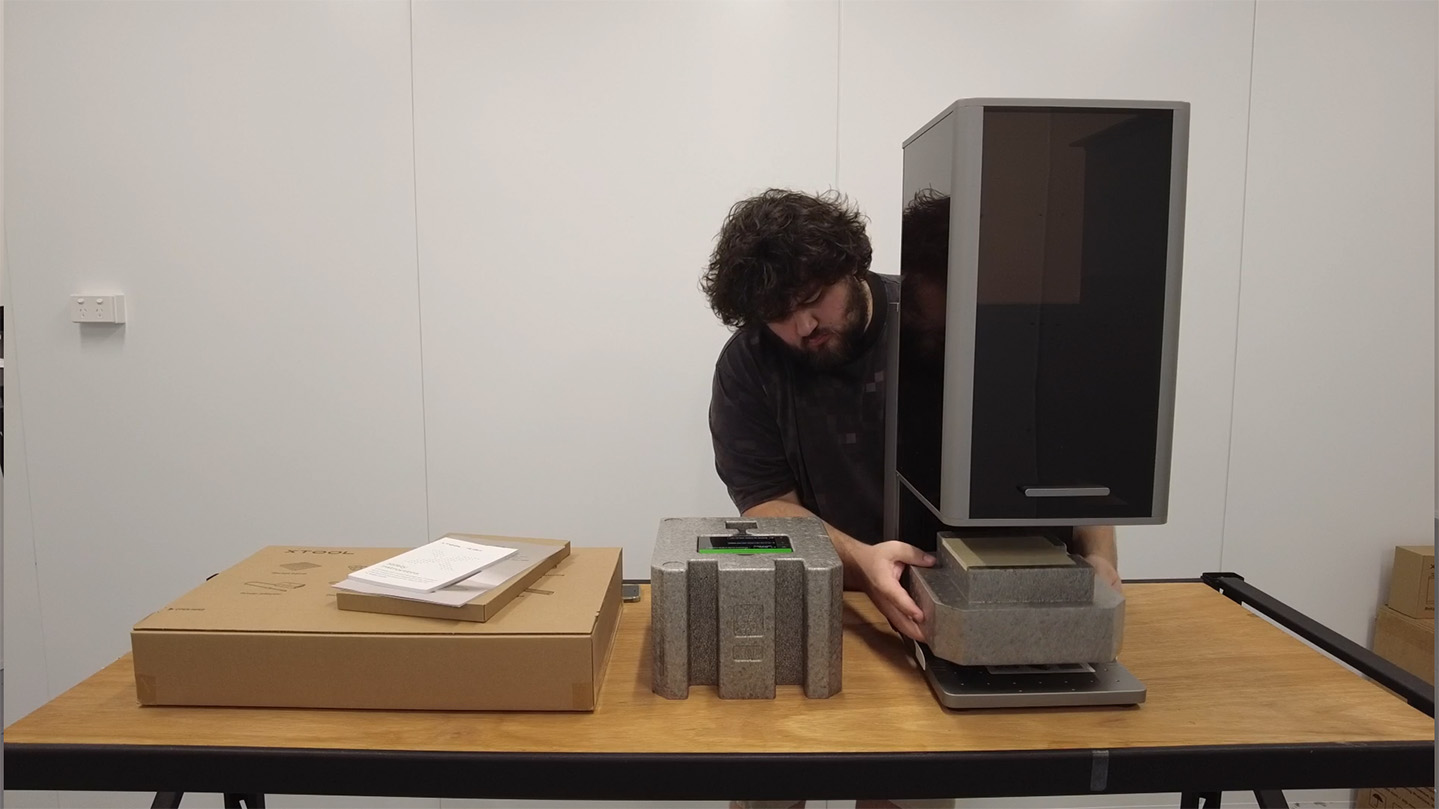
Next, slide the tinted safety lid upwards. Inside the bottom foam block sitting in the machining area, you will find your machine’s touchscreen controller. Go ahead and take that out.
With the foam out of the way, peel off the protective sticker on the bottom plate. Finally, look up into the laser module housing, and you will see a big lens cap. Just pull the dangly cord to safely pop it off.
NOTE: It might be smart to hold onto these straps, foam blocks, and the lens cap! If you ever need to transport the machine to a different workshop, classroom, or event, reinstalling these pieces will make the journey much safer for those delicate internal mirrors.
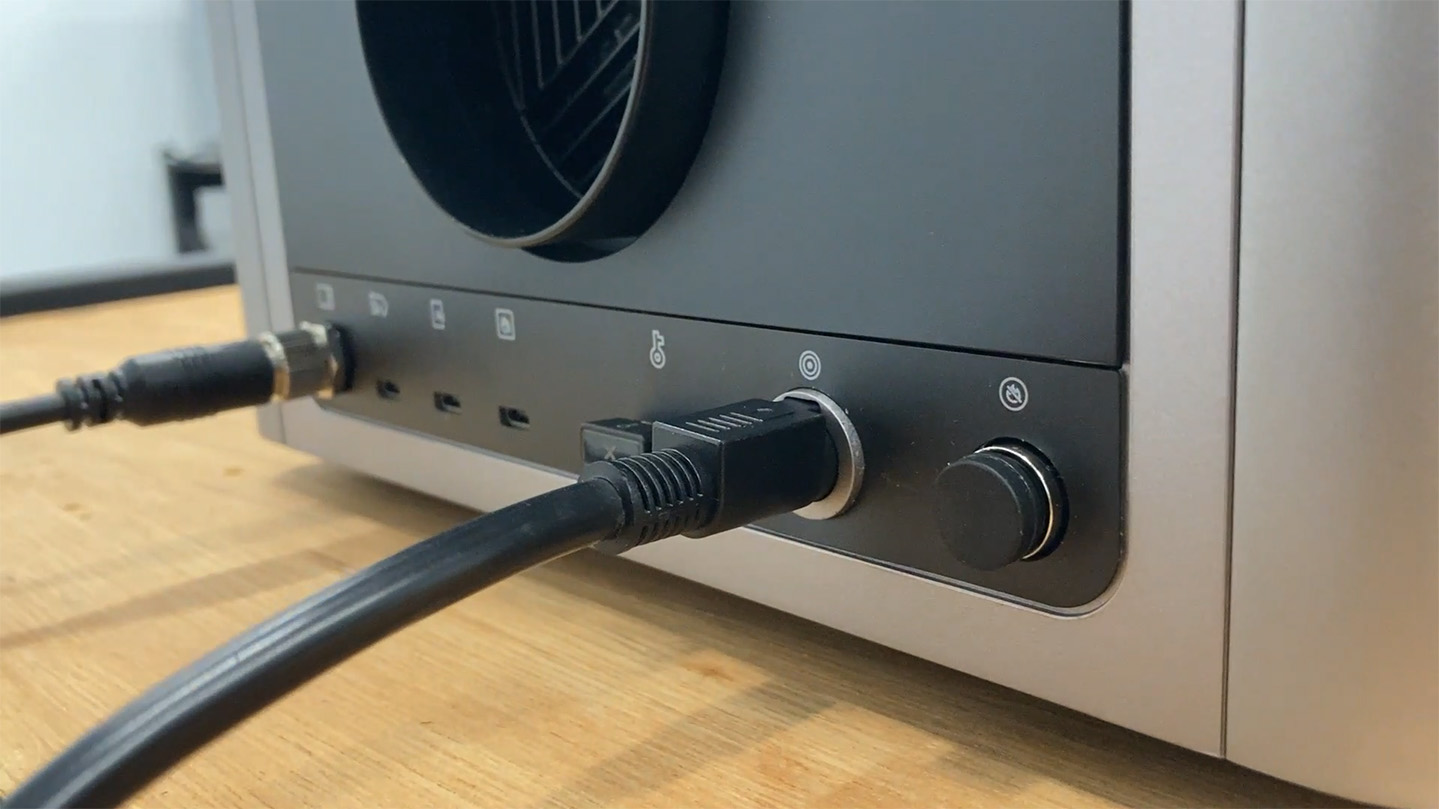
Now, thankfully, the F2 Ultra comes largely assembled, and all we need to do is plug things into it. From your accessory box, connect the following:
- Plug the USB safety key into the rear port of the machine.
- Plug the touch screen controller into its port on the rear of the machine.
- Plug the power brick into the rear of the machine.
In the accessory box, you will also find a cleaning cloth (that big lens we pulled the cap off needs cleaning once in a while), an L-shape mounting bracket, a black slatted cutting surface, and an air extraction tube.
Now, you are going to need some sort of air extraction or filtering system. You might have an existing filter or extraction system to blow it outside, so go and find the correct tube adapters for that. We, however, are using the AP2 Air Filter, so let's go ahead and set that up.
The AP2 box is packed very similarly to the F2 Ultra. Grab everything out, use the included lifting straps to hoist it out of the box, and then remove those straps and the plastic wrap.
A quick heads up: This unit sits on some incredibly "rolly" caster wheels. We ended up 3D printing some wheel chocks for ours to prevent it from skating around the shop. Designing and laser cutting some custom blocks for these wheels out of wood might be a good first practical project for your new machine! If you want it to roll around on the floor, then you are good, but we have ours on a shelf and don't want it to fall off!
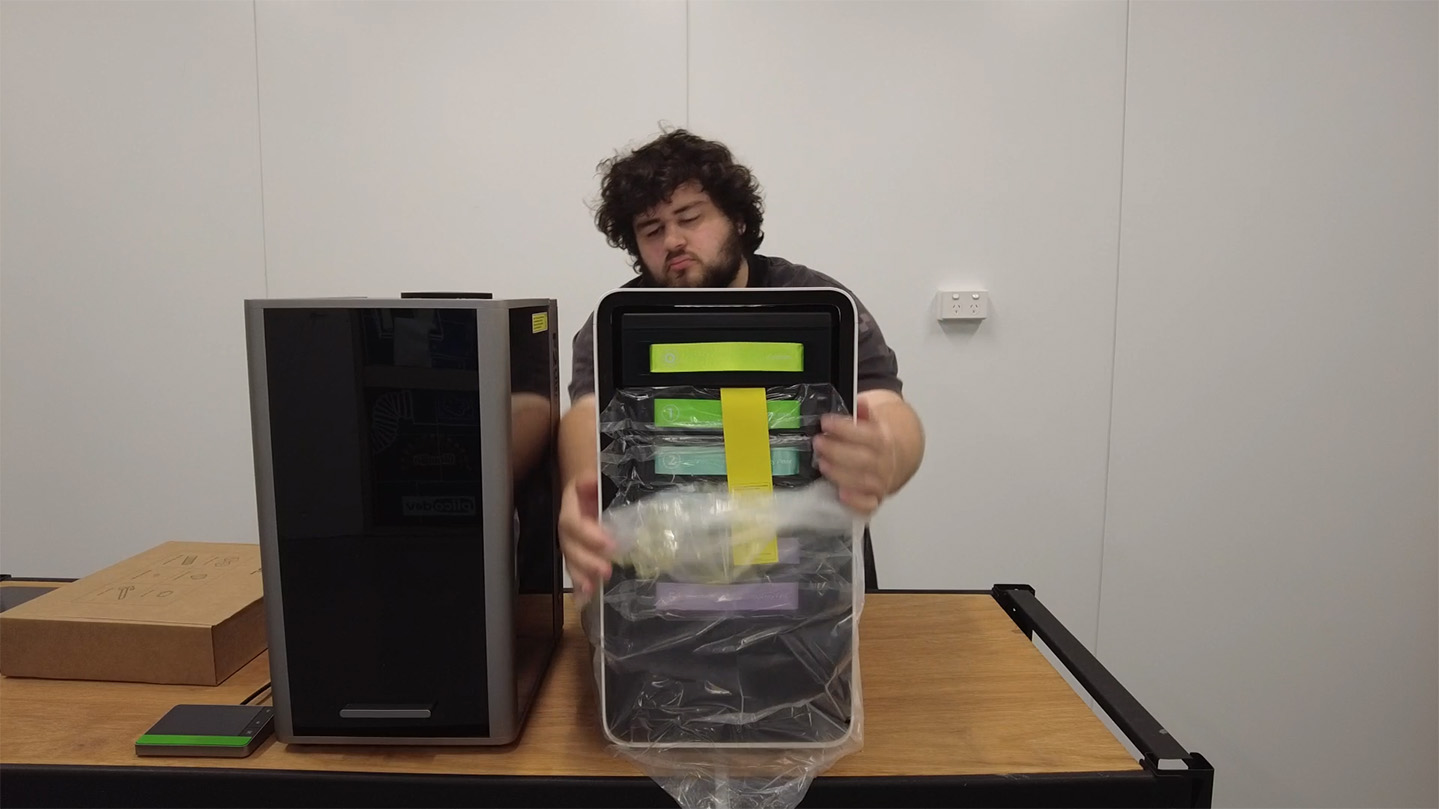
Next, we need to remove the packaging from the filters. Slide out each filter, remove the protective plastic bag from it, and slide it back in. Just ensure they go back in the same order. They are numbered, so don't worry if you mix them up; just order them.
Once done, pop that front panel on. It just magnetically attaches.
Go ahead and open up your AP2 accessories box to find your tubing adapters and your lengths of flexible tubing.
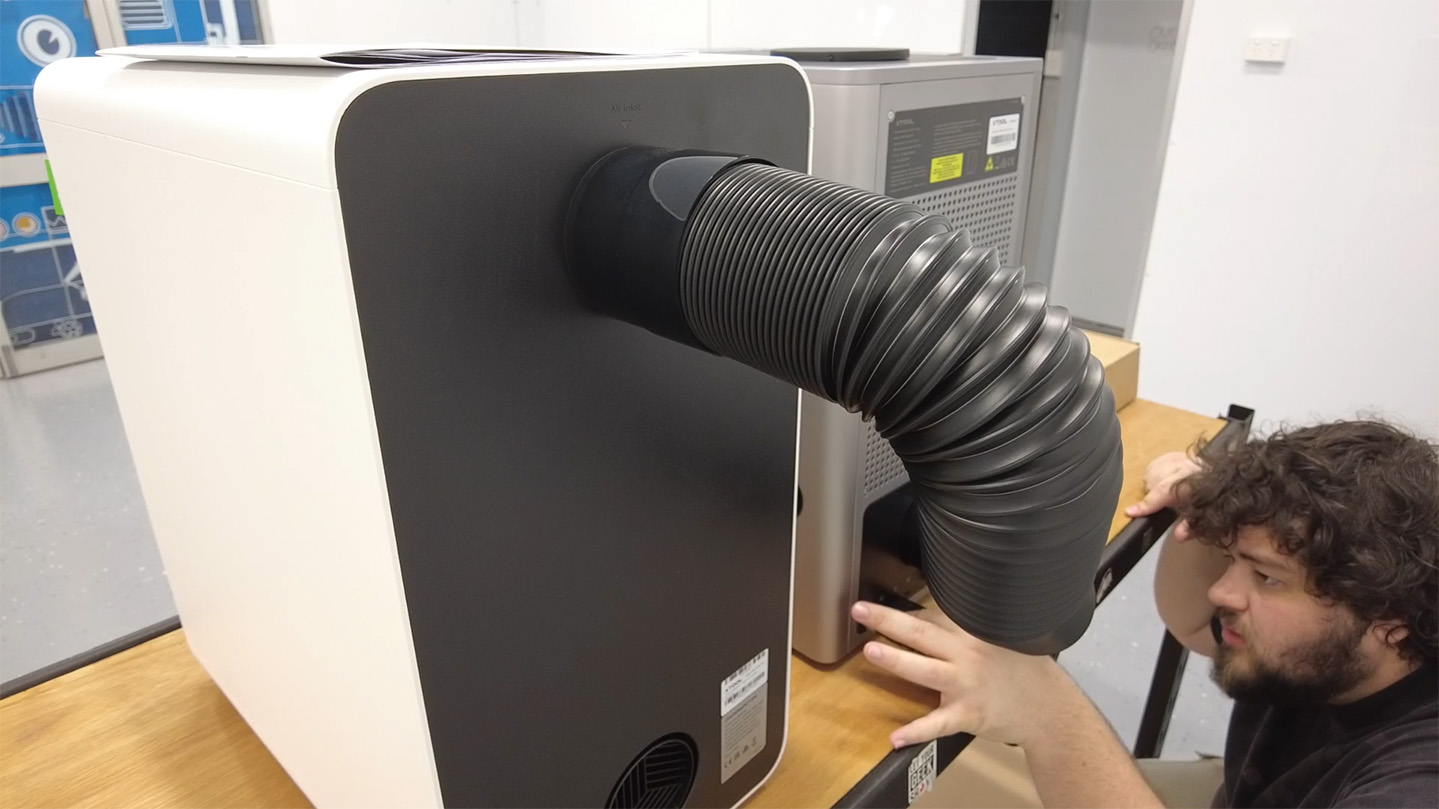
Grab one of your tubing adapters, stretch out the end of the flexible tube, and thread it securely onto the adapter. Once it is threaded on, give it a few extra turns to ensure it stays on. Then, simply connect the exhaust outlet port on the back of your F2 Ultra to the top inlet port on the AP2.
You will notice you have an extra tube floating around. You can attach this to the bottom exhaust port of the AP2 to guide the scrubbed air somewhere else if you'd like. In our testing, we found the AP2 filter to be good enough to directly circulate air back into the room without any funky smells or fumes on most things. However, certain materials can still get a bit smelly even when filtered, so having the option to hook up that second tube and vent it completely outside is a really nice option to have.
xTool Studio Setup
Next, go ahead and plug your AP2 filter into the wall and turn it on.
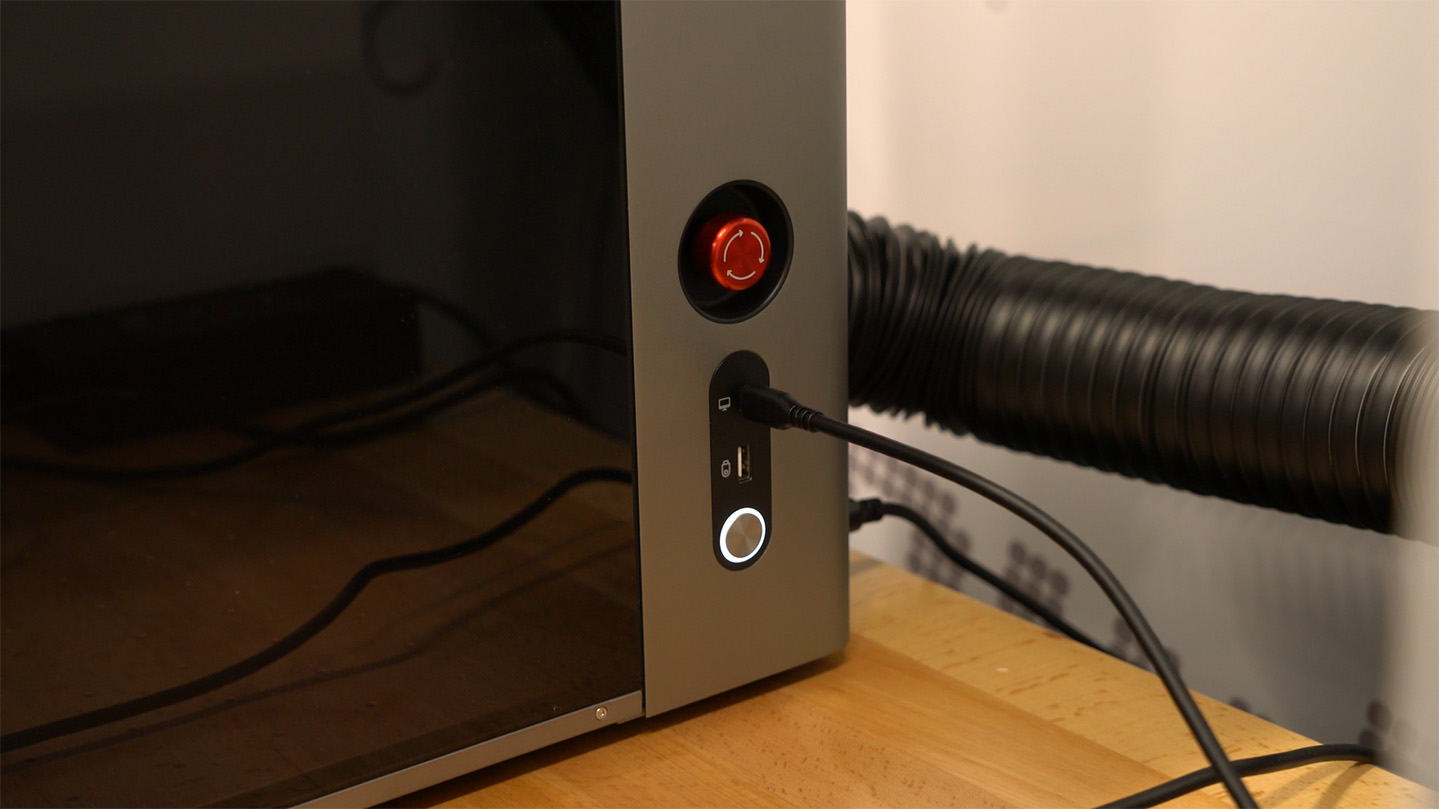
Now, let’s power up the F2 Ultra. On the side of the machine, you will find two main switches: a big red Emergency-Stop button and a silver Power button. If the red e-stop button is pressed, twist it to pop it up, which allows the machine to be turned on. Then press the silver power button to turn the machine on.
An important note on power: If you want to turn your machine off at the end of the day, always use the silver power button. The red emergency stop button cuts power abruptly and is only designed for actual emergencies where you need to immediately halt the machine. Consistently using the E-stop as a regular power switch can actually reduce the lifespan of your F2 Ultra's internal components, so stick to the silver button! Of course, if it's an emergency, press the e-stop.
Regardless, with your F2 Ultra powered on, plug it into your computer using the included USB-C cable.
To operate your F2 Ultra, you will need a piece of software called xTool Studio. We will be using this not only to finish setting up the machine, but also as our main hub to prepare and send design files to the laser.
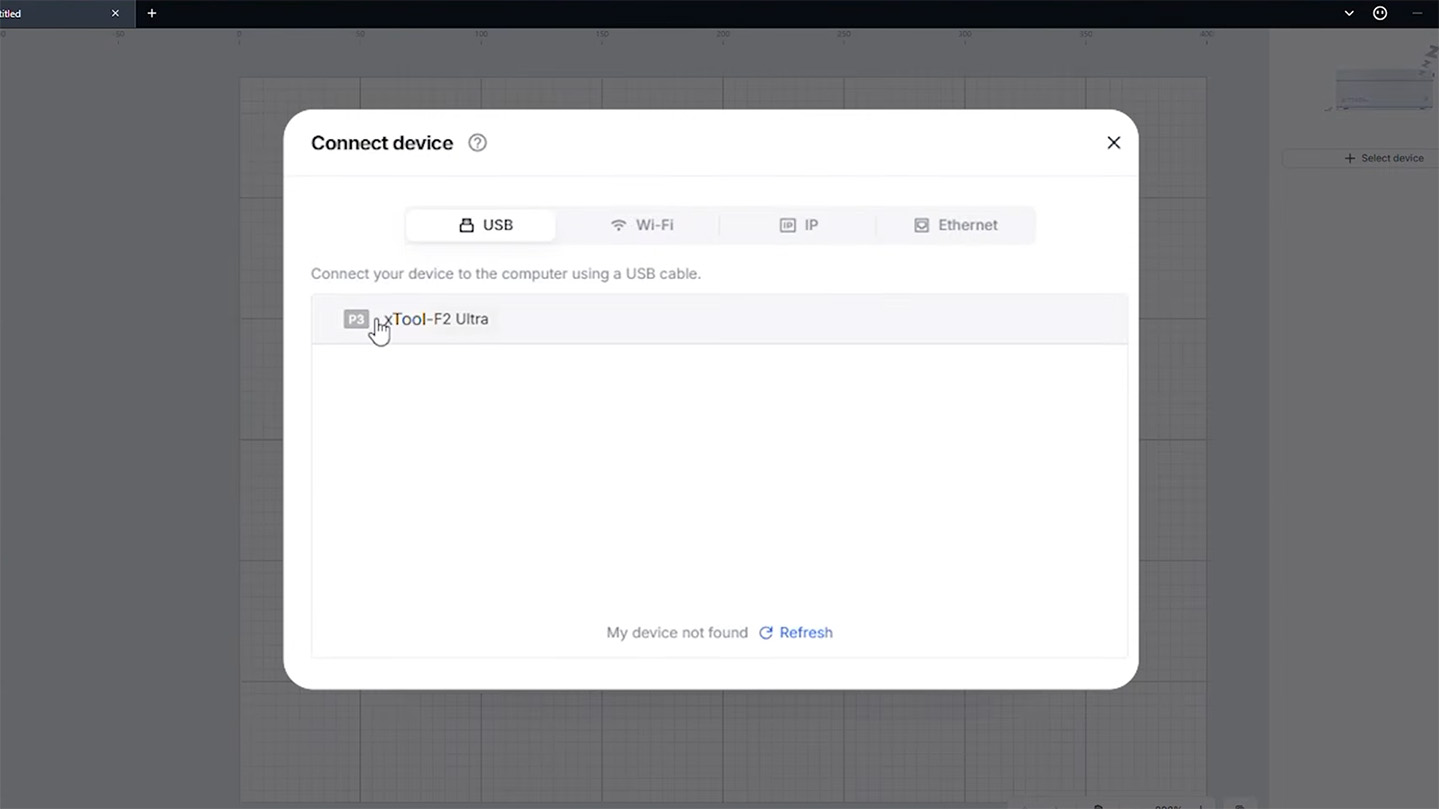
Open up xTool Studio, go ahead and create a new project, and click to connect to a device (in the top right of xTool Studio). You should see your F2 Ultra pop up in the list, so select it to connect.
Because this is a brand new machine, it will likely require a first-time setup. Thankfully, the software walks you through absolutely everything you need to know and do. The automated process will likely involve updating the machine’s firmware, running through a basic laser safety training, and running the laser calibration process. Just follow the on-screen prompts!
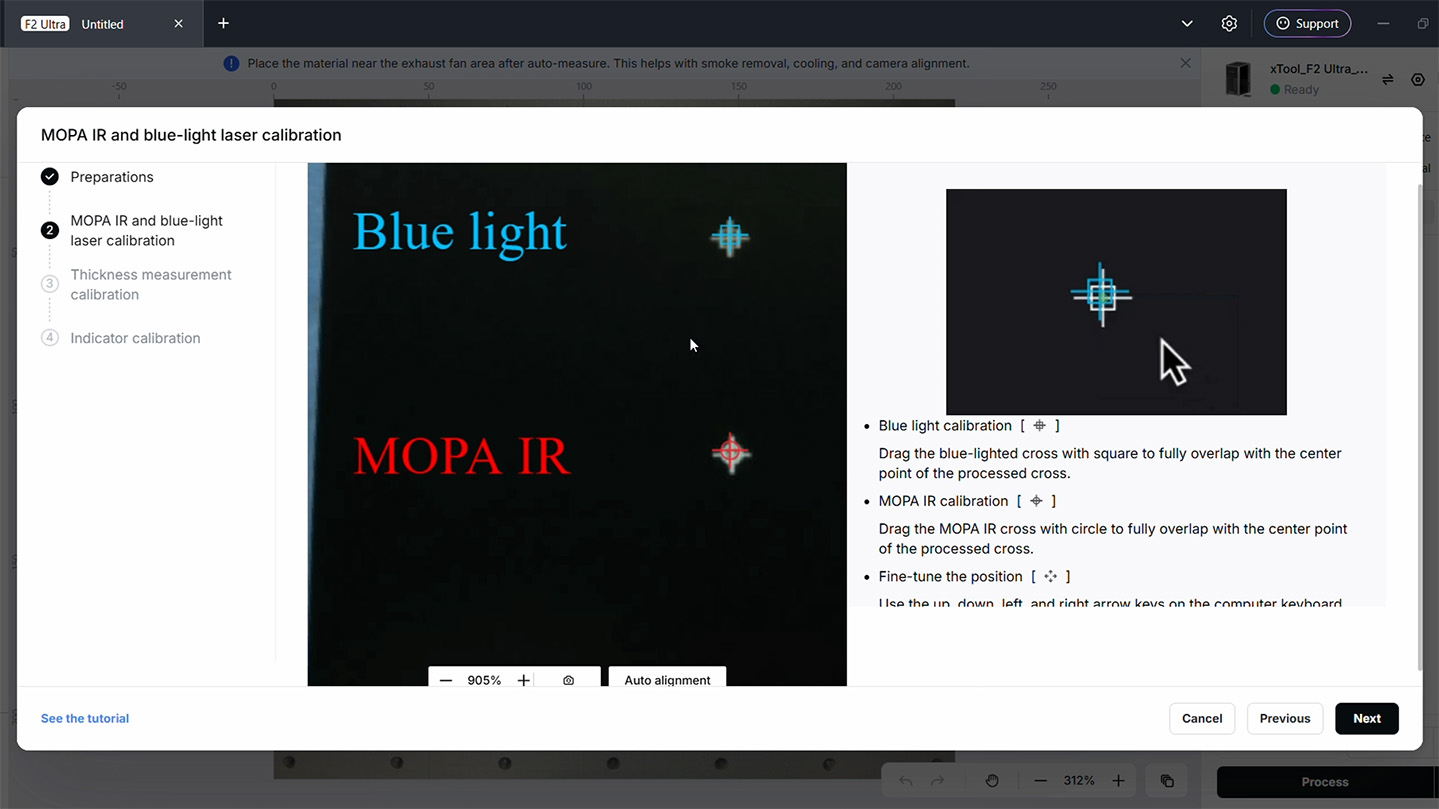
For the calibration step, the software will ask you to grab a piece of the black laser card (included in your materials pack) and tape it to the middle of the laser bed. The machine will then engrave some crosshairs onto it, and the software will ask you to manually move the digital lines until they perfectly align with what was just burned onto the card. It's super easy and ensures your laser is dead-accurate.
Our test is for the dual-laser version of the F2 Ultra; if you only have the single version, you will only have one laser to align.
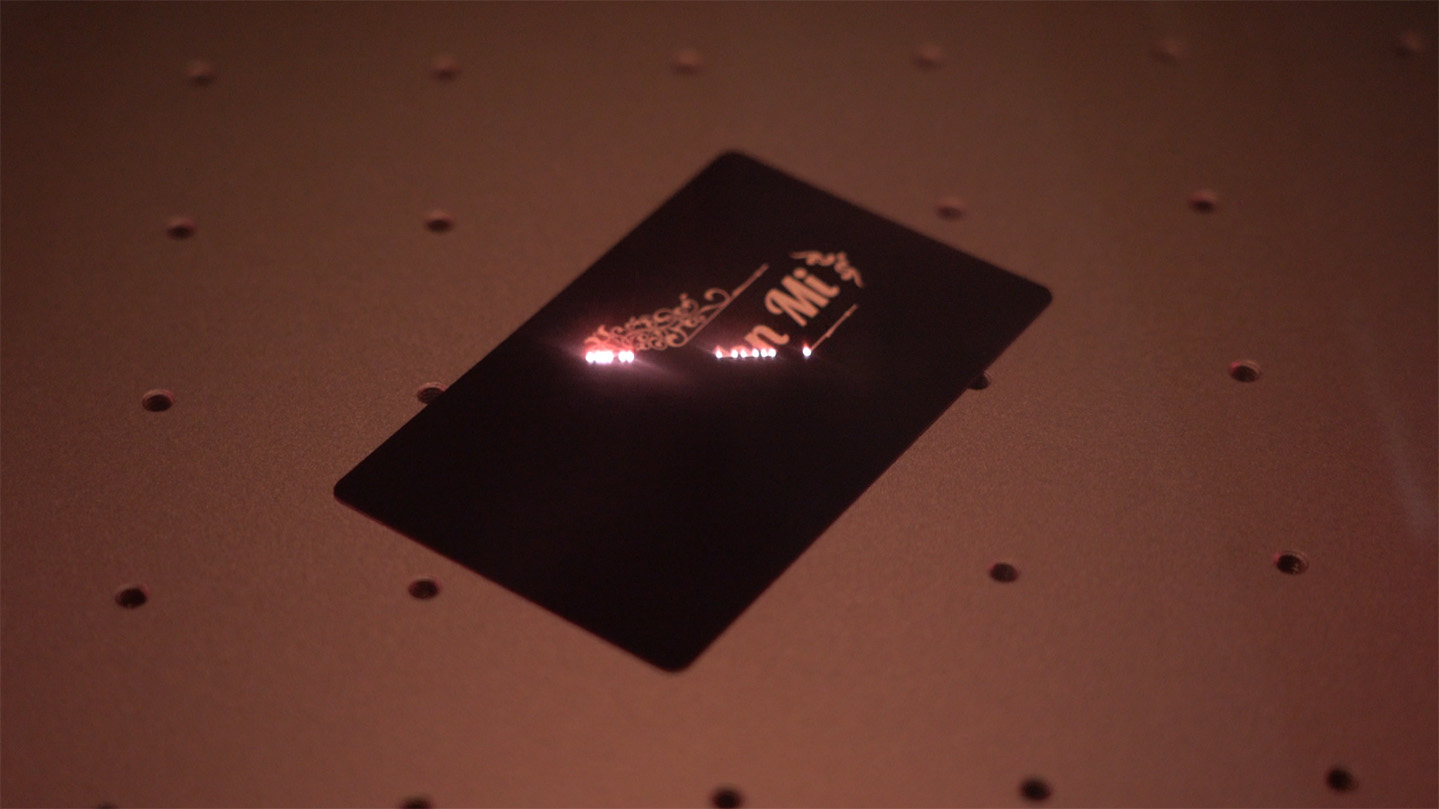
After calibration, xTool Studio will run you through a beginner tutorial where you will engrave an aluminium business card while teaching you the basics of the software.
It is definitely worth doing this tutorial if this is your first time using xTool Studio, and the actual engraving only takes about 15 seconds, so it won't take too long.
Just a quick heads up: you will need to manually turn on your AP2 filter for this first demo print, so your room doesn't get smoky.
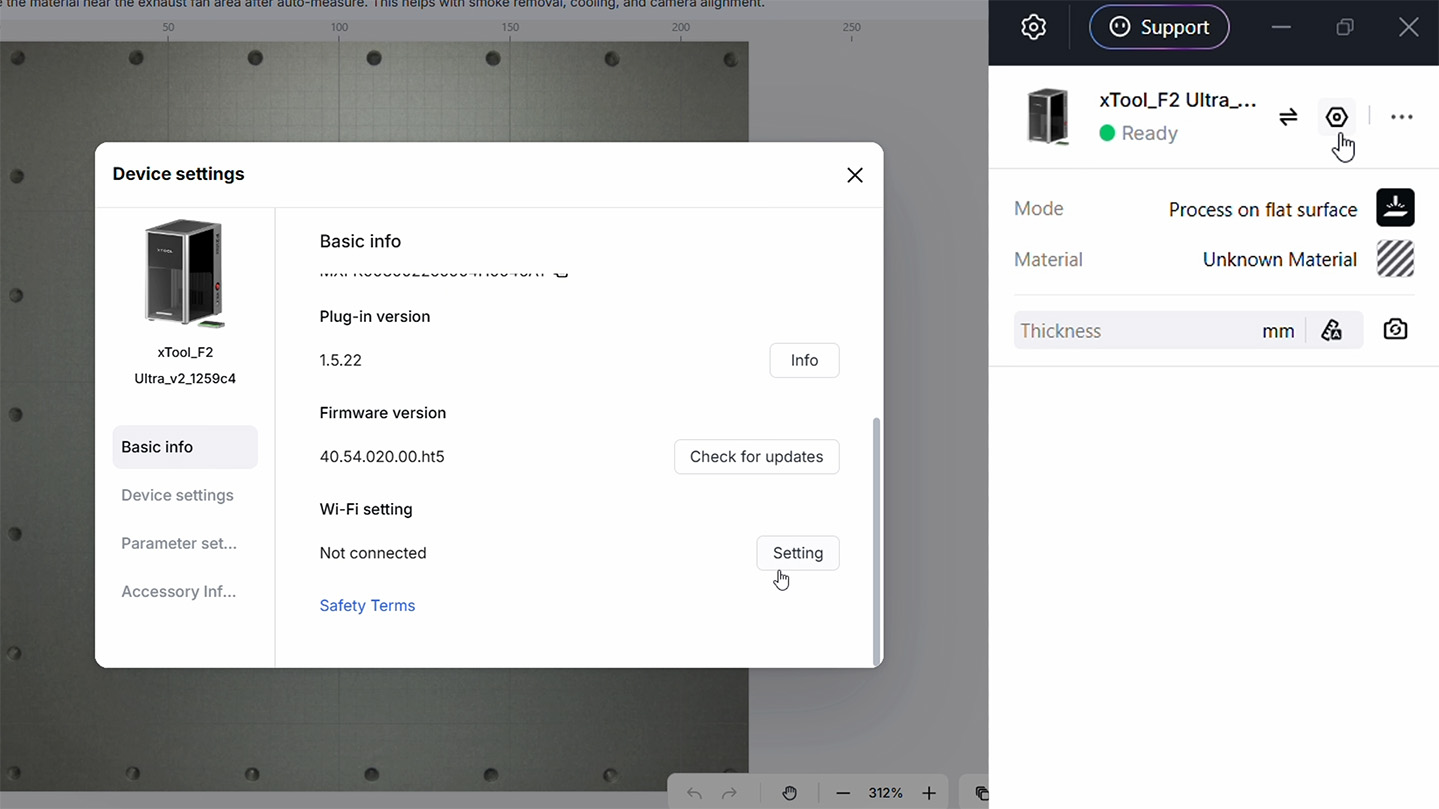
Once your first engrave is done, head into your machine’s settings within xTool Studio (the little nut icon in the top right on your connected machine) and at the bottom of the basic info. This is incredibly handy, as any computer running xTool Studio on your home network will now be able to connect and send jobs to the machine completely wirelessly.
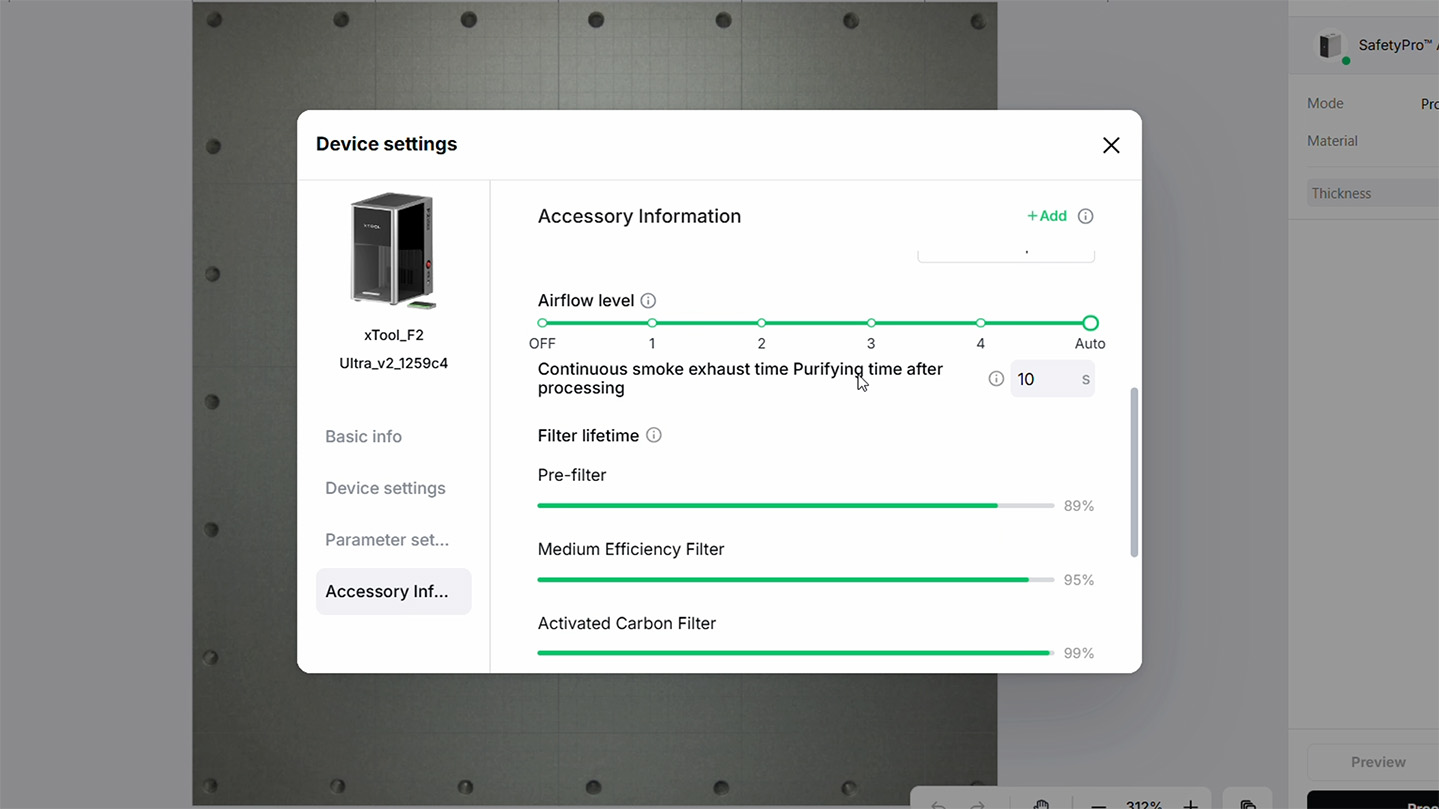
Another massive quality-of-life step to do right now is connecting the AP2 filter directly to your F2 Ultra so they talk to each other. Turn your AP2 off with the power button on the top. Then press and hold it for 5-10 seconds until the Bluetooth pairing light turns on. This light is the little LED with the chain icon near the power button. Then, in xTool studio, open the machine settings menu, and under accessory info, press "+ Add". Select the AP2 when it appears.
This is absolutely worth doing because you can now set the AP2 to Auto mode. In Auto mode, the filter will automatically ramp up when your laser starts firing and turn itself off when the job is done. It also allows you to monitor the remaining lifespan of your filter cartridges directly in the software!
Note: You may have noticed a little wireless USB receiver dongle included with the AP2. You do not need to use this on the F2 Ultra. That dongle is meant for older machines like the F1 or S1 that don’t have built-in Bluetooth.
Where to From Here
And with that, your xTool F2 Ultra is fully set up, calibrated, and ready to go!
If you are looking for something to do next, we highly recommend finding some beginner-friendly projects to make using the provided materials in your starter pack. Dialling in the correct speed and power settings for a brand-new material can be a bit of a hurdle when you are just starting out. The beauty of the xTool-provided materials is that xTool Studio already has pre-tested, built-in profiles for them, which get you good settings right out of the gate. It is well worth giving them a go to build your confidence.
To find projects, a quick search on Google or YouTube can get you some good starts, but you might also want to check out Atomm, xTool's design repository site, with a huge amount of projects.
We hope this guide got you up and running smoothly. If you need a hand with anything we covered, or if you just made something incredibly cool and want to show it off, head on over to our community Maker Forums at the bottom of this page! We are all makers over there and are always happy to help or just admire a cool project.
Until next time, happy making!

