In this guide, we will be unboxing and setting up the xTool S1, and walking through your very first cut using xTool Studio. We are going to cover the entire process, from getting the machine onto your bench and installing the laser head, to designing, cutting, and engraving your very first custom nametag.
Let's get into it!
Unboxing and Set Up
First things first, open up your box and remove the top layers of packaging. Right at the top, you will find a green box containing your instruction manual and setup guide.
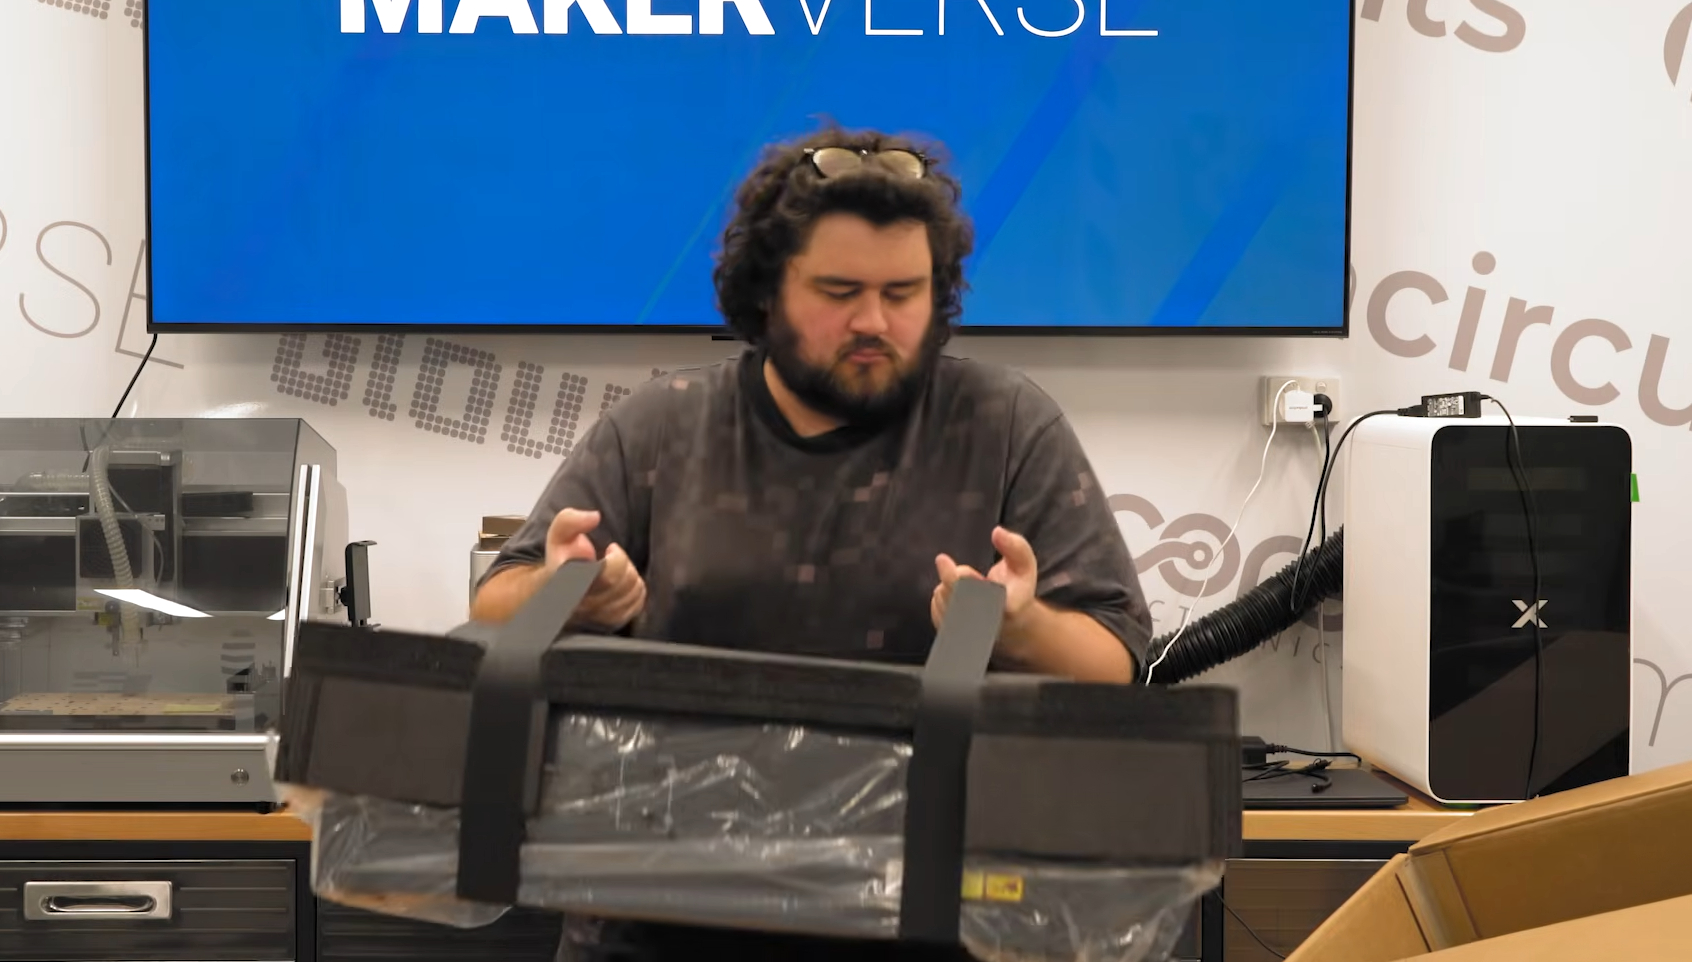
Inside, you will also find a set of big straps wrapped around your laser cutter. These are incredibly handy for lifting the machine out of the box and onto your workbench. Keep in mind that this machine weighs in at about 20kg, so a two-person lift might be helpful here!
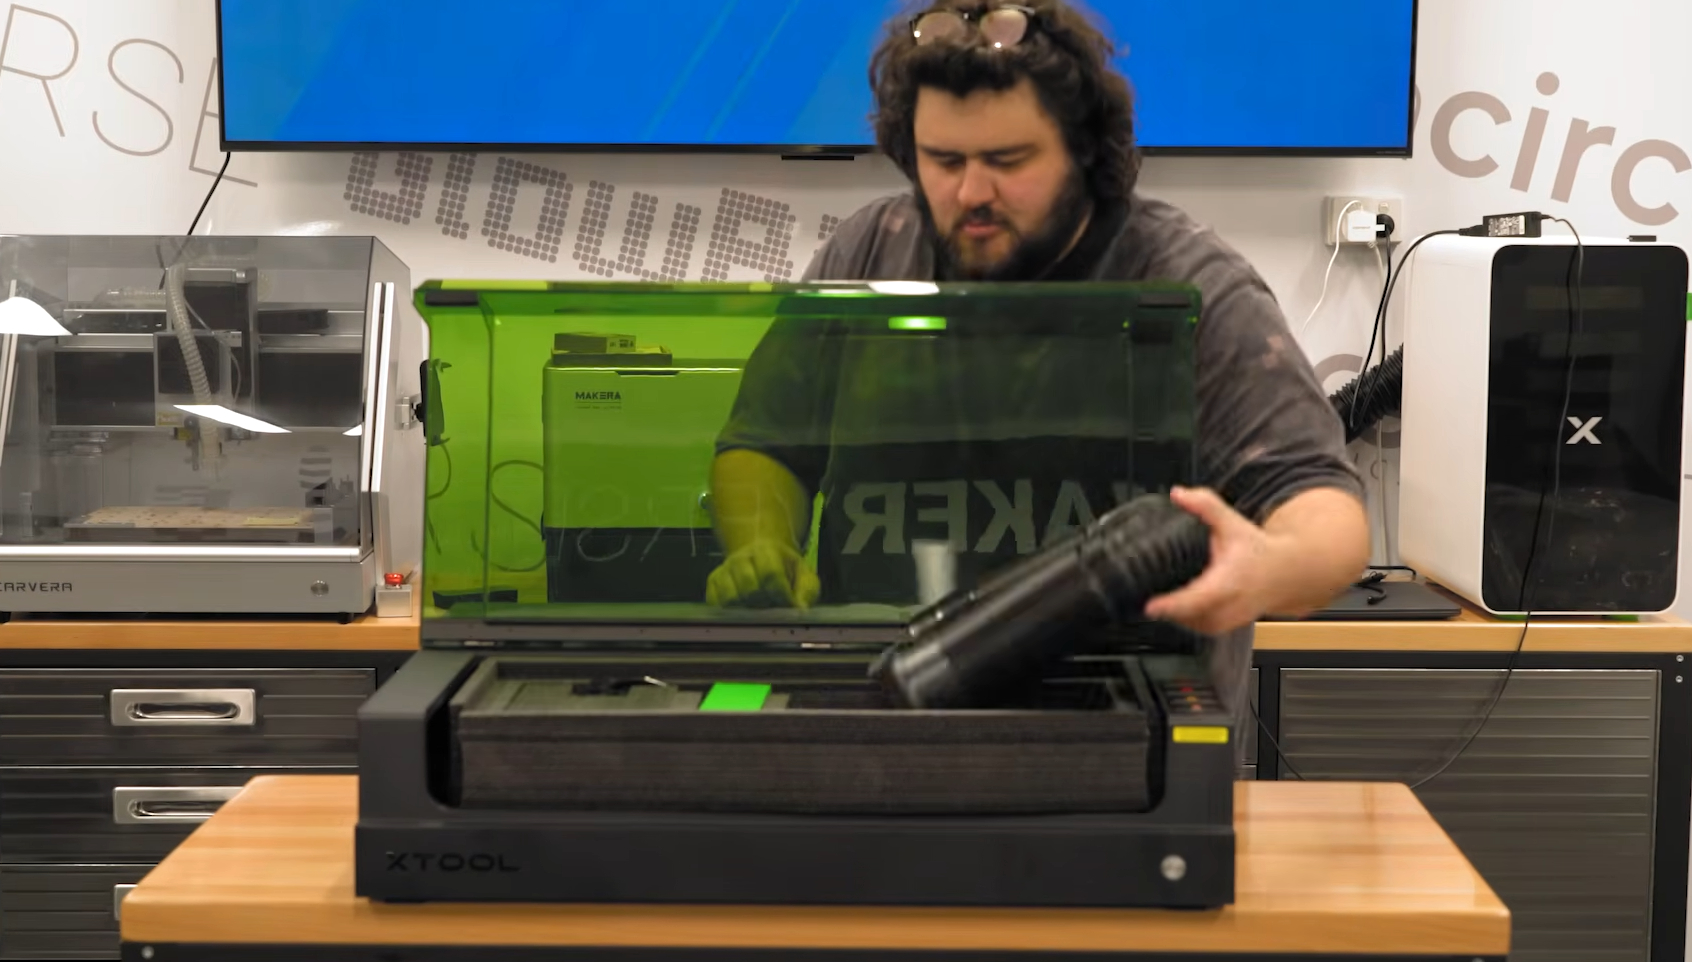
Once it is out and sitting on your bench, go ahead and remove the straps. Under these, you will also find your honeycomb panel. Go ahead and take it out, as well as remove the remaining bits of foam, the outer layers of plastic, the tape with the yellow tag, and all the little bits of protective plastic you can find.
Inside the bed of your machine, you will find a few more important components packed away:
- Materials Pack: Contains some plastics and woods to get you cutting right away.
- Exhaust Tube
- Accessories Box
- Air Assist Pump and Tubing
- The Laser Unit (The most important part!)
Remove all the bits of foam from inside your machine. Looking inside at the back, you will find two white blocks holding your gantry (the rail system) firmly in place for shipping.
Open up your accessories box and grab your toolbox. Inside, you will find a handy little hex screwdriver. Use this to undo the bolts on those white blocks and remove them. Keep this screwdriver safe! If there is a screw on this machine, chances are this screwdriver will fit it.
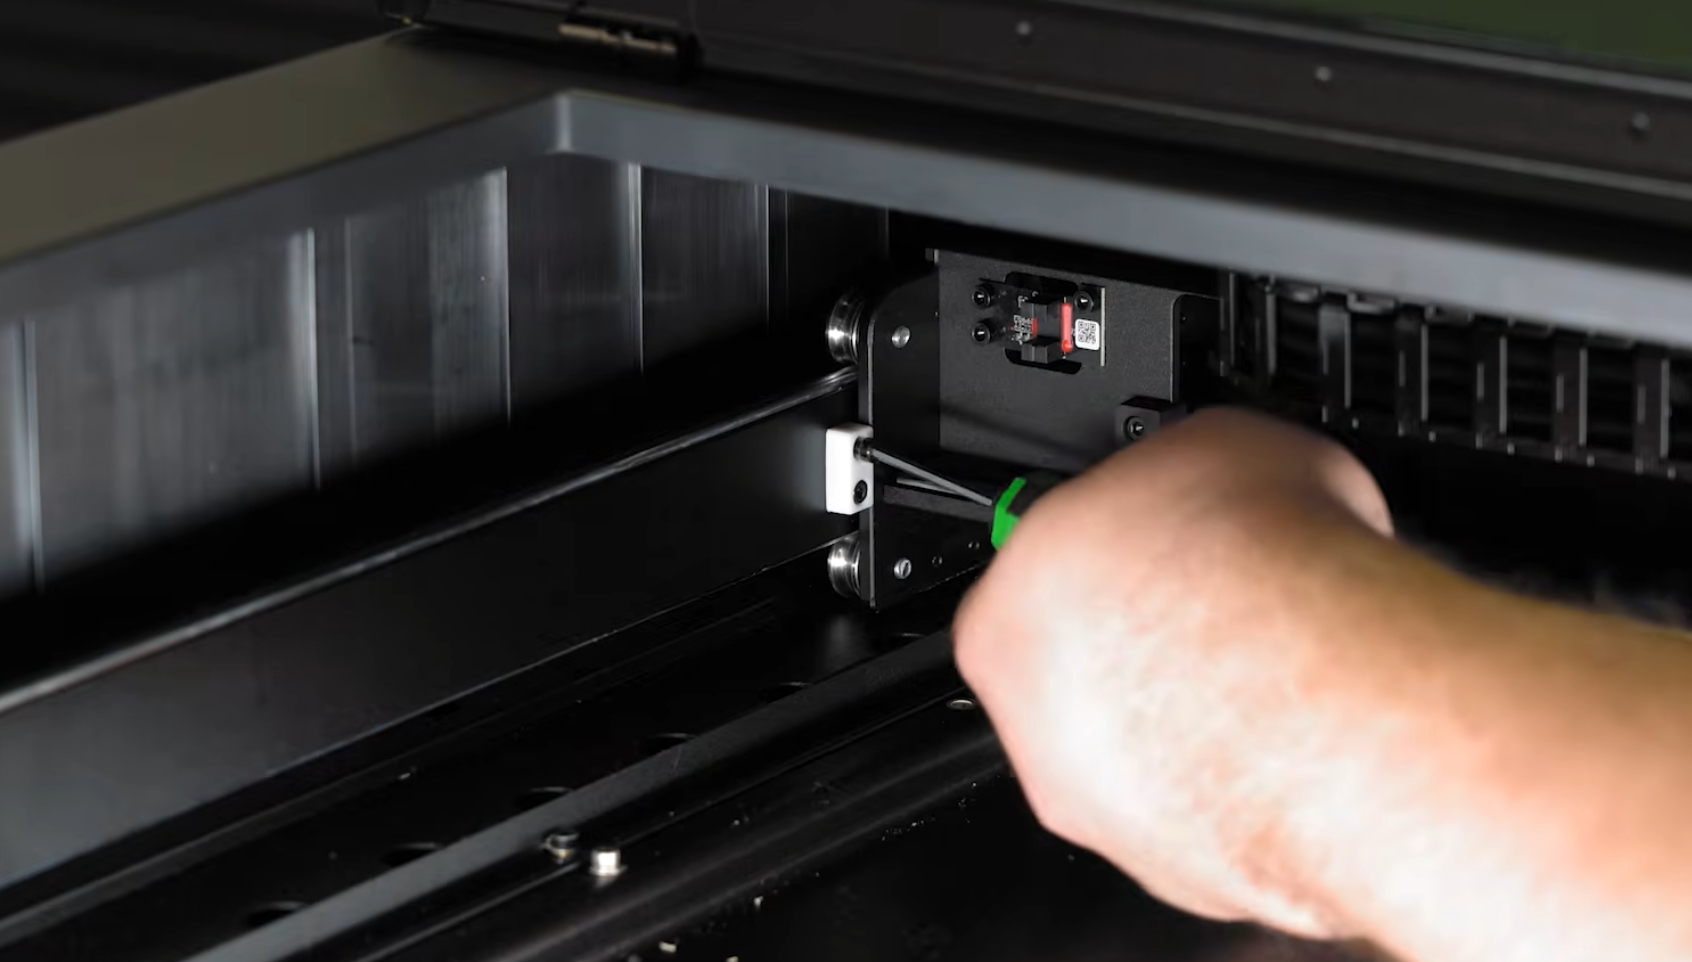
Once those blocks are removed, you should be able to slide your rail forward smoothly. Carefully cut off the cable ties holding the protective covering on the gantry head (being extra careful not to snip anything else) and remove the protective covering from the rail.
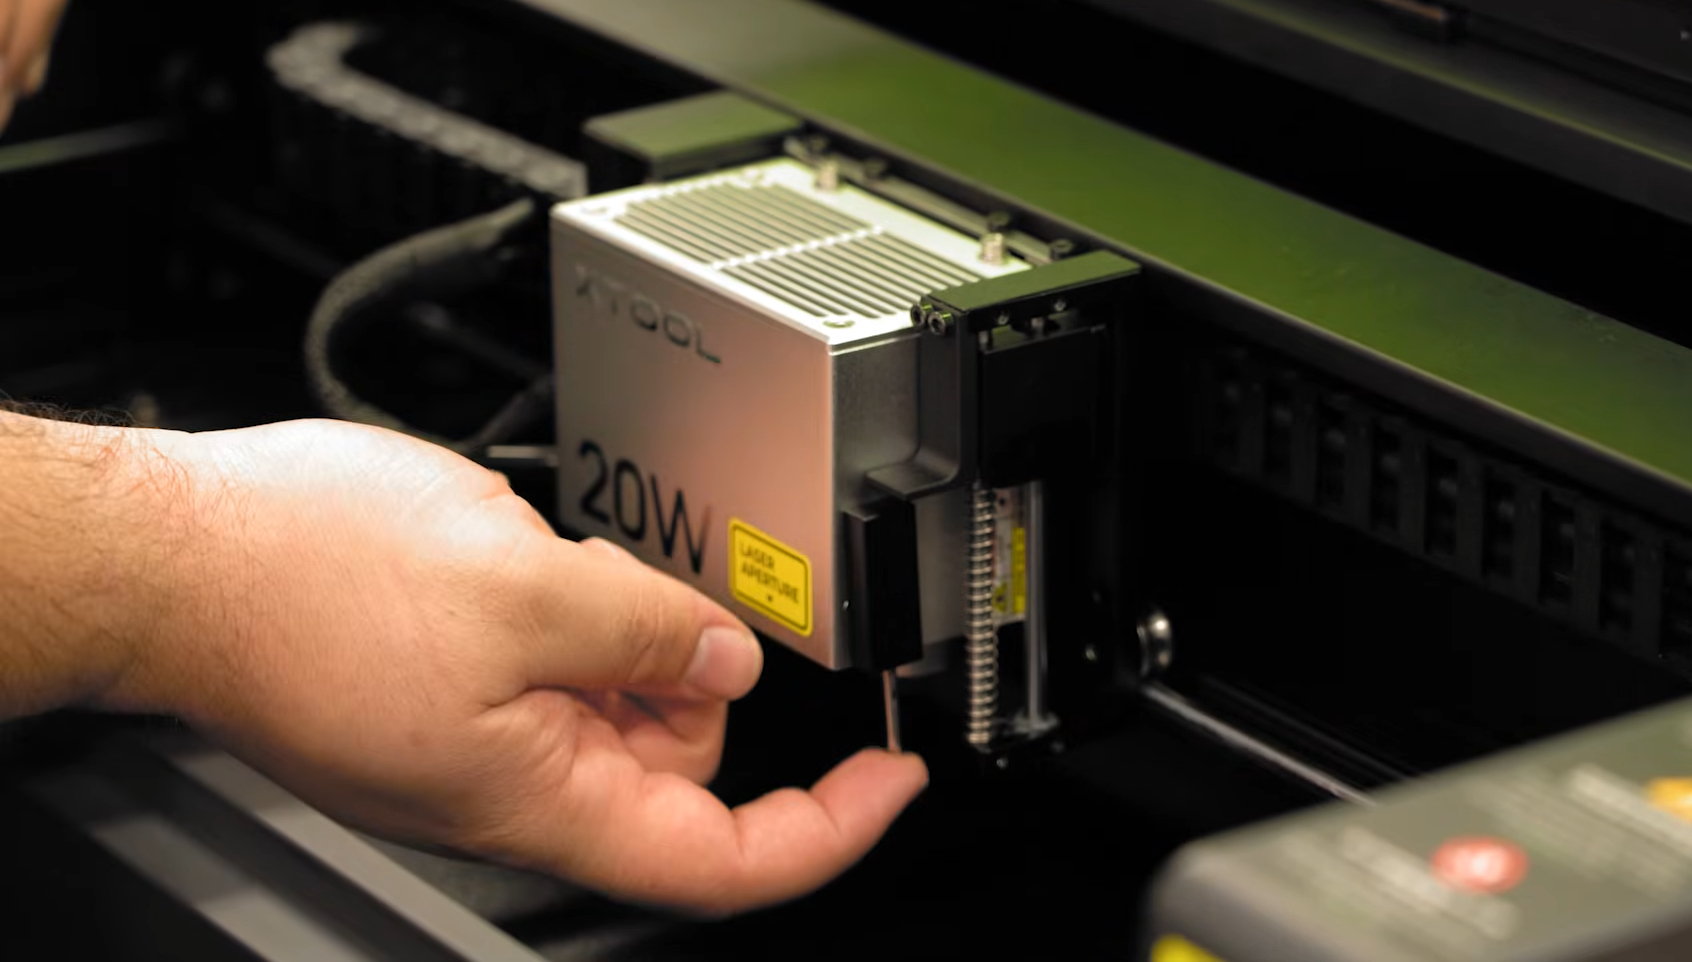
Grab your laser unit. Before mounting it, plug the air hose and the connector cable into the side of it.
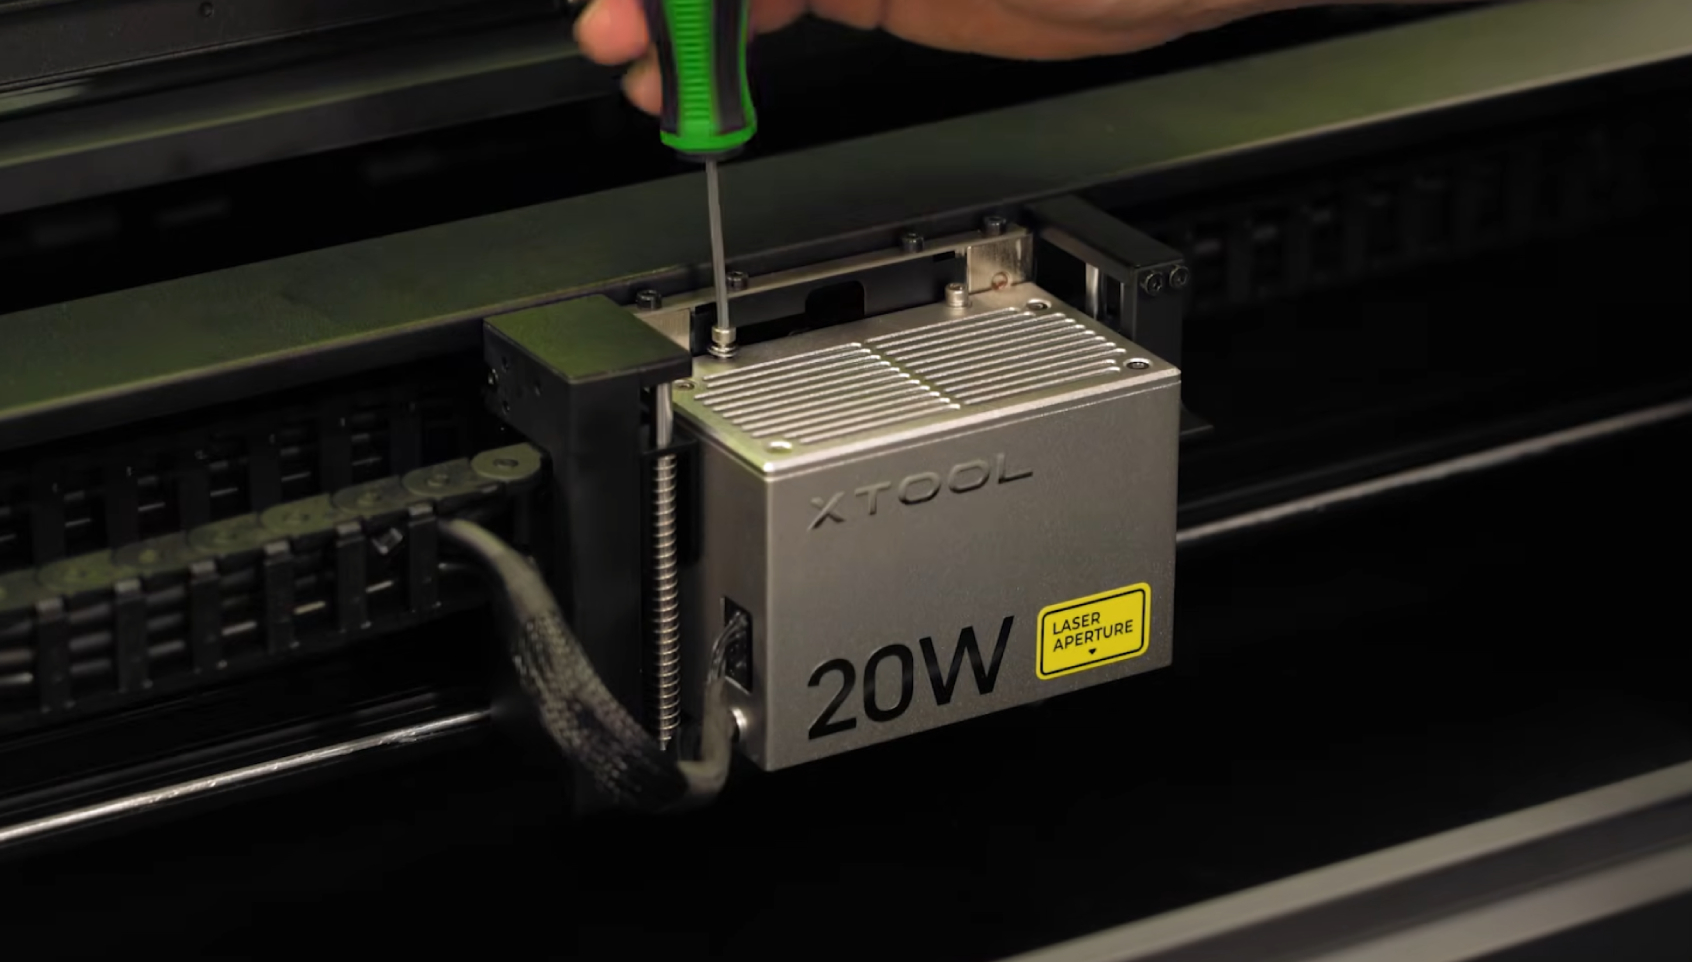
Looking at the back of your laser unit, you will notice a small notch. This notch perfectly lines up with the hole in the rail mount. Sit the laser head into the mount, letting that notch guide it into place.
Jump back into your toolbox and grab the two mounting screws. These go straight down into the top of the head to hold the laser unit securely in place. Once it is mounted, give it a gentle push; it should spring up and down smoothly.
Finally, grab the distance probe from your toolbox. This simply attaches magnetically to the side of the laser unit.
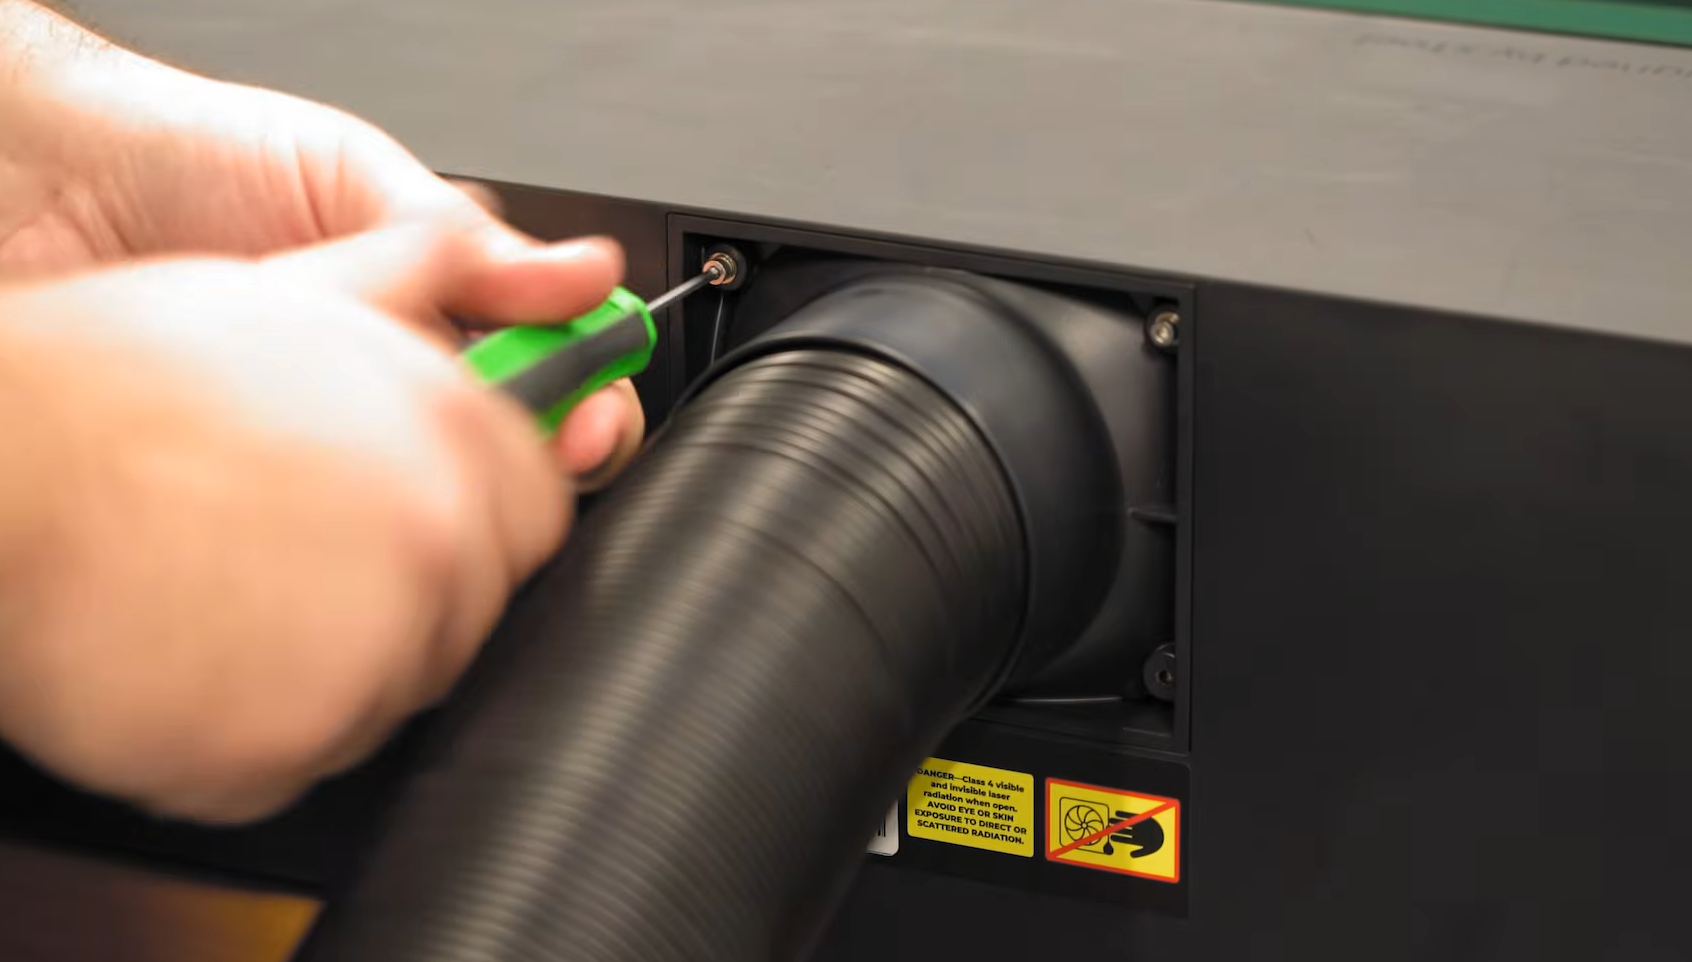
Looking at the rear of your machine, you will find an exhaust vent. Laser cutting produces a whole heap of nasty gases and microscopic particles that aren’t good to breathe... and they can also smell pretty bad. Because of this, you absolutely need a way to either vent this air outside or run it through an appropriate filter.
To attach the included exhaust hose, simply take the 4 screws off the vent, place the hose over the port, and put the 4 screws back on. There is a small fan right behind that exhaust vent to blow out the smoke. However, you may find that it is a little bit underpowered if you are trying to push that air through a long hose to vent outside, so adding an inline fan to help pull that air through might be a smart upgrade down the line.
Alternatively, if you are using a dedicated filter like the xTool AP2 air filter (which filters the exhaust well enough to safely blow the air right back into the room), go ahead and set that up now.
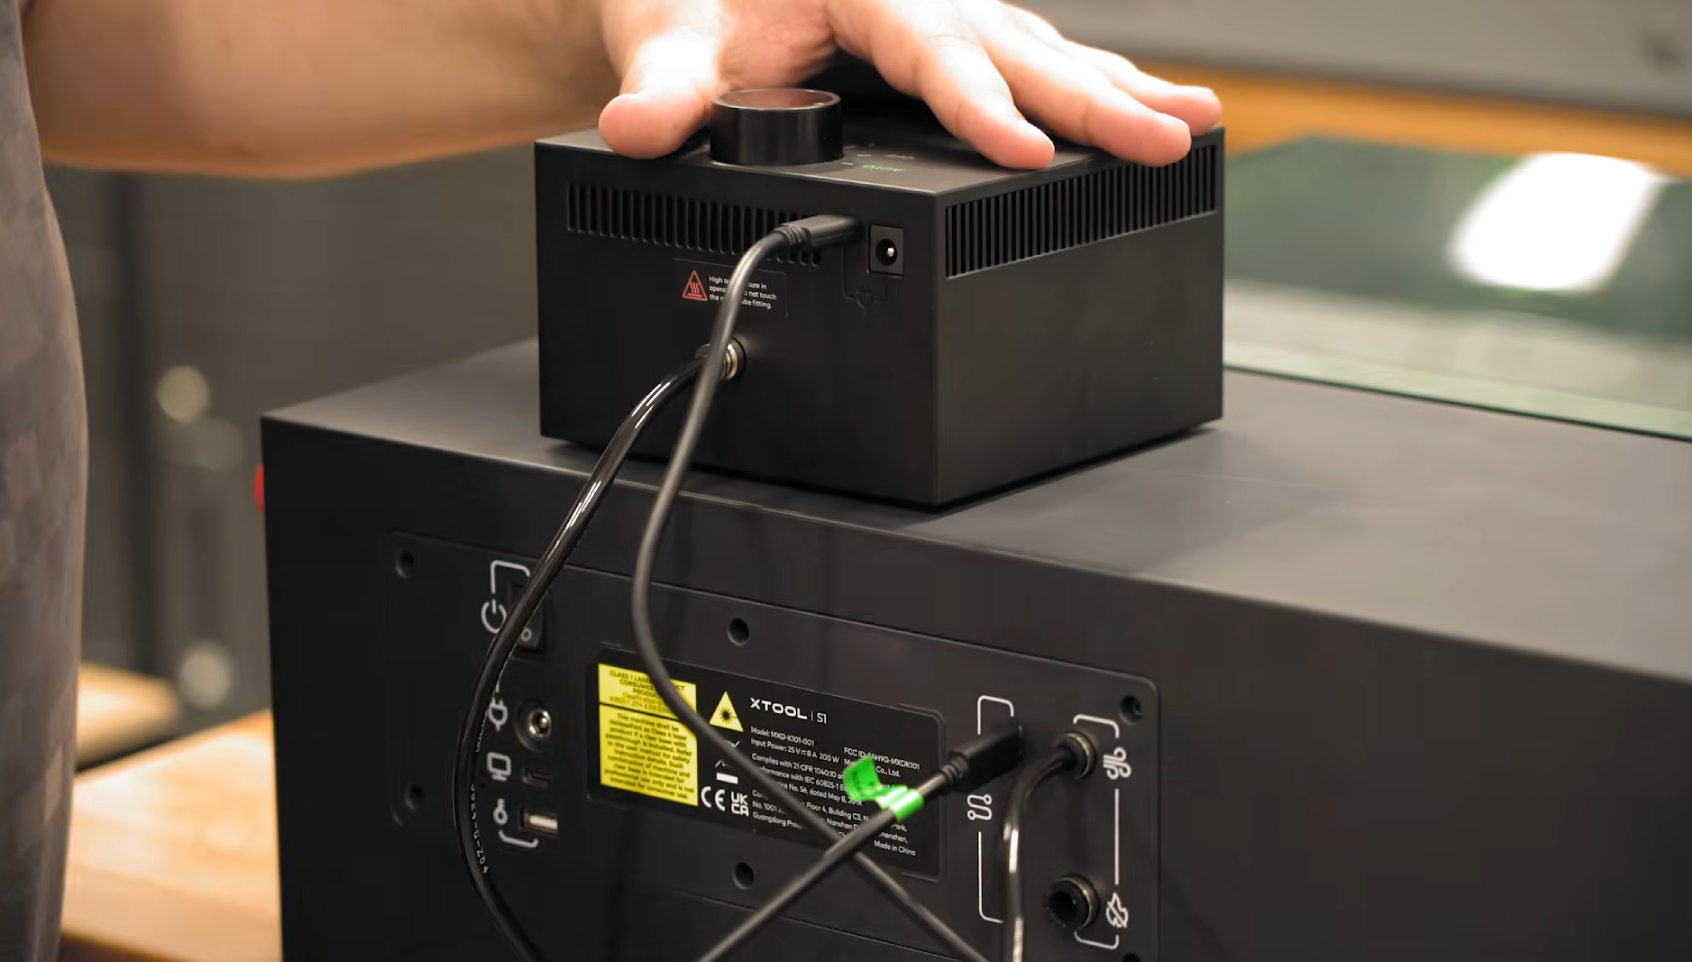
Next, we need to set up the Air Assist. This little box is essentially just an air pump, but it plays a massive role in your cut quality.
- Connect the air hose tubing into the rear of the air assist box, and run the other end to the air hose port on the rear of your machine.
- Use the included accessory cable to connect the air assist to one of the accessory ports on the back of your cutter.
- Note: There is a power input barrel jack on your air assist—do not worry about plugging this in! It receives all the power it needs directly through that accessory cable.
- Ensure you switch the air assist to Auto Mode. This allows the laser cutter to intelligently turn the air assist on and off exactly when it needs it.
Why do we need this air pump? The air assist runs through the machine and directly into the laser unit, blowing a constant stream of air right around the laser cutting head. This air clears away smoke and debris, keeping gunk from building up on your delicate lens, and results in significantly cleaner cuts and deeper engraves.
We are almost ready to go! In your toolbox, you will find a small USB key. This is your Safety Key, and if it’s not plugged in, the machine simply will not turn on. Go ahead and insert it into the rear of your machine.
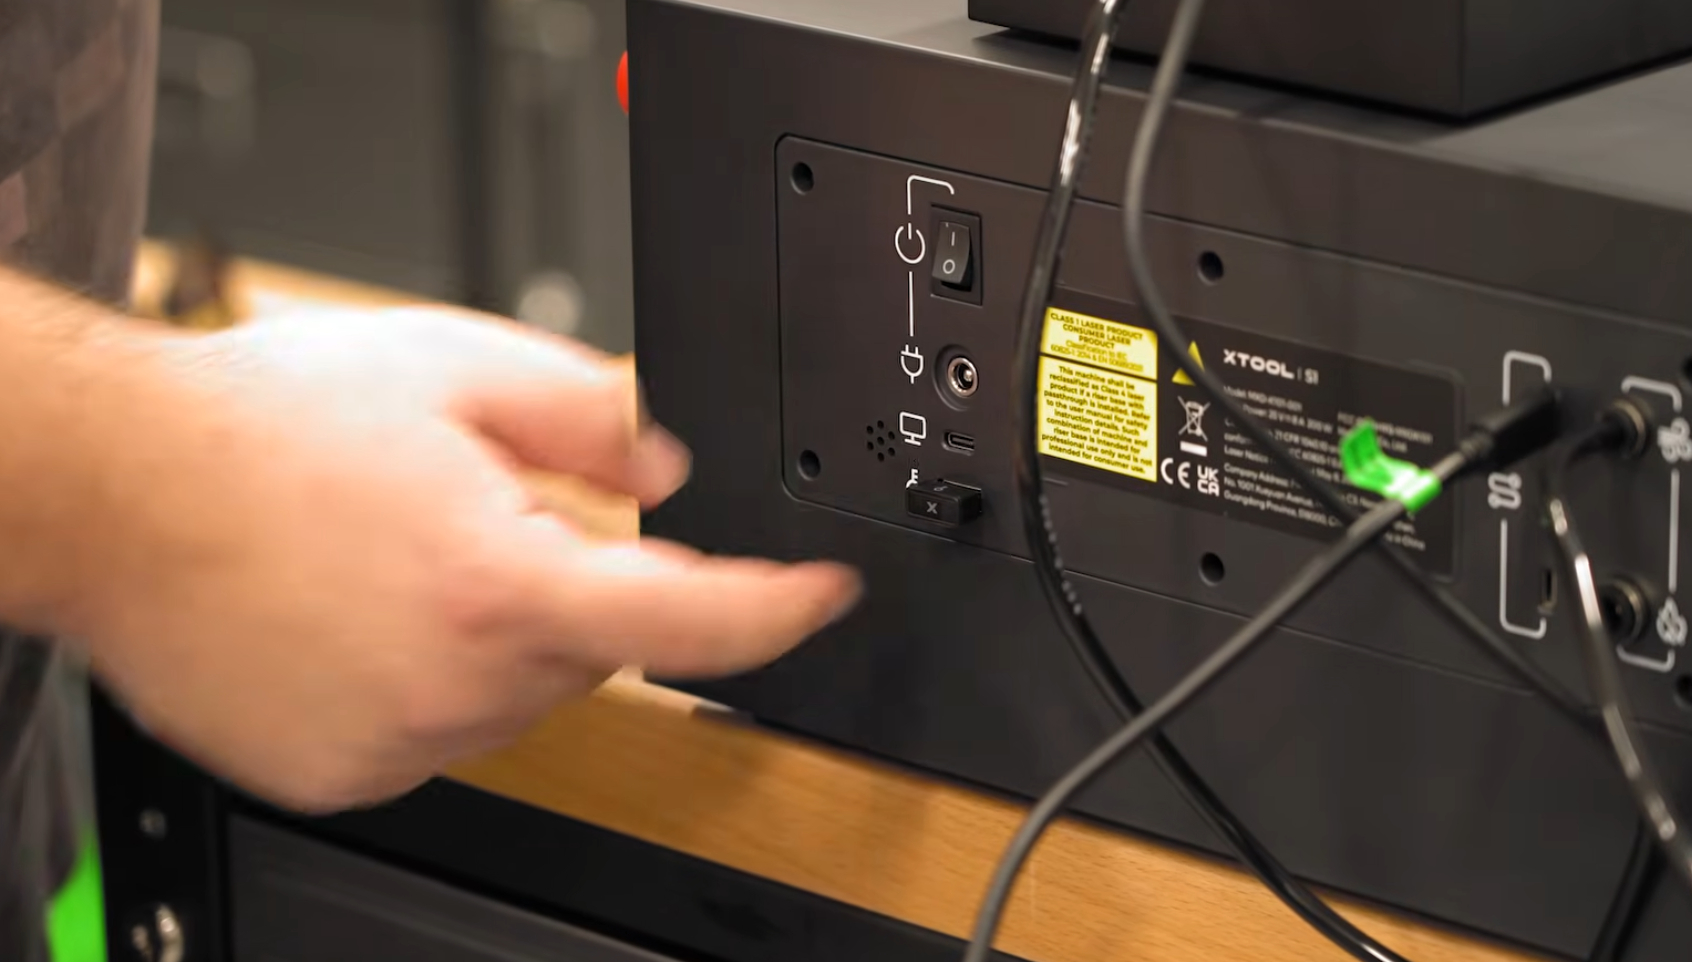
Now, we can plug in our main power supply.
On the right side of the machine, you will find the E-stop (Emergency Stop) button. This is your kill switch for when you need to turn the machine off in a hurry. To disengage it, give it a twist and it will pop up.
Hit the power switch on the back of your machine, and your S1 should turn on and come to life!
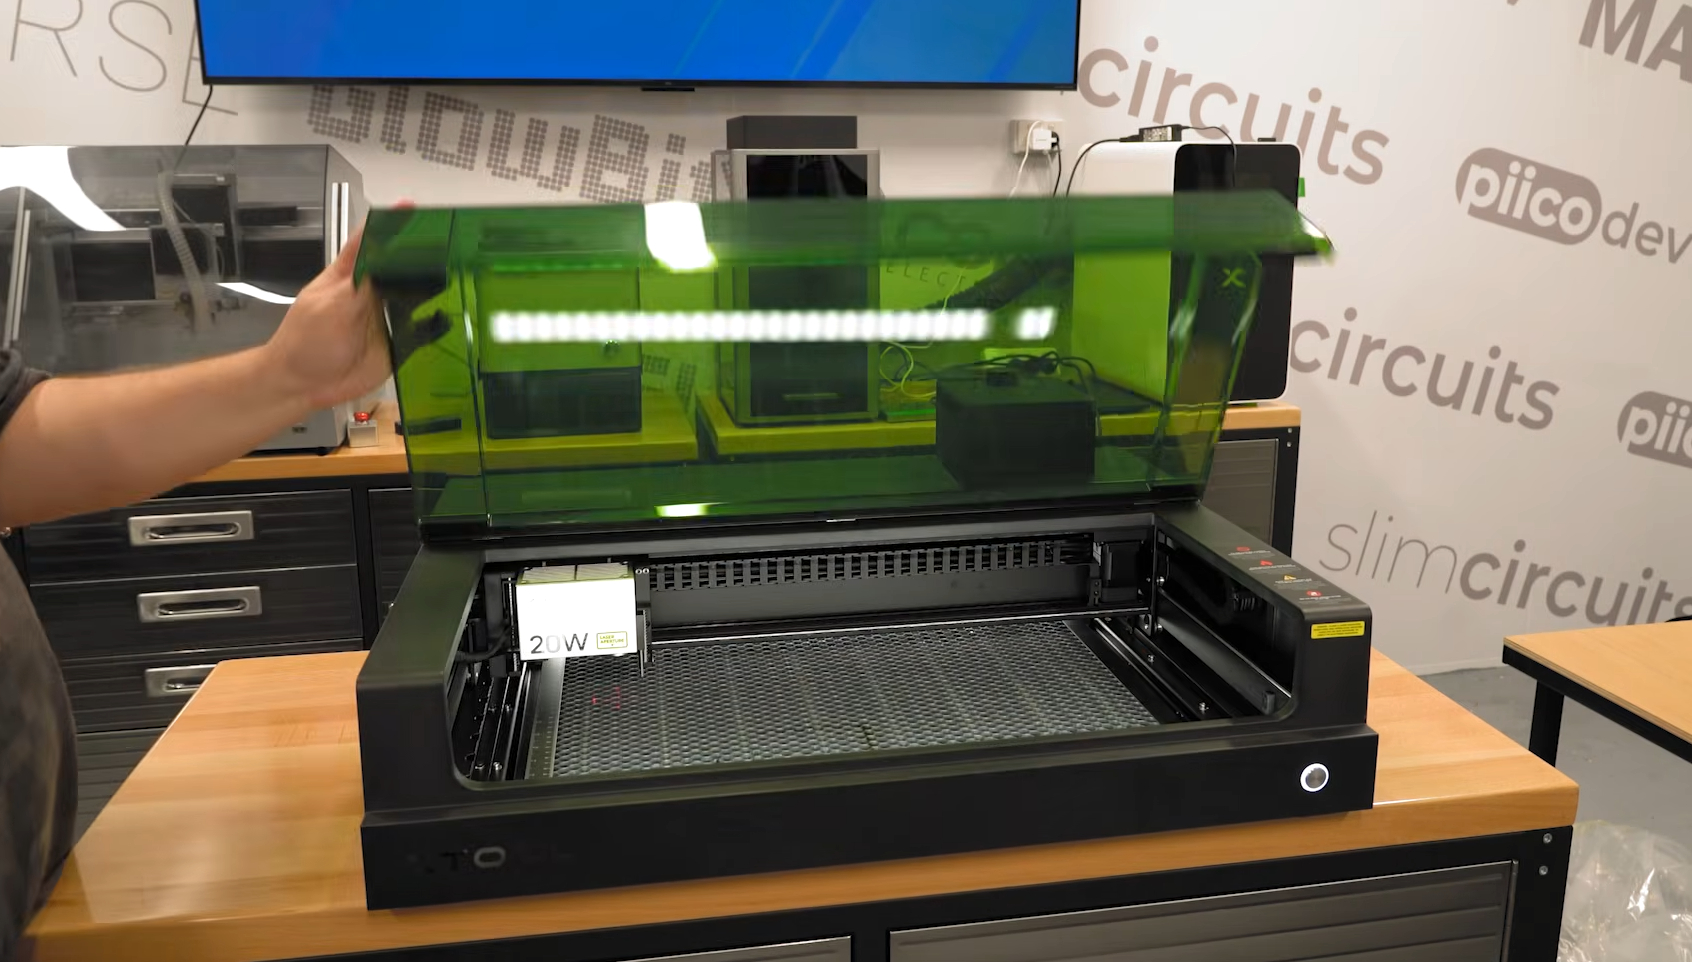
Finally, carefully slip your honeycomb panel into the bottom of the machine bed. With that, your xTool S1 hardware is completely set up and ready to go.
Setting up xTool Studio and Designing Something!
Alrighty, let's go ahead and actually do some test cuts and engraves! To do this, you will need to install a piece of software called xTool Studio (formerly called xTool Creative Space). This software is the brain of the operation—it takes our digital designs and translates them into movements and laser pulses that the machine can understand. Go ahead and download and install that to your computer.
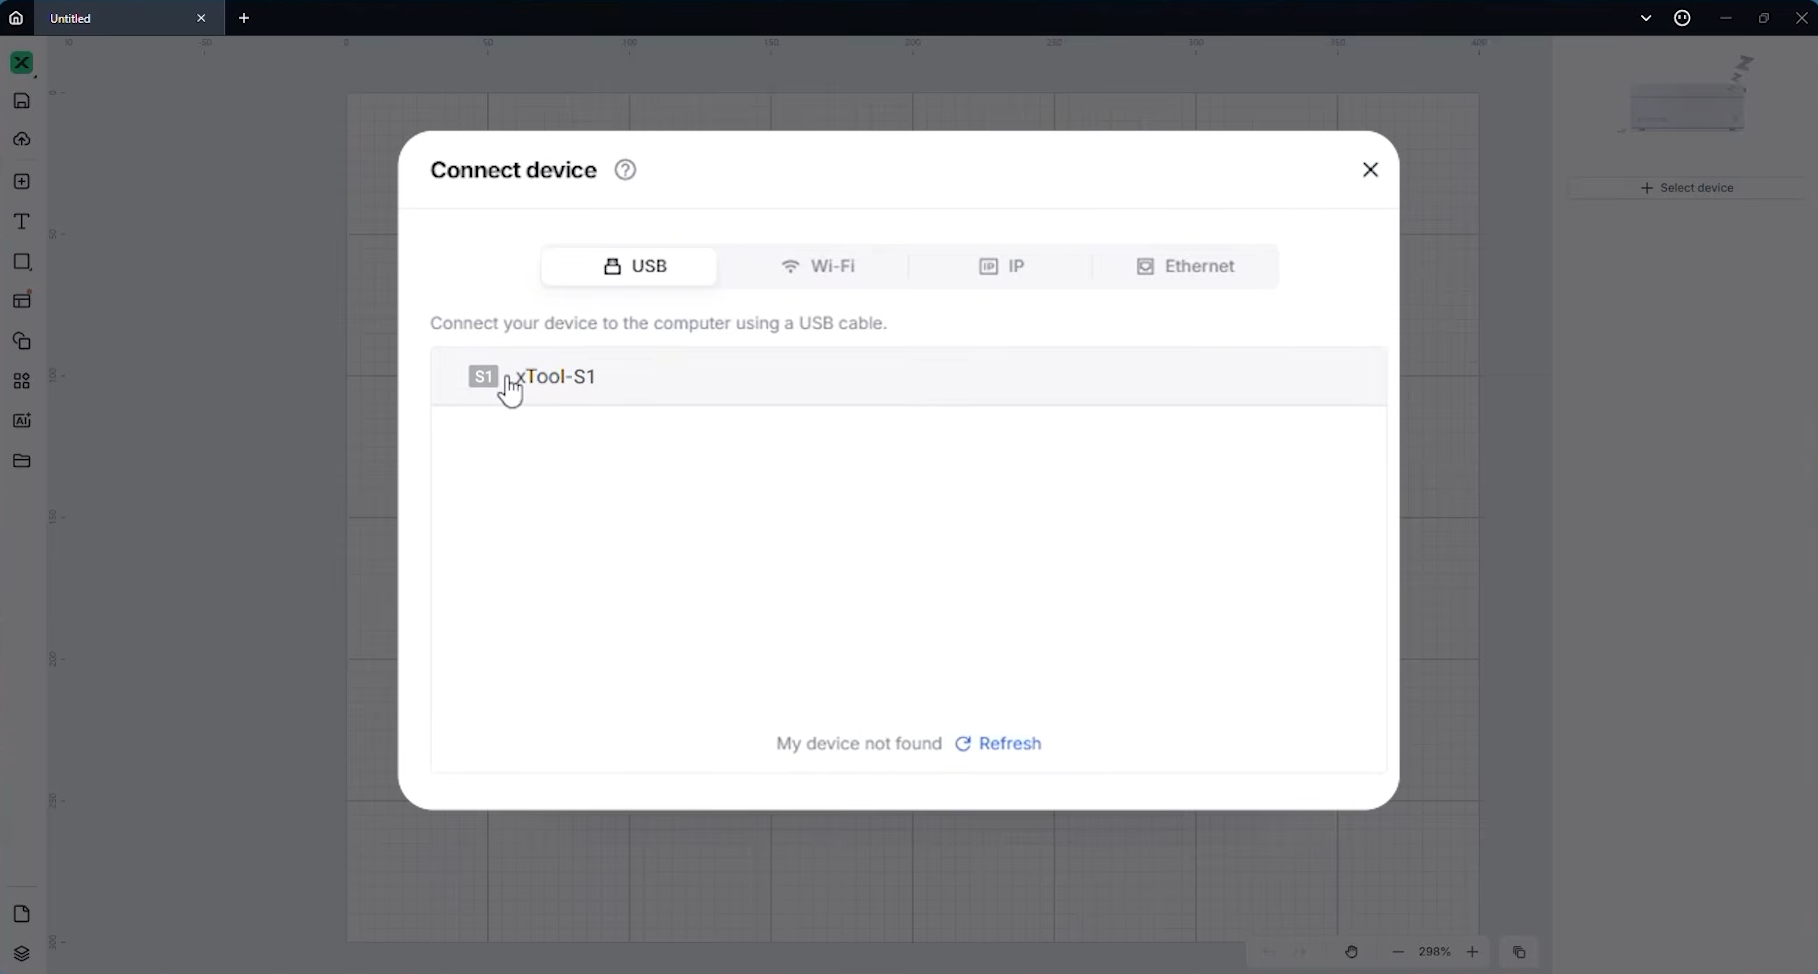
Once you are in xTool Studio, create a new project. Plug your laser cutter into your computer using the provided USB cable, and you should be able to connect to the machine using the Devices menu at the top of the software.
Now, the very first time you do this, the software will likely run you through a first-time setup sequence. This usually involves a short laser safety video, a firmware update, and a first-time cutting tutorial. Do not skip the firmware update! It is always worth doing to ensure your machine has the latest features and bug fixes. If this is your absolute first time using xTool Studio, we also highly recommend running through their quick cutting tutorial to get a feel for things.
Regardless of whether you did the tutorial, once you are done with that initial setup, go ahead and create a new blank project. We are going to design, engrave, and cut a little custom nametag keyring from scratch.
Taking a look at the software, the workspace is broken down into three main areas:
- The Left Panel: This is your toolbox. It contains all of your drawing, text, and creation tools.
- The Middle Canvas: This is your virtual workspace, and it is actually the exact same size and proportion as your physical laser cutter bed.
- The Right Panel: This is where your laser settings live (power, speed, passes, etc.).
Let's start building our nametag. Head over to the drawing tools on the left, select the Shapes tool, pick a rectangle, and just draw one anywhere on your canvas.
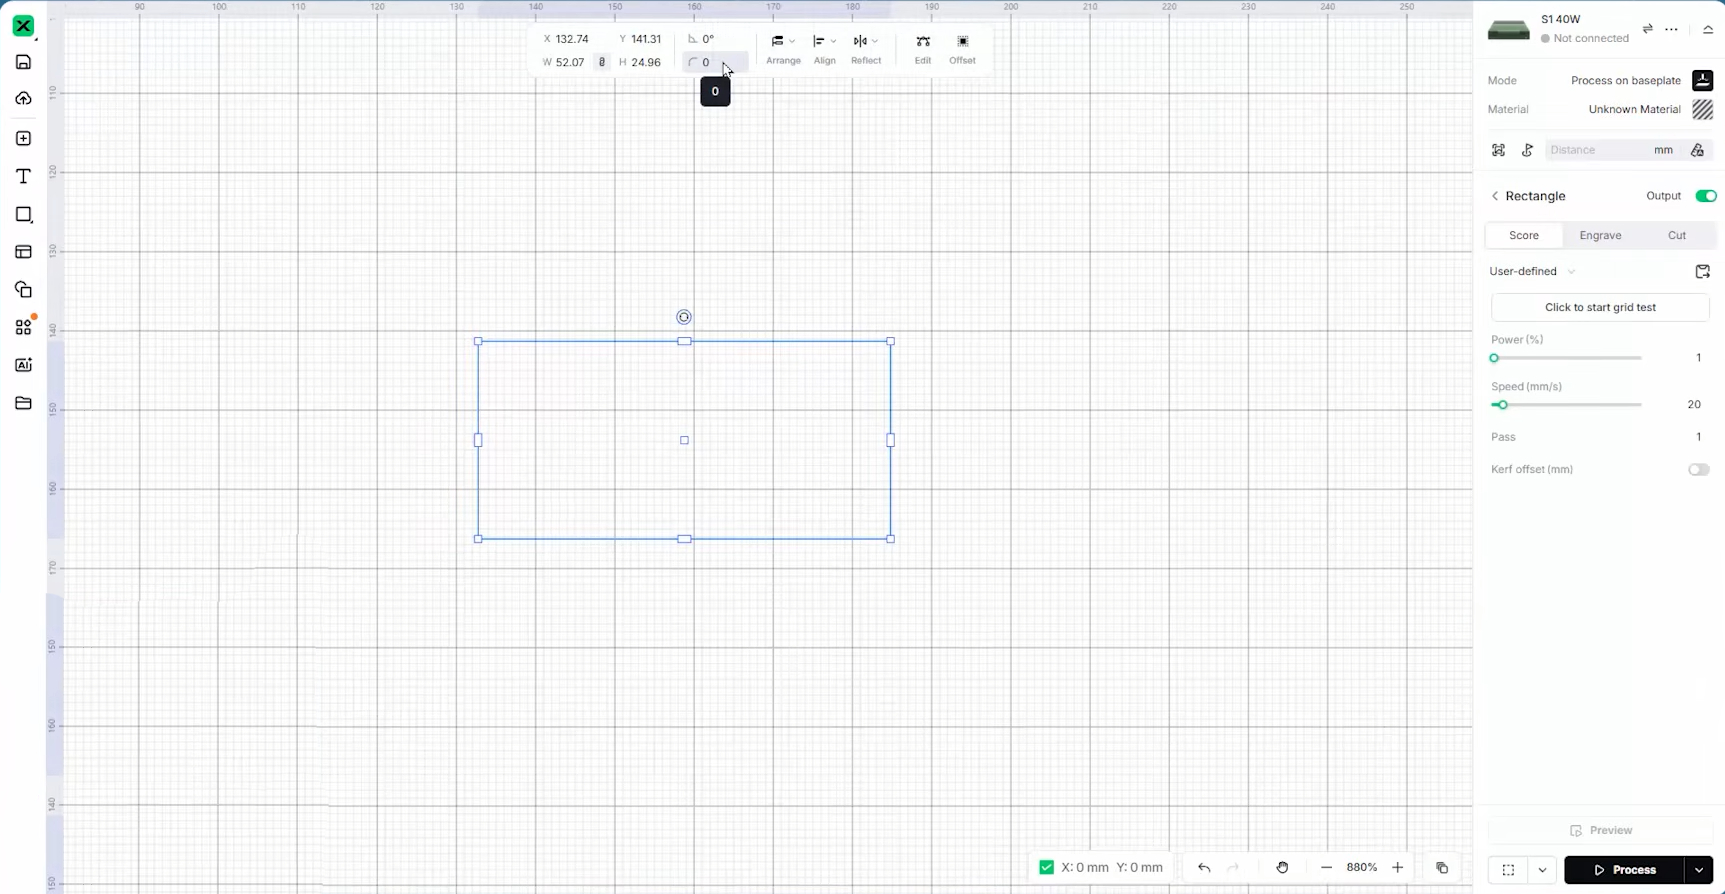
When you select this rectangle by clicking on it, you will see a new settings panel pop up right at the top of the screen. This top menu contains all the specific dimensions and properties for whatever shape, text, or drawing you currently have selected.
We are going to use this top menu to dial in the exact size of our nametag. For this example, we want it to be 30mm long and 10mm wide (though you can make yours as big or small as you want).
A quick tip on resizing: When you try to change that second value, you will probably notice the first one changes as well. That is because the Aspect Ratio is locked (usually indicated by a little padlock icon). This feature keeps graphics from accidentally being stretched or squished out of proportion. Since we want to stretch our square into a specific rectangle, simply toggle that lock off, and it will let you set independent dimensions.
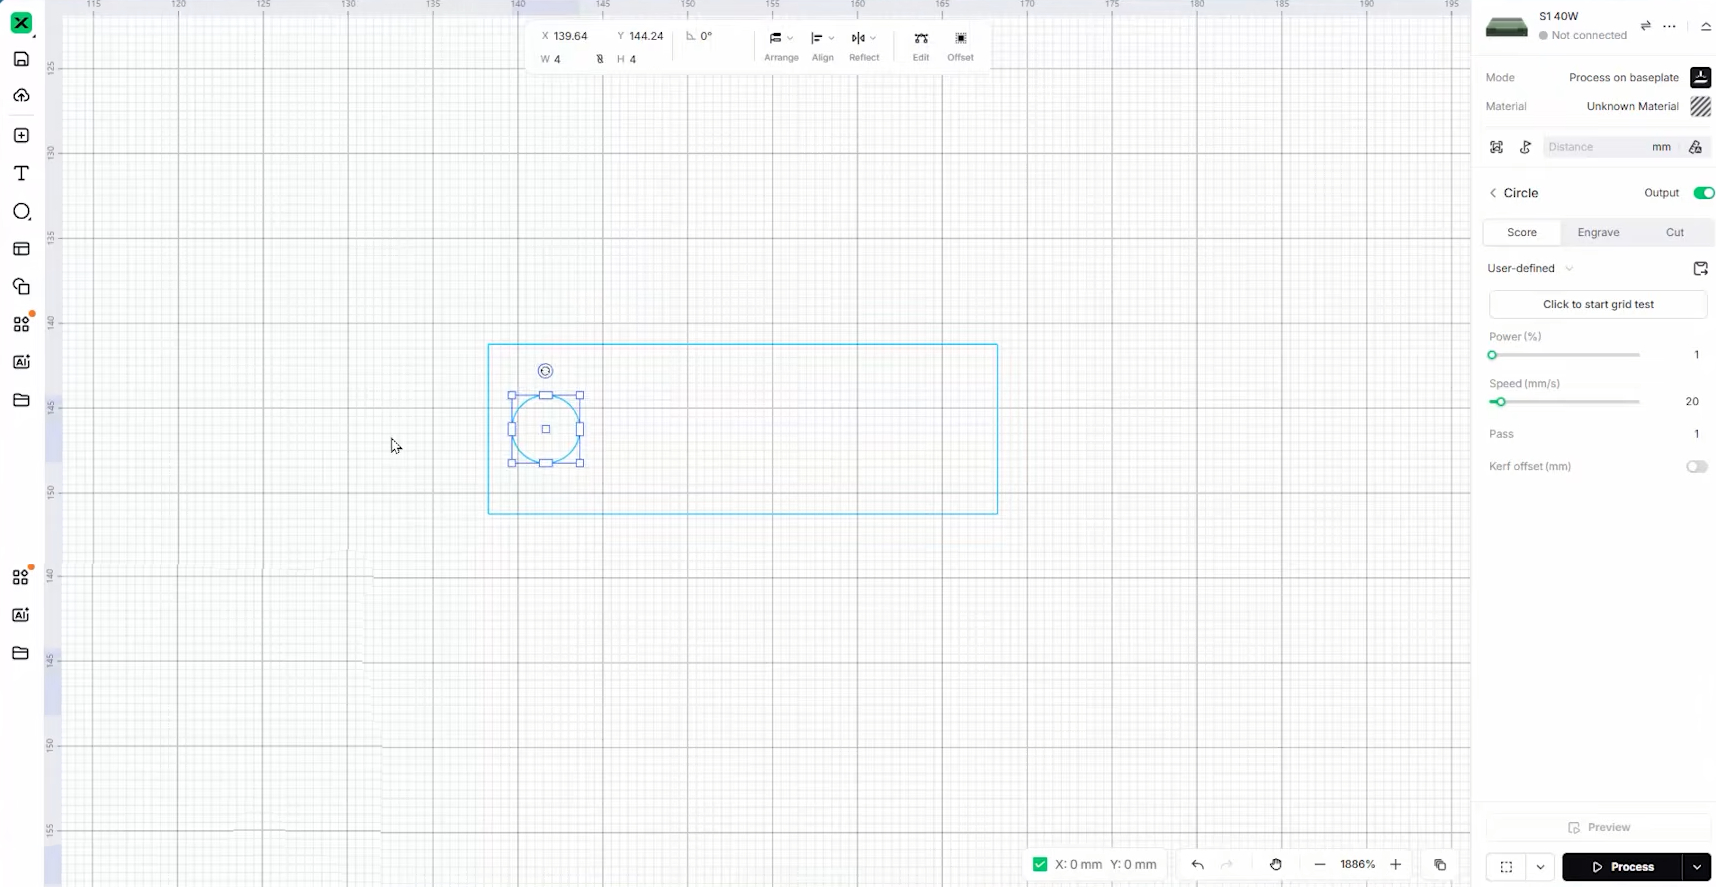
Next, go ahead and create a 4mm wide circle using the exact same steps. We are just going to drag and place it roughly where it looks good on one end of the rectangle. This is going to be the cutout hole for our keyring.
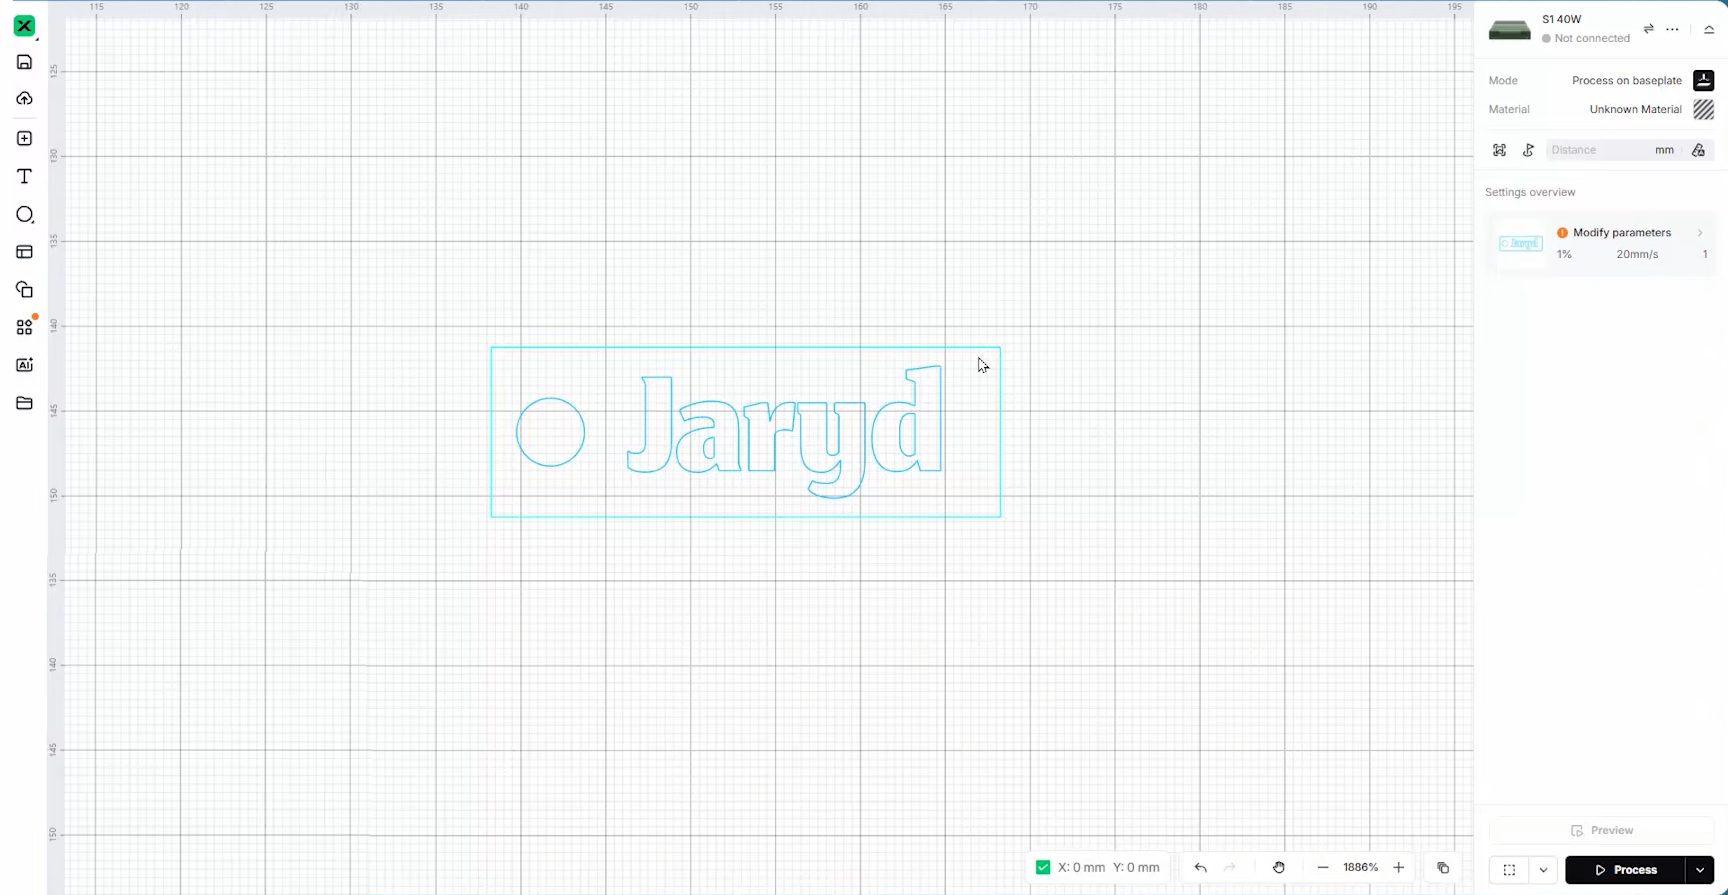
Grab the Text tool from the left panel and type out your name. You can change the size of the text using that same top menu until you are happy with how it fits inside the tag. Feel free to play around with the font drop-down as well to find a style you like!
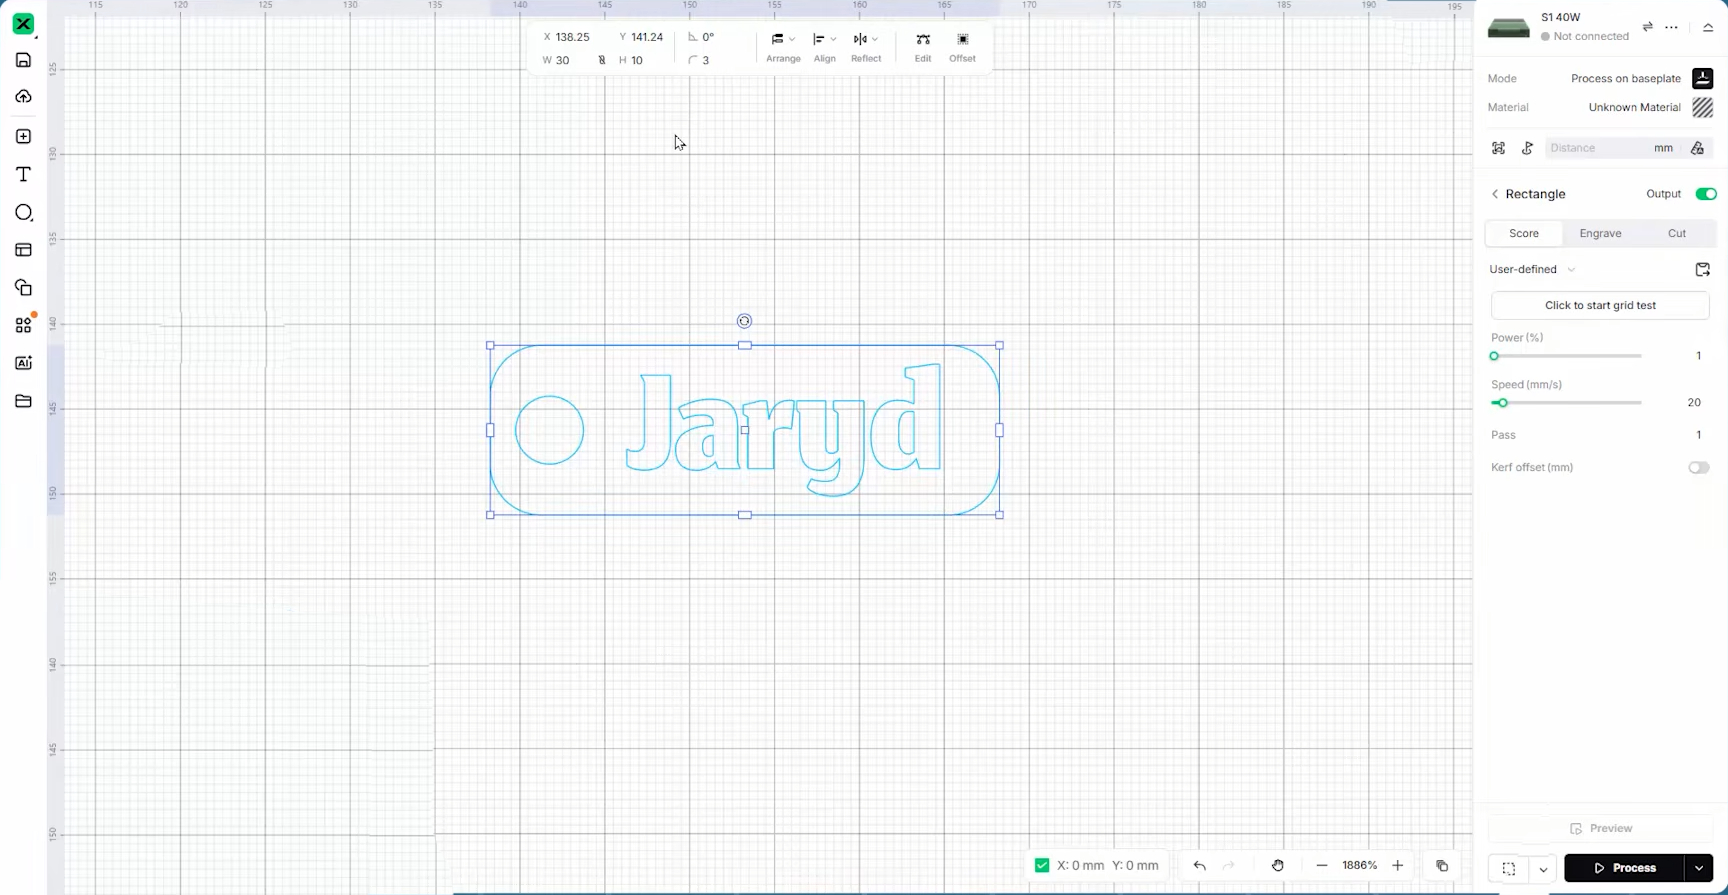
Now we are going to do something a bit funky and round off the sharp, pointy edges of our rectangular tag. To do this, click on your rectangle to select it. Up in that top settings menu, look for the corner radius setting (it usually looks like a curved corner icon) and set the size of the round. We are going to go with 3mm, which gives it a nice, polished look.
Before we move on to cutting, take a moment to explore! We are intending to cut the rectangle and circle to create the physical shape of the tag, and engrave the name onto the surface. But have a little play with the drawing tools on the left to see if there are any extra decorations, stars, or patterns you might want to engrave on the tag to personalise it even more.
Cutting out Your Design
Once you are happy with your design, we can go ahead and start assigning laser operations to it.
Starting off, we need to tell xTool Studio exactly what material we are cutting. Head over to the material menu in the top right and search for 3mm Basswood Plywood, which is the wood that should have come in your included materials pack.

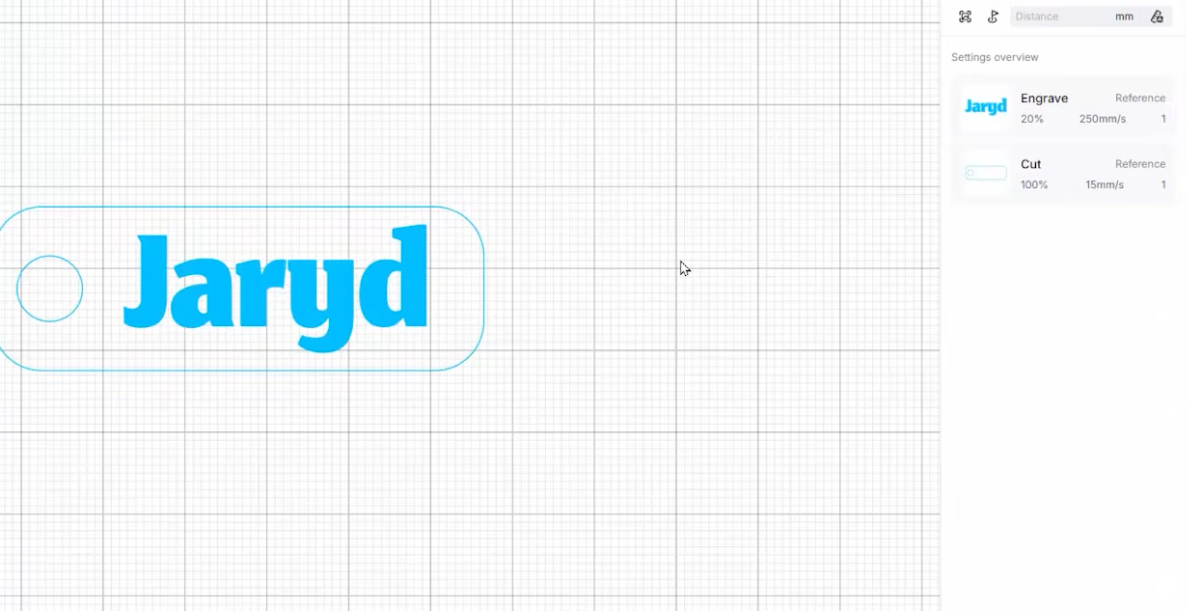
Next, select the big outer rectangle you drew, and on the settings menu on the right-hand side, assign this as a Cut. Then, select the circle, and assign it as a Cut as well. Finally, select your name or any other decorative elements you put on there, and set them as an Engrave. You will notice that the text fills in completely with a solid colour when you do this; that is the software visualising the engraved area for you.
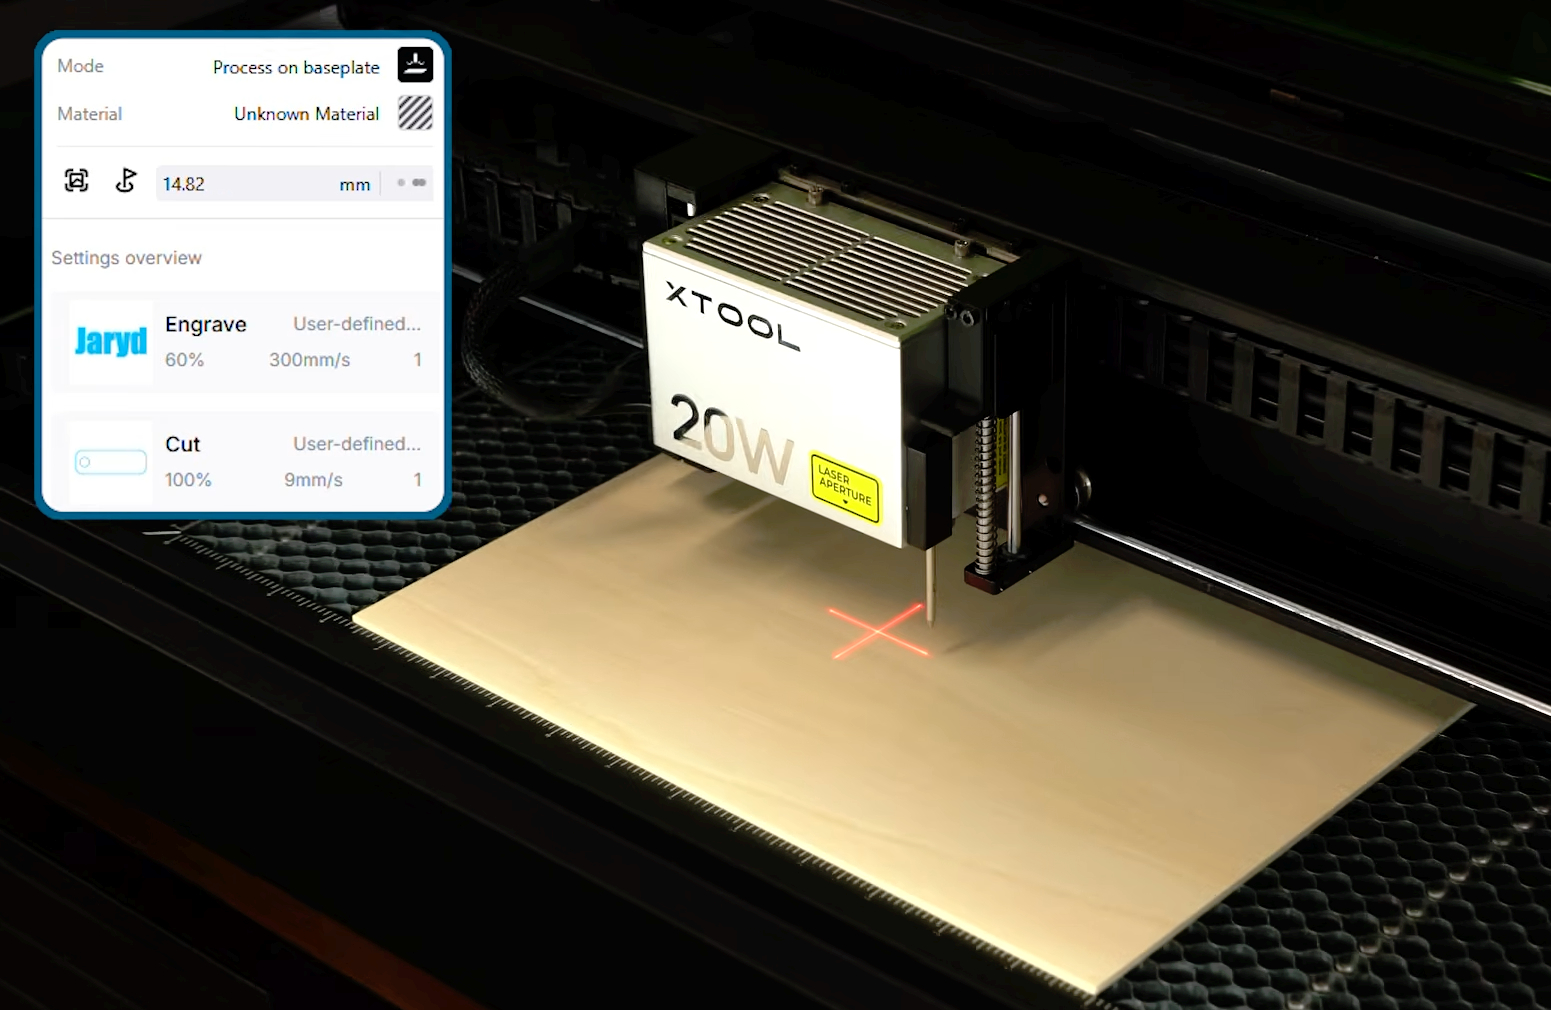
Once we have our operations assigned, click on an empty space on the canvas to deselect everything. The right-hand menu will now display a summary of every operation you have assigned. This is a fantastic little sanity check to quickly ensure you assigned everything correctly before firing the laser.
Now, we want to show you a really cool feature here. If we click back onto our engraved text, we can see a few key settings appear on the right: Power and Speed.
Power is exactly what it sounds like—how much raw laser power you are putting into the material. Speed is how fast the laser head moves to perform that cut or engrave. Usually, when you get a brand-new material, you have to run a bunch of test grids to find a good combination of these two variables. But, because we selected "3mm Basswood Plywood" from xTool's library, the software automatically filled in known good values for us!
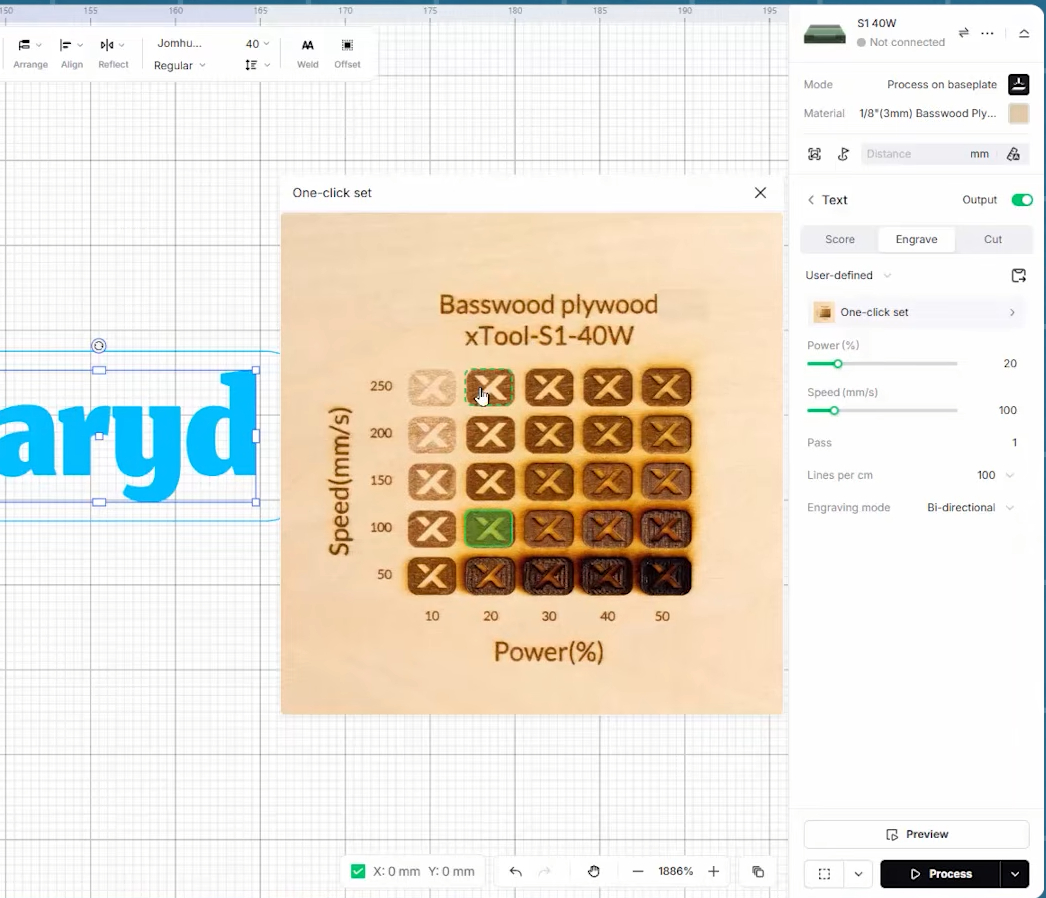
In fact, if you click the little parameter test button next to those settings, you can see the results of a physical power/speed test matrix. Every result on that image is a clickable button you can use to apply those exact settings to your design. For now, though, just leave it on the default values.
The other important setting we might want to tweak is Lines per cm. When your laser engraves, it does so by scanning back and forth over the wood, line by line. This setting changes the resolution of that engraving. More lines will give you a much higher-detail image, but it will take longer to engrave. At the default of 90 lines per cm, this tiny nametag will take about 30 seconds, but at 300 lines per cm, it will take just over a minute.
Since it's a small part, we might as well run this at maximum quality! Go ahead and set it to 300. (After you run this job, we highly recommend trying one at 90 just to see a real-world example of the difference).
Next, go ahead and place your plywood sheet into your cutter. Where you put it on the honeycomb bed really doesn’t matter right now - as long as it is not at a weird angle, try and keep it square with your machine.
Because xTool Studio is a virtual representation of our cutting bed, we need to tell the software exactly where our physical piece of wood is sitting so it can cut the file in the right spot.
The first step is setting the focus of the laser. Open your lid, and gently move the laser head by hand until it is hovering directly over your wood (the laser cross should be on your wood). Back in the software, select the Auto-Measure button (next to the Distance setting). The distance probe we attached earlier will tap the wood, and you should see a precise height measurement populate in the software.
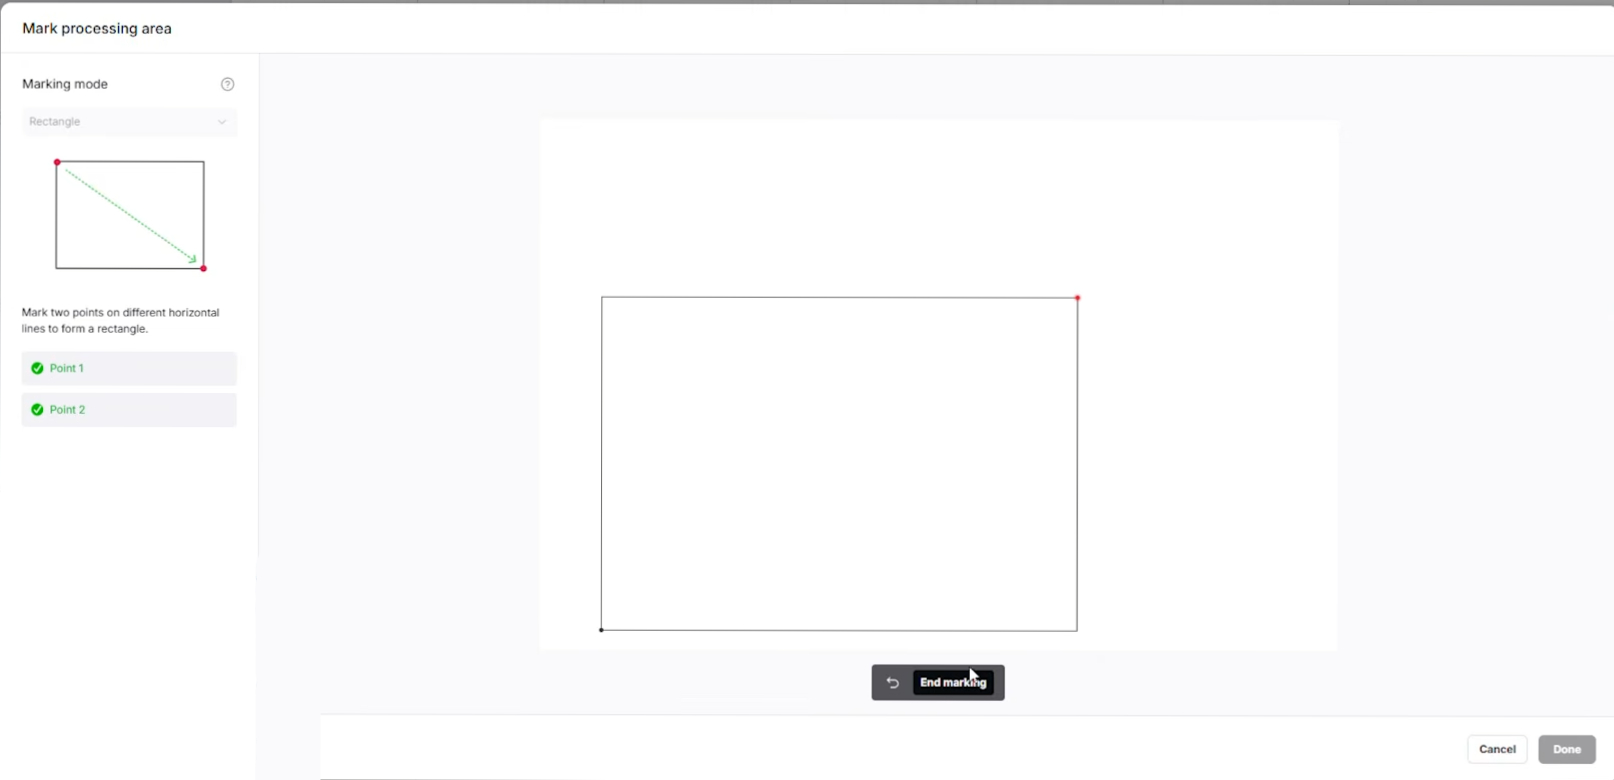
Next, we are going to mark our processing area. Under the Marking section in the software, select the Rectangle option. This is an incredibly cool and useful function of the machine. Here is how it works:
- Move the physical gantry by hand so that the laser head's red crosshair aligns perfectly with the bottom-left corner of your wood.
- Press the physical button on the front of the S1 machine.
- Next, move the laser head to the opposite (top-right) corner of your wood.
- Press the physical button on the machine again.
- In the software, hit End Marking, and then Done.
If you now look at your xTool Studio canvas, you will see a green rectangle overlaid on your workspace. That is your piece of wood! You can now drag your nametag design perfectly inside that box to virtually align it. This is such a great tool—it is highly precise, and if you are ever engraving on scrap wood, keychains, coasters, or other odd bits and bobs, it is incredibly helpful. Utilise it whenever you can!
And now, we are ready to cut.
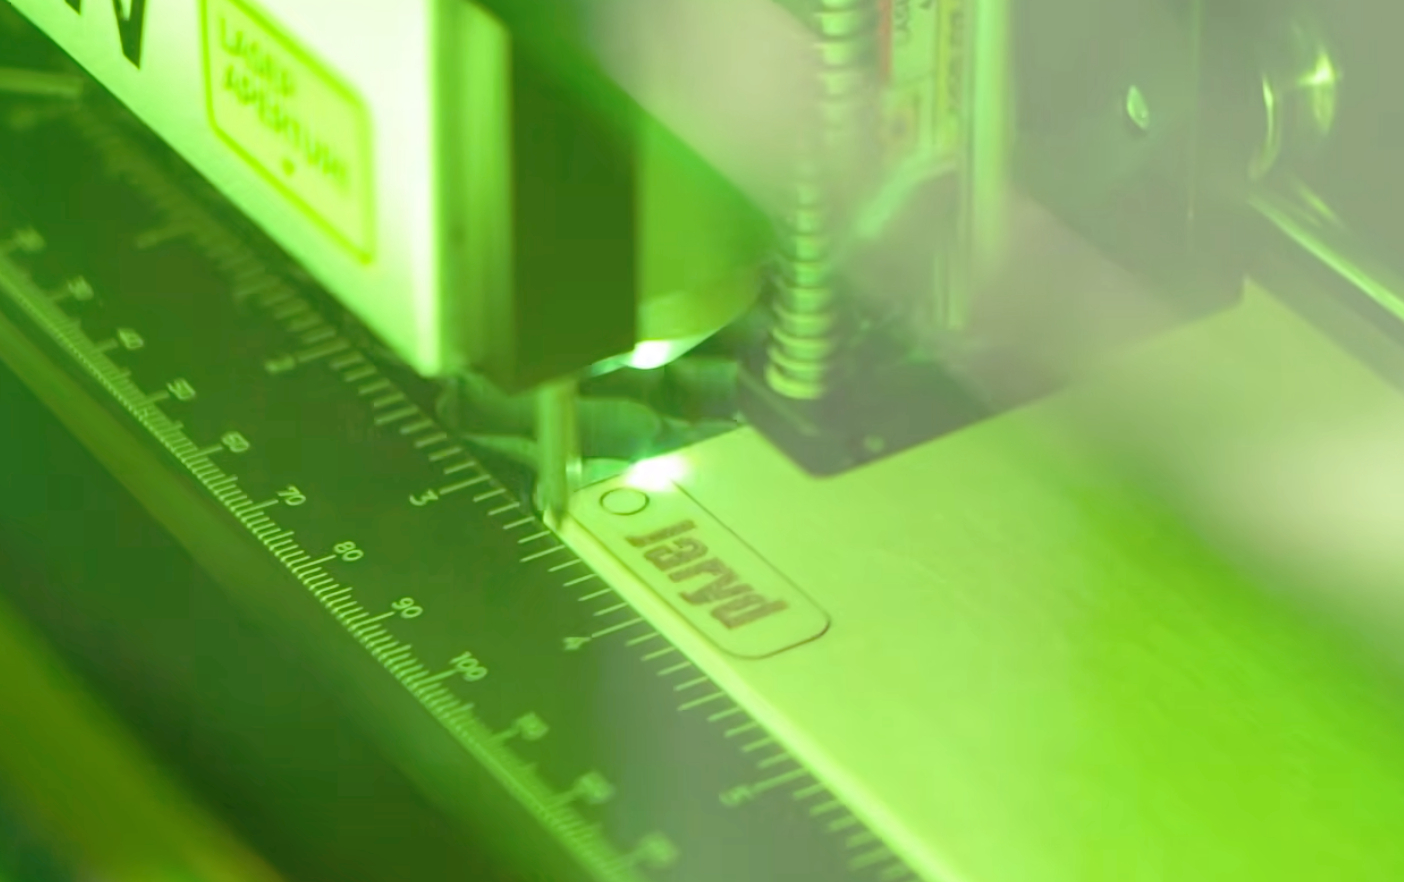
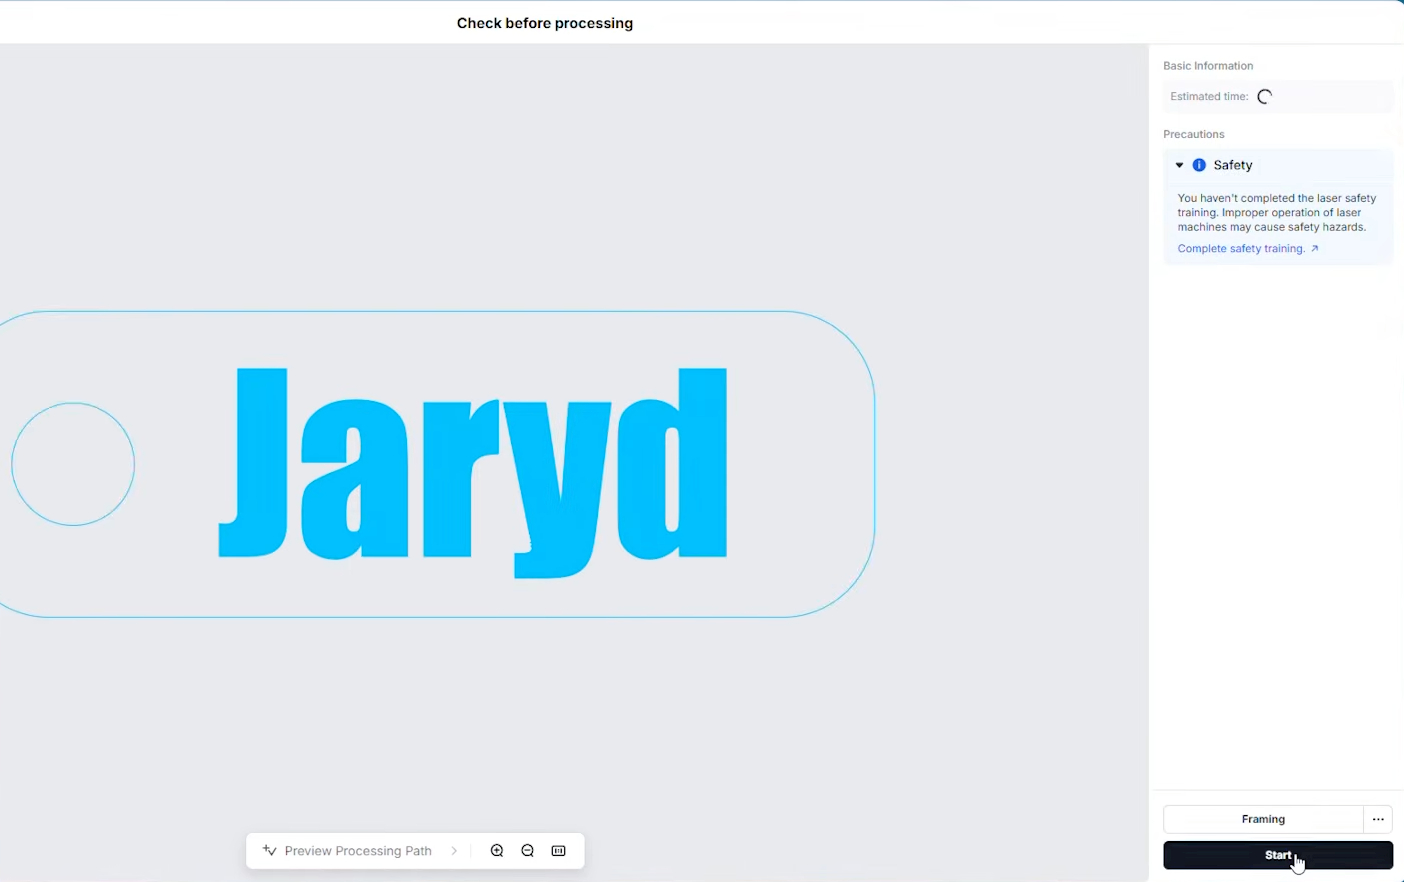
Go ahead and hit the Process button in the bottom right corner. At the top of the new window, you will get a helpful estimation of the total job time, and a final preview of your laser path in the middle. If everything looks good, hit Start. Once the file has been sent over USB to the machine, the button on the front of your S1 will begin blinking. Press it to start the job.
IMPORTANT SAFETY NOTE: As with any laser cutter, NEVER let it run unattended. If your machine starts a fire, it will start very small and be incredibly easy to extinguish if you are standing right there. We always keep a little spray bottle of pure water on hand next to the machine just in case.
Thankfully, this is a very quick job. Once the machine finishes and the laser head returns to its home position, you can open the lid and pull out your custom nametag. You just designed and manufactured a custom part from scratch in about 5 minutes—that’s a pretty darn cool thing to be able to do in the comfort of your own home!
Where to From Here
And that is your very first piece done! The steps we outlined today are pretty much the gist of how most jobs are going to go, so we hope this guide has equipped you with exactly what you need to get out there and start cutting your own creations.
If you are looking for a really cool party trick to try next, it is always super impressive to engrave on the slate stone coasters that came in your materials pack. If you do a quick search on atomm.com (which is xTool’s dedicated design repository site) you can find a whole bunch of awesome, ready-to-cut projects using these exact coasters to follow along with.
When you are ready to expand beyond the included goodies, be sure to check out the available material packs. They are a fantastic way to get a wide variety of guaranteed laser-safe cutting and engraving materials without ever having to guess what is safe to put inside your machine. Just ensure your machine is able to engrave/cut them. Unless you purchase the IR module, your S1 will not be able to engrave metals very well.
Well, that about wraps us up! If you need a hand with anything we covered in this guide, or if you just made something incredibly cool with your new S1, feel free to head on over to our community forums below. We are all makers over there and happy to help.
Until next time, happy making!